
iLoveToCreate Teen Room Décor
Mixed Media Patchwork Paper Wall Letters
Margot Potter Teen Crafts
“Mom crafted, teen approved.”
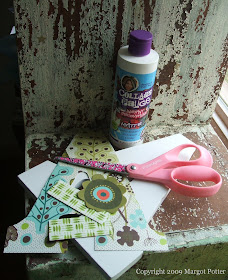
Teens love to personalize their rooms and this is a fun and easy way to do that in a flash. You can make an entire word to fill a wall or just an initial like I’ve done here for a door. I really fell for these retro themed papers, but you can use any papers you like including recycled scrap stash papers, wrapping paper and magazine pages. You don’t have to save this idea just for your teen’s room; these would be adorable anywhere in your home. I love the idea of seasonally themed words done in this patchwork style. Avalon squealed when she saw this, so I'm pretty sure it’s a winner!
Materials
Wood letter or letters
K&Company Carolyn Gavin Scrapbook paper (or other paper of your choice)
Liquid Fusion Glue
Traci Bautista’s Collage Pauge medium in matte finish
Vintage or new coordinating button
Tulip clear crystal to fit inside of button
Wired tinsel
Tools
Paint brush
Scissors
Exacto knife
Pencil

1. Select your papers. Place your letter on the paper, hold it down firmly, trace and cut with your Exacto knife. (If there’s a little overlap you can trim it later.)

2. Cut the accent papers (I made a small border with a coordinating paper and cut out a coordinating paper flower.)

3. Adhere the papers using an even coat of decoupage medium and paint a coat of medium on top. I love using a brush because it gives you texture, but you can opt for a foam brush if you prefer. If you get bubbles, wet your fingers and gently work them out. (Don’t fret, they will deflate when the medium dries. I promise!) Allow medium to dry.
4. Paint a second coat of decoupage medium over surface and allow to dry.
5. Run a thick bead of Liquid Fusion along the edge of the letter and above your borders and adhere the tinsel wire. IMPORTANT: Do not smash the wire into the glue or it will flatten and lose its dimension and sparkle. Just gently lay it into the glue bead. For the longer pieces you can place something small (like small glue bottles) on each end and the center until they’ve tacked into place and then remove them and allow the tinsel to dry overnight. This is kind of like using hot glue without worrying about the heat melting the tinsel or burning your fingers.
6. Attach a button to the center of your flower using Liquid Fusion. Attach a Tulip crystal to the center of the button with Liquid Fusion. Allow to dry.

2 comments:
Thanks for the tip - sounds fun
Wow, this craft sounds cool! Me and my daughter are having bonding moments in making crafts, but for the last few months, we haven't had a time for craft making because our home was under renovation. We didn't throw the old decors, furniture, and even our carpet because they're still useful. I'm able to maintain the durability and beauty of our carpet because of my grandma's tips about carpet cleaning. If I'm busy with other activities, I ask the help of my cleaner for carpet cleaning. Grand Rapids, our hometown, services for carpet cleaning (Grand Rapids MI-based) are easy to find and most cleaners here are reliable and friendly. That's why I'm worry-free from household chores problems.
Post a Comment