Wednesday, September 30

Halloween Countdown Calendar


Who says countdowns are just for Christmas? Your little goblins will think it's a scream to keep track of Trick or Treat time, with this creepy calendar! Here's how to make your own.
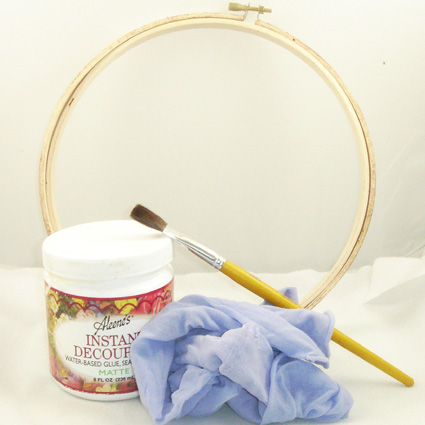

MATERIALS
5/8 yd of Grey Felt
1/2 yd of Black Felt
Scraps of Yellow & Orange Felt
Fabric Fusion
White Transfer Paper
Printable Fabric
Bat Ball Fringe (Optional)
Sewing Machine/Thread (Optional)
Scissors

DIRECTIONS
  • Cut grey felt to 60" x 19" piece. Set aside.
  • Download Haunted House pattern. Tape together to pages to make full silhouette. Lay pattern on the wrong-side of black felt, with transfer paper sandwiched in between. Transfer pattern onto fabric (following the manufacturer's instructions). Cut out haunted house and either glue (with Fabric Fusion) or sew onto one end of the grey fabric.


  • Out of yellow, white & grey felt scraps. Free-form cut out windows, doors and optional ghost. These don't have to be perfect, so don't worry that there's not a pattern for these! Using project picture as a guide, glue pieces on to house. Cut out two candy corn pieces and glue them together. Follow the provided pattern, to ensure that it fits in pockets.
  • Cut out 21, 2x2" squares out of the leftover black felt. Print out the calendar numbers onto printable fabric. Cut out each individual number. Glue numbers on felt squares. Arrange squares evenly on haunted house. Using 1/8" seam allowance sew (or glue) squares to house.
  • Cut out 1, 7"x 2" and 1, 4" x 2" rectangles from orange felt. Sew or glue to grey fabric, above house. If you didn't do so at the same time as the numbers, print out "Happy Halloween" text onto printable fabric. Cut out and glue onto orange felt.

  • Fold grey felt piece in half length-wise, so the fabric background of your calendar is doubled. Sew a straight line about 2" down from the fold, to create a rod pocket. Using a 1/4" seam allowance, sew around the sides and bottom edge of piece. Trim.
  • Glue on ball fringe at bottom & top of piece.
To hang, either add grommets to the top or, insert a dowel into the rod pocket and attach some decorative ribbon. Insert candy corn in a different pocket, every day until Halloween!

Psst! Don't worry that tomorrow's already October 1st. In my book, if you can get one of these puppies made by the 13 days before Halloween (October 19th), then you're keeping a DEADline that's fit for the holiday!


Craft.Rock.Boo!,
Vickie

Vickie Howell is a mother, designer, author and crafty spokesperson.  For more scoop on her projects, check out her personal blog.

Sunday, September 27

Sassy Tote Bag for the Sewing Expo Tour!


I'm flying to D.C. on Wednesday to the Sewing Expo for Hancock Fabrics to demonstrate The Tulip® Dye Techniques Kit™ and the Tulip® Cordless Heat Setting Tool™ with the Tulip® Glam-It-Up!™ Iron-On Crystals™ combined to create a cute and sassy quilted tote bag and a mini quilt wall hanging.
The Sewing Expo is part of a national campaign to bring inspiration, motivation, education and personal satisfaction to everyone who enjoys sewing, quilt making, embroidery, embellishment and related needle arts. I can't believe I get to be a part of this amazing event.

So, to design the sassiest little bag with dyed fabric, I first have to grab my supplies at the iLoveToCreate design studio and dye my little heart out. I decided to create 3 of the 5 techniques in the kit for my projects.

Our house in Clovis has a darling patio out back with a ceiling fan, and it's just begging to have a little dye party, so I got the fan buzzing, and laid out my kit. I grabbed 2 kits, because I needed 12 yards of fabric for the tote, the quilt, and the demo swatches.

First step? I washed and dried all the 100% cotton fabric to take out the sizing and prepare it for the dye.

My steel sink is perfect for mixing the dyes. They're great because all I have to do is put on my gloves and then fill all the bottles with water (the dye is already in there) and shake.

Scott set up a table cover with plastic trash bags. Of course he used bungies to hold it down. I call him Bungy Man. (When I'm not calling him Zip-tie Man.)

I started with the shibori technique and since my project is so humongus, I taped the 2 tubes together that come in the kits.

Then I laid it under the fabric and scrunched it up. The shibori tube holds the fabric up so that you get that cool look, and keeps it from puddling. You'll see!

Now, the dying begins. I squirted it onto the fabric along the top of the tube. Then, I moved the tube over about 8 inches and repeated until I was at the end of the fabric.

Voila! I hung it on the clothesline and replaced the trash bag with a new one for the next color.

Woohoo, the brush technique was amazing. I simply poured my dye out of the bottle and into a disposable bowl, dipped my brush from the kit into the dye, and made crisscross strokes all the way across. Loved it.

After changing the trash bag on the table again, I was ready for the spray technique. This was soooo easy and fast. I made little hills and valleys with the fabric, then used the spray top from the kit to spray away.

I don't know what the neighbors think, but it sure gave them a colorful view while the dye set for 4 hours. Last step, wash and dry the fabric separately and then make my little tote bag.

I love how the cotton dyed fabric turned out and it feels good, not crunchy. I'll be posting the project at iLoveToCreate.com with all the instructions right away.

The crystals were uber easy to apply with the heating tool, and I think they added a little sparkle-farkle to the bag. Like I said, super fun, and a little bit sassy with the crystals and in bright, happy colors.

Come see me at the Sewing Expo in Chantilly, VA! I'll be there Thursday, Friday and Saturday in the Hancock Fabrics booth. Look for the gal with the bright green tablecloth and the happy smile.... I'll show you how to dye fabrics for your quilting and sewing projects, and our cute little cordless heating tool for jazzin' up your projects.

See you there!
Pattiewack

Thursday, September 24

DIY Silk Screening


I realize not everyone has a Yudu or the knowledge of how to make and burn their own screens. Never fear, if you were feeling a little left out of the screen printing fun I have just the project for you. Today for I Love to Create we are silk screening using pantyhose, decoupage and an embroidery hoop!


SUPPLIES
Tulip Soft Fabric Paint
Collage Pauge or Aleene’s Instant Decoupage Medium
Onesie or something to screen on
Embroidery hoop
Pen
Pantyhose
Paint brush
Business card


WHO DOESN’T LIKE UNICORNS?
First choose your image. Something in silhouette works best. Also I would not opt for a design that was too complicated. Make sure your design will fit inside the embroidery hoop you will be working with. I chose a perky little unicorn in all its magical glory.

PREPARE YOUR SCREEN
I retired my panty hose a long time ago when I quit my day job as a secretary. Luckily my friend Susann who was the mastermind behind this project brought over a lavender pair for me to work with. All you do is stretch the hose out in your embroidery hoop nice and taunt just like you would get a piece of cloth ready to embroider on.


TRANSFERING YOUR IMAGE
Lay your image down on a flat surface and place your embroidery hoop on top. Trace the outline of your image with a pen onto your panty hose.


BLOCKING OUT THE SCREEN
Using your decoupage and a paint brush fill in the area around your image. Be sure to apply the decoupage to the top of your screen and only put the decoupage where you do not want your paint to go. Allow the screen to dry completely.


GET YOUR SCREEN ON
I stretched my onesie over a piece of cardboard so that the fabric paint would not soak through to the back. Once I had done this I laid my screen top side down on my onesie and squirted out a generous helping of paint.


SCREENING YOUR IMAGE
Using a business card or old hotel key scrape the paint across the image in a firm manner while holding your embroidery hoop in place on your onesie. You do not want the image to shift or your baby will have an ugly outfit.


PLAY DRESS UP
Once the paint has dried on the onesie give it a 45 minute spin in a hot dryer to heat set the image and all that is left to do is get your baby dressed!

Have you tried the embroidery hoop method of screen printing? I am particularly curious if anyone has tried to screen a multi colored layered image? I wanna hear all about it!

Also remeber this is day 4 in a week long screen printing adventure. Flip back through Print Liberation, Screen Printed Record Bracelets and a YuDu Improved Record Clock. Don't forget our Handmade Nation round up and contest tomrrow!

Wednesday, September 23

Creating a Shoe Lover!

There are many things in their lifetime that I hope to pass on to my children: compassion for humanity, a strong work ethic, the ability to love whole heartedly and, the unbridled appreciation for fabulous shoes. As they say, "Every journey starts with the first step.", and
thanks to the Stardust Shoes' Cloth Shoe Pattern my daughter Clover's pathway to ped perfection has officially begun! Join me wont' you, as I pay crafty homage to mother-daughter shoe goodness. Steve Madden, can you hear me?

Golden Delicious

All that glitters isn't gold; that is unless you're rockin' some flaxen footwear! Inspired by one of my favorite pairs of strappy heels, this first set of baby shoes are my masterpiece...my shoesterpiece as it were. ;-) Pretty much scrapping the pattern for this pair, I free-styled; ditching the called-for interfacing, opting for thicker fabric (a gold vinyl outer & vintage, upholstery lining), changing the construction of the elastic channel, and weaving, top-sewn fabric strips for the toe (I used a few dabs of Liquid Fusion to keep 'em in place).


Silver City Slicker
If you ask me, metallics are the new neutral. Every gal-on-the-go can use a nice pair of glam flats. They'll turn any daily basic outfit into a fashion, forward statement. So mama, add a little twinkle to baby's toes by making her (or him, for those hipster dude babes out there) some silver slippers! This pair was made using the base Stardust pattern (altered to fit my daughters long & narrow feet), silver pleather and Amy Butler fabric lining.

The Cat's Meow
Leopard print is a timeless classic and in my opinion, a must-have in a woman's wardrobe. They funk up a pair of jeans, chic up a business suit, or add a little vintage flair to a party dress. You know how some people never travel without their American Express cards? I never travel without my leopard stilettos. I wore a pair frequently when I hosted Knitty Gritty; sometimes propping my feet in such a way that they were sure to be in the shot. I often make it my mission to get my beloved shoes on camera whenever I'm working (watch the 1st video in the post below this one, for proof) because ladies, if I'm going to precariously balance on 4 inch heels at the crack of dawn, then you can bet those beauties are gonna be seen! But I digress.

The companion booties to my leopard lovelies are made out of a unisex, bronze fabric, lined with green felt and animal print, and embellished with a machine-sewn, star applique. Can you say, Yo Fabba Fabba?!

Orange You Glad I Love Shoes?

It may be hip to be square, but it's HOT to be heart! These shoes are silly, which makes me love them all the more--they're also the perfect big-sisters to the wee wearables I made! The petite pair is constructed out of quilted, orange fabric and white vinyl, then topped off with a metallic & white heart which I attached with Liquid Fusion.


Have you made (sewn, knit or crocheted) baby shoes before? Post links to pictures here--I want to wallow in some more couture cuteness!

Craft.Rock.Love,
Vickie

Vickie Howell is a mother, designer, writer and crafty spokesperson.  Her latest book Awareknits: Knit & Crochet Projects for the Eco-Conscious Stitcher is on sale now.  For more info go to: VickieHowell.com


Tuesday, September 22

I Love to Create Girly Boyfriend Jeans


Girly Boyfriend Jeans by Margot Potter for I Love to Create
(Click on image to view close up!)

Girly Boyfriend Jeans
Margot Potter for
I Love to Create Teens

Copyright 2009

Boyfriend jeans are back and I’m a happy camper. Luckily my hubby had this pair of perfectly worn in jeans he was going to take to Goodwill. Okay so technically they’re husband jeans, but stick with me because I’m going somewhere with this! The ‘boyfriend jeans’ in the stores are all artfully distressed and shredded and absurdly expensive, but you can find worn in jeans just like them at thrift stores for a song. Since these were kinda raggy looking, I thought I’d gussy them up a bit.

Enter Tulip Dimensional Paint, Tulip Fabric Spray, Tulip Glam It Up crystals, Fabric Fusion and my Sizzix Big Shot machine. Add some fun fabric I scored in Tokyo (don’t fret my pet you can find plenty of fab fabric on the interwebs and in retail stores.) Mix it all up and this becomes a project a teen will love to make their own.

Materials
One pair thrift store ‘boyfriend jeans’
Durable fabrics in coordinating colors with paints
Tulip
3-D Slick Fashion Paint (purple, coral, yellow, blazin’ blue, ‘lectric lime)
Aleene's
Fabric Fusion
Tulip Glam it Up™ Crystals (clear in two sizes)
Tulip
Fabric Spray (neon pink and yellow)
Sizzix Hello Kitty Bigz Die Daisies

Tools
Tulip Cordless Heat Setting Tool
Sizzix Big Shot

More Madge, More!
Add more crystals in a variety of colors. Decorate both sides of the jeans. Use fabric sprays and stencils to add layers. Paint more planned patterns and dots instead of splatters. Use masks to leave unpainted areas you can embellish in different ways. Add some blanket stitch with colorful floss around the flowers and the pockets. If you want more rips, use a razor blade (carefully) to slash holes across the fabric and then pop the jeans in the washer, instant fray!

Less...please.
These jeans looked cute just with paint splatters. You can opt for a single color or to use black and white. Skip the crystals and just leave the flowers simple and folksy. Just paint the cuffs and the back pockets.

1. Get a pair of ‘boyfriend jeans’ from the thrift store. If you want to distress them more use the razor blade tip above.

2. Begin with a layer of splattered paint. Cover the area under the jeans with plastic and gently squeeze and flick the paint on the front of the jeans until you’re happy with the results. Allow to dry.
3. Use Fabric spray in neon colors to add further color layers to the jeans.
4. Use the Sizzix Big Shot and the Hello Kitty Bigz daisies die to cut out fabric flowers.
5. Spread an even layer of Fabric Fusion on back of flowers and adhere to jeans. Allow to dry. (You can opt to tack these down further with some colorful embroidery floss.)
6. Place three crystals randomly in center of each flower. I used three large crystals on each large flower and three small on each small. Attach the crystals to the flowers by holding the hot end of the heat setting tool on the top of the crystals for 12 seconds.

* Next week my I Love to Create post will be on Friday because I’ll be joining in the fun of Terroriffic Tuesdays. So be on the look out for four free Halloween Themed teen craft projects on Fridays starting on October 2nd and a post with links to fab projects all over the internet every Tuesday! BOO!

Sunday, September 20

We're re-designing our studio!


"FLIP OUR STUDIO"

At iLoveToCreate we have been given the green light to turn our design room into an ultra-uber design studio that we are proud of and excited to create in every day. That's the GOOD news.

Now for the BAD news... Okay, you have to realize that it took YEeeears for this space to become engorged with tons of craft supplies, tools, sewing machines, computers, and projects. Of course, we have to BLOG about it. And it is a work in progress which we will finish in the next 2 weeks.


And... Yes, as expected we have the pics and story to show the metamorphosis of this huge space.


So, what you are about to see might change you forever. Hide the small children, warn your mother, and you might want to peer through your fingers….


The West side of the studio is where you can find Chloe Tatro, our copy writer who is often our in-house model, and Designer Suzie Shinseki who creates fabulous ceramics and crafts every day.... somewhere in there.

Here's the East side of the studio where Designers Kathy Murillo and Cheryl Ball and Allee Marderosian create amazing designs amidst the clutter.

More of the East side where my Pattiewack design space is tucked behind there somewhere. Can you find the sewing machine?

This is our conference table, which sometimes is so covered up we just forget about it and put chairs in a circle.

The sink & clean-up station, where paint brushes go and never are seen again.


I warned you! Can you imagine looking for a box of pins, a bag of crystals or a bottle of Aleene’s Tacky Glue? Trust me, there are some amazing designs coming from this chaos, but it is time, time, time to get some serious scrub done.


We've rolled up our sleeves and grabbed our brooms and scrubbies. I’ll be posting more behind-the-scene pics and show how we totally re-designed this pile of crafty chaos into a seriously sweet design studio.

So in the words of Tim Gunn, "Designers, make it work!"


Clicky Web Analytics
Pin It button on image hover

Subscribe to our newsletter

* indicates required
I am interested in products and inspiration for...
Close