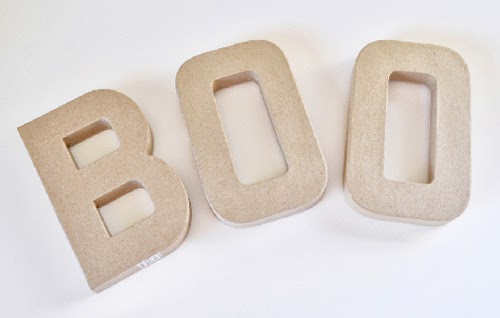
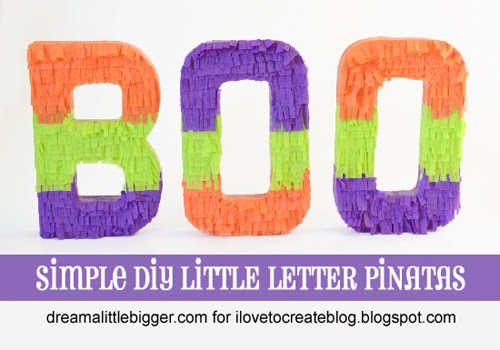
I have a very strong love for pinatas having grown up where no festivity was complete without one. It seems that pinatas are really popular right now which makes me very happy. Today we're going to knock out some super cute and super simple DIY little letter pinatas to spell out "BOO" for some Halloween fun.

For this project you will need:
paper mache letters
bristled brush
crepe paper on the roll
scissors
There's a ton of different ways you can doll up your drab letters. I decided that I wanted lines of colors so I drew lines across all three so that they would match up when when finished.
My initial plan had been on letter of each color, but I got adventurous right before I started.
Prepare your crepe paper by removing a strip about a foot and a half long, folding it over once, then again until you have a piece that is about 3 inches wide. Use your scissors to trim the paper so that it is fringed.
Take another bit of paper and cut rectangular and square pieces. These don't need to be exact, just make a little pile of each color to work from.
Brush some Aleene's Collage Pauge Instant Decoupage into the center of the letters. Take your little solid pieces and cover the interior of each letter. Go over each bit of crepe paper with a topcoat of pauge as you go.
Go around the edges of the letters also.
Our fringe is going to cover pretty well for he most part, except at the bottom where there will be fewer layers. To prevent the paper mache color from showing through, slap a quick layer of crepe paper and decoupage along the bottom front of each letter.
And now we get to add the fringe! Brush a small amount of decoupage onto the letter, place the fringe down, and then brush the top part that hasn't been cut to get it to adhere well.
When you get near the top edges of the letters, fold your crepe paper over to double and then fringe. You'll need just a small amount each go. Attach just as you have been.
Cover the full front of the letter and set someplace to dry. The crepe paper is kind of delicate when wet, so you can easily mar the surface if you bump it while still wet so take care.
When dry, try the excess fringe around the letter (so you can still see the shape of the letter!)
You can spell just about anything you please! I had a hard time choosing between EEK and BOO but since there were no E's at the craft store my decision was pretty easy to make!
As my cute little pinata letters sat out I learned something I didn't know before. One of my cats is obsessed with eating crepe paper. To keep these out of her fuzzy little face, I added eye hooks and fishing line so that mine can be hung!
And hang then I did hang them on my front door!
When I was working out this project, I only considered these as decoration, but you can also pop open the front of each letter with an X-acto knife, clean out the inside and stuff with fun pinata things like candy!
Just use some Tacky Glue to shut them back up and give a good amount of dry time before fancying them up with your fringed paper! They could make great little party favors or place settings!
If you like this project, you may want to check out my other tutorials at my craft blog, Dream a Little Bigger!


4 comments:
They aren't a Pinata if you can't put candy in them and hit them with a stick. Although they are cute.
These are so cute way go gal great job love colors to, woot,woot,,,,,
I truly get pleasure from while I read your blogs and its content.
is bubblegum casting legitimate
I am happy with your article, Fajartoto think your website is pretty good. Many articles are very useful for everyone. I am sure your website will grow in the future. Fajartoto will always support your website, hopefully more advanced. keep the spirit... thanks
agen togel terpercaya
togel online
fajartoto
situs togel online
bandar togel terbaik
bandar togel terpercaya
judi roulette online
situs togel terbesar
bocoran togel sgp
live draw hk
Post a Comment