Showing posts with label Easter craft ideas. Show all posts

Wednesday, March 4

Easter Chic Mug

Here Chicky,Chicky! Easter is almost here and I can't even begin to tell you how much I love decorating eggs! There is ONE thing however that I have never made...an Easter mug. I love items that are versatile and can be given as gifts. I sometimes tend to do lot's of designs but today I wanted to show you how to make something sleek and clean but still have a punch when you are done with it. 

I swear I am just in love with this cute chic! She can be used as a coffee mug or a planter! The great thing about this project is kids can do it and they will have so much fun. Let's get started!!!

Wednesday, April 20

MAYA IN THE MOMENT TEEN CRAFT: Perky Easter Bunny Ears

Photobucket


It's almost Easter! I made some funky bunny ears to wear to school on Friday to celebrate! I saw these ears at Target in the dollar area and bought several to decorate!

 At first I was just going to use the Tulip Glam It up Crystals. I wanted to cover the entire front of the ears with rainbow colors.

One problem - it takes FOREVER to glue on that many crystals. It took me an hour to cover the white silk part (I was also watching TV), and then I decided to vary from my idea and glue colorful thingies all over.
 I used Aleene's® Clear Gel Tacky Glue™ to add felt, buttons, letter beads and more.


Visit us on Facebook!
Craft on! Click here for today's daily giveaway!

Tuesday, April 19

Scrappy Little Easter Eggs

IMG_6044
If you are like me (which I have a feeling some of you out there are!) you probably have lots of fabric scraps. I can't quite bring myself to throw out all my scraps- even the tiny ones because the creative ideas are really endless. In my quest to create some more unique Easter eggs I decided to put all those teeny tiny scraps to use...


IMG_0109
I started by selecting fabric scraps.


IMG_0111
Next I bought some cheap plastic Easter eggs and pulled out my Aleene's Original Tacky Glue-one of THE best crafting supplies to ever exist :)


IMG_0115
Using a brush I began to cover the surface of the egg with glue.


IMG_0116
I added scraps to the glue and using my brush I pressed down the fabric.


IMG_0122
I covered the entire surface with scraps of fabric and then added a thin layer of glue all over the surface to get all the edges and loose ends pressed down.


IMG_0124
I smoothed everything down with my fingers- messy but effective.


IMG_6047
I let the surface dry and then added a little rolled fabric flower to the top. Tutorial for flowers here


IMG_6048
5633825942_ae5a1549d9_b copy
IMG_6065
I created eggs in a variety of colors.

IMG_0143
IMG_6064
IMG_6062
IMG_6057
IMG_0138
IMG_6038

alisa-burke

Wednesday, March 30

Au Naturale Mosaic Eggs

Designed and Decorated by Cheryl Ball
The perfect springtime project for those inspired to use natural elements in their creativity and their everyday lives. Aleene’s® Quick Dry Tacky Glue™ helps you tap into your refrigerator – and your imagination – to decorate these au naturale, delightfully colorful eggs!

Materials List

  • Aleene’s® Quick Dry Tacky Glue™

  • Miscellaneous

    •   Purple cabbage – one head
    •   Excelsior – natural or colored
    •   Turmeric spice
    •   White vinegar
    •   Paper towels
    •   Beets – 3
    •   Eggs – 2 per color
    •   Scissors
    •   Twigs
    •   Tongs
    •   Wood eggs – natural or painted
    •   Silk leaves
    •   Newspaper
    •   Measuring cup
    •   Cooling rack 

    Instructions

    1. The color for each egg is derived from a natural source. Pink from beets, yellow from Turmeric and blue from purple cabbage.
    2. Boil six eggs until hardboiled then dry with paper towels.
    3. Cover work surface with several layers of newspaper then a few paper towels – the dyes are very strong and may dye kitchen surroundings. Place cooling rack over paper.
    PINK:
    1. Cut up beets into chunks and place in pot. Cover with water then add 2 tablespoons of white vinegar.
    2. Let boil 30 minutes then strain out beets and let reserved liquid cool.
    3. Place two dry hardboiled eggs in dye and let sit to desired intensity of color.
    4. Remove eggs with tongs and let dry on cooling rack.
    BLUE:
    1. Cut up half a head of purple cabbage and place in large pan. Cover with water and add ¼ cup white vinegar. Let boil for 30 minutes then strain out cabbage and reserve liquid.
    2. Place two dry hardboiled eggs in dye and let sit to desired color.
    3. Remove eggs with tongs and place on rack to dry.
    TURMERIC:
    1. Place 3 cups water in non-stick pan. Add 2 tablespoons of Turmeric and bring to a boil, reduce heat and let simmer about 15 minutes.
    2. Take off heat and let cool.
    3. Pour liquid into measuring cup.
    4. Place two hardboiled eggs in dye and let set to desired color.
    5. Remove eggs with tongs and place on rack to dry.
    Assembly of eggs:
    1. Select two eggs of the same color to begin working with. Crack eggshells and peel off in large sections if possible. Place on paper towel. Repeat for other colors of eggs.
    2. Carefully peel shell pieces from inner membrane and place on paper towel.
    3. Determine design for each egg – gradation of color, center stripe or dots – or any design of choice.
    4. Select colored shells you would like to begin working with. Working in small sections at a time, use tip of bottle to apply a thin layer of Aleene’s® Quick Dry Tacky Glue™ on wood egg. Place shell in glue and press lightly to secure. Continue with next piece, placing right next to last but leaving a very thin gap between. Refer to photo. Continue process for entire egg, adding different intensity of color for each design. Repeat step for all eggs. Let dry.
    5. Nest – Use hands to form a nest from excelsior, pressing tightly so it will stay together. Add Quick Dry Tacky Glue™ to ends of twigs and insert into nest as shown. Pull plastic backing from silk leaves then glue leaves in place at tips of twigs. Let dry.

Visit us on Facebook!
Craft on! Click here for today's daily giveaway!

Wednesday, March 23

ILoveToCreate Teen Crafts: Pink Sparkles Easter Bunny Ears


Pink Sparkles Easter Bunny Ears
Avalon Potter for ILoveToCreate Teen Crafts
“Teen Crafted, Mom Approved”

I was walking through a store when I saw this adorable Easter bunny ear headband! I took it home and after I tried it on I felt it was lacking...something. So what did I do next? I headed straight to my Tulip® bins to dig up some pink glitter and Tacky Glue! Next I looked through my ribbons gathering up some that matched the sparkles, and then I grabbed some tiny pink chicks. Finally I was ready to make some super cute pink Easter bunny ears!

Materials
Tulip® Fashion Glitter Bond™
Crafty Chica® Chunky Glitters™ (Frida's Fuchsia)
Aleene’s® Quick Dry Tacky Glue™
Pink ribbon
Pink tiny chick
Newspaper
White fuzzy bunny ears with satin fabric inside the ear

Tools
Scissors

Instructions


1. Gather your materials and place newspapers around your workspace. Take Tulip® Fashion Glitter Bond™ and apply a thin layer inside of the ears.

2. Take your Frida's Fuchsia Crafty Chica® Chunky Glitters™ (if pink isn’t your color just use a different one from the various assortment) and sprinkle over the glue then shake it around making sure everything is covered. Shake off excess glitter and put back in container.

3. Let the glitter/glue dry for two hours. While you are waiting start on your bow.

4. Decide how big you want the bow loops to be and cut a piece of ribbon in the desired length. Place a small amount of Aleene’s® Quick Dry Tacky Glue™ in the center and fold in the ribbon ends.

5. Add another dab of glue in the center of the bow. Cut a small piece of ribbon just long enough to go around the middle of the bow.

6. Fasten the small ribbon around width of your first ribbon forming a bow and secure with a small dab of glue.

7. Use the Tacky Glue to attach the ribbon in the middle of the two ears directly in front and let dry.
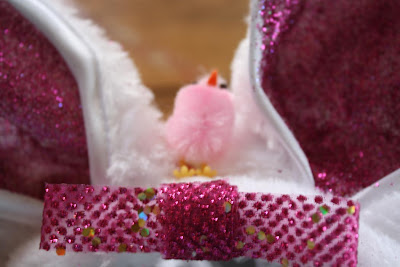


8. Take the little chick and glue it on top of the headband positioned in the very middle. Allow to dry before wearing, even though you know you’ll want to wear it them right away!

Thursday, April 1

A Tisket a Tasket Make a Recycled Easter Basket


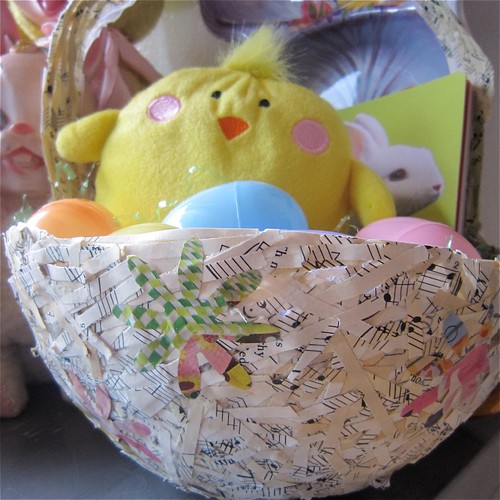
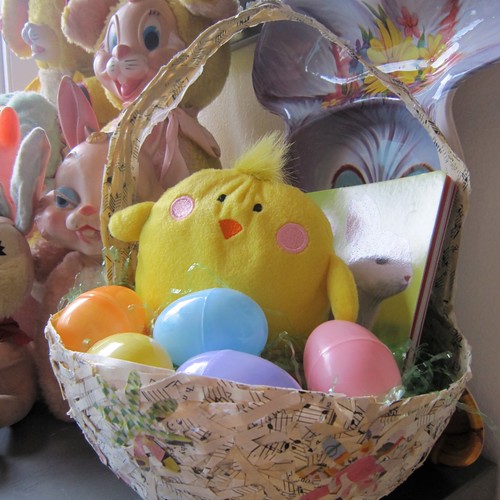
Though this is not Tallulah's 1st Easter, it will be the first one that she can carry a basket. That being the case I made it my life quest to try and make her a custom Easter Basket. Gather up some Collage Pauge, balloons and scraps of paper today for I Love to Create and make your own.


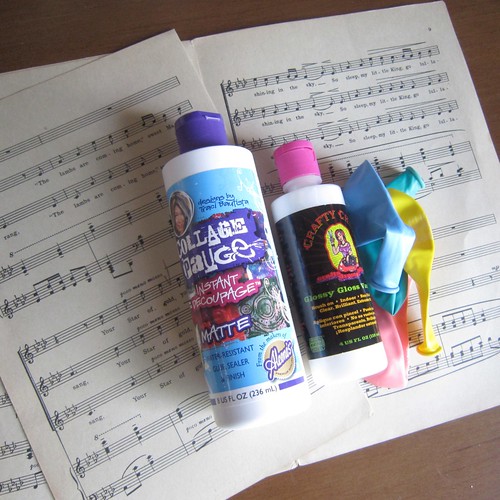
SUPPLIES
Paper
Crafty Chica Glossy Gloss Varnish
Balloon
Collage Pauge
Magazines
Fiskars flower paper punch


SHRED
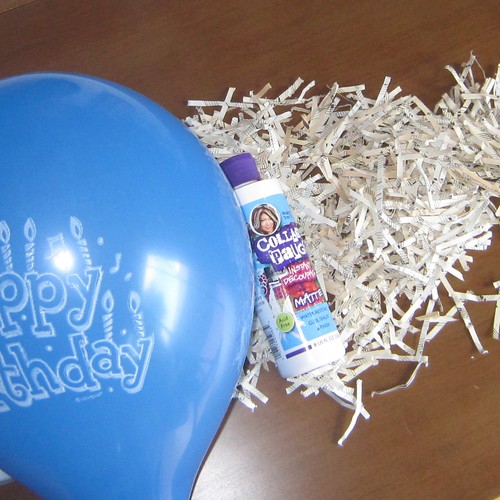
You might remember my Eco-Friendly Ping Pong Necklace how-to from last year and recall that I love working with shredded paper. Use colorful magazine pages for one look or black and white sheet music or newspaper for another option. If you don't have a shredder, never fear. Use scissors to cut strips or do it old school and hand shred the paper. Either way you are going to need a large pile of shredded paper.


BALLOON BASKET
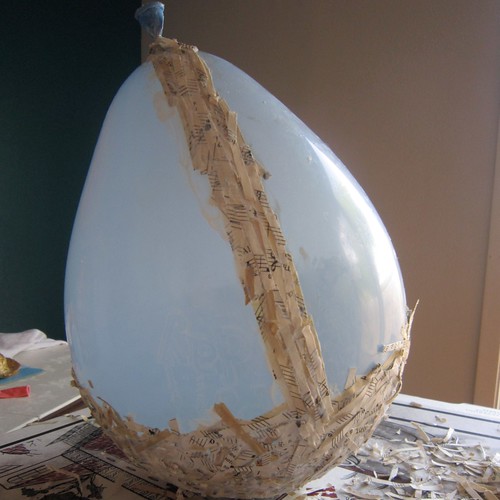
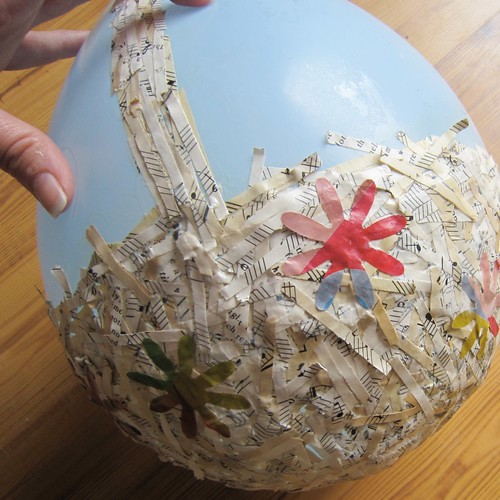
Using Collage Pauge cover half of your balloon with several layers of paper. Feel free to make a nice smooth top edge now or you can go back after the paper dries and hardens to do it with scissors like I did.


TOO HOT TO HANDLE
Also using Collage Pauge and paper create a handle for your basket going over the top half of the balloon. Allow basket to dry completely.


DECORATE
Feel free to go in an add decorations to your basket: polka dots, flowers, pictures from magazines.


POP
Once your basket is completely dry, pop your balloon. Your basket is born! Coat your balloon in Crafty Chica Glossy Gloss Varnish or Paper Glaze to help prevent any tackiness. You never know when dew can strike early on an Easter morn!


FILL TO THE RIM
All that is left to do is hide a few Easter Eggs and let your kiddo fill their basket! Don't forget to make a pair of Egg Shell Mosaic Earrings with those left over dyed Easter egg shells.

Wednesday, March 24

Robbit Plushies!

Robbit Plushies!

Rabbits are nice but robots are (dare I say) cooler--this year add a little techie love to a traditional bunny to make the kids a Robbit plushie for their Easter basket! Here's how.
Materials

Grey Felt
Poly or Bamboo Stuffing
Sewing Machine & Grey Thread
Fashion Graffiti Fabric Paint Tagger (in either color: Soho, Merge or Taxicab)
Fine Tip Paint Brush
Optional: Embroidery Needle & Floss (Silver & Light Blue)
Optional: Wooden Skewer

How-To
  • Cut front & back pieces for the head, body, legs, arms & ears (see photo below for examples.)
DSC00668
  • Use Fabric Paint Tagger to color in the center of the front ear pieces, and a square on the front body piece. Let dry.
DSC00669
  • Use Fabric Marker to draw a robot-y face on front head piece and the frequency modulator line on the body front.
DSC00670
  • Using needle & floss, embroider detailing on the body & eyes (optional).
  • Sew Robbit together using a top stitch & 1/4" seam allowance; stuffing all pieces (except the ears) as you go along.
Note: If you don't want your Robbit to be all flopsy-mopsy, insert a wooden skewer through the stuffing in the body & head.

Blue Robbit
Blue Robbit

Pink Robbit
Pink Robbit

Yellow Robbit
Yellow Robbit

Beep-beep, hippoty-hop--Happy Easter!

Craft.Rock.Love,

Saturday, February 27

Too Cute Easter Crafts

Looking for a fab and fun new project to whip up for an easter basket or perfect Easter centerpiece? This month on our home site iLoveToCreate.com, we have three springtime projects that will get you in the perfect mood for Easter crafting!


Fuzzy Easter Friends
A tisket, a tasket, create these adorable friends for your Easter basket! Glue felt and fuzzy yarn to foam balls with Aleene’s® Fast Grab Tacky Glue™ for a project that’ll make you want to put all of your eggs in someone else’s basket.


Easter Celebration Paper Cones & Blown EggsCelebrate Easter with colorful décor! Turn scrapbook paper into a festive egg holder with Aleene’s® Original Tacky Glue® and add shiny embellishments with Aleene’s® Paper Glaze™.


Fluffy Fun Easter BouquetCreate an Easter bouquet of fluffy fun! All you need is Aleene’s® Crystal Clear Tacky Spray™ and yarn in your favorite springtime colors to transform foam eggs into a charming centerpiece for Easter brunch or dinner!
Clicky Web Analytics
Pin It button on image hover

Subscribe to our newsletter

* indicates required
I am interested in products and inspiration for...
Close