


We made Snow Globes for Halloween, Necklace Cupcake Toppers for Valentines Day and Customized Beer Bottles for Father's Day -did you really think we were going to let Groundhog's Day pass like a ship in the night? Heck no! Who needs Punxsutawney Phil when you could make your own Groundhog pop up puppet to check for a shadow on February 2nd. That's right, today for I Love to Create we are revamping one of my favorite Kindergarten crafts.
SUPPLIES
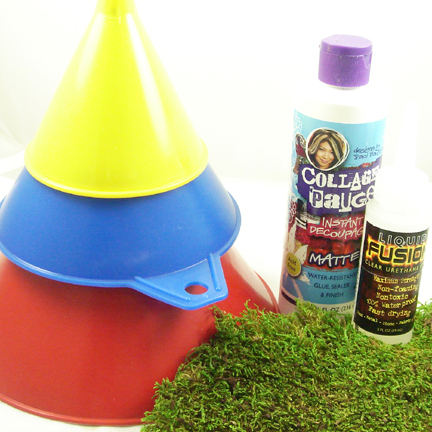
Funnel
Crafty Chica Little Chica Paint Packs
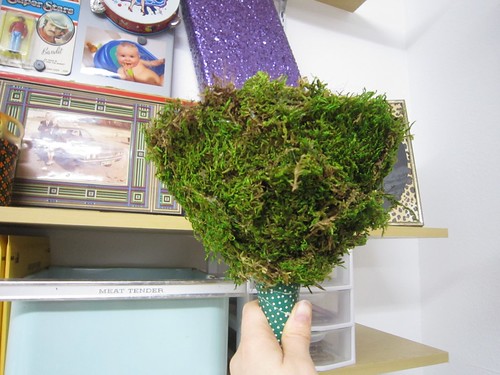
Moss
Paint Brush
Hot Glue Gun
Knitting Needle
Collage Pauge Instant Decoupage
Fun Fur
Brown Felt
Liquid Fusion Glue
Sewing Machine
foam Ball
A GOOD GROUNDHOG HEAD ON YOUR SHOULDERS
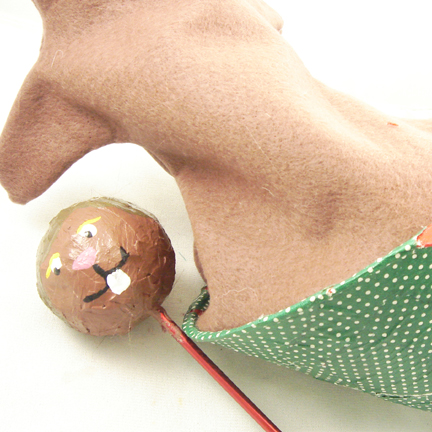
What you use as the head of your groundhog is up to you. I opted for a foam ball because I had some leftover from the Black Cat Bobble Head Project. You could also use a wooden dowl for your puppet, I opted for a knitting needle. What can I say I don't knit and it saved me a trip to the store.

PAPER MACHE
Using paper from my shredder and collage pauge I covered the foam ball. I also used Liquid Fusion glue to attach the ball to the knitting needle.

FELT BODY
Lucky for me my younger sister Hope Perkins stopped by and drew me a groundhog body pattern. If only she had staid long enough to paint a groundhog face, more on that later. First I cut out two pieces of brown felt. You need to make sure your pattern is large enough to cover the mouth of your funnel which will act as the ground that your groundhog pops out of. I stitched the felt together on my sewing machine and then turned the felt right out.
SWITCH-A-ROO
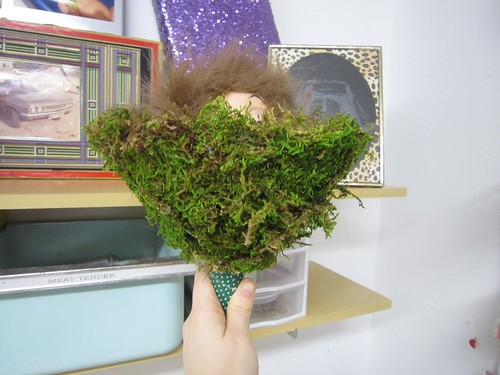
A lot of things happened in the next step that later changed. The idea to use a funnel as the ground for my groundhog came to me from an episode of Craft Lab I filmed with the adorable Claudine Hellmuth where she taught me how to make Victorian Cone Puppets. I covered the funnel with green paper so there would be a background for my moss. I used Liquid Fusion and a hot glue gun to attach the felt body to the inside rim of the funnel.
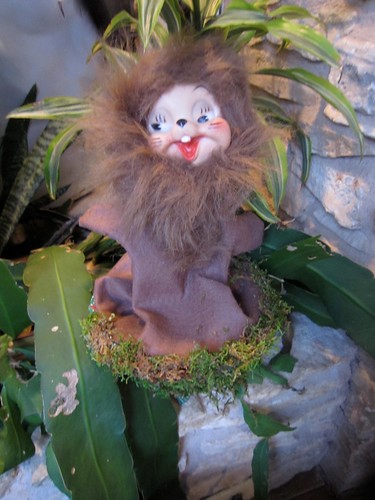
Also as you can see in the picture I painted a little groundhog face. This was the part where I wished my sister was still there to do the face painting for me. I actually hated my little face so much I decided to cover him up.
GROUNDHOG FACE LIFT
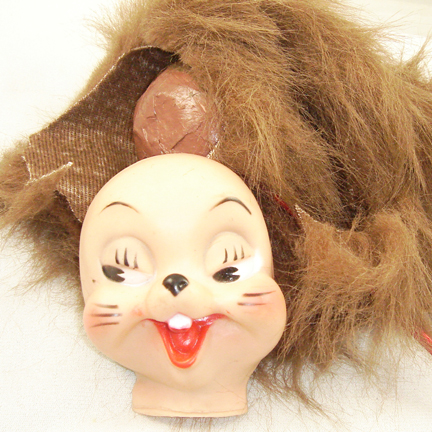
I just happen to have a whole storage bin full of doll parts and faces (like the ones I used on the Kitschy Hair Covered Earmuffs). In that bin was one loan vintage animal face that looked close enough to a groundhog to suit my needs.
First, I attached the plastic face to my painted foam ball. The next step was to get heavy handed with the glue and the fun fur. I covered the entire head and even added a little patch on the groundhog's tummy.
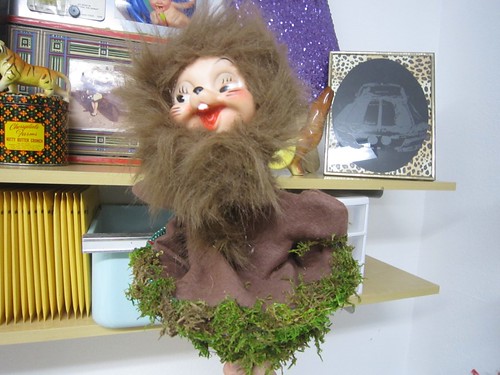
POP YOUR PUPPET
Using your knitting needle you can make your groundhog pop up from his grassy funnel home and check for his shadow. Remember if on February 2nd you pop your groundhog puppet and he does not see his shadow summer is on the way. If on the other hand it is a bright and sunny day and your groundhog puppet sees his shadow, bummer 6 more weeks of winter.
2 comments:
That kind of scares me. It reminds me of Babyface from Toy Story.
http://en.wikipedia.org/wiki/List_of_Toy_Story_characters#Babyface
The face was something you could buy in the 50's at craft stores to use when making stuffed animals. I collect vintage Rubber Face Dolls so I am kind of partial to the little guy. Might even add him to my collection. I have a skunk doll with the same face who was my mother's when she was a teenager.
Post a Comment