With Halloween right around the corner I think it's time for us to start decorating our home! I am madly in love with burlap so when I love to Create came out with these burlap pillows my heart dropped to the bottom of the earth. Literally. OK, fine not literally but you get it right! There is something about a prickly pillow that makes me feel all warm and cozy. Maybe it's the fact that burlap kinda smells like a barn or feed store. I may be crazy but what can I say burlap is the bomb. Today we are making some fun and quick Halloween pillows so let's get started.
Move over potato stamping! There are some other fruits and veggies
that want in on the action. Printing with fruits and veggies is nothing
new -- but when applied to a grocery or green market bag, you get a tote
that forecasts what should go inside (apples, onions, peppers, celery,
corn...). Not to mention, you can construct this sturdy bag from an old
T-shirt without sewing--a single safety pin is the closest you'll get to
any specialty tools. I worked out the bag particulars while I was in
residency at a workshop up in NH (I've since discovered a great tutorial for a very similar technique by Lee Meredith over at Leethal.net,
which I imagine works particularly well for larger T-shirts, where the
bottom bunching can be redistributed between several gathers). And I was
inspired to use an apple after seeing Kayte Terry's lovely apple-printed tote (I wish my apple had had a stem on it!).
What You Need:
-Plain old T-shirt (I used a kid's size 6-8 for this particular one)
-Tulip Dimensional Paint or Tulip Soft Fabric Paint Tubes
-Plastic lid to use as a paint palette
-Half an apple (or bell pepper, or onion, or...) to use as a stamp
-Fabric scissors
-Safety pin
-Scrap paper
Insert sheets of scrap paper between the layers of the T-shirt so the colors won't bleed through. Squeeze a fairly generous amount of fabric paint onto your paint
palette. Place the apple half flat side into the paint and slide it
around to make sure it's covered. Make a test print on a scrap piece of
paper or the sleeve of the T-shirt (which will be cut off) before
printing on your shirt.
Then print away, starting at the bottom of the tee and working your
way up to the shoulders. I re-inked between each pressing of the apple.
Reapply fabric paint to your palette as needed. When the front of the
T-shirt is complete, let it dry partially (about 30 mins), then flip it
over (onto a protective surface, in case not all the glue is dry) and
stamp the back!
Hang the T-shirt to let it dry completely (and decide whether the
T-shirt wants to stay a T-shirt now that it's been revived with color!).
If you choose to continue on to make the tote bag....
Cut off the sleeves of the T-shirt, just inside the shoulder seams. Then cut out the neckband in a gentle arc, going through both layers.
Cut off one of the T-shirt sleeve hems, just outside the seam (so
that no stitching remains on the strip that you cut off), and cut
through the loop to make a strip. Stretch it out, so it curls in on
itself and becomes cord-like. Set it aside.
Use the tips of your scissors to snip a small hole through just the inside of the bottom hem of the T-shirt.
Attach the safety pin to one end of the cord and thread it through the hole in the hem.
Inch it through, making sure you hold onto the non-safety-pinned end so it doesn't get lost in the hem casing.
Pull both ends even, remove, the safety pin, and...
...pull tight the drawstring, so that the bottom hem gathers completely. Then tie it in a bow or a double knot.
Now here's to crumpling it up, stuffing it in your back pocket or purse, and hitting the farmer's market! See, now you can FILL it with fruits and veggies.
Don't forget to share your collected loot!
And stay tuned: Another veggie-printed, no-sew tote bag tutorial is coming your way over on Generation T next week!
When you think of Puffy Paint, you might think back to the eighties or early nineties and recall making your own t-shirt. While, puffy paint has made quite a crafting comeback and the uses for it have branched out quite a bit.
While the type of puffy paint might vary from project to project (3D paint, Beads in a Bottle, paint pens) all these cool projects make use of some sort of puffy paint.
1) Easter eggs. I just made these yesterday. I got out my white 3D paint and wrote the letters on the eggs. It's simple and pretty Easter decor that you can do in just a few minutes. I even tried Beads in a Bottle for one of the eggs.
2) Labeled Mason Jars. While I believe this source (found HERE at Pure and Noble) actually used hot glue, I think puffy paint would be a lot easier to use. There's no glue strings to deal with.
3) Vases. In the same vein, here's puffy paint on a vase from P.S. I Made This.
4) Canvas Art. Isn't this so pretty? She had a smart technique to get the letters just right and you can find her tutorial HERE at Virginia and Charlie.
5) Pumpkins.HERE is my pumpkin from last year and check out a great round up of other puffy paint pumpkins HERE.
6) Clothing. While clothing might be an obvious use, check out the amazing ways these ladies use it. So hip. Alisa Burke works serious magic with this stuff.
Ashley at Lil Blue Boo uses it to look like rhinestones HERE.
7) Gripper Socks. I made these a while back for Rex. He loved them and they helped him slip less. Find the tutorial HERE (and I added an addendum to that tutorial a while back, advising dots or small shapes instead because the pictures work, but they crack a bit in the wash due to the stretchiness of the socks.)
9) Texturizing Fabric. I added Beads in a Bottle HERE to make it look like stitched on beads on this clutch. It's a lot less work than stitching on beads.
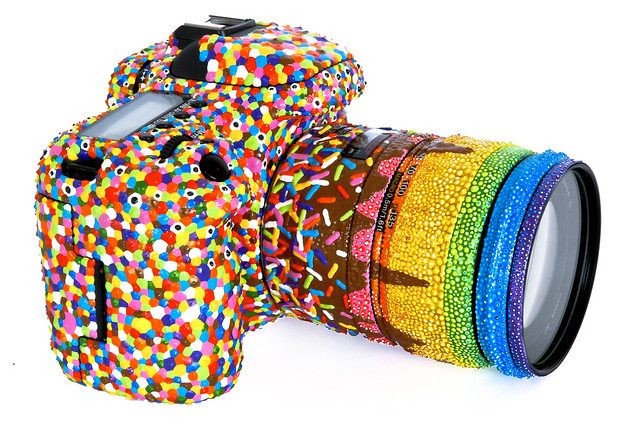
10) Novelty Projects. Check that out. I'm not ready to do it to my camera, but it looks pretty cool. It's found HERE.
Have you seen any additional ways to use it? It's pretty fun stuff.
Lately I have been a little obsessed with Tulip 3D fashion paints, I have made multiple t-shirts playing with the paints and recently developed this technique. I think it is very fun and beautiful once finished. I love working with tulip paints and I know that you will not be disappointed!
1. Draw out your design on a piece of paper using pencil, then practice tracing over the design with you paints till you feel comfortable with them.
2. On your shirt start with the first large tendril using Lectric Lime. For the next three tendrils use in this order Deep Turquoise, Fl. Pink, and Lectric Lime.
3.To give it that necklace effect on the seem on the neck use Fl. Pink on the left side and Deep Turquoise on the right.
Mom’s Note Avalon decorated this canvas bag using the same technique, but layering the colors over each other. I thought this was a really cool effect and the technique itself innovative and interesting. To me, it looks like branch coral. You could decorate a super fun canvas beach tote with this technique.
When I was 18, I dated a boy named Paul. Paul was obsessed with Elizabeth Taylor, it made me mad jealous! The only thing I knew about her was in sixth grade when my language arts teacher explained what the word "understatement" meant. Her example: "Elizabeth Taylor likes to get married." So until I met Paul, I thought she was a crazy actress with a string of husbands. I had yet to see her films.
One night I asked Paul why he liked her so much. He answered by taking me to the video store so we could rent A Place in the Sun, Cat on a Hot Tin Roof and what would later become one of my all-time favorite flicks, Giant. That night, I fell in love with Elizabeth too. I remember going home to inform my mom, only to find out that Elizabeth was her favorite actress too!
Paul and I eventually broke up, but I'll always remember and thank him for turning me on to classic Hollywood films, mostly for Elizabeth Taylor. Her movies even helped strengthen the relationship with my mom! From then on, whenever my mom and I had rough patches between us, we would watch a Elizabeth Taylor movie to serve as a buffer - a happy medium to bring us together to laugh again.
Some people wonder why we care so much about a dead celebrity. For me, she was more than that. She was a talented and gifted artist who brightened the lives of so many people. Her work helped us escape the stress of daily life, and her campiness, humor and devotion to charities showed us she was more than just celebrity, she was a real person with a diamond-encrusted heart.
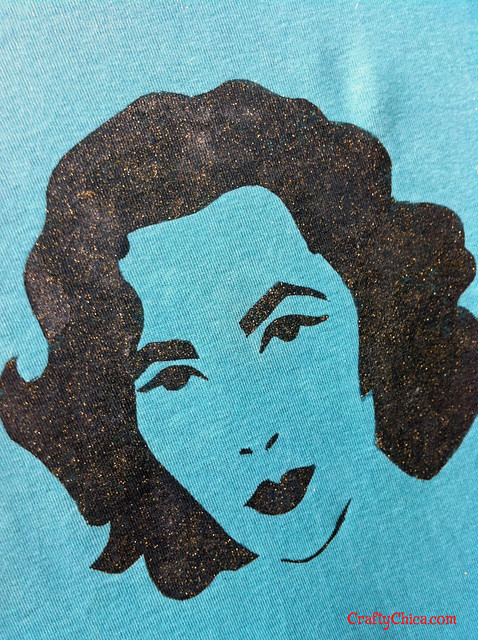
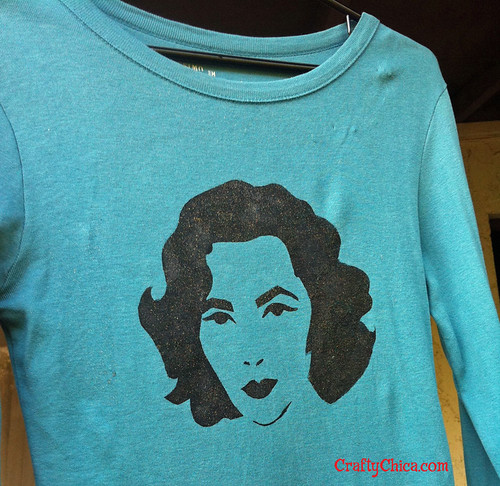
My daughter is now a big Elizabeth fan too, and I decided to make this shirt for her. Viva Elizabeth Taylor!
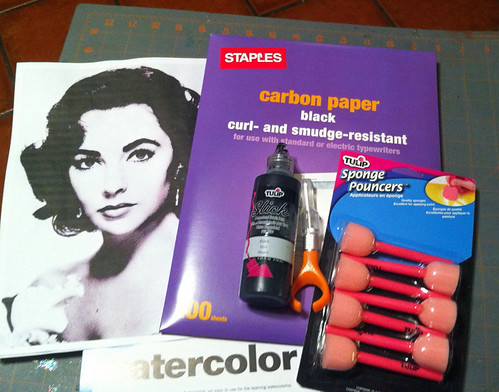
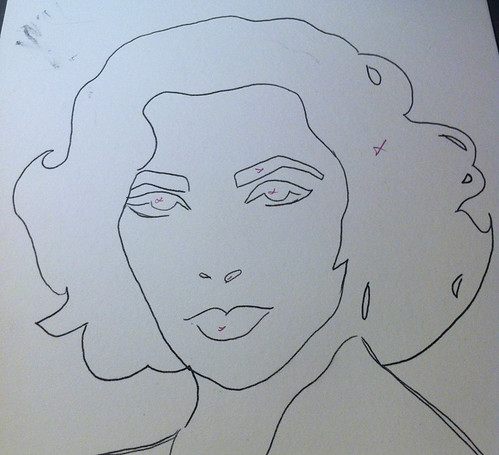
Supplies: An 8x10 print-out of a clean black and white image, carbon paper, ballpoint pen, watercolor paper, Tulip Sponge Pouncers, Tulip Black Fabric Paint (3D slick or Soft Paint), craft knife, self-healing cutting mat, Tulip Fabric Glitter Spray.
.
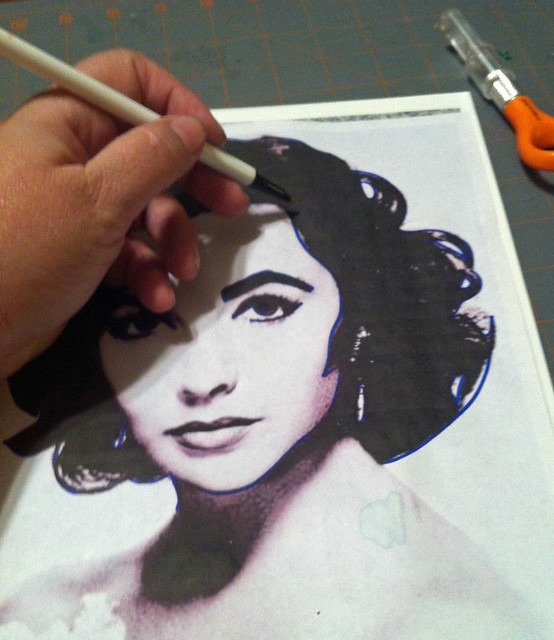
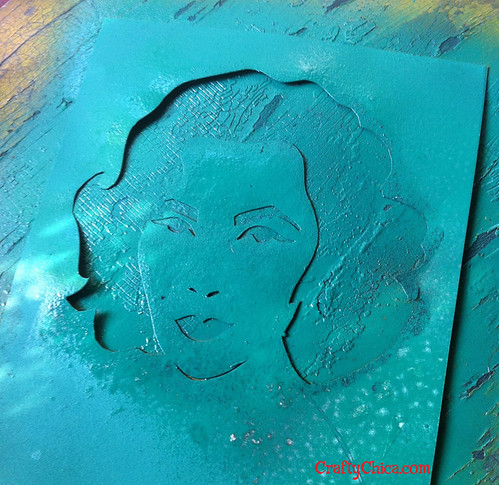
Set the picture on top of the carbon paper, and then the carbon paper on top of the watercolor paper. Trace the BLACK areas with the ballpoint pen. NOTE: I have used freezer paper stencils before, but always use watercolor paper for my hand cut stencils so I can reuse them.
Put an "X" on the black places, this is where you will cut.
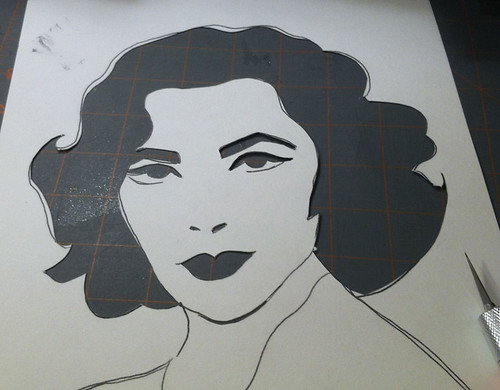
Cut out all the black areas.
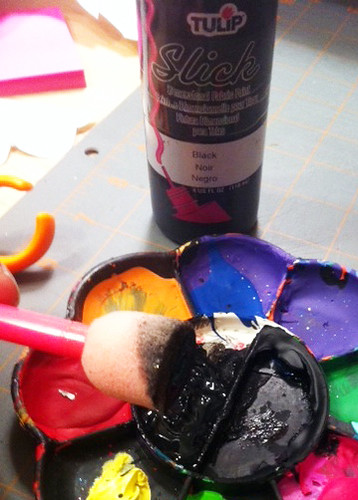
Set the stencil on your shirt (insert a t-shirt form) and tape down the corners so the stencil won't move. Apply paint to the pouncer and add color all over the open stencil areas. Hold down edges with your fingers.
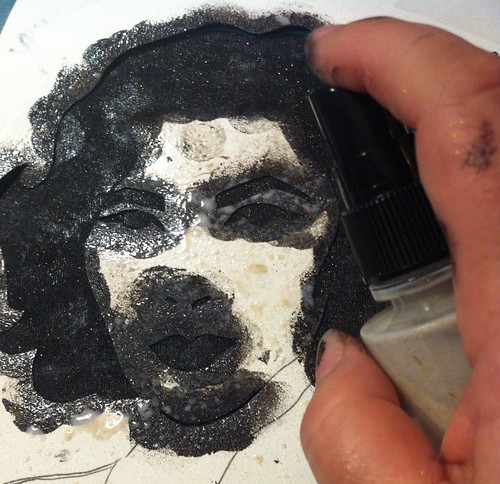
Let the black paint dry, and then add the Tulip Glitter Spray. Let dry. Peel off the stencil.
Here you have the finished shirt! My husband said she needs crystals, so I may add those next!
Preserve your stencil! Spray it with glossy spray paint, it will dry thick and flexible so you can use it over and over again!
Here is my favorite Liz Taylor scene from Giant. Enjoy!


.png)
.png&description=Halloween%20Face%20Paint%20Tutorial "Pin on Pinterest")

")