

I LOVE ALL THINGS THAT ARE GLITTERY AND MAKE MY HEART FLUTTER!
A while back I was shopping in pretty expensive craft store and I ran across this beautiful ornament chandelier. Now don't get my wrong my inner voice was saying "buy it now, buy it now" however the DIY (do it yourself) voice was screaming "GIRL YOU GOT THIS"... I can honestly say most of the time I have a hard time buying anything that looks like I can make it. Typically I make it better because I get to do it the way I want! I figured I would take the plunge and make my own ornament chandelier only with a twist, a glittery twist.
Let's get started!
.png)

You will need:
*Ornaments
*Feathery Yarn
*Feathers

Step 1: Lay out your yarn on a clean surface and spray the dye on it. Remember we just want a light coat so you do not need much. Since you are spraying so little, the drying time is around 30 minutes. If you want pop it in the sun and it will be ready in about 10! I liked this yarn because it was extremely feathery and I knew it would look great when it was complete. You can use any yarn you want or ribbon, totally up to you!

I am seriously in love with Tulip's Fashion Glitter. You can use it on practically anything and it stays on securely. I am using the pack of five that come with red, blue, teal, green and purple. FUN!

Step 2: Spray a light coat of tacky spray onto your feathers

Step 3: Sprinkle your feather with glitter

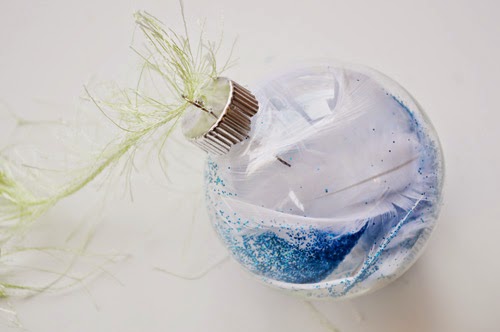
Step 4: Once your feathers are dry carefully stuff them into the ornaments. You don't have to put too many feathers in the ornament because they start to curl up inside and it fills it nicely.
If you have trouble putting the feathers inside use the end of a pencil to stuff them in! I mixed some of my feathers to add a ball of fun inside!

I used some white yarn and green yarn to add some variations to my chandelier. If you want you can dye your yarn every color in the book! That would be so much fun.
For some of my ornaments I used the same color to break up the multi-colored ones. I am really digging the solids in one ornament.

I hope you had fun learning how to make this easy ornament chandelier. Have fun with it!
I SIMPLY GATHERED ALL OF THE FEATHERY RIBBON AT THE TOP AND TIED A KNOT. YOU CAN HANG FROM A HOOK, YOUR FAN, A CHANDELIER AND ANYTHING ELSE YOU CAN FIND. I PASSED ALL OF MY YARN THROUGH ONE OF MY CHANDELIER LOOPS AND TIED A KNOT. THIS DISPLAY IS NOT HEAVY AT ALL SO IT WILL NOT WEIGH THINGS DOWN. HOPE THIS HELPS!

Huge glittery hugs, JADERBOMB

5 comments:
How did you hang it up all together?
I was wondering the same thing..
these "instructions" are pretty lame. You basically stuff the balls with feathers, then say bye bye. What does it look like when it is finished? How do you hang it? What do you hang it from? Can you show a picture of the finished project? thanks
DEAR ANONYMOUS:
I SIMPLY GATHERED ALL OF THE FEATHERY RIBBON AT THE TOP AND TIED A KNOT. YOU CAN HANG FROM A HOOK, YOUR FAN, A CHANDELIER AND ANYTHING ELSE YOU CAN FIND. I PASSED ALL OF MY YARN THROUGH ONE OF MY CHANDELIER LOOPS AND TIED A KNOT. THIS DISPLAY IS NOT HEAVY AT ALL SO IT WILL NOT WEIGH THINGS DOWN. HOPE THIS HELPS! JADE
Fake spending games are a great way to learn money management, especially for students and anyone who wants to understand how fast money can disappear if it is not planned properly. By setting a custom bank balance, players can see how quickly spending adds up and learn how to manage funds more wisely. The game includes products ranging from one dollar items to multi million dollar purchases, making it easy to understand real life spending decisions. I really enjoy the Fake Spending billionaire virtual money game because it mixes fun with learning and helps people practice smarter spending without any real risk.
https://fakespending.com/spend-jeff-bezos-money/
Post a Comment