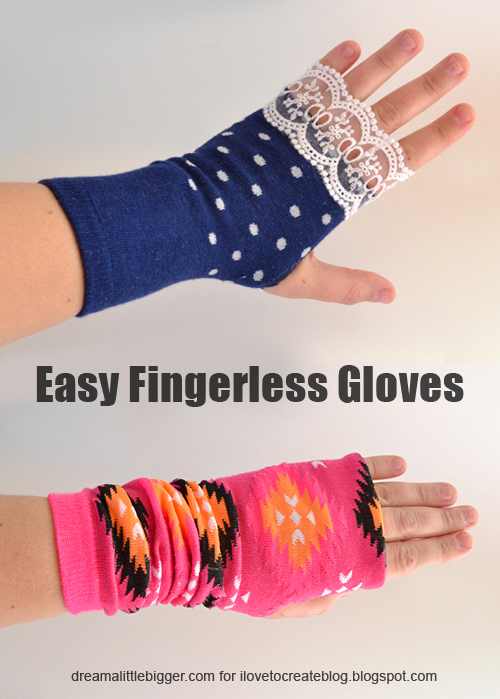
My hands get really cold come the winter and for some reason my office is like an ice box if it's lower than 50 degrees outside. Since I still have to work even if my hands feel like ice cubes, I've started wearing fingerless gloves. And when I realized I could make my own, my collection grew like you wouldn't believe!
Showing posts with label 80s style. Show all posts
Tuesday, November 18
Tuesday, May 22
I-Love-the-'80s Fringe Fabulous T-shirt
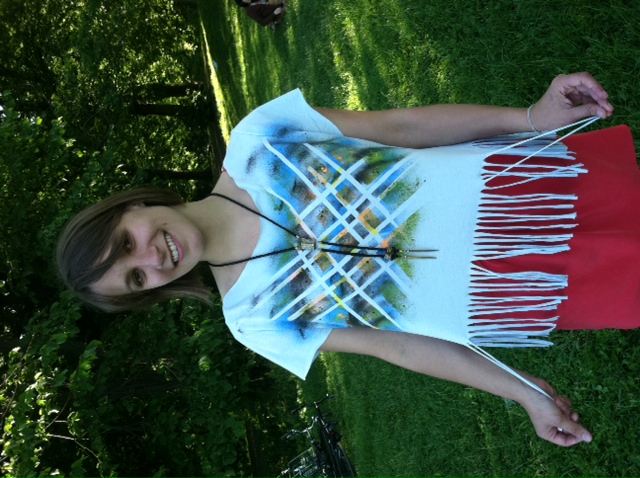
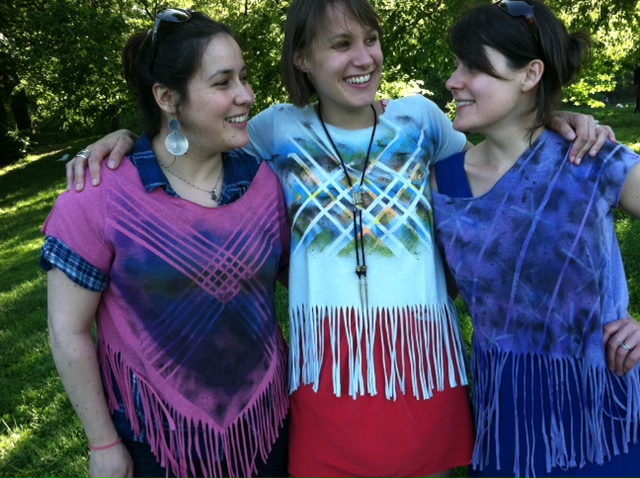
It's springtime, which means one thing to me: T-shirt weather! It's an exciting time over in the Land of Generation T, because as many of you know, it only gets better: After spring comes summer, which means we all get a little more scantily clad -- T-shirts turn into tank tops and tube tops and ooh-la-la! So grab your scissors (to cut away some of that extra fabric, of course), dial up the color (bring on those fabric spray paints), and hop in your fabulous fashion time machine, because fringe is enjoying a bit of a renaissance this season. Last weekend, I dialed back the decades and dug into my craft stash to make some classic '80s-inspired geometric tees.
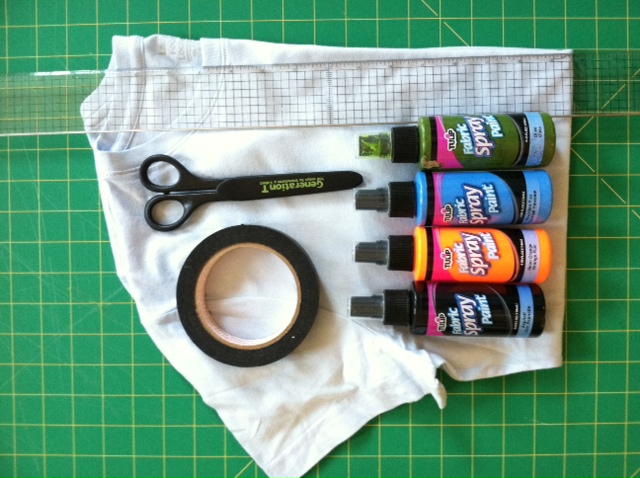
Materials:
-light-colored T-shirt (I used a light blue one)
-ruler
-masking tape
-fabric scissors
-fabric spray paint (variety of colors)
-scrap newsprint paper
Make it:
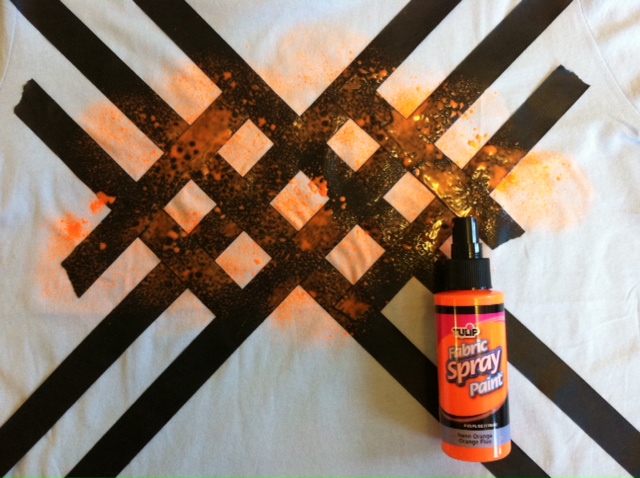
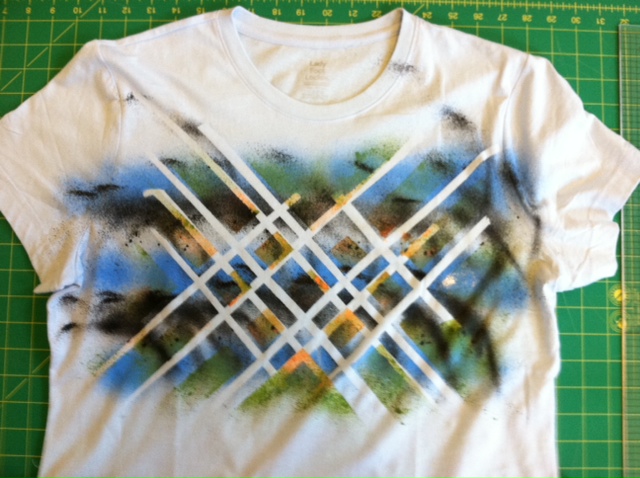
1. Lay the T-shirt flat. Use masking tape to mark a horizontal line about 8" up from the bottom of the shirt. Find the vertical center of the shirt and apply tape to the chest-region of the T-shirt to create a crisscrossing geometric pattern.
2. Insert the newsprint paper between the layers of the T-shirt to prevent the paint from bleeding through. Then apply fabric spray paint over the taped area. Apply another color or two, then let dry.
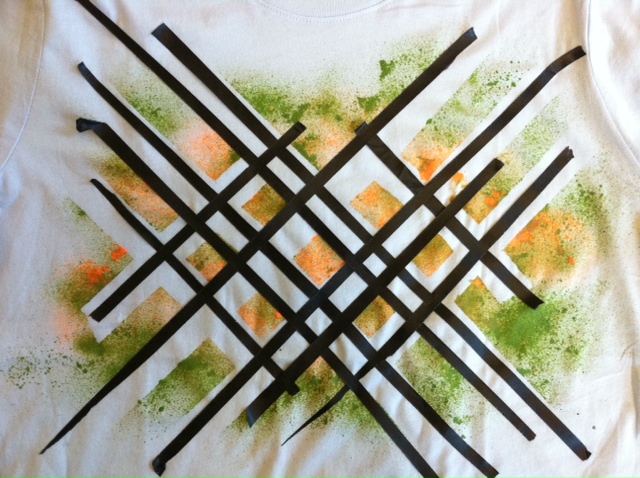
3. Peel back the tape, and then lay down more tape (I cut the tape strips in half, thirds, and quarters to make thinner lines) across your pattern to create a modified plaid pattern. Then spray paint more color!
4. Let dry completely before peeling off the tape to reveal your design.
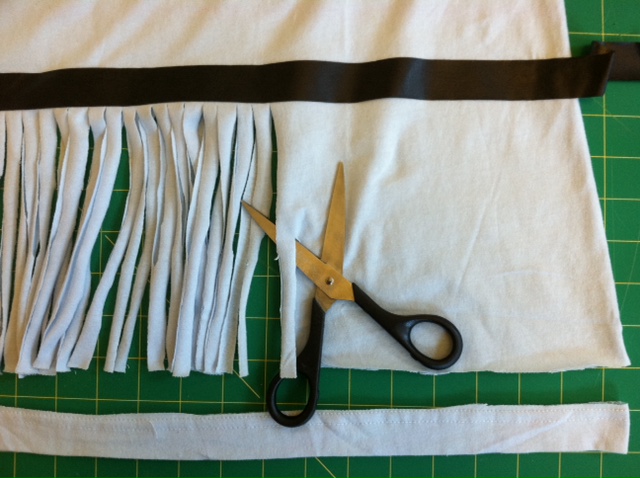
5. Cut off the bottom hem of the T-shirt, just above the stitching. Then, using the tape marker you pressed down in step 1 as your guide, cut 1/3"- to 1/2"-wide fringe from the bottom edge of the shirt.
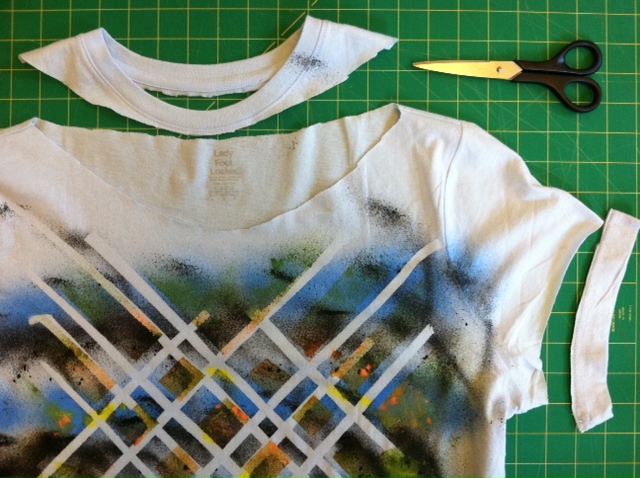
6. Cut off the sleeve hems, just above the stitching, and cut out the neckband, just below the neckband edge in the front and the back, and about 2" wider on the sides.
7. Gently tug on the fringe to stretch it out (the fabric edges will curl in). Try it on!
8. Grab up additional T-shirts and experiment with your paint patterns and fringe -- cut it on a diagonal, in a chevron-inspired V-shape, make it long or short!
Then pack a picnic, sling your boombox over your shoulder, and crank up any of the decade's Billboard hits!
Visit us on Facebook!
Craft on!
Tuesday, January 5
Then and now Tulip® Fashion!

Here at iLoveToCreate, we love it when we rediscover old flyers, packaging, and books from back in the day. It is cool to see how looks have evolved over the years and to laugh at the crazy creations we dreamed up and created using Tulip Soft and 3D Dimensional Paints. Admit it, you made and wore these shirts too, along with your scrunchies, layered socks, and tight rolled jeans!
Well, with this in mind thought it might be fun to take a sweatshirt look from back then (1990) and share how you can revamp it to fit today's style! We even had our model styled to reflect today's looks versus the look 20 years ago. It is possible to make the old designs look cool again!
Then and Now 80s Tee
Designed by Cheryl Ball
Supplies:
– Tulip® Fashion Form™
– Tulip® Fashion Bead Paint™
– Tulip® 3D Fashion Paint
65408 Gold Metallics
– T-shirt – black (ours was long sleeve!)
– Paper towels
– White chalk
– Pattern (click here and scroll to link for pattern)
Instructions
1. Wash shirt to remove sizing then dry and iron smooth.
2. Insert Fashion Form to prevent paint seepage to back of shirt.
3. Use white chalk to lightly trace along pattern lines.
4. Position pattern chalk side down around neckline then press in place. Hold with hand then trace around designs with finger to transfer pattern in chalk onto shirt. Remove pattern.
5. Start flow of Gold Metallic 3D Fashion Paint on paper towel using an even pressure on bottle for a smooth line. Outline each leaf shape with Gold Metallic. Let dry.
6. Start Silver Fashion Bead Paint on paper towel, holding bottle straight up and down then squeezing a few practice beads of paint, making sure they are not too close together. Squeeze equally spaced dots just under neckline or where desired. Let dry.
7. Referring to photo, use Gold Bead Paint to add different sized beads at neckline. Let dry.
And just for fun, check out the cover and other great finds found in a "No Sweat" project guide from 1990!
Hmm, judging by this cover, pastels were all the rage!
You know you want to rock the squiggle tuxedo shirt!
A squiggle/geometric shirt with a bow to match - now that's what we call style! And you totally can't you go wrong with a side ponytail!
Did you wear any of these sweatshirt styles from the 80's and early 90's? What did they look like? Tell us about them in the comments below. We'd love to hear about it!
Subscribe to:
Posts (Atom)