Showing posts with label altered t-shirt. Show all posts

Monday, September 21

Tie Dye DIY Kimono


A much cooler version of a cardigan and a great summer trend that’s transitioning nicely into fall, kimonos are the perfect cover up for unpredictable fall weather. Made from a XXXL t-shirt, this Tie Dye DIY Kimono is super easy to make with NO SEWING required. 

Tuesday, August 25

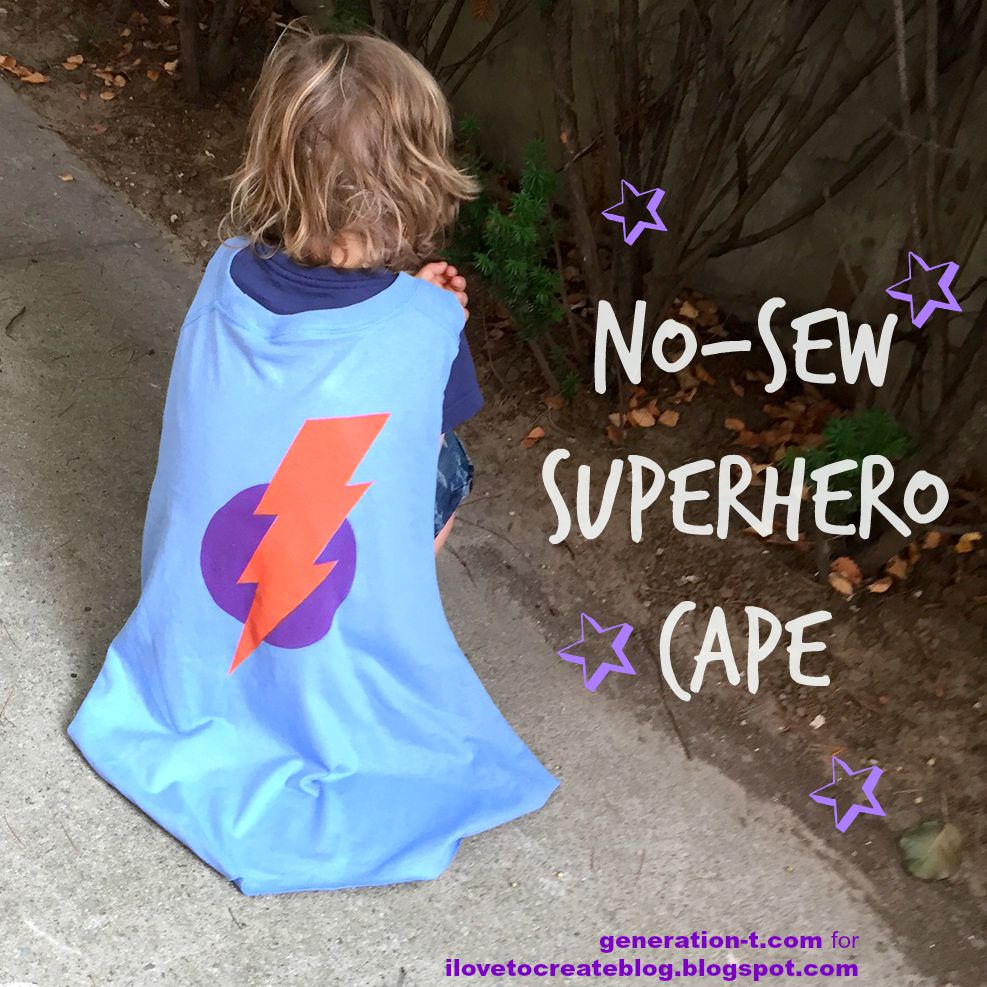
No-Sew Superhero Cape

superhero finish2 generation-t.com
Here's a classic I recently adapted from my second book, Generation T: Beyond Fashion, because, hey,  it's superhero season (okay, okay, when is it not...). A plain T-shirt is the key ingredient to this phonebooth-like transformation. Whether you're a superhero at rest, or in action (leaping tall buildings in a single bound, racing faster than a locomotive, and generally exercising capabilities beyond those of mortal men (and women) -- you know, the usual), this cape has got you covered. Well, partially covered. The superhero in my household requested an orange lightning bolt on his cape, so once I created the basic shape, I made a couple of stencils I could layer to get the two-color effect.
megan-nicolay-blog-footer

Monday, June 15

Tie Dye Ruffle Top Girls Dress DIY


One of my favorite summer silhouettes is an off the shoulder top with a ruffle and they are right on trend for this summer. This DIY was inspired by the super cute ruffle tube tops from Lilly Pulitzer, who we all know is the queen of summer and resort dressing! So let me show you a super easy way to alter a big t-shirt into a super cute Ruffle Top Girls Dress and while we’re at it we’ll add the perfect summer print TIE DYE using Tulip’s One Step Tie Dye kit!


Monday, April 13

Believe Altered T-Shirt DIY

 
One of the fastest and most fun ways to create designs or patterns on a t-shirt is with fabric markers. They’re definitely one of my favorite crafting supplies; they're easy to use, add great color and stay on through the wash! What’s not to love! Alter a t-shirt with this simple tutorial to personalize your t-shirt with fabric markers and while you’re at it we’ll cut it up for a chic new look!

Monday, February 9

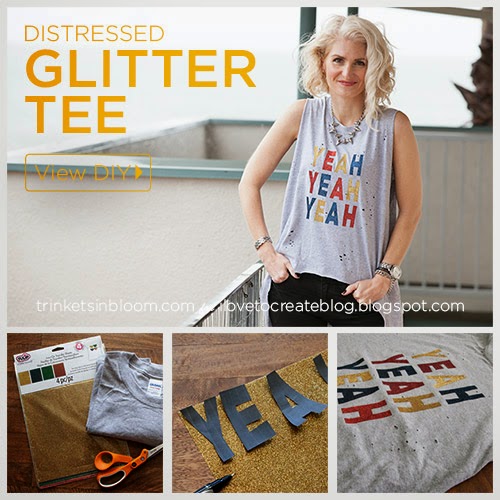
Distressed Glitter Tee DIY


It’s easy to create fabulous colorful graphics on t-shirts with Tulip’s Iron-On Transfer Sheets. Personalize your tee and create some distress with a high low hem for a super chic tee you can pair with jeans, leggings or even a skirt. I love the unexpected length in the back mixed with a cool graphic and an old school feel on the front. These transfer sheets work so well and so quickly you’ll want to make a ton! Let’s get started!

Monday, November 10

Abstract T-Shirt Using Fabric Markers


Creating unique artistic designs on t-shirts is easy and fun when you use Tulip’s Brush Tip Fabric Markers. With the thicker markers you can control the width of your strokes to create more painterly brush strokes. Get creative and have fun with your designs! Let’s get started!

Monday, October 27

Furry Cuffed T-Shirt DIY


Faux fur is everywhere for fall and as the days get cooler it’s really nice to add soft furry touches to your wardrobe. Using Aleene’s Fabric Fusion Peel & Stick Tape is a super easy "No Sew" way to turn a basic t-shirt into a chic Furry Cuffed T-Shirt DIY. I'm always impressed by how well this fabric fusion tape works, you may just want to put your sewing machine aside and use the tapes for everything! Let's get started!

Tuesday, July 22

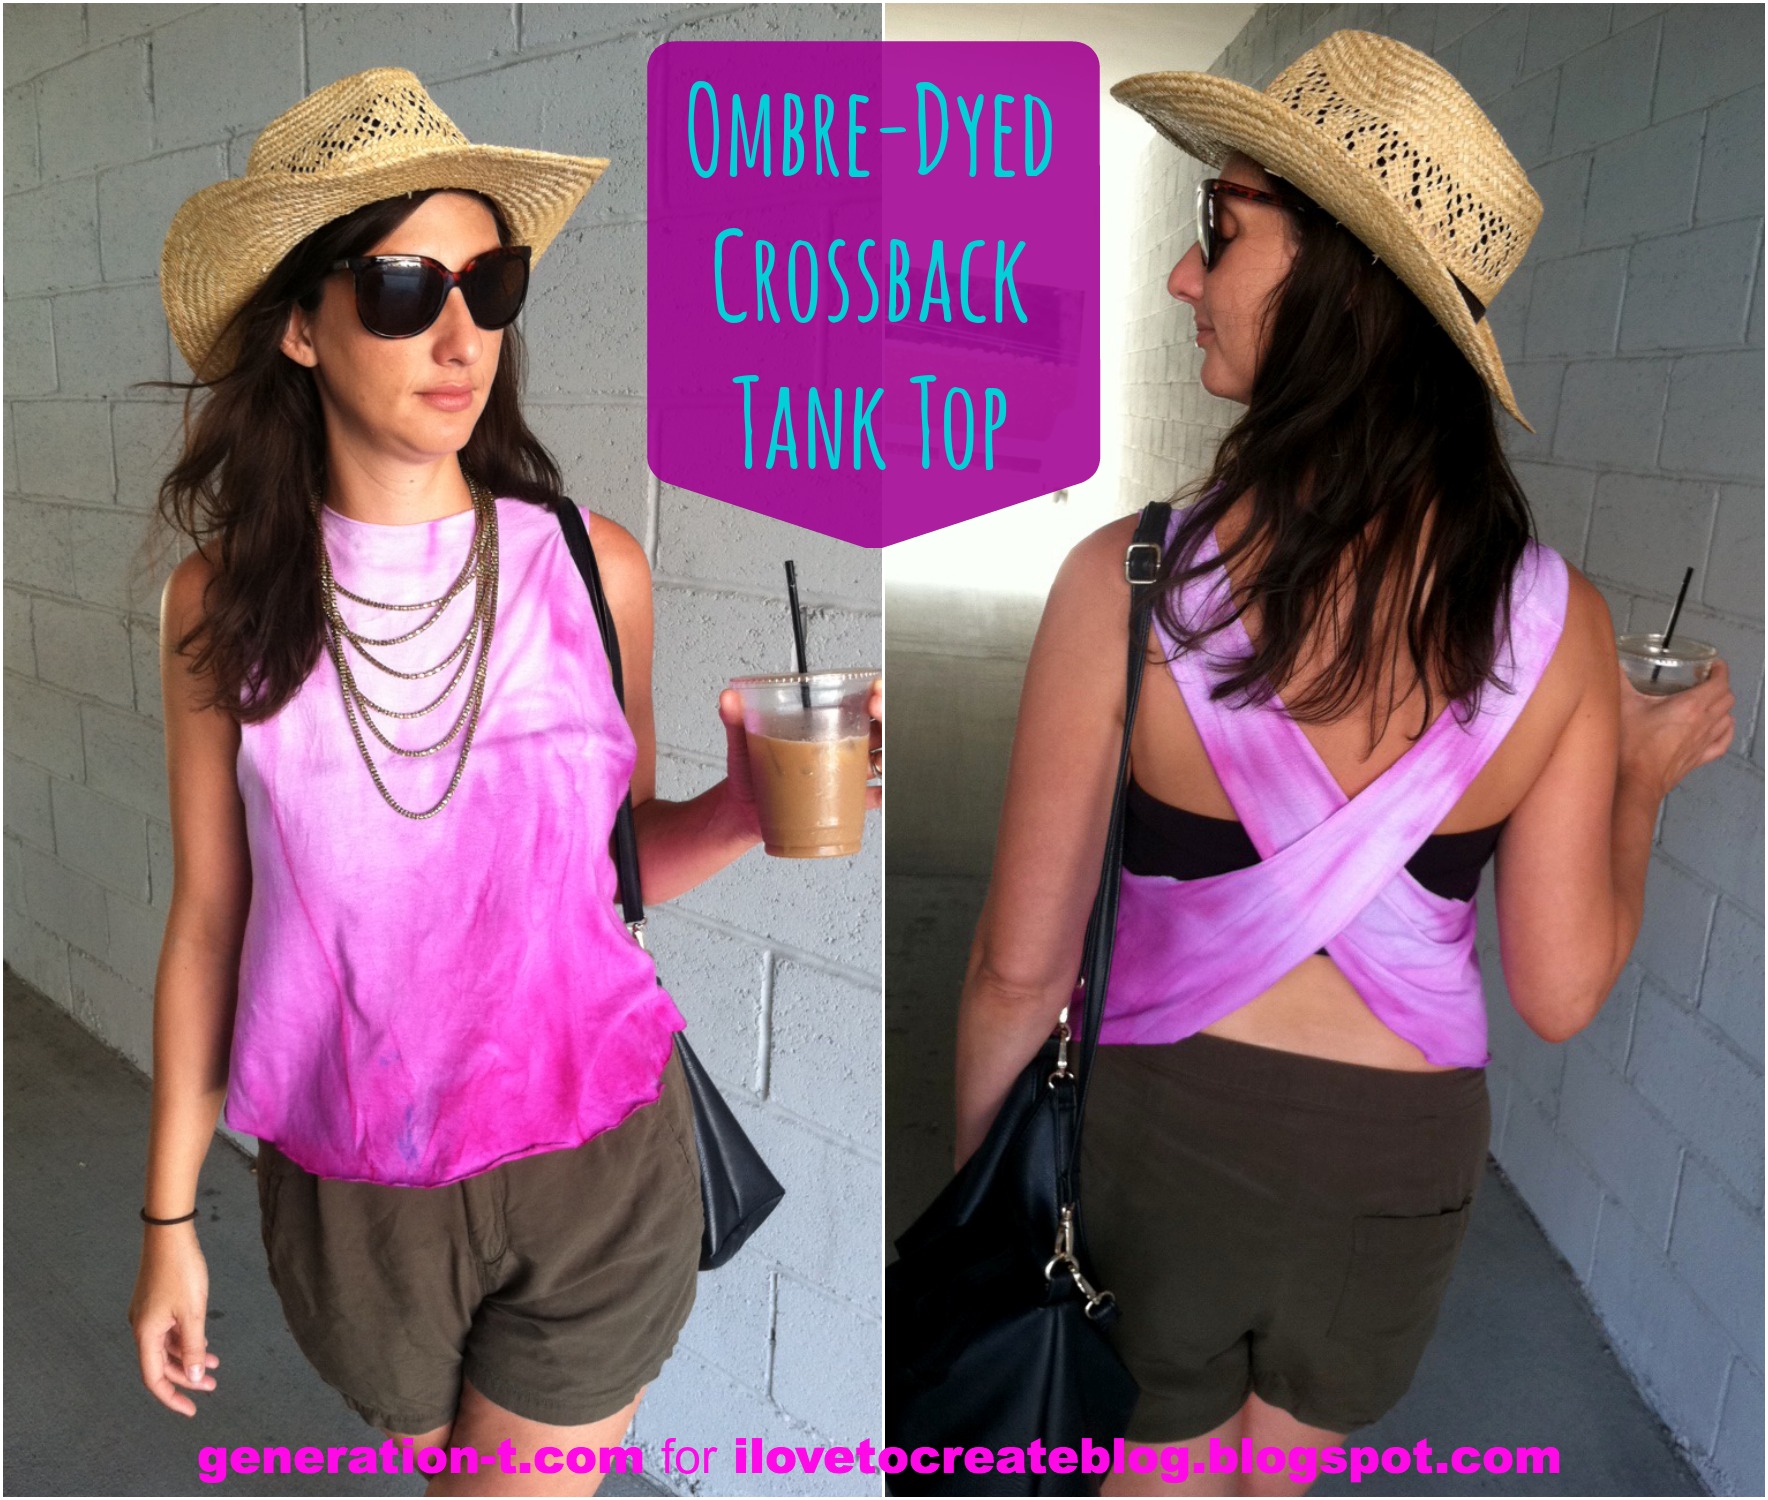
Ombre-Dyed Crossback Tank Top

Smock Tank Finish generation-t.com
Summer is all about easy, breezy fashion (stay cool) and tie-dye (stay fun!). Here's an ombre-style surface treatment for a quick-and-easy T-shirt transformation. From plain white T-shirt to a smock-styled, crossback tank top that's nearly no-sew (about 6 inches of stitching) in no time. Smock it to me!
megan-nicolay-blog-footer-1

Wednesday, October 23

Altered Quote Art T-shirt DIY


I love adding an altered touch to my clothing, so making this inspirational shirt was a fun afternoon project for me!  I liked playing with brushstrokes and textures to get my own custom look. Here's how you can make your own inspirational quote tee!

Monday, October 21

DIY Tribal Print Tee

Hi! I'm Lauren, I do freelance designer for iLoveToCreate.  I was recently challenged by the iLoveToCreate design team to come up with a cool, altered t-shirt that started from a basic store-bought t-shirt!  I LOVE a challenge, so I whipped out my scissors, men's t-shirt, and my Tulip Fabric Markers and went to town making this cute tribal t-shirt that looks like I got at Forever21!  I LOVE being able to  DIY the hottest looks and fashions and I'm super excited about the outcome. Here's how you can get the look!!

Tuesday, August 20

Trompe L'Oeil Necklace T-Shirt DIY

 This Trompe L’Oeil Necklace T-Shirt DIY is a fun way to add a simple pattern to a basic t-shirt. Inspired by the black drawn necklaces on t-shirts by Yves Saint Laurent, this is not only a fun DIY to make it’s also a lot cheaper! 

Friday, June 14

Holographic Dyed Tank (Made from a White T-shirt!)

What happens when you need a black T-shirt, but can't find one? You dye a white shirt! That's what I did and then I added some shiny squares for the wow factor! Here's how you can you can make one too!
What you need:
– White cotton T-shirt.
– Scissors.
– Chalk

Here's a video tutorial I made!

Monday, June 10

Altered Chevron No-Sew T-shirt


Here's a cool shirt perfect for a summer picnic or evening out!  And it's entirely no-sew and so easy to make. Here's how you do it!
What you need:
– T-shirt (this shirts ia a Men's Large Hanes)
– Scissors
– Tape
Lay your shirt out and mark a diagonal line from under the arm to the top of the opposite shoulder.
Cut on the line.

Cut the shirt on the shoulder down about 12 inches.

Cut open and tie a bow from the fabric left of the cut.
Now cut off the top of the sleeve.
Cut two lines on the sleeve.
Cut them open.

Tie Them.

Take your paint and put it on a paper plate.

Tape off your shirt in a chevron pattern.

Put a piece of cardboard between your shirt.
 
Paint your shirt with the pouncer

Let dry about 3 hours, then remove the tape.
Here's  how the bows look on the side.
When you wash this shirt, wash in cold and hang dry.
A fun, summer, no-sew t-shirt.

Have a wonderful Monday.

Lots of love,
Anne

See more of my tutorials at my Wobisobi blog!

Tuesday, January 22

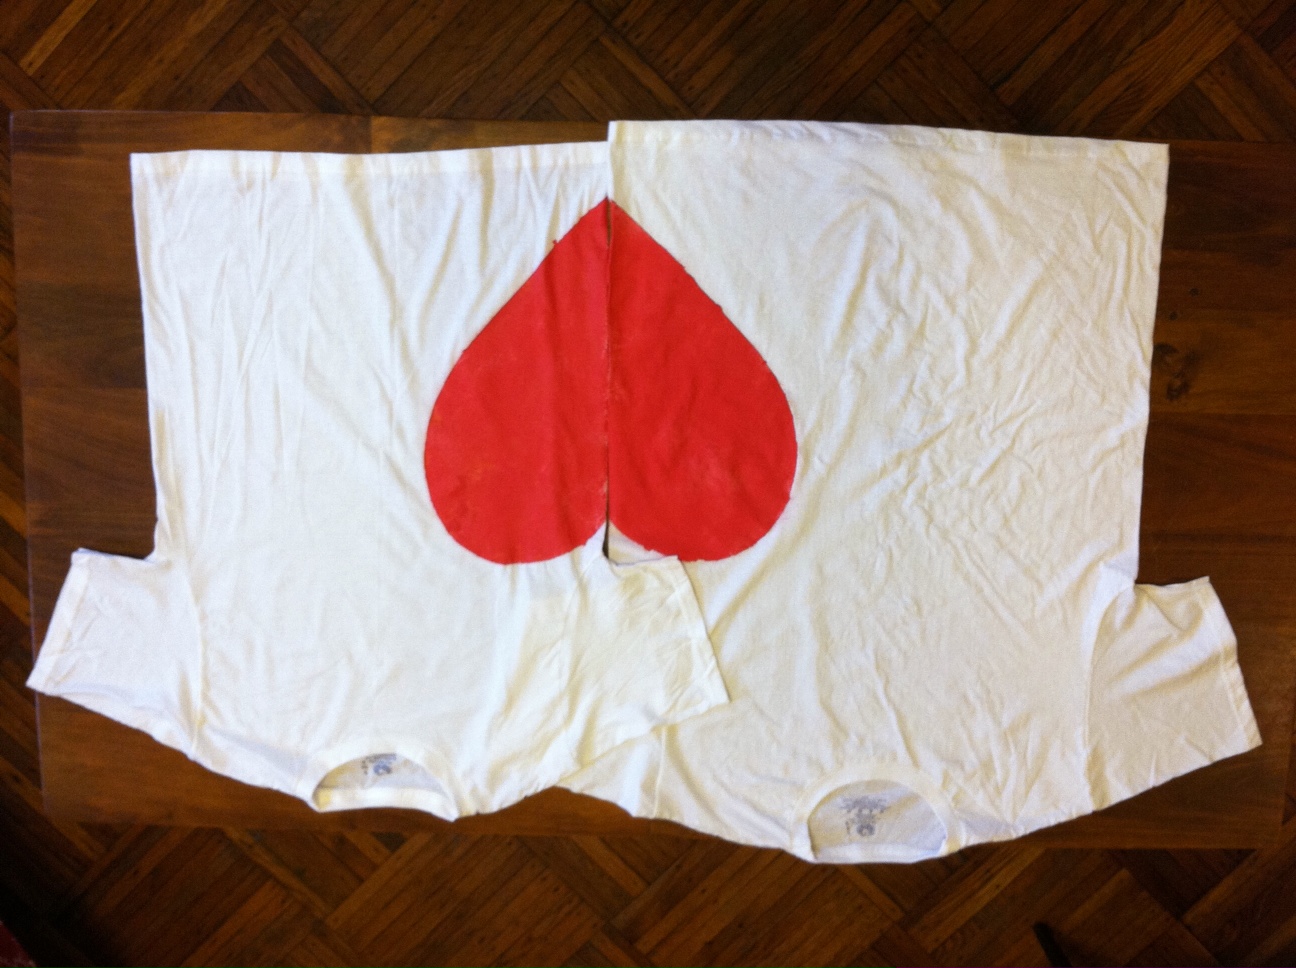
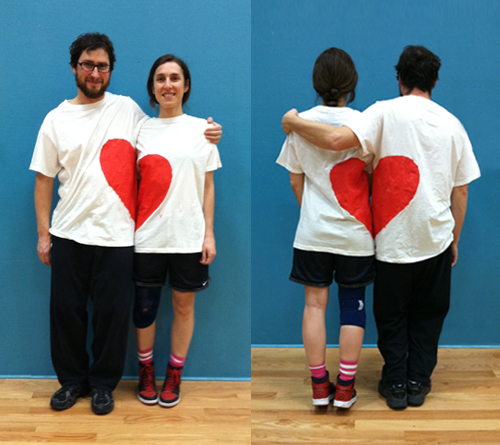
DIY "You Complete Me" Heart T-shirts!

The best thing to make for your best pal on Valentine's day? The sweetest thing for your sweetie? I call it the "You Complete Me" Tee. Part friendship charm necklace, part Pinterest inspiration (these gloves!), each T-shirt in this pair appears, at first look, to be decorated with an abstract design when it's without its match. When the two shirts are reunited, however, they form a heart. Awww...


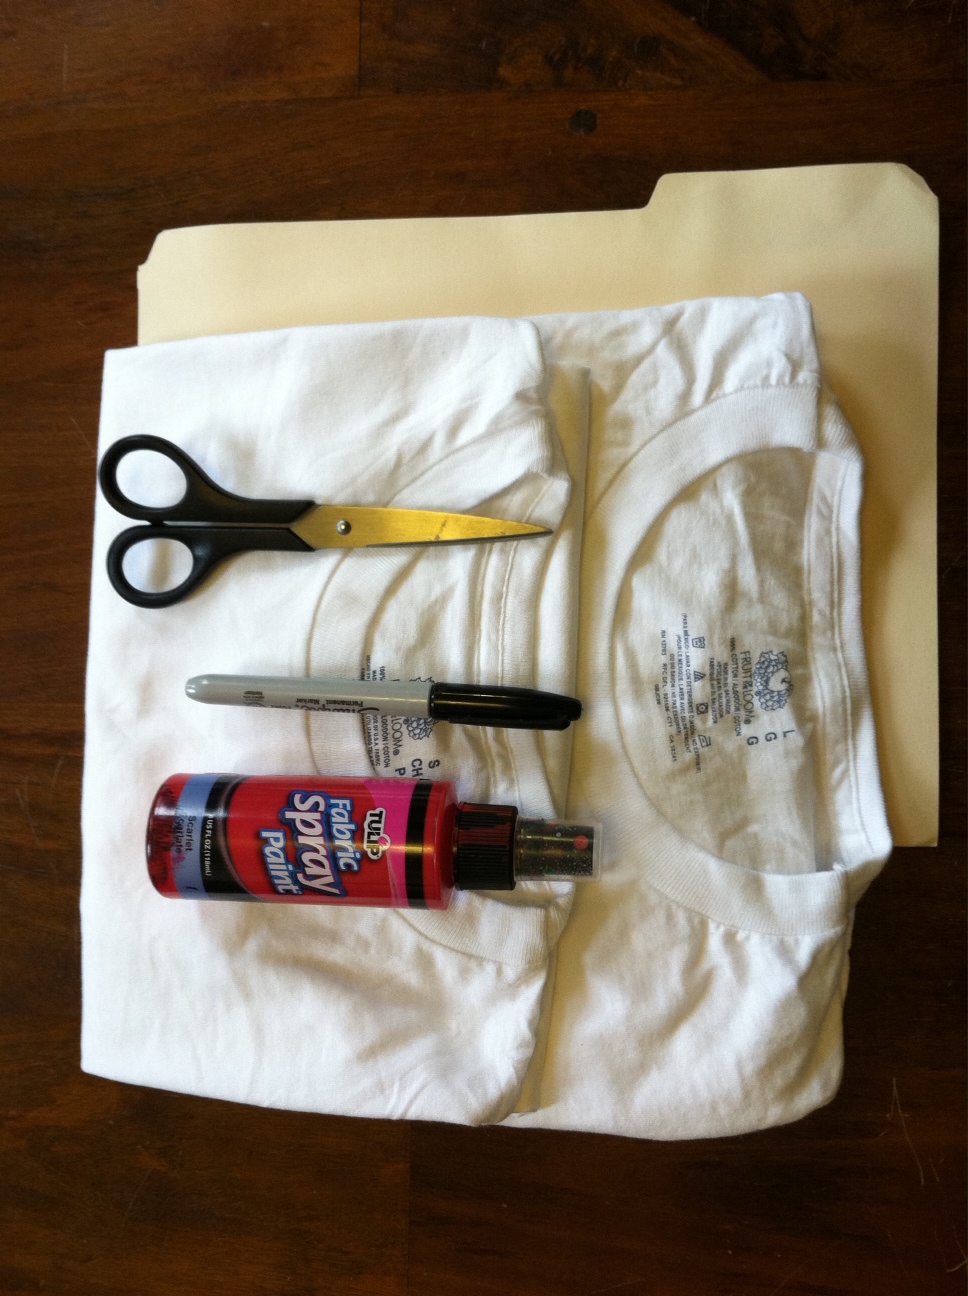
Materials:

-2 plain T-shirts (preferably light in color)
-scissors
-empty file folder (or other large
piece of card stock)
-marker
-Tulip Fabric Spray Paint (in red!)
-plenty of newsprint to protect your work surface

Make It:

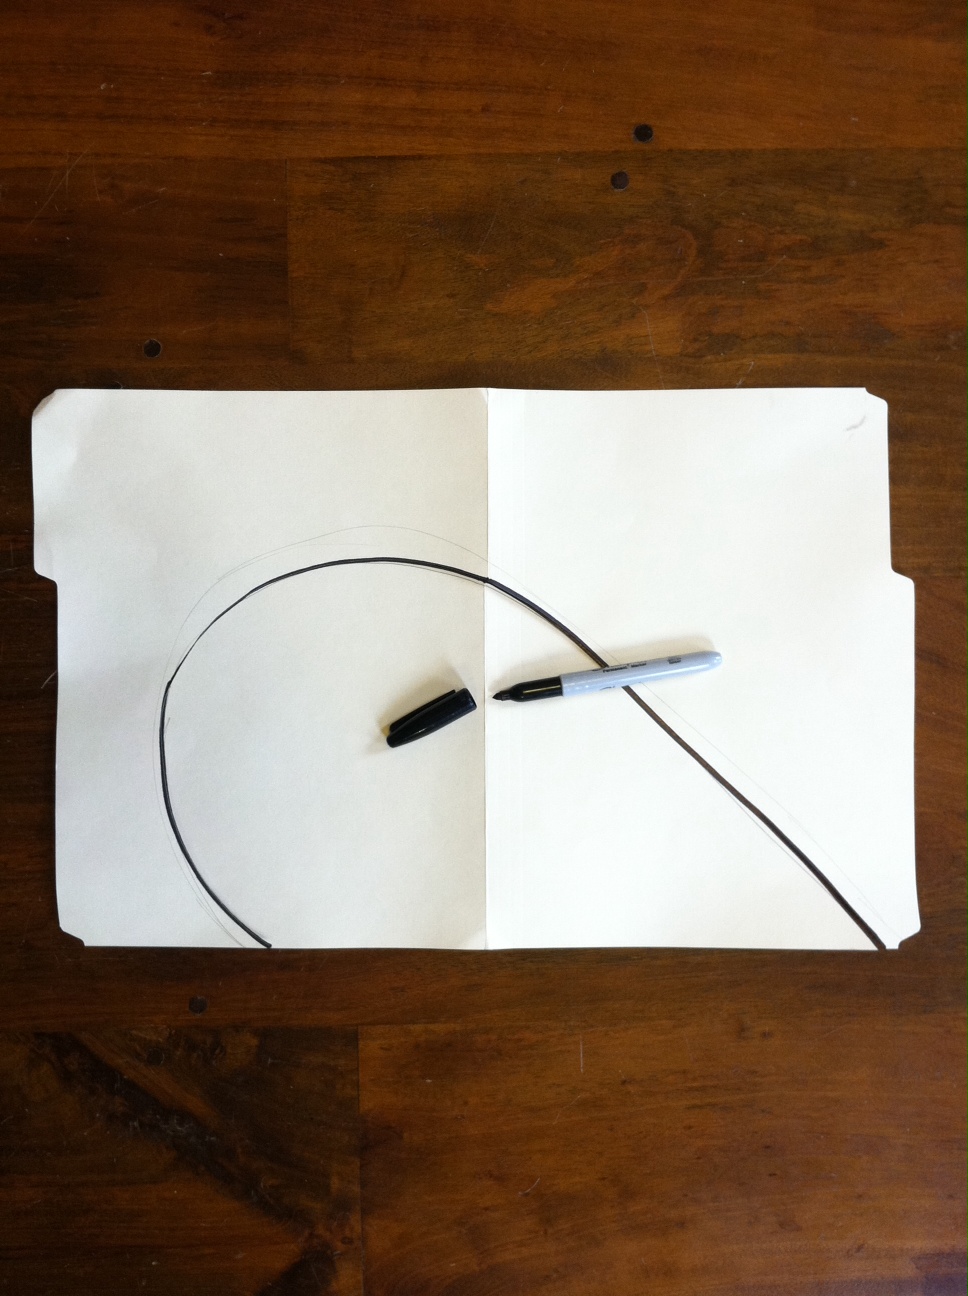
1. Lay the folder flat and use the marker to draw half of a heart along one of the long edges. (Note: I had to make an adjustment later on to accomodate the dimensionality of the human body--so don't be afraid to make a particularly bulbous heart in order for it to "read" when the shirts are side by side.)


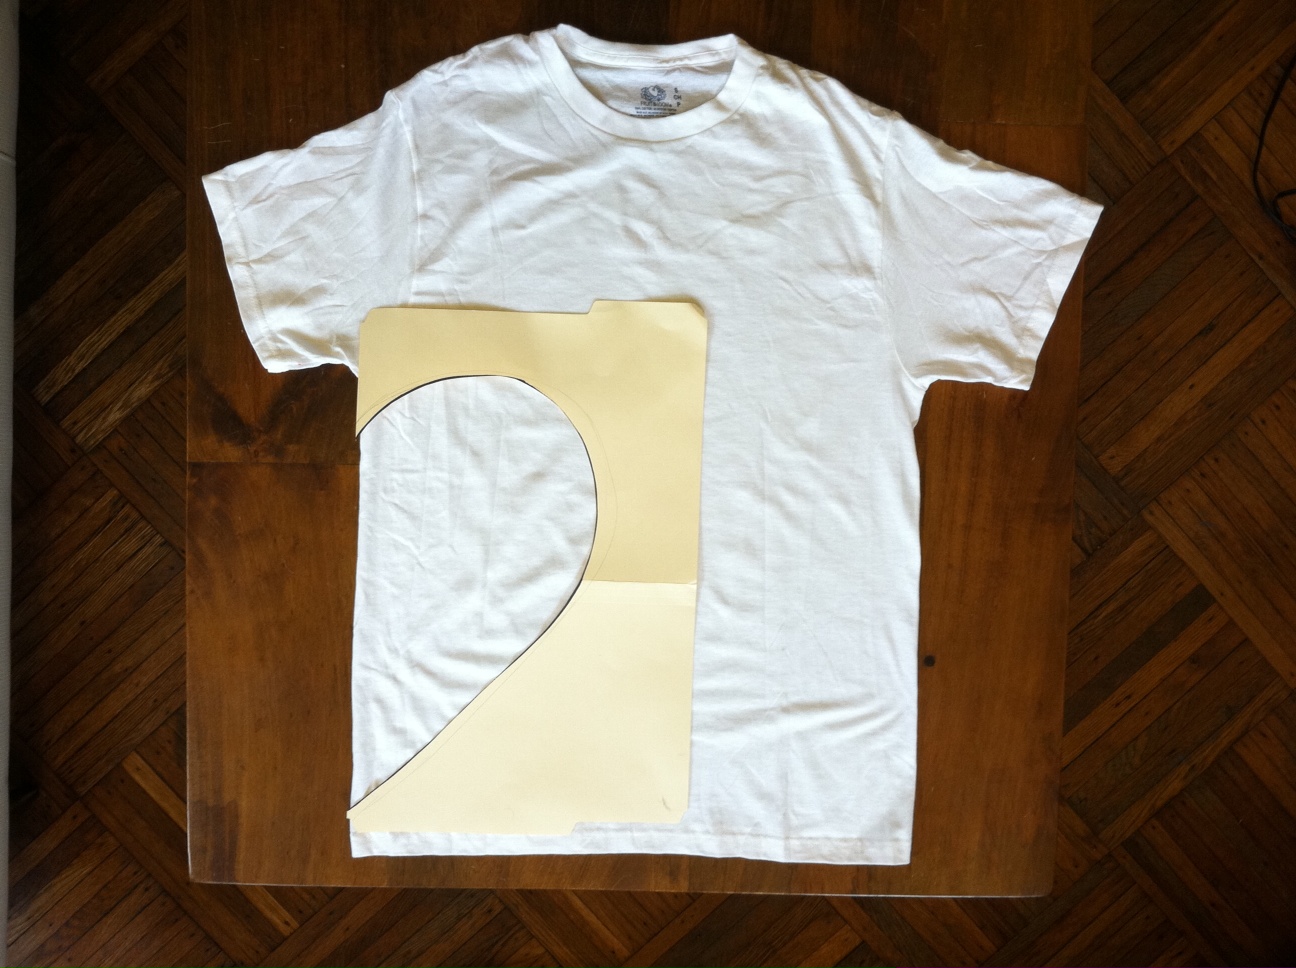
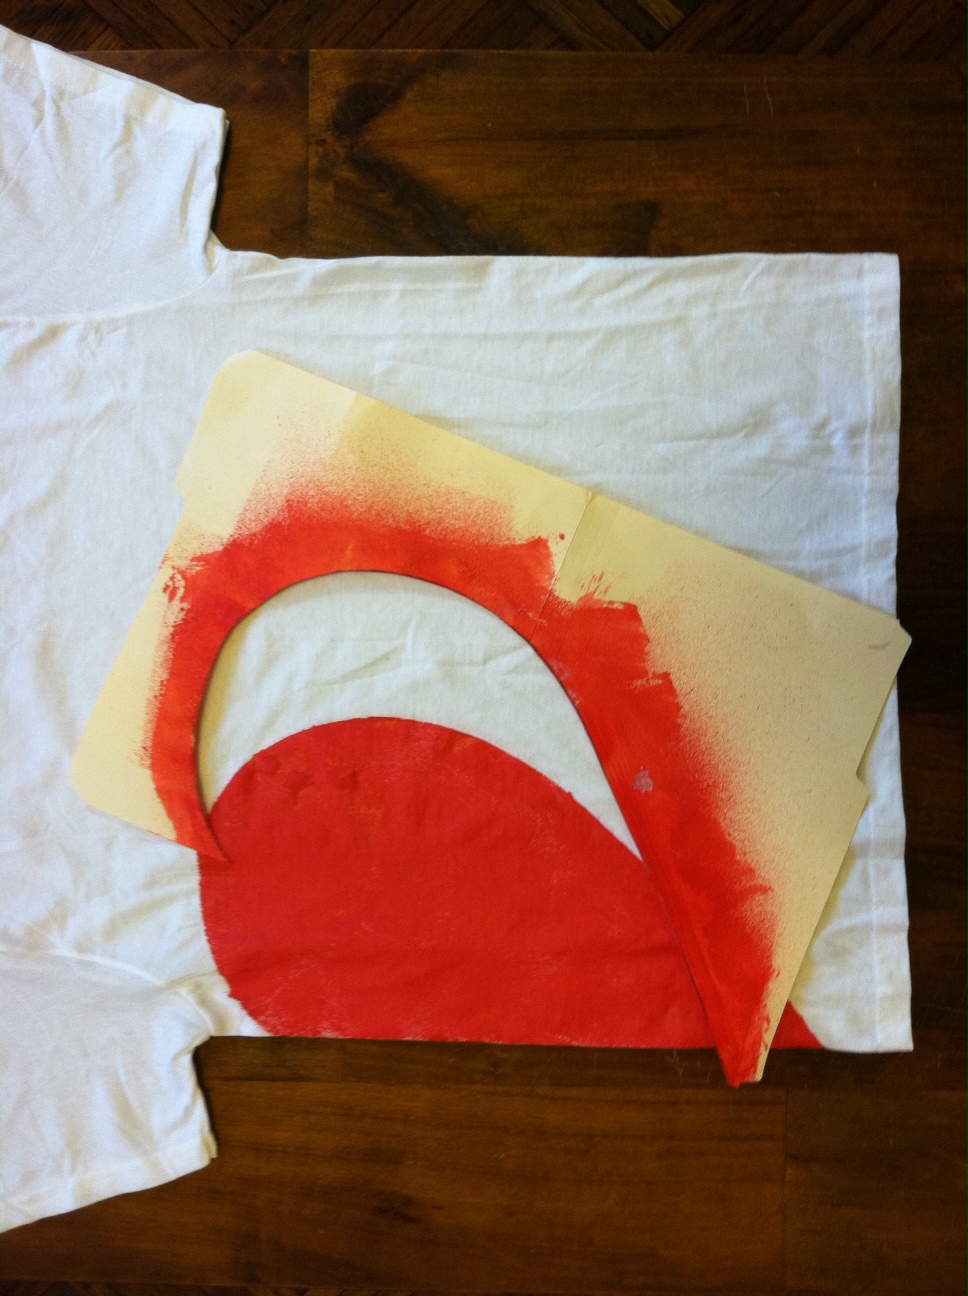
2. Cut out the half-heart template and line it up along the side of the torso of one of the shirts (under the sleeve). Mask the rest of the T-shirt (and use newsprint to protect your work surface), and spray paint the half-heart.


3. Carefully remove the stencil from the T-shirt, let it dry, and then flip the template to paint the other side of the heart on the other T-shirt. Then, when both the T-shirts and the stencil have dried, repeat the process to complete each heart on the back of the shirt. (And don't worry if the paint seeps under the stencil a bit -- like relationships, it might get a bit messy at times!)


4. Let it dry completely, wear it, and go find your best bud. (And don't forget to make sure you stand on the correct side--and bend your knees or stand on your tiptoes, if necessary!)


Thanks to my friends Michael and Helen (who thematically appropriately identify as members of Camp Friendship Basketball League!) for modeling! 
 
Clicky Web Analytics
Pin It button on image hover

Subscribe to our newsletter

* indicates required
I am interested in products and inspiration for...
Close