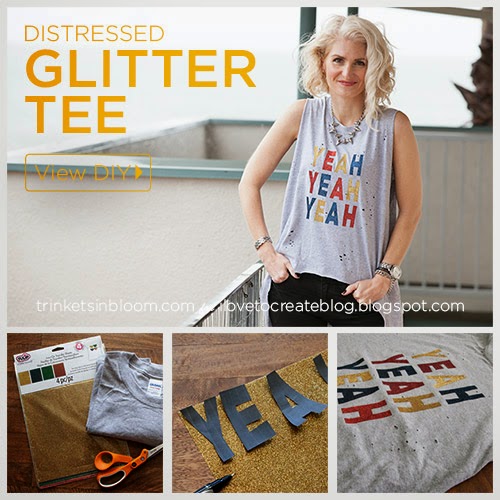
It’s easy to create fabulous colorful graphics on t-shirts with Tulip’s Iron-On Transfer Sheets. Personalize your tee and create some distress with a high low hem for a super chic tee you can pair with jeans, leggings or even a skirt. I love the unexpected length in the back mixed with a cool graphic and an old school feel on the front. These transfer sheets work so well and so quickly you’ll want to make a ton! Let’s get started!
Showing posts with label tulip iron on transfers. Show all posts
Showing posts with label tulip iron on transfers. Show all posts
Monday, February 9
Distressed Glitter Tee DIY
It’s easy to create fabulous colorful graphics on t-shirts with Tulip’s Iron-On Transfer Sheets. Personalize your tee and create some distress with a high low hem for a super chic tee you can pair with jeans, leggings or even a skirt. I love the unexpected length in the back mixed with a cool graphic and an old school feel on the front. These transfer sheets work so well and so quickly you’ll want to make a ton! Let’s get started!
Monday, November 25
Holiday Gold Bow T-Shirt DIY
Add some sparkle to the holidays by creating a fun Holiday Gold Bow T-Shirt DIY using the easy to use Tulip Iron-On Transfer Sheets. With all your holiday running around and shopping to do, it’s easy to just throw on a t-shirt and go. But why not add some sparkle and a festive bow to keep those errands from becoming too dull and help spread some festive cheer! This is a simple and quick way to create your own t-shirt designs to wear for the holidays and they’d make great gifts too!
TOOLS & MATERIALS:
T-Shirt
Iron
Scissors
Design
Pen
Cloth for ironing
step 1
Draw out your design on a piece of paper or use a stencil if you have one.
step 2
Trace around your design on your Tulip Iron-On Transfer Sheet.
You’ll need to use a pen for this to make sure you can see your lines.
step 3
Cut out your design carefully to make sure you don’t see your pen lines.
step 4
Place your design on your t-shirt where you want it.
Lay your cloth over your design and press with your iron.
Keep moving your iron around for about a minute to make sure your design is set.
Make sure you use a dry setting on your iron, NO STEAM.
Check your design to make sure it is all secure and adhered to your t-shirt. If you need to you can iron it more to make sure it’s secure.
These Tulip Iron-On Transfer Sheets are so easy to use. I was really surprised at how well (and quickly) they attached to the t-shirt. It was really simple. You can use these to make so many fun graphic T-Shirts to wear yourself or give as gifts.
For more fun fashion DIY’s check out my blog Trinkets in Bloom! You can also follow me on Facebook, Twitter and Instagram.
xoxo
Cathy
Wednesday, November 9
iLoveToCreate Teen Crafts: Onesie, Twosie

Avalon Potter
"Teen crafted, mom approved."
I was asked to decorate a onesie for an upcoming Baby Shower. I knew right away I wanted to use a Tulip Iron On transfer and the phrase: "Little Love Muffin." I know lots of teens have babies in their families and it's really easy and fun to make onesies using products from iLoveToCreate. My mom was so impressed with my design, she made one too!

Materials
Washed cotton baby onesie
Tulip Fabric Markers
Tulip Iron on Transfers
Tulip Letter Stencils
Small cardboard form to slide inside shirt while decorating
Tools
Tulip Mini Fashion Iron
1. Wash the onesie to remove the sizing. Slide a piece of thick cardboard into the onesie to protect the back from the inks. You can also use a book for this because onesies are so small!
2. Use an iron to attach applique to shirt. Allow to cool.
3. Use the fabric markers and the stencil to write your words.
4. Mom used the Tulip Beads in a Bottle paint to add dimension to her wings, halo and hand written words.
Subscribe to:
Posts (Atom)


