I seem to have a thing for notebooks, sketchbooks, journals, basically anything paper. What I love best about them (aside from everything) is being able to personalize them, to make them your own. Many journal or sketchbook covers are fabric which makes them perfect for decorating with drawings or doodles using fabric markers. For lighter colors you can easily use the regular fabric markers but for dark colors Tulip’s Opaque Fabric Markers work perfectly! With back to school right around the corner, decorating a new sketchbook or journal is a perfect way to get ready for the new school year. Let’s get started!
Showing posts with label back to school crafts. Show all posts
Monday, July 20
Monday, September 2
DIY Neon Colorblock Cosmetic Bag
I found this nifty cotton cosmetic bag at Michaels recently and had to pick it up! It's a perfect blank canvas. This would make a great little pencil case for Back to School, too. A little painter's tape, Tulip fabric paints, some angled paint brushes and in under thirty minutes you can make a custom bag with just a few splashes of neon. Neon works best as an accent for maximum visual impact. The quilting on the bag made it easy to create a colorblock pattern, which is vaguely chevron inspired, but given a fresh, asymmetrical spin. I love this so much, I want to make a matching purse!
Tuesday, August 28
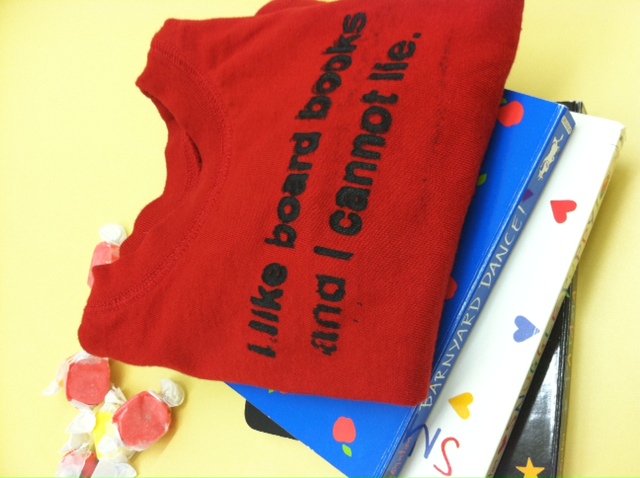
Back to (Pre)School Screenprinted T-shirt
Whether your wee ones are heading back to daycare this fall or are
college-bound (not so wee ones), it's always a treat to have fresh togs
to celebrate the occasion -- learning! Yes! When I was brainstorming ideas for dressing my little one, I was inspired to try out my shiny new Tulip ScreenIt
machine (unlike paper stencils that can wilt a bit after a few uses
with soggy paint, you can print in bulk once you make a screen that you
like! -- I'm stashing that thought away for future birthday party
favors...) For this one, I riffed on a little ditty I penned last year to the beat of the esteemed Sir Mix-A-Lot with a nod, of course, to the toddler set and their literary repertoire.

Materials:
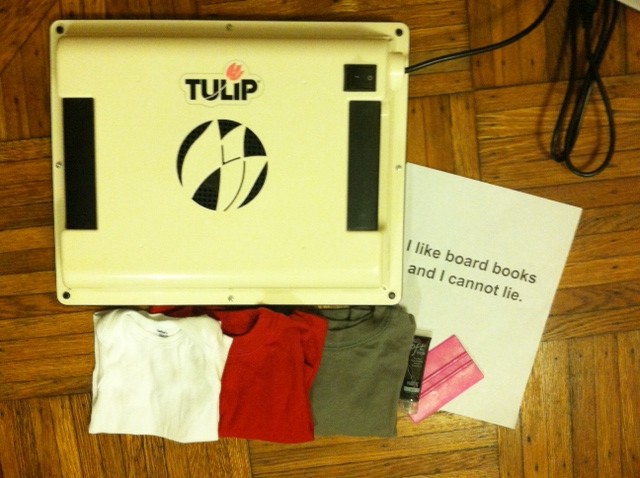
-Tulip ScreenIt kit (including fabric ink/paint, brayer, design screens, and a darkroom bulb to install in your workspace)
-8 1/2" x 11" sheet of printer paper with black design printed on it ("I like board books and I cannot lie." in Arial font, size 54)
-tub of water large enough to accommodate the screen
-non-abrasive sponge
-plastic covering for your work surface
-blank T-shirts in the appropriate size

Make it:
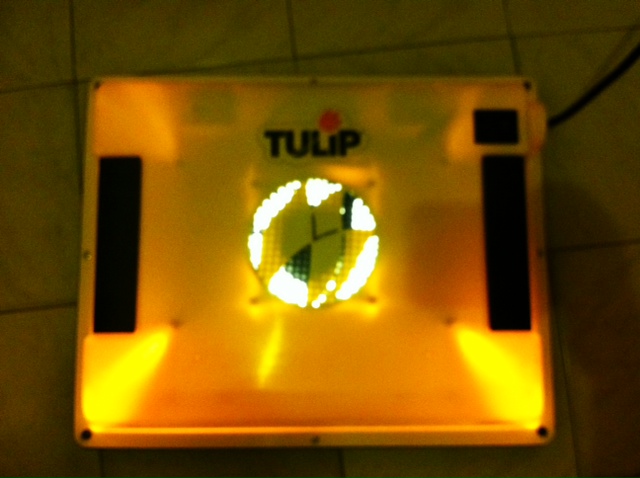
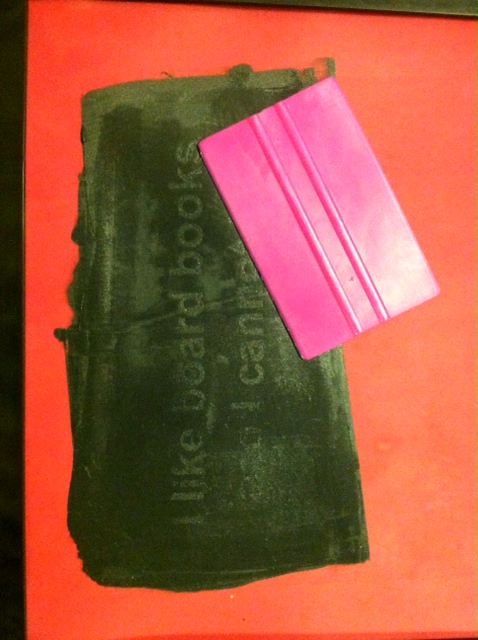
1. In a totally light tight room (my bathroom is the only room in my apartment that qualifies, so welcome to my bathroom, dear readers!), place one of the blank screens onto the foam bed, then layer your design face down on top of it. Close the ScreenIt system, sandwiching your design and the screen between the foam bed and the light lid. Then flip the switch on the system to expose the screen to your design. (I set my smart phone timer to 14 minutes.)

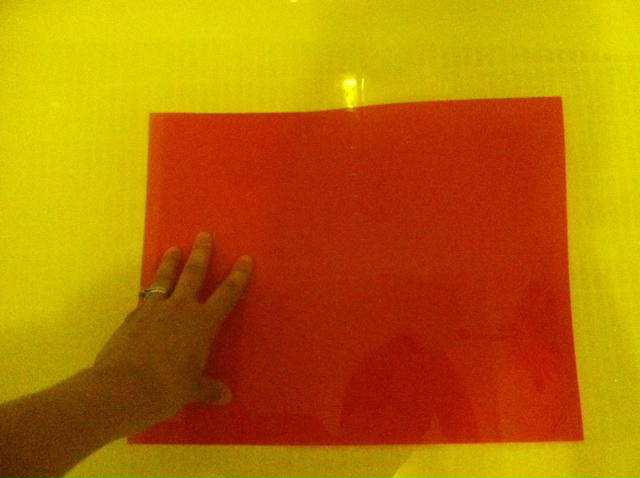
2. When the timer goes off, briefly submerge the film completely in water (since we're getting so well acquainted, welcome to my bathtub!). I left the darkroom light on (that's the yellow tinge you see), but it's safe to turn on the regular overhead light at this stage.

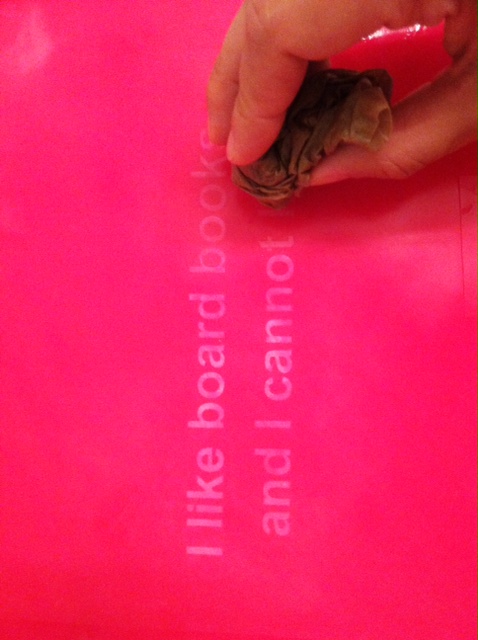
3. Place the screen on a flat, dry, plastic-covered surface for 30 seconds, then begin gently rubbing a wet sponge over the design to "bring out" the design and clarify it. (Note: I didn't have a sponge, so I used a wadded up wet paper towel, which isn't ideal, but can work in a pinch.) Let it dry completely (about 45 minutes to 1 hour).

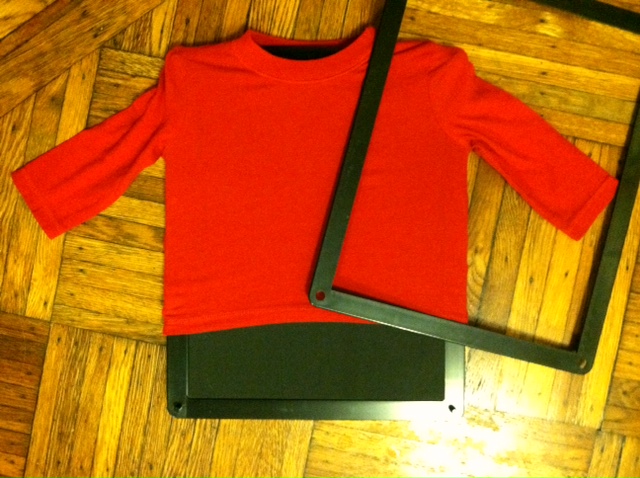
4. Slide the T-shirt over the foam bed of the machine, centering it as best you can.

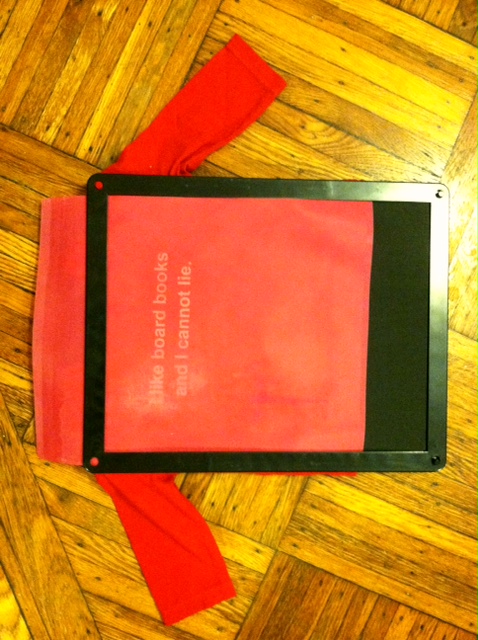
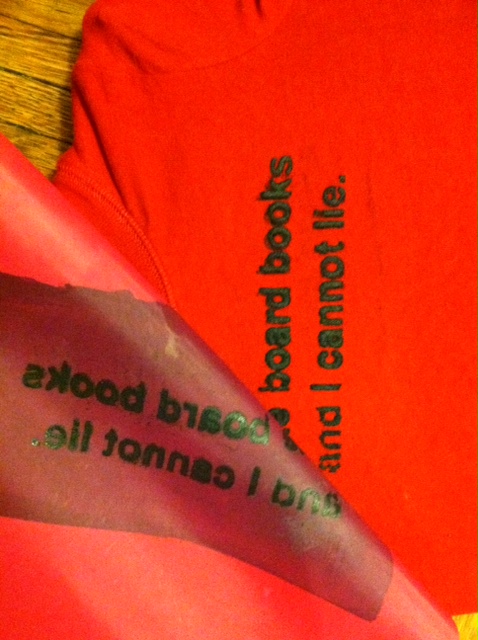
5. Place the design screen (right-reading, if you use text like I did) and then the black frame over the design, to keep the shirt and screen from shifting. (Note: Because of the size of the shirt I used -- very tiny! -- and the placement of the design on the screen, there was overlap, making the screen not entirely secure.)

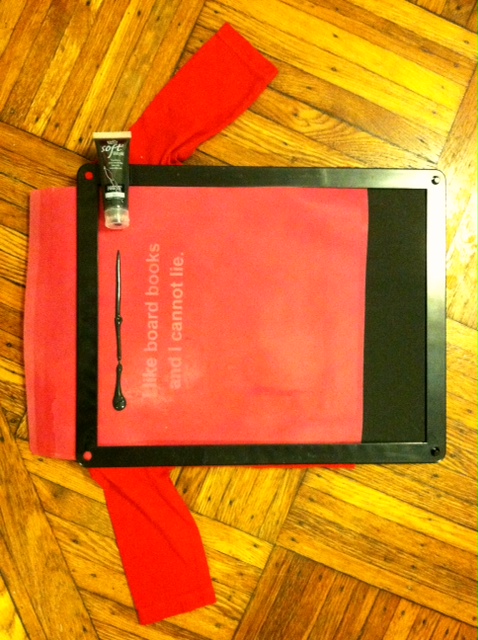
6. Apply a thin line of ink directly to the screen, along one side of the design.

7. Use the brayer to firmly spread the ink over the entire design, always swiping in the same direction.

8. Remove the black frame and peel back the design screen. Rinse the screen immediately, without scrubbing it, so that you can let it dry and use it again. (As you can see, mine smudged a bit because the screen shifted slightly because of the small tee, but I think it just looks a little raw and edgier!)

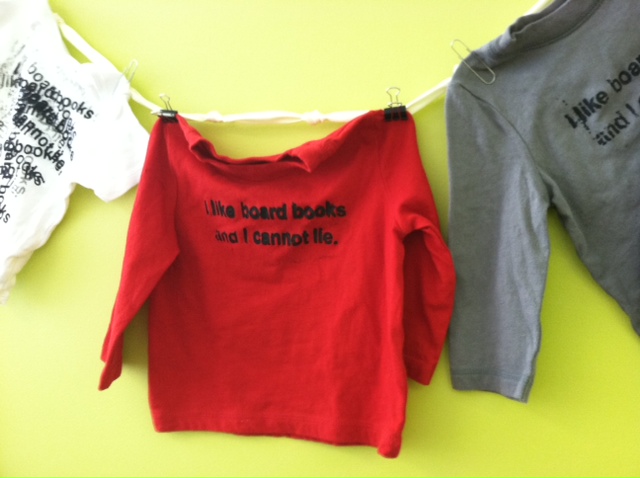
9. Let the shirt dry completely -- about 4 hours (no heat-setting required) -- and then dress your studious little guy or gal for success!

Variations:
-Since your screen can be used up to 75 times (I haven't tested this!) if you rinse it immediately after using it (don't scrub it!), try printing the same design on multiple different items. Print the design across the tush of a pair of pants for a crawler, or down the leg for a little one who's walking. Print on bandanas, skirts, jackets, shoes and socks, even!
-Use your screen as a pattern that can be layered and repeated (see the white T-shirt in the photo above) -- this is especially smart for when it smudges a little too much -- just go with the mistake and turn it right around into something great!
Materials:
-Tulip ScreenIt kit (including fabric ink/paint, brayer, design screens, and a darkroom bulb to install in your workspace)
-8 1/2" x 11" sheet of printer paper with black design printed on it ("I like board books and I cannot lie." in Arial font, size 54)
-tub of water large enough to accommodate the screen
-non-abrasive sponge
-plastic covering for your work surface
-blank T-shirts in the appropriate size
Make it:
1. In a totally light tight room (my bathroom is the only room in my apartment that qualifies, so welcome to my bathroom, dear readers!), place one of the blank screens onto the foam bed, then layer your design face down on top of it. Close the ScreenIt system, sandwiching your design and the screen between the foam bed and the light lid. Then flip the switch on the system to expose the screen to your design. (I set my smart phone timer to 14 minutes.)
2. When the timer goes off, briefly submerge the film completely in water (since we're getting so well acquainted, welcome to my bathtub!). I left the darkroom light on (that's the yellow tinge you see), but it's safe to turn on the regular overhead light at this stage.
3. Place the screen on a flat, dry, plastic-covered surface for 30 seconds, then begin gently rubbing a wet sponge over the design to "bring out" the design and clarify it. (Note: I didn't have a sponge, so I used a wadded up wet paper towel, which isn't ideal, but can work in a pinch.) Let it dry completely (about 45 minutes to 1 hour).
4. Slide the T-shirt over the foam bed of the machine, centering it as best you can.
5. Place the design screen (right-reading, if you use text like I did) and then the black frame over the design, to keep the shirt and screen from shifting. (Note: Because of the size of the shirt I used -- very tiny! -- and the placement of the design on the screen, there was overlap, making the screen not entirely secure.)
6. Apply a thin line of ink directly to the screen, along one side of the design.
7. Use the brayer to firmly spread the ink over the entire design, always swiping in the same direction.
8. Remove the black frame and peel back the design screen. Rinse the screen immediately, without scrubbing it, so that you can let it dry and use it again. (As you can see, mine smudged a bit because the screen shifted slightly because of the small tee, but I think it just looks a little raw and edgier!)
9. Let the shirt dry completely -- about 4 hours (no heat-setting required) -- and then dress your studious little guy or gal for success!
Variations:
-Since your screen can be used up to 75 times (I haven't tested this!) if you rinse it immediately after using it (don't scrub it!), try printing the same design on multiple different items. Print the design across the tush of a pair of pants for a crawler, or down the leg for a little one who's walking. Print on bandanas, skirts, jackets, shoes and socks, even!
-Use your screen as a pattern that can be layered and repeated (see the white T-shirt in the photo above) -- this is especially smart for when it smudges a little too much -- just go with the mistake and turn it right around into something great!
Wednesday, August 8
iLoveToCreate Teen Crafts: Divine Damask Locker Magnets
iLovetoCreate Teen Crafts
Divine Damask Locker Magnets
Miss Avalon started High School this week and I am understandably ferklempt. When did my beautiful baby turn into a gorgeous young woman? She's gorgeous, creative, sweet and smart as a whip to boot! She's taking honors classes this year, which means she's going to be a busy gal for sure. Proud mama? Yes indeedy do!
Have you seen the 'Locker Chic' accessories in the stores this season? They have everything from mini chandeliers to book shelves in an array of styles and colors all designed to work in a school locker using magnets. What fun! Avalon got this lovely damask set at a big box office store and I thought she just might need some coordinating magnets. These are so easy to make with scrapbook papers or even recycled magazine or greeting cards or printed pictures, just use some matte finish Collage Pauge and add some texture with Tulip Beads in a Bottle and attach Aleene's magnetic tape to the back and just like that, instant locker chic! Tres jolie, n'est pas?
Materials
4 2 1/4" diameter 1/4" wide wooden circles
Various coordinating scrapbook papers (or any fun papers you wish to use)
Tulip Fashion Bead Paint or Beads in a Bottle White
Tulip Soft Paint Black
Traci Bautista's Collage Pauge Matte
Aleene's Magnetic Tacky Tape
Tools
2" Circle punch
Paint brush
Sponge brush
Wednesday, June 27
iLoveToCreate Teen Crafts: Carnival Canvas Covered Notebook
Avalon Potter (a.k.a. NGC-New Generation Crafter) for iLoveToCreate
"Teen crafted, mom approved."
Avalon has been obsessed with tribal prints all summer, from ikat to Native American to African inspired patterns and chevron, she's been showing me pictures of bedding, bags, clothes, shoes all emblazoned with an array of colors and patterns. I trust a teen to know what's really cool and she's a really cool teen. She wanted to make something fun to express her new found love of all things 'pattern-y', and we remembered Claudine Hellmuth's fabulous sticky back canvas. By covering a basic notebook with layers of painted and embellished canvas, she made a truly fabulous one of a kind work of art. This is so much fun to do with the vast array of paints from Tulip and Scribbles brands and with school just around the corner, a great way to help your teen personalize their supplies!
Materials
Notebook with hardback cover
Sticky back canvas
Decorative tape
Tulip 3-d fashion paint
Tulip fabric markers
Scribbles brush on fabric paints
Scribbles fabric paint brushes
Tulip sponge pouncers
Tools
Scissors
Cut canvas to fit cover of book, leave a 1" edge, cut edge at corners, fold over book cover and press to remove any bubbles on front of book. Add a decorative tape accent to left side of canvas to conceal edge.
Create three strips of canvas. Peel and press on notebook at top, center and bottom edge. Paint each stripe and the spaces in between a solid color and allow to dry.
Make two rectangular mini-canvas accents using dimensional paint in patterns, press together and adhere to front of notebook.
Use markers and paints to make a variety of patterns along strips.
Subscribe to:
Posts (Atom)