Showing posts with label card making. Show all posts

Monday, December 3

How to Make Pretty Papers DIY Christmas Cards


Pretty Papers DIY Christmas Cards
Margot Potter for iLoveToCreate

It's all about Pretty Papers DIY Christmas Cards in today's fun filled tutorial!  Ho, ho, ho!  The holidays are upon us!  It's easy to just buy some generic Christmas cards at the bargain stores, but it's much more fun and rewarding to make your own.  And I bet you already have the ingredients in your craft studio closet!  I used patterned scrapbook papers, cardstock, shape cutters and various sundries from my crafty coffers to make these three adorable cards as fast as you can say, "Kris Kringle" and you can too.  Aleene's adhesives and Tulip glitter and beads in a bottle are fabulous for paper crafts!

Ingredients:
Red and green cardstock
Patterned scrapbook papers
Decorative trims and ribbons
Buttons with wells for crystals
Tulip Glam it up Crystals
Tulip 3D Fashion Paint 
Plastic rhinestones
Tulip Beads in a Bottle or Tulip Fashion Glitter
Aleene's Original Tacky Glue
Aleene's Tacky Dot Runner
Dimensional foam stickers
Handwriting fonts (DaFont is a great source for these)

Tools:
Fiskars shape templates in oval, circle and square
Scissors
Bone folder
Paper trimmer


To make the 'Jingle All the Way card', cut out three circles graduating in size to fit front of card. Cut the hat shape freehand. Fold cardstock and score with bone folder, trim excess paper. Attach circles and hat with glue runner. Attach rick rack scarf with Tacky Glue. Use black matte dimensional paint to draw stick arms. Print text (jingle all the way)on computer using a handwriting font. Use Beads in a Bottle or glue and loose glitter to add sparkling accents to snowman's body.  Cut out 'jingle' and stick on green card stock to frame. Stick this on front of card with a foam dimensional sticker. Cut out 'all the way' and stick on green cardstock to frame, adhere to inside center of card with glue runner.
To make the 'Joy to the World' Card cut out a large and a small oval using the Fiskars shape cutter.  Freehand cut a bow shape (fold paper segment in half and cut.)  Fold card and crease with bone folder, cut any excess paper with trimmer.  Attach paper shapes to card as in picture using glue runner.  Attach a ribbon segment across front of larger oval using glue runner.  Glue rick rack trim above smaller oval and button and faux rhinestone accents with Original Tacky Glue.  Allow to dry.  Print "Joy to the world."  Cut out 'j' 'o' and 'y.'  Layer on green cardstock and cut as in picture.  Attach to card using foam stickers.  Cut out 'to the world' and layer on green cardstock and attach to center of inside of card. 
To make "Merry Christmas Card" cut out three graduating in size rectangles using patterned scrapbook paper and the Fiskars shape template.  Cut out stripes and bows using red and white card stock and rick rack trim.  Attach papers and trims to front of card as in picture.  Print 'merry christmas and a happy new year'.  Cut out 'merry christmas' and stack on a lighter green cardstock border and a second border of coordinating scrapbook paper.  Attach to front of card using glue runner (rick rack bow will need to be glued to card.)  Cut out 'and a happy new year' and attach to lighter green card stock frame and center inside of card.  Using Beads in a Bottle or glue and loose glitter, add sparkles to paper bows and ribbons.  Glue buttons on center of bows and glue rhinestones and Glam it Up crystals into button wells with Tacky Glue.

Thursday, September 6

Embellished Harajuku Thank You Cards (tutorial)


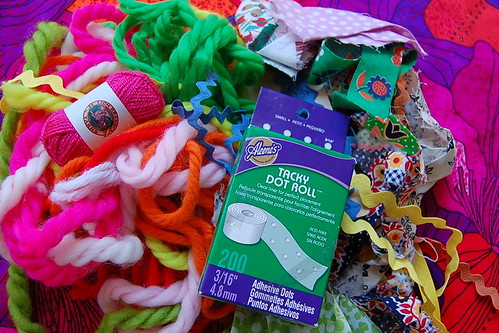
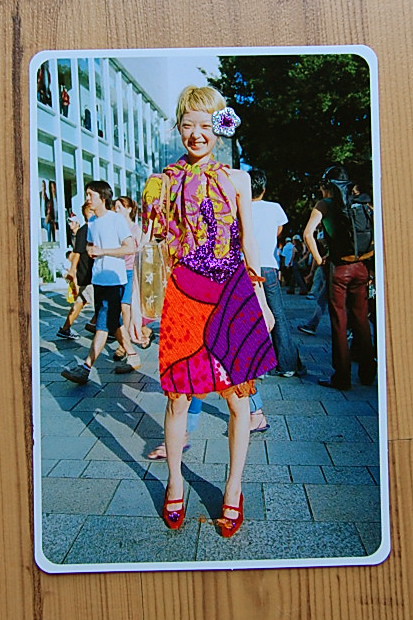
I'm in need of a few thank you cards. Since I'll be sending these thank you cards to fellow crafters it felt wrong to just send plain old store bought ones, even if they did picture kids from Harajuku.

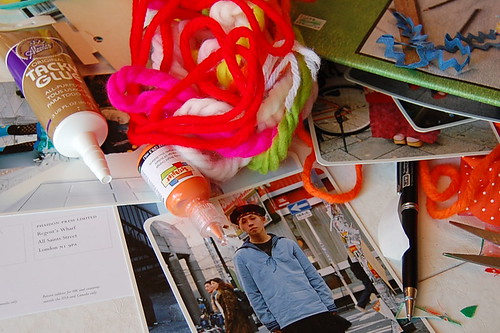
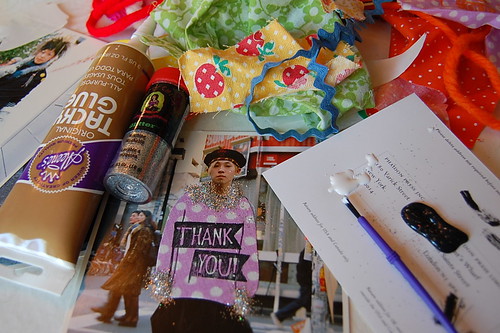
As if the kids from the pages of Fruits were not funky enough I thought I would add a little sparkle and texture to their outfits. I raided my stash of I Love to Create products and scrap crafting bits and this is what I came up with. I kept thinking about this kitschy postcard my parents sent me from Spain as a child where the Flamenco dancer's dress was actual fabric. I loved that card.

SUPPLIES
Cards
Scrap Fabric
Variety of Aleene's Tacky Glue Products
Tulip Fabric Paint
Stamp
Tulip Fashion Glitter
Tracing Paper
Scissors
Paint Brush
Scrap trim, ribbon and yarn

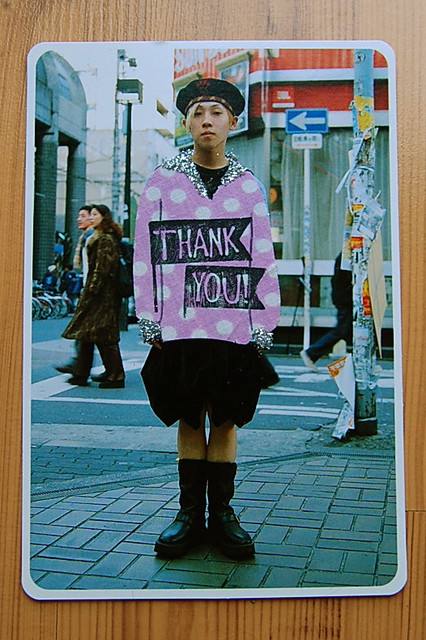
I made several variations of these cards, but this guy was my favorite. The first thing you want to do is pick your card based on the outfit. You don't want anything too complicated.

Place your tracing paper on top of your card and trace the portion of the outfit you are going to replace. In the case of this strapping young sailor I decided to give him a new top.

I used Aleene's Tacky Double-Stick Sheets for adding clothing to the cards. I estimated the size of fabric I needed and added the adhesive to the back side. This acted as fabric stiffener. Next, I cut out the sailor top from the tracing paper and used it as a pattern on my piece of fabric. Once I had the fabric the shape of the shirt I removed the second piece of adhesive and attached it to my card.

I happen to pick up a stamp that said 'Thank You' recently so I decided to test it out. I painted the stamp with Tulip Fabric Paint and added the logo to my sailor's new fabric shirt.

I could have stopped here, but the glitter was calling my name. I applied a little Tacky Glue to his cuffs and collar then sprinkled on the Crafty Chica glitter.

All that is left to do is write out the actual thank you notes and mail. These are postcards so if you get a letter with a speck of glitter on it you can blame me!

Wednesday, August 22

iLoveToCreate: Retrofabulous All Occasion Greeting Card


iLoveToCreate Retrofabulous All Occasion Greeting Card
Margot Potter
"These are your grandmother's crafts, ya gotta problem with that?"

Avalon has been taking advance placement and honors classes and her homework straw pile is epic!  It's my birthday today, so I decided to whip up my own birthday card.  I'm a Leo, we're kooky like that.  You can make one too using layers of coordinating paper, trim and faux rhinestones and a vintage image sized with text added in photo editing software.  I share my birthday with the ever so lovely and talented Miss Cathie Filian, so I used her fabulous Podgeables to add some dimension to the card!  Aleene's Dry Adhesives make putting it all together as easy as 1-2-3!

Materials
Podgeables tag shape
Yellow and orange cardstock
Patterned scrapbook paper (I used Retro Collage from Michaels)
Patterned tissue paper
Genevieve Gail Felt Floral Ribbon Trim
3 large faux rhinestones
3 medium faux rhinestones
Aleene's Tacky Sticker Sheet
Aleene's Tacky Dot Roll

Tools
Paper cutter (largest cardstock layer is 5.5"x11"-folded to make card.)
Scissors
Bone folder

My image came from a vintage Vogue pattern from the early 1950s, Dover books is a great source for permission free images.  I scanned, edited, sized, added the text Retrofabulous and printed it out.  Decide how you wish to frame the image, trace and cut out.

Use a paper trimmer to cut yellow cardstock and patterned scrapbook paper in decreasing size. Cut ribbon to fit card. Use Aleene's Tacky Sticker Sheets to adhere image to front of acrylic frame and tissue paper to back of frame. Layer and stack remaining papers and trim using Tacky Sticker Sheets. Add faux rhinestones with Aleene's Tacky Dots!

Wednesday, May 23

iLoveToCreate Teen Crafts
Rage Comics Inspired Father's Day Card
Avalon Potter

Avalon has become obsessed with Rage Comics memebase.  We have to literally peel her phone out of her hands to get her to focus on something else.  She drew this AWESOME Rage Comics inspired whale recently and we knew it would be perfect for a Father's Day Card.  This is the 'Sudden Clarity Whale'.  You can have your teen draw their own version and scan, size, print and use on a one of a kind greeting card to make Dad feel super special on his super special day.

Aleene's Dry Adhesives make it super easy to make great cards in a flash!

Materials
Blue cardstock
White printer paper
Patterned coordinating paper
Whale image printed to fit front of card
Words: Dude! and I'm literally a Happy Father's Day card!  printed and sized to fit card
Aleene's Tacky Tape Runner

Tools
Small scissors
Paper trimmer
Fiskars Shape Cutter template word bubble and brackets

Print your whale image to fit card.
Cut out printed whale. 

Cut frame, word bubble and waves using shape templates and cutting tool. 

Use Aleene's tape runner to assemble front of card. 

Use tape runner to assemble card interior. 


Visit us on Facebook!
Craft on!

Monday, May 7

iLoveToCreate Retrofabulous Crafts: One 'Cool' Mom Mother's Day Card


iLoveToCreate Retrofabulous Crafts
One ‘Cool’ Mom Mother’s Day Card
Designed by Margot Potter
...ya gotta problem with that?”

It's almost here...are you ready?  This Sunday is Mother's Day, my fine friends.  No one works harder than mom and no one deserves a day off more than she does.  Take it from this hard workin' mama, we really, really, really appreciate the love.  What better way to show mom how much you love her than with this wickedly funny retrofabulous card you can make yourself using Aleene's FABULOUS dry adhesives?  Take her somewhere special and let her kick her feet up and relax, she's earned it.  Believe me.  

Materials
Dove gray and soft pink cardstock
Damask scrapbook paper
One flat back large faux gem
Vintage images (digital downloads here)
Print out vintage typewriter text  18pt.: “Happy Mother’s Day, to one ‘cool’ Mom.”
Aleene’s Tacky Tape Runner

Tools
Fiskars Shape Templates (Stars and Banners)
Fiskars Shape Template Mat and Cutting Tool
Fiskars Paper Trimmer
Fiskars Scissors
Bone folder

FREE Digital Downloads FOR PERSONAL USE ONLY-NOT FOR RESALE
1.  Print out digital downloads and text.  Use paper trimmer to cut. 

2.  Cut graduated layers of pink and damask paper for backgrounds using paper trimmer, see images for reference.

3.  Use bone folder to crease center of gray cardstock.

4.  Attach paper layers using Aleene’s Tacky tape runner on edges.  Make sure you center each layer as you stack.  No Sweat on front, Relax on inside cover.

5.  Cut out shapes.  Three stars starting with the smallest in grey and graduating in the next two sizes in pink and damask.  Cut thin banner shape in damask. 

6.  Use sticker sheets to layer stars on lower left hand corner of front of card.

7.  Use Aleene’s Tacky Dot to adhere faux gemstone.

8.  Attach damask banner to center of inside of card using Tacky Sticker Sheet, add text with background using glue runner.

Visit us on Facebook!
Craft on!

Wednesday, January 11

iLoveToCreate Teen Crafts: (P)upcycled Valentine's Card

Visit us on Facebook!
Craft on!
(P)upcycled Valentine Copyright Margot Potter for iLoveToCreate

iLoveToCreate Teen Crafts:
(P)Upcycled Valentine
Margot Potter for Avalon Potter
“Mom crafted, teen approved”

Avalon was buried in school work this week, so I’m stepping in for a little retrofabulous infused teen craft. This can be either a card or an invitation to a Valentine's Day party!  You can upcycle any old Valentine you may have in your collection. I had this adorable little vintage card in my coffers that was begging for a new life. Arf, arf. I loved the way the edge punch looked centered on each of the four sides of the pink square, gave the layer purrfect doily style appeal. Tulip Glam-it-Up Crystals and Beads in a Bottle gave it all a little dimension and Aleene’s glue made quick work of putting it all together. Nothing fishy about it, this is, as Avalon says, “Adorbs!”


Materials
Red Cardstock
Baby pink Cardstock
Tiny Heart Scrapbook Stickers
Fish Scrapbook Sticker
Printed Letter “u” in Campbell or similar vintage style font
Upcycled Valentine
Aleene’s Acid Free Tacky Glue
Aleene’s Tacky Dot Runner
Tulip Beads in a Bottle Pink Glitter
5 Tulip Glam-it-Up Crystals

Tools
Chain Nose Pliers, Tweezers or a Crayon to pick up and place crystals
Scalloped Border Punch
Ruler and Scissors 
Pinking Shears
Word Bubble Punch

A sampling of some of my collection of vintage Valentines.

1. Print a letter ‘u’ in Campbell or a vintage style font size 14.

2. Cut your cardstock to 5.5”x5.5” or dimensions that work with your Valentine.

3. Use pinking shears around edge of pink cardstock.


4. Center border punch and cut out scallops inside of all four edges of paper. (Don’t punch the edge off, this is just to add a little doily style window. Save punched dots to use with word bubbles.)

5. Punch or cut word bubbles, I cut the little talking tag from the bottom since these are thought bubbles in this card.

6. Use glue dot runner to attach pink layer on top of red background and card to center bottom of pink layer.

7. Attach heart sticker to card.

8. Use pliers, tweezers or crayon to lift crystals, dip into glue, tap off any excess and place on card. Crystals go in each of the four corners and in center of the small heart.

9. Attach word bubbles with tape runner. Add hearts, fish and ‘u’.

10. Punch one scallop out of the white paper you used for word bubbles and save the tiny punched out circles. Use a toothpick to dab a small amount of glue on card where you want your paper dots leading up to word bubbles to be placed and gently place dots on card.

11. Use Beads in a Bottle to add dimension to edges of the pink layer on your card.

12. This is a flat invitation style Valentine, you can opt to make a folding card if your prefer.

Monday, January 2

iLoveToCreate Retrofabulous Crafts: Pulp Fiction Thank You Cards

Visit us on Facebook!
Craft on!


iLoveToCreate Retrofabulous Crafts: Pulp Fiction Thank You Cards
Copyright Margot Potter
"These are your grandmother's crafts, ya gotta problem with that?"


The glitter has faded, the confetti swept away and it's time to start a new year filled with possibility. It's also time to take a moment and thank your friends and family for the lovely gifts they sent. What better way to say, "Thank you" than these Retrofabulous Pulp Fiction cards? The covers are scanned from my collection of ephemera, you can easily find similar books on eBay. I dragged them into Photoshop, color matched the fonts and added some new words to the mix, sized and printed and layered them with coordinating scrapbook papers and cardstock. Tulip Glam-it-up metallic crystals on the corners were the perfect touch of dimension. My first attempt to frame them with glitter was not so fab, so I started over. I've added coordinating sentiments inside. Aleene's AWESOME new glue dot tape runner made quick work of putting it all together.

Materials
Vintage patterned scrapbook papers (I used my fav Carolyn Gavin papers from K&Company)
Coordinating card stock
Tulip metallic Glam-it-up crystals
Aleene's Tacky Glue Dot tape runner
Aleene's Acid Free Tacky Glue

Tools
Paper cutter
Bone folder
Ruler
Scissors
Chain nose pliers or tweezers


1. Use photo editing software to add sentiments.

2. Use Word or similar software to create sentiments for inside of cards.

3. Print. I printed my images at 536x774dpi 150 resolution. It's easy to drag these into publishing software and put them side by side for printing.

4. Cut out images. You are stacking them on a solid cardstock and a patterned paper, each one gets slightly larger. I eyeballed using a paper cutter, you can measure them at 1/4" increasing margins, mark and cut.

5. Fold your card stock, crease with bone folder and cut off 1" from bottom.

6. Layer images starting with patterned paper which is straight, solid card stock on an angle and image straight. Use Aleene's Tacky Glue Dot Runner Tape to attach to card.

7. Cut out a sentiment, add a slightly larger coordinating cardstock paper frame, layer and attach to inside of card on an angle using tape runner.

8. Squeeze out a small amount of Tacky Glue. Use tweezers to careful pick up crystal, dip back in glue (don't over do it here) and attach to corners of image on card. Press gently with finger tips.


Clicky Web Analytics
Pin It button on image hover

Subscribe to our newsletter

* indicates required
I am interested in products and inspiration for...
Close