Showing posts with label fabric spray paint. Show all posts

Sunday, July 12

ColorBlock T-Shirt using ColorShot


Turn a plain t-shirt into something special with pops of color using Tulip’s ColorShot Fabric Spray paint. It’s a super quick and easy way to get solid smooth color on any fabric surface. Let’s get started!

Tuesday, June 30

ColorShot Love Tote DIY


Looking for a cute and fun tote for the summer? Create your own designs using stencils and Tulip’s ColorShot for a fun, easy and super fast design with this DIY Love Tote tutorial. I’m always so impressed with how well ColorShot’s color goes on, I was able to get smooth, solid color with just a couple of sprays. Read more to see how you can make your own tote!

Sunday, June 14

ColorShot Summer Kicks


With a little tape, some patterned shoes and a shot of color (pun intended!) you can create some super cute summer kicks in no time! ColorShot the newest fabric spray paint from Tulip is a super fun and fast way to add color to most any fabric. I’ve had so much fun making projects with ColorShot and I can’t believe how easy it is to get bright color with it! It’s so much fun,check out this post to make your own Striped Summer Shoes.

Tuesday, June 24

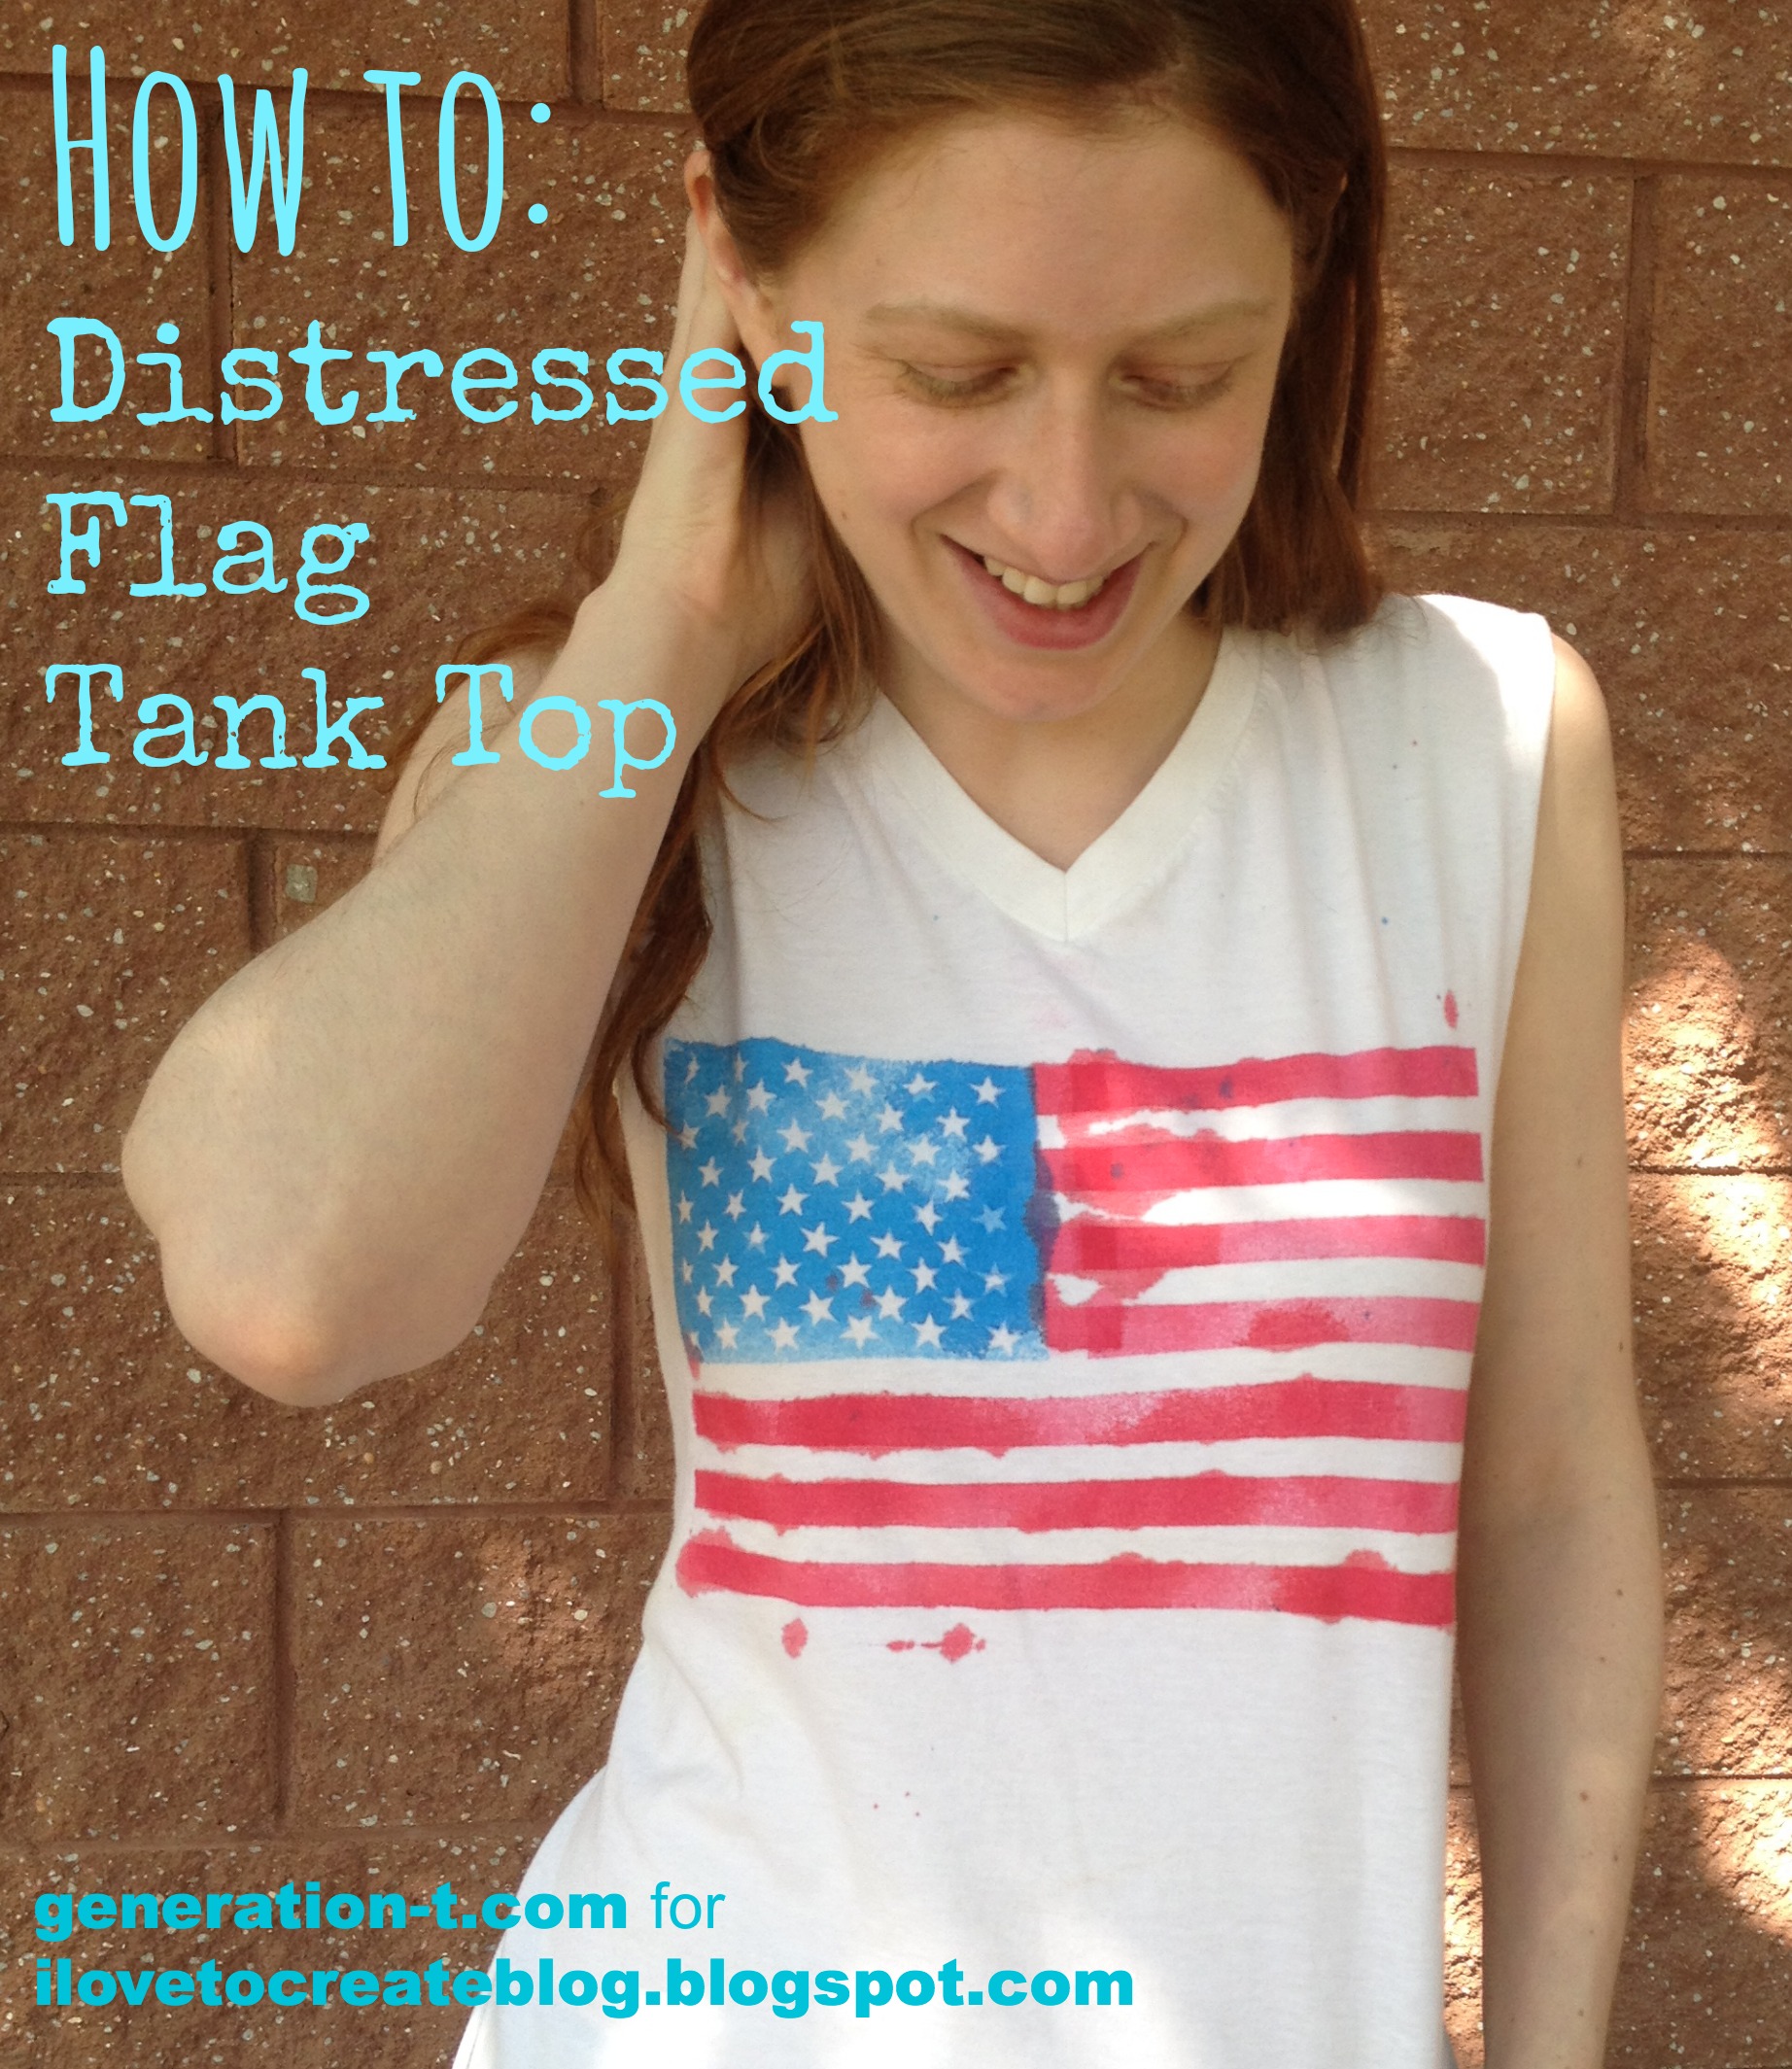
DIY: Distressed Flag T-shirt

USA tank top1 generation-t.com.jpg
Between cheering on Team USA in the World Cup and all the 4th of July barbecues just around the corner, this project is at least a fashion twofer (at least -- you can save it for next Memorial Day picnic, Flag Day...or whenever you're feeling stylishly patriotic!). With just a plain white T-shirt, some classic gold star stickers (50 of them, to be precise), clear tape, and fabric spray paint, you can, for just a few bucks, make a T-shirt that might otherwise retail for umm...$84(!!!). Here's how.

megan-nicolay-blog-footer-1

Monday, July 15

DIY Nautical Sailor Shorts & Belt DIY

We always have something new and exciting going on here at iLoveToCreate and instead of coordinating the craft designer projects and schedules like I normally do, I got to be the designer for a day! The entire design studio was challenged to create a pair of DIY shorts and I got to join in! Since I love all things nautical..anchors, lobsters, ropes, seahorses, etc., I knew I wanted to add that flair to my shorts!  Here's how you can unleash your inner Gilligan and make your own sea-worthy pair along with a super easy-to-make rope & ribbon belt!

Saturday, July 6

Neon Ombre Heart Freezer Paper Tee

Are you in  love with the neon trend as much as I am?  I don't know about you, but I'm not an all-over neon color girl.  Neon is best for me when used sparingly!  That's why I made this cute neon heart tee.  It's just the right amount of neon to rock and it's super easy to make using the Tulip Neon Fabric Spray paints!

Wednesday, June 26

DIY American Flag-Inspired Shorts


Fourth of July is right around the corner, and if you're like me you want to look fly for the holiday weekend..
.
because let's face it Jeshua...you're single and you need to make an effort... at some point.  
 -_-


The other day I was shopping at an overpriced boutique store - and by shopping, I mean looking at everything saying "I could make that"- and I came across some denim cut-offs with an American (USA) Flag pattern painted on it.

I decided to do my own take on the painted denim. It's subtle enough to be worn all summer long and patriotic enough to be an Independence Day statement piece.

– A pair of denim shorts
– Sand paper
– Painter's tape

Wednesday, May 22

Galaxy Twist Bleach Tie Dye Shirt


A couple weeks ago, iLoveToCreate designer Lauri Eaton came walking through the design studio and said, "Check out the shirt I just made!" We immediately dropped our jaws and awed at her cool galaxy creation.  She had been seeing a lot of cool galaxy art shirts and shoes online and was inspired to add in some fun tie dye scrunch and spray effects!  Today we share this super cool galaxy technique with you to try at home.  It's really OUT OF THIS WORLD! Lol.
What you need:
– Bleach
 – Spray bottle
– Sink
– Washer/dryer
– Scissors
– Dark colored t-shirt (black, brown, or navy)

Before you begin: Wash and dry shirt to remove fabric sizing. Note: Washing out the sizing will better allow the bleach to penetrate shirt fabric for a more intense design.

Cut a piece of your surface cover and fit it inside your shirt so that the bleach won't seep to the back (since it is plastic, it will easily twist with the fabric). Cover work surface with remaining portion of surface cover and lay shirt with plastic inside of surface cover.

 Pinch shirt front between thumb and forefinger and twist until entire shirt is in a spiral.
Mix a 50/50 solution of bleach and water in spray bottle. Lightly spray spiraled shirt with bleach solution.
Allow bleach to remain on shirt until desired lightness is achieved. Spray again if desired for more effect. To speed up the process, use a hair dryer to blast hot air onto the bleach.
Bleaching is so cool!
Here's what it looked like when we opened up the shirt.
Wash out the shirt thoroughly until all the bleach is rinsed out. You can also throw the shirt into the washer and run through one complete wash cycle.  Leave shirt damp for the next step.
Now mix desired spray dye colors with water and spray the colors onto your bleached design as desired. Place plastic over the shirt and allow to set for 6-8 hours or overnight.
Once finished setting, individually wash and dry shirt according to dye packaging instructions.

Lay shirt out flat on covered work surface and spray lightly with Snow Fabric Spray  paint to create "stars".  Let dry completely before wearing and wait 72 hours before washing again.

Here's a video showing the entire process!


Don't you just love how it turned out?  It's so funky!
Here's a colorful detail!
Here's another shirt we made using a black shirt instead of a navy one! What a cool way to add a colorful nebula look to your galaxy shirt using the dye!

Tuesday, May 7

DIY Striped T-Shirt with Spray Paint

Mix up stripes and fabric spray paint in a fun DIY Striped T-shirt using fabric spray paint from Tulip.
I was inspired to make this DIY Striped T-Shirt after seeing this printed striped "tie die" t-shirt in a magazine.
TOOLS & MATERIALS:
– T-shirt
– Fabric Spray Paint by Tulip
– Tape
Lay your t-shirt out on a flat surface and start taping. I started by putting tape all around the neckline of my t-shirt. Then start taping your stripes. I just eyeballed my stripes (they’re not perfect). You can use a ruler to make them even, if you prefer.
  • Put some paper or cardboard inside your t-shirt. You can also get one of these forms for a perfect fit.
    Start spraying!
You can control how your spray paint goes onto your t-shirt by how you pump it. Press it down all the way for a finer mist that will cover more space or press it down half way for larger drops and a splatter effect.

I actually ran out of spray paint by the time I got to the back of the t-shirt. (I know I really should've thought about it first.) So, I added a little water and shook it to get a bit of color on the back. However, being more watery it did bleed under my tape. So for next time what I would recommend would be (to either buy two of the same color or) use at least two colors and either mixing them if you don’t want strong patches of different colors or just really mix up the colors and go crazy!
Peel off your tape to see your stripes!
I was going for a crisp blue and white look for this t-shirt, but you could really make some beautiful stripes with these fabric paints by mixing colors and splattering your paint.
The fabric spray paint dries very quickly making this a really fun and quick project. The colors stayed very true and didn’t fade (the ones I used even have a hint of metallic) and they don't dry stiff or sticky, it feels very smooth. It worked so well with the tape, you could use this technique with all kinds of stencils! 
To see more projects and DIY's please check out my blog at trinketsinbloom.com.


Wednesday, May 1

DIY Lace Fabric Spray Shorts

Did you know you can use Tulip Fabric Spray Paint to make cool designs over jeans, shorts, shirts and more?  Check out the shorts that Brandi did for her DIY on the Fly video.  This pair of shorts started out as white jeans, and Brandi turned them into lace pattern shorts with black Tulip Fabric Spray and leftover lace from the iLoveToCreate fabric stash.  Cool huh?  See the process from start to finish in the video below. After watching the video, we know your brain is going to be swirling with all kinds of ideas using this fun spray technique!


The spray works best on light colored fabrics, but there is a white (Snow) spray that works great on black!  Also, there are various sprays in glitter and neon finishes, so you can get all kinds of cool looks! 

The exciting part is the reveal!! What does this product inspire you to spray?

Tuesday, November 27

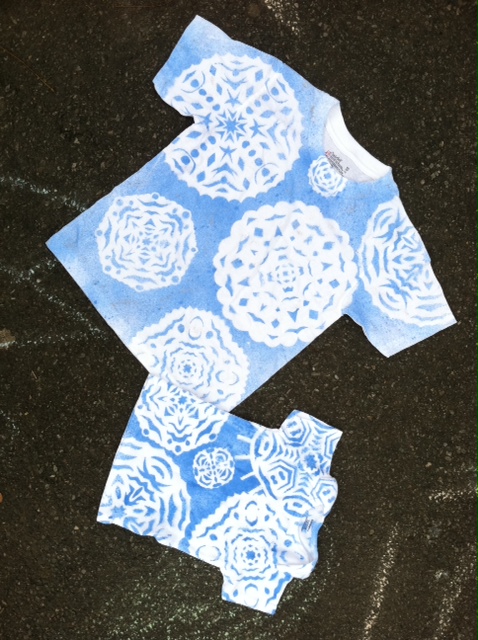
Stenciled Snowflake T-shirts!


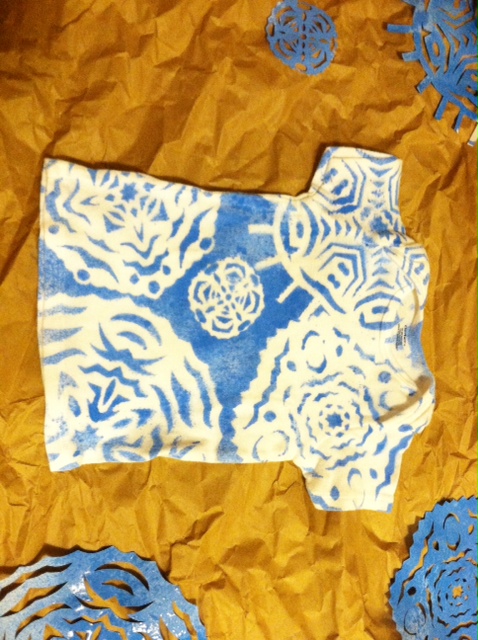
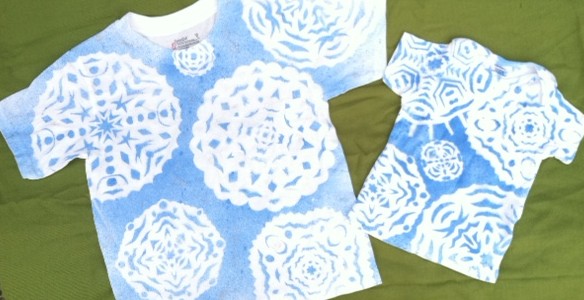
We had a wicked nor'easter blow through the East Coast last week, and though the snow pile-up lasted less than twenty-four hours, it sure put me in the mood for winter. So with the holidays upon us, I decided to make some wintery-themed T-shirts for the two young cousins (note: these tees can be made in adult sizes, too)--a little something to wear inside when it's too cold outside! And a nice alternative to the ubiquitous holiday sweater, don't you think?

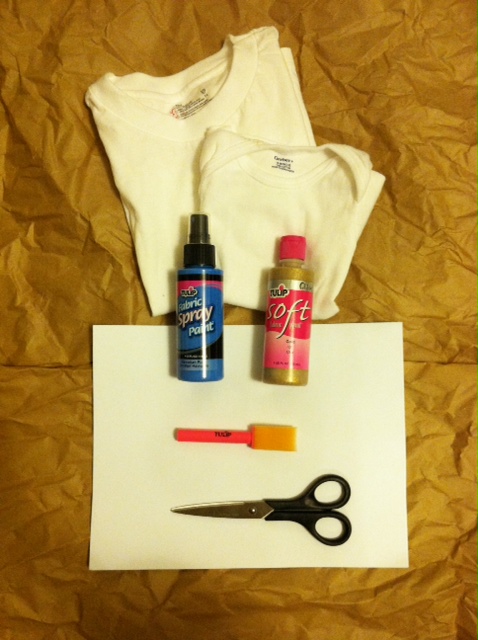
Materials:
-White T-shirt(s) in appropriate size(s)
-Tulip fabric spray paint (Light Blue)
-White printer paper
-Paper scissors
-Warm iron and press cloth
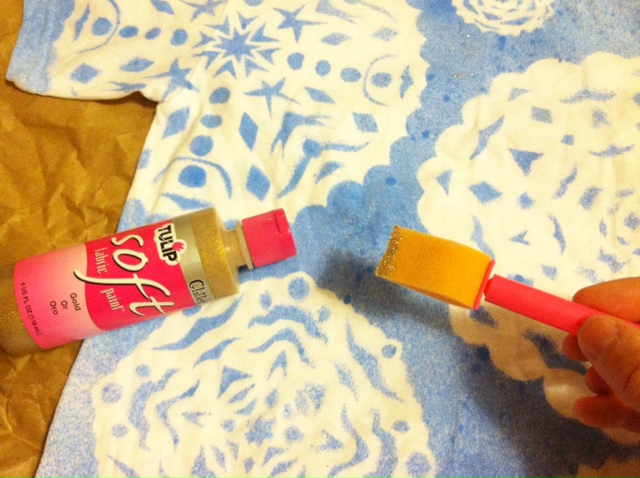
-Tulip Soft Fabric Paint (Gold Glitter, optional)
-Tulip Sponge Brush (optional)


Make it:
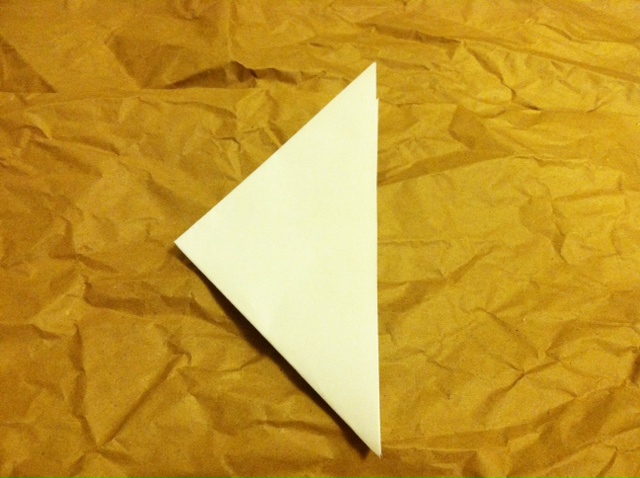
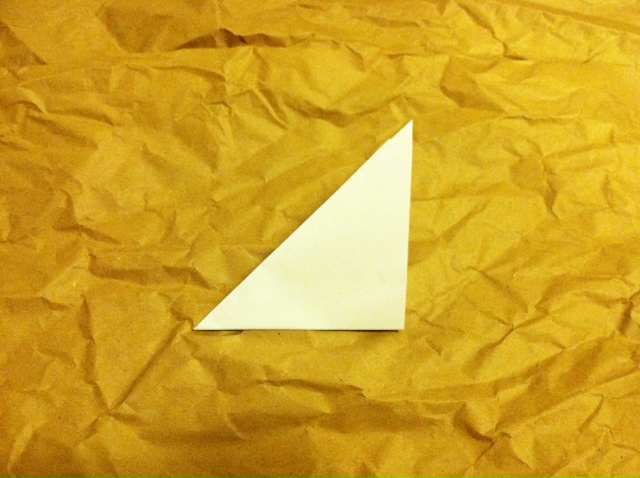
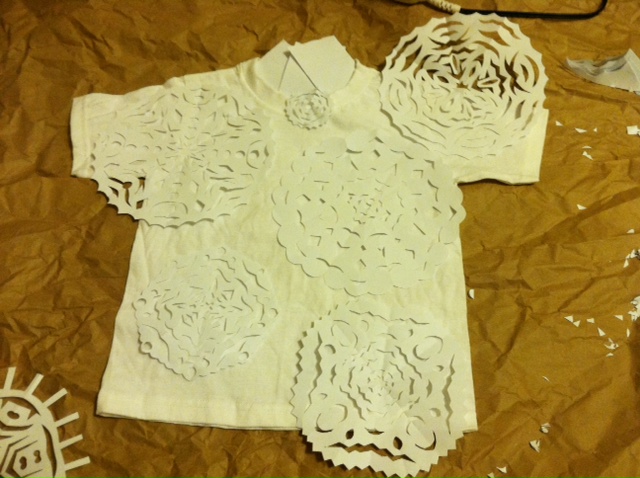
1. Fold one of the sheets of paper on a diagonal to "square" it. Use scissors to cut off the excess strip of paper.

2. Bring the lower left corner up to fold the triangle in half again.

3. And again!

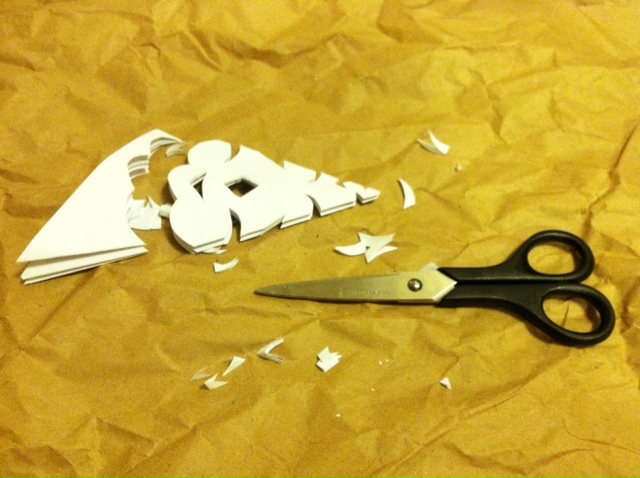
4. Use your scissors to start cutting notches along the folded edges: zigzags, circles, crescents, curls, diamonds, and so on! Don't forget to cut the open edges in an arc, so that the snowflake will be somewhat round in appearance when you unfold.

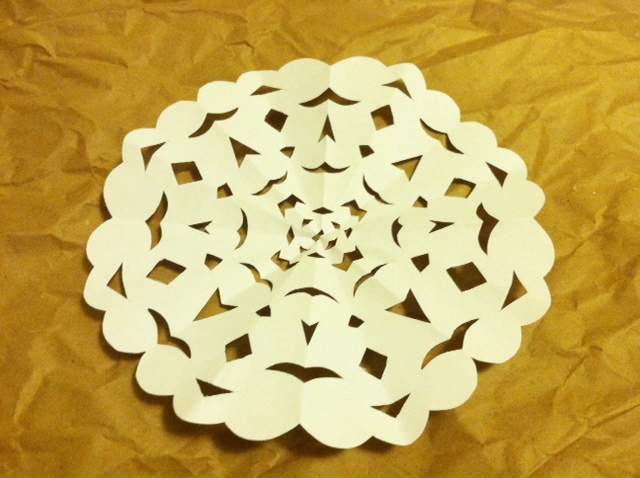
5. Unfold!

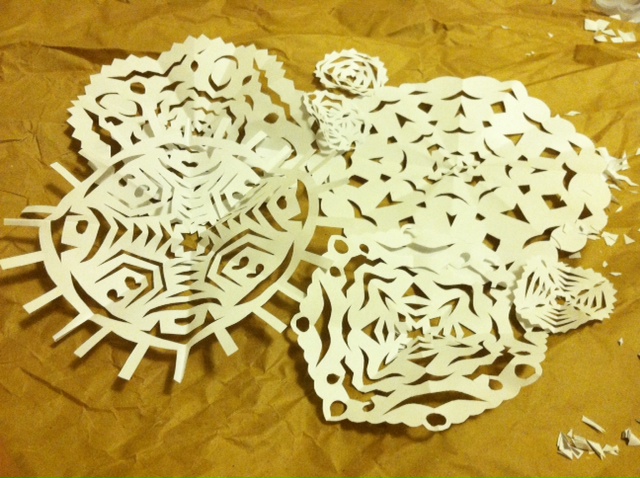
6. Repeat to make many snowflakes (no two will be alike)!


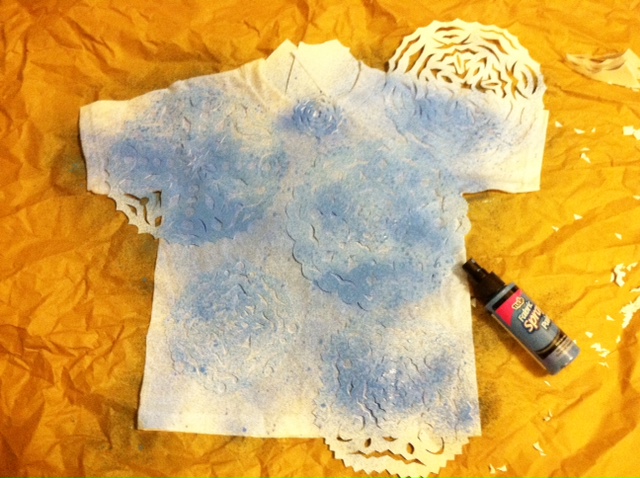
7. Lay the T-shirt flat on your work surface. Arrange the snowflakes onto the front, and press them with a warm iron to keep them relatively flat. (Note: The weight of the spray paint will actually help them stay flat, too.)


8. Lightly spray blue paint over the entire T-shirt (I masked the inside back neckband with paper scraps).


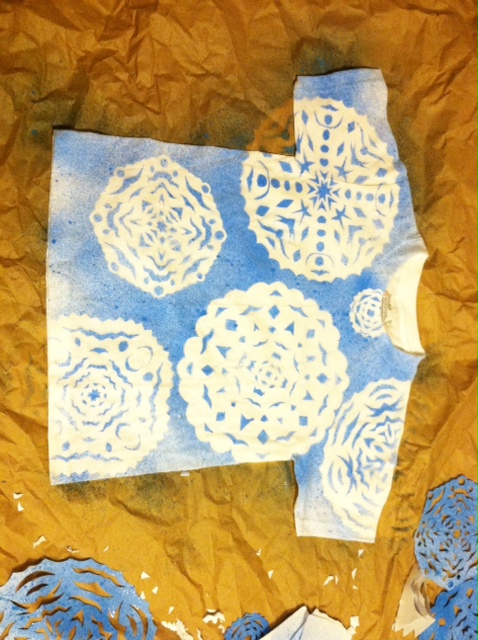
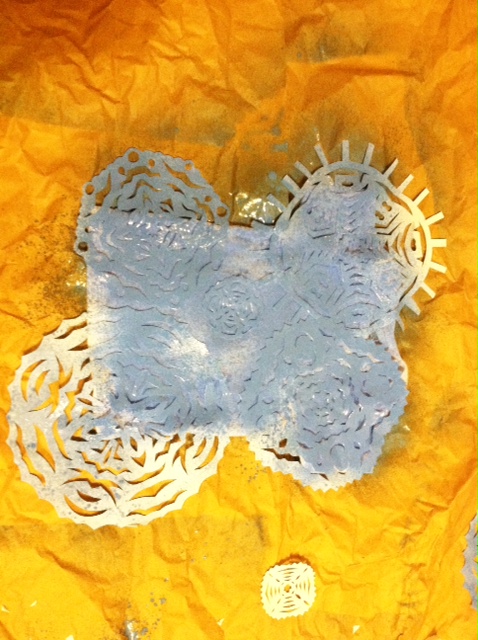
9. Carefully peel off the snowflakes and set them aside. Let the T-shirt dry.


10. Reuse the snowflakes to make T-shirt number two!


Optional: Use the foam brush and glitter paint to add sparkly highlights to the snowflakes.

Let dry, then try on the shirt (or gift it to its recipient!), and curl up by the fire, knowing these snowflakes will never melt.

Clicky Web Analytics
Pin It button on image hover

Subscribe to our newsletter

* indicates required
I am interested in products and inspiration for...
Close