As any girl can tell you dresses can be way comfy. Especially loose, flowy dresses. Add in pockets and you're extra special lucky because that my friends is the perfect dress. My perfect dress quickly got stained and so it met up with some Tulip tie dye and I must say that it's the prettiest dress I have in my closet these days!
Showing posts with label one step tie dye. Show all posts
Tuesday, July 21
Monday, July 7
Cool Hues Shibori Top
I discovered shibori completely by accident. I was browsing a department store and saw a fun shirt with a really interesting pattern and was told that the method used was probably shibori. So I did some searching and found that it's an ancient Japanese resist method that basically involves scrunching, twisting, folding and/or mashing a fabric and then dying it. There are several ways to do it and the results, as with any tie dye, are different every time.
Labels:
amanda formaro,
crafts by amanda,
one step tie dye,
shibori,
t-shirt,
tie dye,
wearable
Friday, June 13
How to bleach and ombré denim
Summer time is a time of reawakening and relaxation, and what better way to relax than to reawaken a plain item of clothing with a burst of color!
Ombré is here to stay, and if you think this trend is going anywhere, think again!
Phillip Lim debuted a bunch of cool color blocked and ombre'd pieces in his men's line earlier this year at New York fashion week.
Check out my video to see the full tutorial and get some summer inspiration.
Monday, May 13
Tie Dye Cut-out T-shirt DIY
Tie-Dye is one of the most popular and fun ways to re-create a plain t-shirt. When you Tie-Dye you become your own Artist by making an original piece of art.
Tulip has made creating that perfect Tie-dyed t-shirt so easy with their One-step Tie-dye kits. This kit has become my new favorite way to tie dye.
What you need:
What you need:
– T-shirt
– Scissor
– Tulip One-Step Tie-Dye kit
Pick out the colors you would like to use fill the bottle to the line with water. Decide on a design. I wanted green and teal varied stripes. Use the rubber bands provided by the kit, and make off your stripes.
Let sit for 6-8 hours you can place this in a plastic bag if you would like i just let mine sit as is.
Rinse until the water become comes clear.
To put my own twist on my shirt, I made cut outs around the top of collar. I cut out two triangle shapes out of paper, one large, one medium. I folded the front part of my shirt in half and folded the triangle in half and traced it on to my shirt.
Then I cut them out.
There are lots more Tie-Dye ideas on Tie Dye Your Summer.
and more T-shirt Ideas on my site Wobisobi.
Have a wonderful day!
Lots of love,
Lots of love,
Anne
Friday, April 19
HOW TO: Dye a Stained Shirt
I bought this gorgeous white crochet top and hung it among my favorite frocks. It's hard to find cool plus-size goods (much less crocheted designs like this!) But, argh! The Chesty Girl's Curse plagued me recently and I spilled a hecka lotta salad dressing on the front area. I tried everything to get it out, but all I was left with was light yellow blob. As a last ditch effort I dyed it and now I love this top even more!
Tips for dyeing a stained shirt: Try to remove as much of the stain as possible without damaging the fabric. If it is a hearty stain, you might want to go with two dyes and layer them like I did. If it something small, you can likely just get away with one color.
You're going to need a cotton blouse, rayon will work too. Nothing synthetic though. I used two boxes of purple Tulip® One-Step Dye®
- and then added one of fuchsia, I'll tell you why in a bit. Set up
your work area with a plastic covering, gloves and a brush and bowl of
water. Mix your dye according to package directions. Wet the shirt and wring out excess water. Set it on the plastic covering.
Start at the top (where the darkest part of the stain is) and add the dye. Add most of it at the top and then dip the brush in the water and drag the dye down until get lighter.
Keep your shirt wet - keep adding water and keep brushing.
When you're done, it will look like this. I used a pant hanger to hang it to dry so all the dye would drip from the top. Let it set for six hours and then wash in cold water, hang dry. Once my shirt was finished, I felt like it needed a second color. I love texture. I went ahead and set up my station again, wet my shirt and added the pink dye in the center area. I let it set for six hours, washed, etc. That's how I achieved this look.
All of this should cover up your stain nicely!
Wednesday, January 9
Make a Striped Tie Dye Shirt using Tulip One-Step Dye
Have you always wanted to tie dye, just didn't know where to start? Here's an easy way to get your feet wet using Tulip One-Step Tie Dye available at Wal-mart, Michaels, Jo-Ann, Hobby Lobby, AC Moore, and other craft stores nationwide. This is the easiest tie dye out there to try and it's not intimidating to use at all, which makes it great for all ages to use.
– Spray bottle
– Optional: Crafty Chica Iron-on Transfer
1) Break open your Tulip One-Step Dye packaging. Inside you will find everything you need to do your project (dye, plastic gloves, rubber bands, and an easy-to-follow instruction guide). 2) Wet a plain 100% cotton shirt. Gather your shirt horizontally from side to side. Tie rubber bands around your shirt in regular intervals, so that it is consistantly banded. We recommend wrapping your rubber band around 3 times for each band. 3) Fill up your entire bottle of Tulip One-Step Tie Dye with water and shake well. Now apply a generous amount over your entire shirt and around the bands. Flip over and do other side as well. We did this process in a small plastic shoebox-shaped container to prevent a messy work area. Seal the dye with the lid and let it set inside for 6-8 hours (this makes for more vibrant results). 4) After 6-8 hours, fill up your plastic container with water to rinse out the excess dye. We filled up the plastic container and poured out the water several times until the water ran clear. You can wash and dry your shirt in your washer and dryer as normal, just wash separate from other clothes for the first couple washes so that the dye doesn't get on your other clothes!
Here's what it looks like when you are dyeing multiples of different colors using this technique.
And here's what our finished orange shirt looked like! It turned out pretty fabulous, don't you think? What color would you like to make?
Tuesday, August 17
VIDEO: Tie dye in lion-themed collage art
Edd, a senior graphic artist at iLoveToCreate, presents a recycled project that he created using old tie-dye t-shirts and foam core remnants! The colorful artwork is displayed in our Design Studio for everyone to admire!
LINK
We love that our co-workers are just as crafty as the products they make!
LINK
Sunday, September 27
Sassy Tote Bag for the Sewing Expo Tour!
I'm flying to D.C. on Wednesday to the Sewing Expo for Hancock Fabrics to demonstrate The Tulip® Dye Techniques Kit™ and the Tulip® Cordless Heat Setting Tool™ with the Tulip® Glam-It-Up!™ Iron-On Crystals™ combined to create a cute and sassy quilted tote bag and a mini quilt wall hanging.
The Sewing Expo is part of a national campaign to bring inspiration, motivation, education and personal satisfaction to everyone who enjoys sewing, quilt making, embroidery, embellishment and related needle arts. I can't believe I get to be a part of this amazing event.
So, to design the sassiest little bag with dyed fabric, I first have to grab my supplies at the 
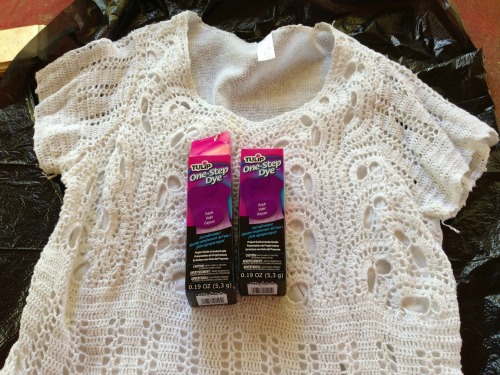
iLoveToCreate design studio and dye my little heart out. I decided to create 3 of the 5 techniques in the kit for my projects.

Our house in Clovis has a darling patio out back with a ceiling fan, and it's just begging to have a little dye party, so I got the fan buzzing, and laid out my kit. I grabbed 2 kits, because I needed 12 yards of fabric for the tote, the quilt, and the demo swatches.
First step? I washed and dried all the 100% cotton fabric to take out the sizing and prepare it for the dye.

My steel sink is perfect for mixing the dyes. They're great because all I have to do is put on my gloves and then fill all the bottles with water (the dye is already in there) and shake.

Scott set up a table cover with plastic trash bags. Of course he used bungies to hold it down. I call him Bungy Man. (When I'm not calling him Zip-tie Man.)

I started with the shibori technique and since my project is so humongus, I taped the 2 tubes together that come in the kits.

Then I laid it under the fabric and scrunched it up. The shibori tube holds the fabric up so that you get that cool look, and keeps it from puddling. You'll see!

Now, the dying begins. I squirted it onto the fabric along the top of the tube. Then, I moved the tube over about 8 inches and repeated until I was at the end of the fabric.

Voila! I hung it on the clothesline and replaced the trash bag with a new one for the next color.

Woohoo, the brush technique was amazing. I simply poured my dye out of the bottle and into a disposable bowl, dipped my brush from the kit into the dye, and made crisscross strokes all the way across. Loved it.

After changing the trash bag on the table again, I was ready for the spray technique. This was soooo easy and fast. I made little hills and valleys with the fabric, then used the spray top from the kit to spray away.

I don't know what the neighbors think, but it sure gave them a colorful view while the dye set for 4 hours. Last step, wash and dry the fabric separately and then make my little tote bag.

I love how the cotton dyed fabric turned out and it feels good, not crunchy. I'll be posting the project at iLoveToCreate.com with all the instructions right away.

The crystals were uber easy to apply with the heating tool, and I think they added a little sparkle-farkle to the bag. Like I said, super fun, and a little bit sassy with the crystals and in bright, happy colors.
Come see me at the Sewing Expo in Chantilly, VA! I'll be there Thursday, Friday and Saturday in the Hancock Fabrics booth. Look for the gal with the bright green tablecloth and the happy smile.... I'll show you how to dye fabrics for your quilting and sewing projects, and our cute little cordless heating tool for jazzin' up your projects.
See you there!
Pattiewack
Friday, June 5
Check out our latest tie dye video
If you've been "dyeing" to try tie dye (yes we meant the bad pun), check out our new video showing you a wide range of techniques! It is so easy and soooo fun using our Tulip® One-Step Fashion Dye™.
If you do make a creation with our tie dye, share it with us and it may be featured here on our blog! E-mail us at ilovetocreateblog@yahoo.com and attach your project! We'd love to see what you do!
Subscribe to:
Comments (Atom)


