Showing posts with label summer fashion. Show all posts

Tuesday, June 16

Color Shot Lace Shorts Tutorial

Right now I'm really into pastels. My favorite shorts are a pretty light apricot. So preppy. So pretty!

Since I literally have a pair in every color that was available I thought it might be neat to spiffy up a pair by spray painting a lace pattern on with Colorshot. I went with my least favorite color just in case this didn't pan out as hoped, because sometimes it doesn't. Luckily this time it did!

Wednesday, June 3

DIY Lemon Shirt

Happy Wednesday! I am so excited to show you how I create this yummy Lemon shirt! It's so bright and refreshing you will prolly want to peel them off and eat them! I have sorta been on a "fruit" kick lately. Seriously, fruits are so much fun to paint especially watermelons. I will say after doing this lemon shirt I am in the mood to do a lime shirt now. I might just have to do one with both! Whatddya say!

Let's get started.

Friday, June 27

How To No Sew 4th of July bandana pocket

 
Lately I have noticed so many trendy stores selling shirts with contrasting "statement" pockets. I really like this trend!  I think it adds a fun pop of color and visually adds something a little interesting to what could potentially be a plain ol' boring tee shirt.  

Wednesday, June 18

How to make A Stenciled Graffiti Shirt


Happy let's decorate a shirt day! I recently got some of Tulip's new stencils in the mail and I just could not wait to use them. They are all super cute! I thought since it's the summer time I would give you a craft that you could do alone or with your kids. You will be creating a unique shirt that will be one of a kind. The great thing about this craft is you can use whatever colors that tickle your belly with happiness. 
Let's get started...

Friday, June 13

How to bleach and ombré denim


Summer time is a time of reawakening and relaxation, and what better way to relax than to reawaken a plain item of clothing with a burst of color! 
Ombré is here to stay, and if you think this trend is going anywhere, think again!
 Phillip Lim debuted a bunch of cool color blocked and ombre'd pieces in his men's line earlier this year at New York fashion week.
Check out my video to see the full tutorial and get some summer inspiration.

Wednesday, July 3

How To Decorate A Summer Hat!


It's summertime! That means bring your summer fashion game. It also means protecting yourself from the harsh sun rays. That doesn't mean you can't do in style! 
Here's an easy diy on how to decorate your summer hat! With this project, you can make several decorated ribbon bands to go around your hat, giving it different looks whenever you want!
 

SUPPLIES:

 First, measure your hat, then cut your ribbon according to size. Make sure to cut your ends with pinking shears!

Shimmer sheet: Place it glue side up on the ironing board and set your ribbon on top. Use a pressing cloth to carefully iron it in place. Cut off the extra. Repeat for the rest of the length of the ribbon.

For the gems, put the Tacky Dots   on the back of the gems, then simply place them on the ribbon! After this, place a tacky dot on the back of your hat to connect the ribbon. I used one, but for security you can place them around the hat.

Other ideas - Use Puffy Paint, paint or stencils and glitter!
 
Go enjoy your summer! Mayainthemoment.com


Saturday, June 22

Glittered & Dyed Shorts

Sometimes I get in moods where I just want to cover everything in glitter. If not covered, then at least trimmed, right? When I dyed these shorts, I felt like they needed some pop - more "wow" - hello, glitter! I know you're thinking - will the glitter wash off? I used Tulip Glitter Bond as my glue. I'm sure it will fade after a few washings, but all you have to do is touch it up and you are good to go, these shorts will always look as good as new!

 SUPPLIES:
Paint brush
Cotton shorts
Pant hanger with clips
Hose with spray nozzle

 1. Wash your shorts, leave them damp. Add water to the dye bottle and shake. Set the shorts on a plastic tablecloth and spray at the bottom.

 2. Well, I changed my plan. I decided instead of spraying the shorts, I wanted them to look dipped. Therefore I switched out the top of the bottle to a tip instead of the sprayer. I hung up the shorts using a pant hanger and dripped the the dye in an even row along the shorts. This gives it the dipped look. Drip, dip, it's all the same, right?

3. Let them set for six hours, then use the sprayer to remove the excess dye. This will prevent the dye from getting on the white part of the shorts. Spray until the water runs clear. Put on the plastic gloves that come with the dye and squeeze out the water and any remaining excess dye. NOW you can wash them in the washer on cold. 

 4. After they are dry, iron them and create a crease at the bottom of each leg. This will give you a nice, crisp guideline to add the glitter!

 5. Paint on a juicy layer of Tulip Glitter Bond and then pour on the glitter! Tap off excess. Do this for the front and back of each cuff. You can also do the belt loops too!
Let dry for an hour.

And here you go - ready-to-wear! To wash, turn inside out and wash in cold water. Hang dry. If your glitter fades after a couple washings, simply repeat the glittering process!

Tuesday, June 26

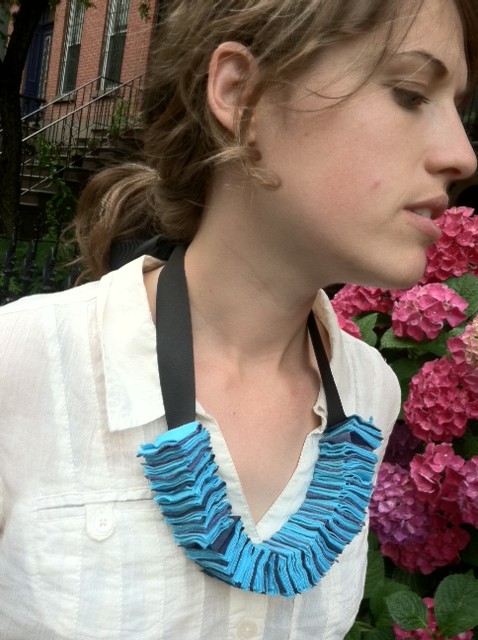
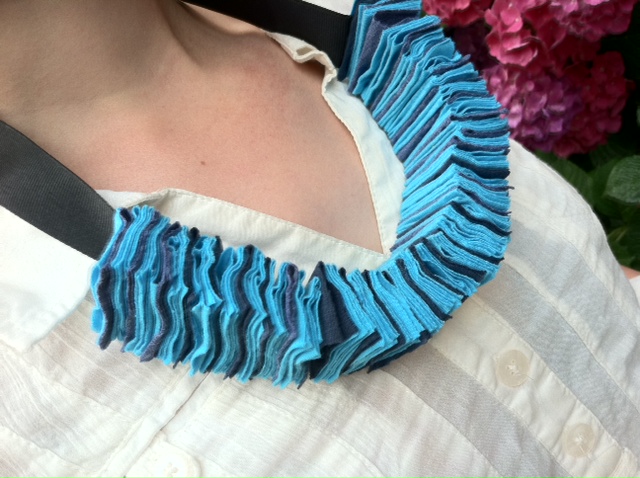
T-shirt Confetti Necklace!

Interestingly, the inspiration for this festive, soft, Fourth of July necklace came from south of the border -- while I was on vacation in Oaxaca, Mexico, we happened upon a small gallery where I spotted an orange folded paper bracelet made by women in a local artist collective. The paper was so soft and fibrous, it reminded me of fabric. So when I set to re-imagining that bracelet stateside in my Generation T workshop (as a necklace of fabric and glue!), I was pleased that the results are even cozier -- a wonderfully celebratory accessory fit for a summer barbecue! (I was intentionally playing it subtle with the shades-of-blue color palette, but a bold red, white, and blue color scheme would really pop.) And it's comfy, too, for when the sun goes down and it's time to snuggle up and watch the fireworks.

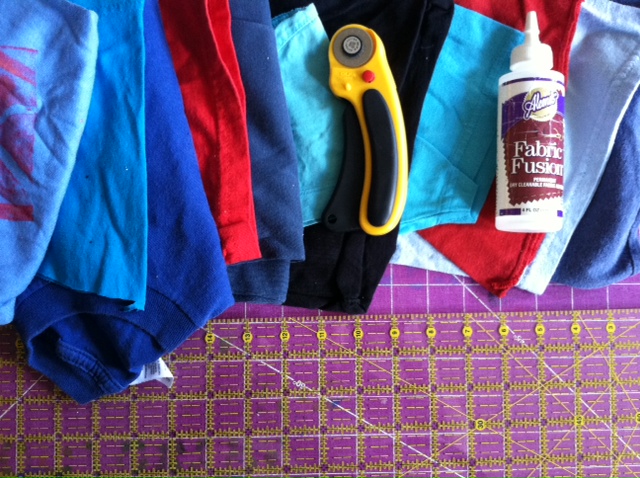
Materials:
-T-shirt scraps (sleeves work well!), including one long one to use as the fastener
-Rotary cutter and cutting mat
-Quilting ruler
-Aleene's Fabric Fusion glue
-Ribbon (optional, in place of the long piece of T-shirt scrap to fasten the necklace)


Make it:
1.
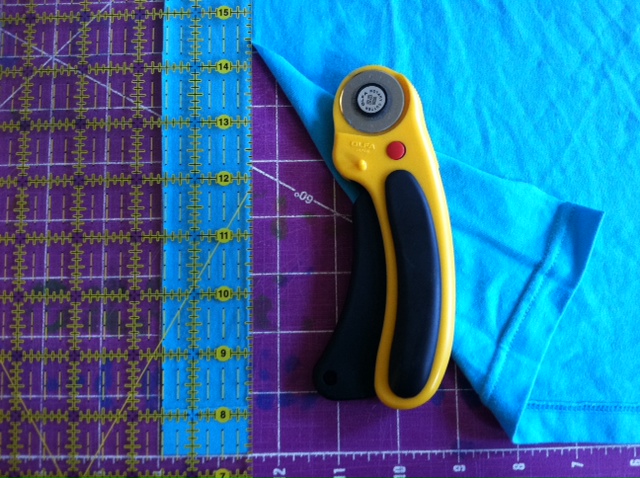
Cut 1 1/2"-wide strips from the T-shirt scraps.

2. Cut the strips into 2" pieces to make rectangles that are 1 1/2" x 2". (I cut about 124 rectangles in two different colors to make an approximately 9"-long necklace segment.)

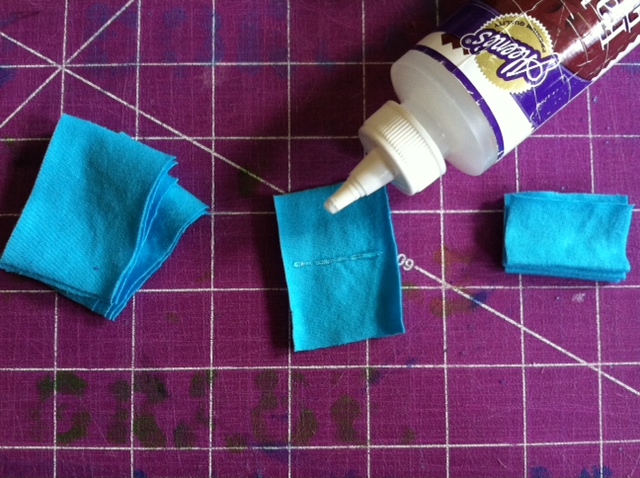
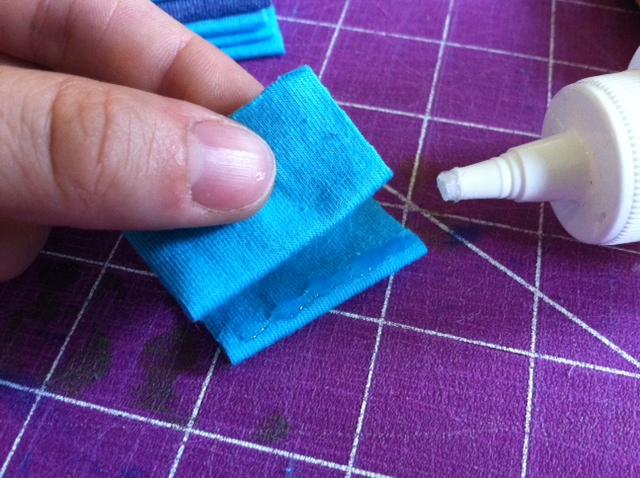
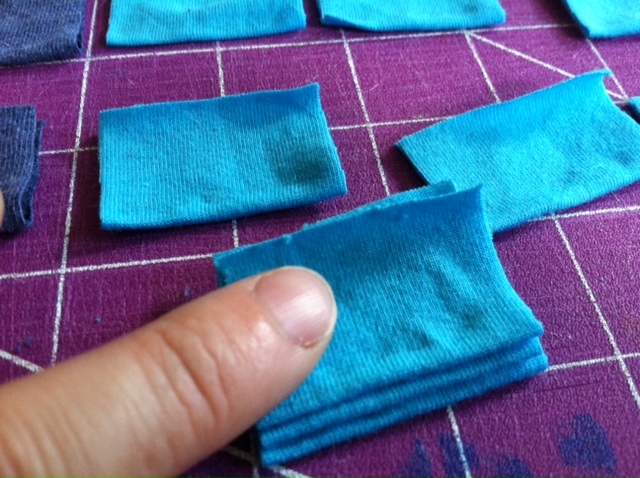
3. Lay one of the rectangles flat, wrong side up, and spread a thin line of glue slightly off-center and parallel to the short ends. Fold it in half so that the glue line retains the crease. Let the glue dry and repeat for the remaining rectangles.

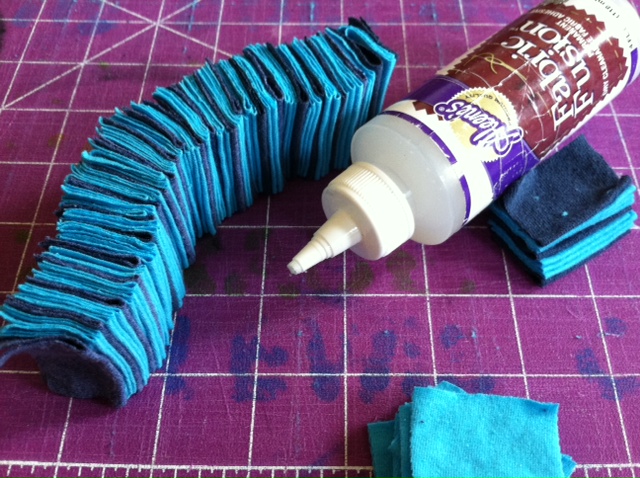
4. Squeeze a thin line of glue close to the folded edge of one of the rectangles and press another folded rectangle over it.

5. Repeat step 4 as many times as needed, to attach more rectangles together and create the necklace piece. (Arrange different colors to create a pattern!) Reserve two folded rectangles to use in step 7.

6. Let the necklace piece dry, then touch up any gaps as desired.

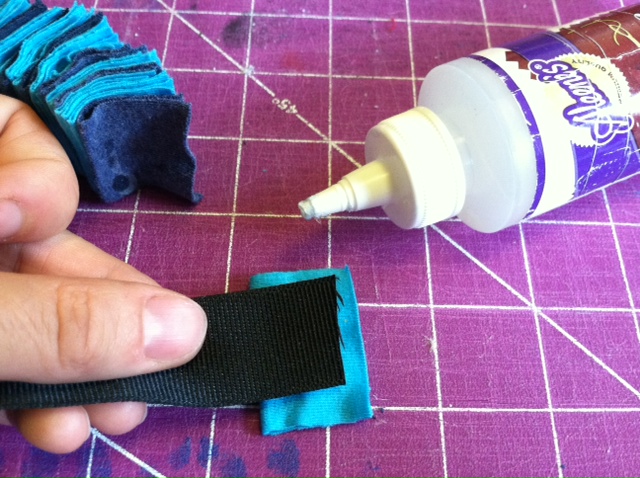
7. Spread glue along the end of a long T-shirt strip or ribbon (shown here), and center and press it along one of the spare rectangles from step 5.

8. Then add more glue to the ribbon and press it against one end of the necklace piece, aligning the T-shirt rectangles (the ribbon end should be sandwiched in between T-shirt material). Repeat on the opposite end of the necklace piece. Let dry completely. Then snip the T-shirt strip or ribbon in the middle so you have two ends for tying.

9. Tie the ends in a bow at the back of your neck.

Variations:
-Experiment by making smaller rectangles for a more delicate piece (you can make a necklace this way, or, I made an accompanying bracelet using 1" x 1 1/2" rectangles).
-Use chain in place of the fabric fastener. (I like the idea of an all-white necklace piece with a gold tone chain.)
-Try wearing it as a headpiece! (My sister's boyfriend tied the necklace around his head as a joke, but with the right messy up-do, it could be quite the statement piece.)

-Play with color: Make the red-white-blue version mentioned above, use the color scheme from your favorite sports team to wear to the next game, or craft a rainbow to brighten your day!

Tune in later this week over at Generation T to see the second necklace I made using the scraps left over from this one--super easy, super fast, and also no-sew (no-glue, even!).
Clicky Web Analytics
Pin It button on image hover

Subscribe to our newsletter

* indicates required
I am interested in products and inspiration for...
Close