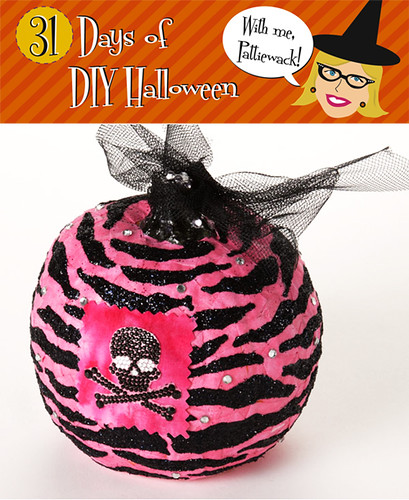
I love how Cheryl Ball turned a simple decorative pumpkin into wildly fun décor with vibrant fabric and Collage Pauge™ Instant Decoupage™! Add extra attitude with Tulip® 3D Fashion Paint™ and Tulip® Glam-It-Up!™ PDA: Personal Dazzle Assistance™.
Wild Child Pumpkin
Materials List:
– Tulip® Fashion Glitter™ in 23560 Black Fine Jewel
– Tulip® 3D Fashion Paint™ in 65038 Black
– Tulip® Glam-It Up!™ PDA: Personal Dazzle Assistance™ in 26637 Clear Red Black
– Collage Pauge® Instant Decoupage
– Aleene's® Fast Grab™ Tacky Glue
– Paper towels
– Pinking shears
– 1” foam brush
– Pumpkin
– Foil
– Scissors
– Tulle – 4” x 18” wide strip
– Scratch paper
– Small paintbrush
– Fabric – ¼ yard – bright pink – or desired color
Instructions:
1. Use scissors to cut fabric into about 1” squares.
2. Squeeze a puddle of Collage Pauge onto foil. Working in small sections at a time, use dry foam brush to apply an even coat to surface of pumpkin. Tap foam brush onto a piece of fabric then place into adhesive, then brush on another coat. Add another piece of fabric slightly overlapping the first then apply more over top. Repeat step until entire pumpkin is covered. Let dry.
3. Start flow of Black 3D Fashion Paint on paper towel using an even pressure on bottle for a smooth line. Place scratch paper on work surface. Working in sections at a time, paint on zebra stripes as shown. Immediately pour black glitter over wet paint then pour off excess onto scratch paper. Repeat step, letting paint dry if needed before moving to new section. When thoroughly dry, use small paintbrush to brush off excess glitter.
4. Squeeze a small puddle of Black 3D Fashion Paint onto foil then use small brush to paint stem of pumpkin. Let dry.
5. Peel skeleton design from plastic backing sheet then press onto a piece of pink fabric. Use pinking shears to trim into square as shown.
6. Peel off single clear crystal from backing sheet then press into place throughout design. Add black crystals to stem.
7. Use Fast Grab to glue fabric square to front of pumpkin as shown.
8. Tie a bow of tulle around stem


1 comment:
Both of my daughters will go crazy when I show them this blog...Definitely will be doing these!
Post a Comment