
This close to Christmas you probably already have the tree decorated, stockings hung and gifts wrapped. Did you remember to bake cookies for Santa to set on Christmas Eve? Sure a plate would work just fine to set those cookies on, but come on this is the guy that is about to hook you up with a bunch of gifts couldn't you go above and beyond? Why not make a tiered treat tray to really set your house apart from all the others Santa is going to visit that night.

SUPPLIES
Christmas Records
Paint Brush
Wooden Dowel
Foam Core Board
Scissors
Oven
Metal Bowl or Can
Wooden Beads
Drill with bit the size of your dowel
small saw
Wooden Disc
Festive Trim

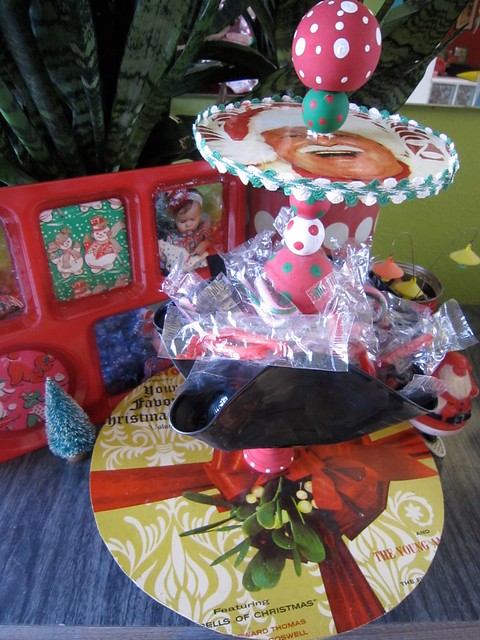
3 Tiers of Treats - Base
Your tiered treat tray is going to have 3 levels in graduated sizes. The bottom tray will be the largest. I used one of my records as a guide for size and cut out a circle of a festive Christmas Record I found at the thrift store. Using Liquid Fusion Glue I attached the circle to the actual record for stability.

Record Bowl in the Middle
The middle tier of the treat tray is going to be a record bowl. Heat your oven to 200 degrees. Place your record over a bowl or empty can and allow to become flaccid. When the record is limp remove from the oven and work quickly to shape it into a fluted bowl.

Santa on Top
The top tier is the smallest. I just so happened to have a record with a large picture of a man dressed as Santa. I used a small bowl to trace my circle and then cut it out. To back the tier I used Liquid Fusion Glue to adhere it to a round piece of foam core board. I trimmed the rough edges in festive trim.

Tiered Tray Infrastructure
Now that my 3 tiers are ready all that is left to do is assemble the wooden core. We used a round wooden base, wood dowel and wood balls. The first thing is to choose a bit for your drill that is the same size as your dowel. You will need a fairly large dowel for stability. Drill a hole in the wooden base and inserted the dowel with Tacky Glue. Allow to dry completely.

While the base glue is drying use your drill to ream holes in your wooden beads the size of your dowel. Once all the holes are drilled you can paint them red, white and green. Be sure to add lots of polka dots using pencil erasers and paint brush tips. Allow the paint to dry completely.

You will also need to drill holes in your 3 tiers so that they will slide down the dowel.

Once all your holes are drilled and paint has dried start stacking your beads, bowls and tiers onto your dowel. Save a large round ball for the tippy top.

Now on Christmas Eve fill the tiers up with treats and leave out with a glass of cold milk for Santa.

Happy Holidays from Naughty Secretary Club!
Visit us on Facebook!
Craft on! Click here for today's daily giveaway!
1 comment:
I love this!! Maybe I'll make it next year.
Post a Comment