
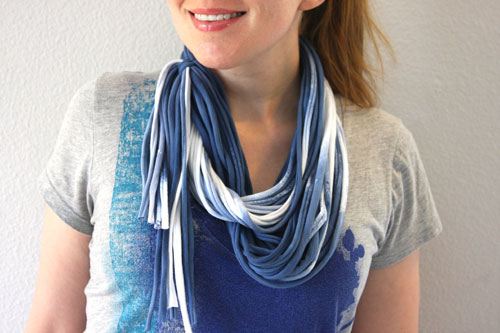
A wonderful, versatile accessory that is lightweight enough as a Summer scarf, and will transition into the Winter months easily. You can even use a t-shirt that has a print on the front or the back, as long as it doesn't extend much below the underarms or prevent the fabric from stretching and rolling when cut. Remake and re-use an old tee out of your own closet for the ultimate in Recycling Chic!

Materials:
– Tulip® One-Step Tie Dye in Colbalt
– Tulip® Craft Gloves™
– white t-shirt
– garbage bags
– rotary cutter and mat (or fabric scissors)
How To:
1. First check which way the fabric of your shirt rolls when stretched. (On most jersey cotton t-shirts, the fabric rolls to the outside, so you'll want to dye or paint the inside of the shirt.) Cut a tiny test piece from the hem (just a single layer of fabric), and pull the sides. Note which side is the exposed side when it rolls - which you'll place that side UP on the flat surface in Step 2).
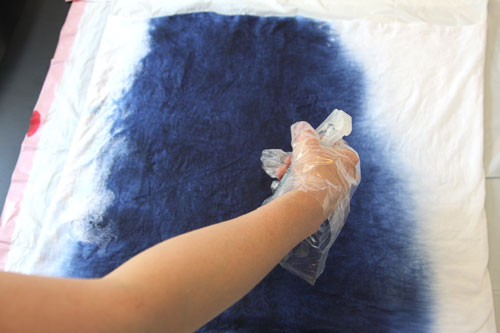
2. Begin by dyeing the t-shirt. For an ombre effect, the t-shirt must be wet, so wash in the washer (do not use fabric softener) and remove before putting into the dryer. Place onto a garbage bag, laid onto a flat surface. Place another garbage bag in-between the fabric layers so the dye does not seep through. Mix the Tulip Cobalt Tie-Dye according to the kit directions, and spritz onto the fabric using the spray bottle, concentrating in the center and allowing it to fade near the edges of the color. Turn the shirt onto the back and repeat, leaving an area of un-dyed fabric at the side. (Use the gloves that came with the kit to prevent dyeing your hands!)
3. Place another garbage bag over the top, and leave for 4-6 hours. Once dry, wash in the washer with a small amount of detergent and water at the hottest suitable for the fabric. Dry in the dryer.
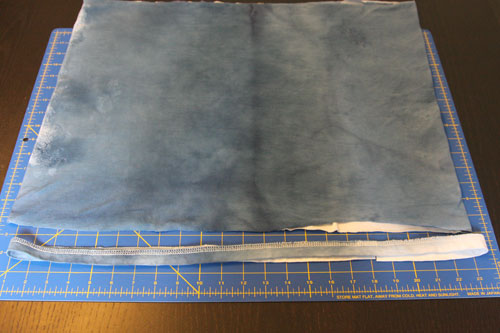
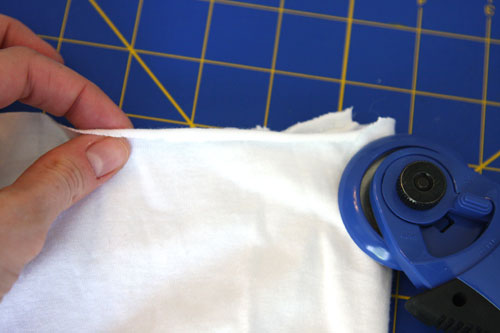
4. Place the dyed t-shirt onto a cutting mat. Cut off the bottom hem, just above the line of stitching.
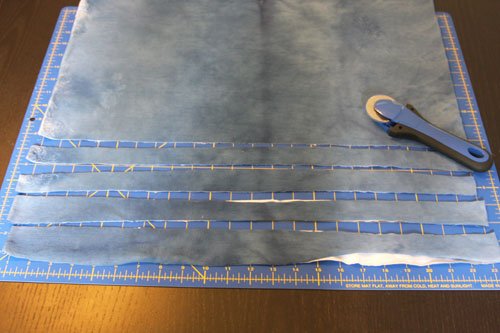
5. Use the rotary cutter to cut strips from the shirt, going from side to side, through both back and front, spaced about 1" - 1.5" apart. Go all the way up to the underarm area.
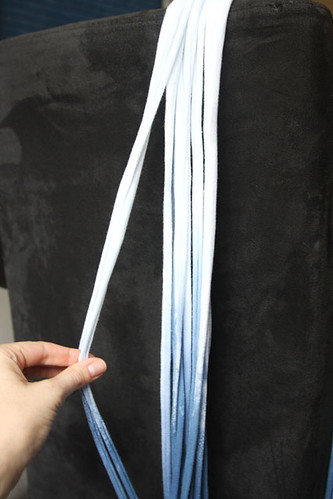
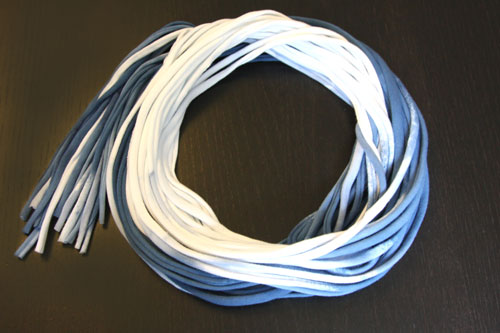
6. Stretch each strip side-to-side so the fabric rolls.
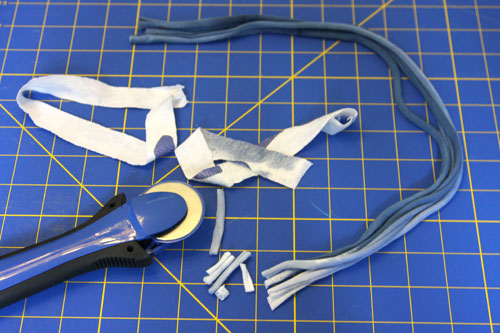
7. You'll probably have one or two longer loops out of the strips you made, so save one and cut the other one/s into shorter pieces. Salvage the fabric from the hem, cutting off the stitching line, and stretching the fabric so it rolls. Cut into shorter pieces to match.
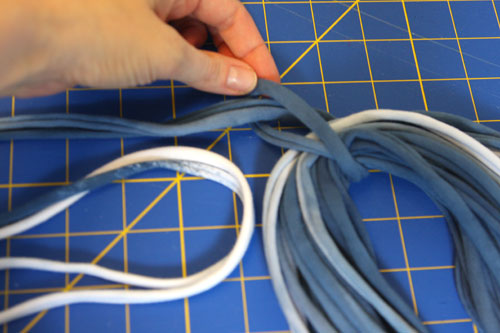
8. Gather all the loops and short pieces together, and line up the white areas.
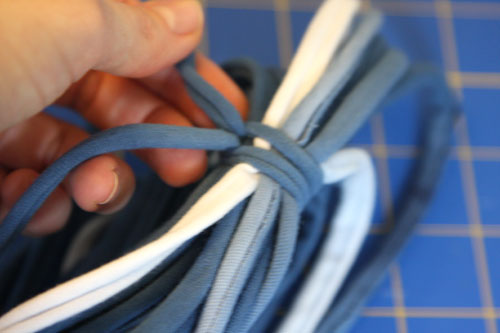
9. Use the one longer loop to wrap around all the others, tying it around itself. Pull the knot tight.
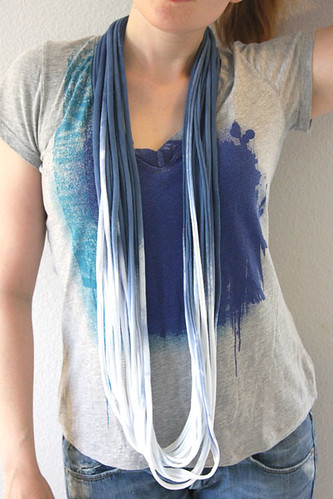
You're done! You can wear the piece long, or looped twice around the neck with the short fringe at the side, or even wrapped three times with the fringe in the front. You can even jazz it up with iron crystals, nailheads, or fabric paint!
Visit us on Facebook!
Craft on!
1 comment:
Wow, marvelous blog layout! How long have you been blogging for?
you made blogging look easy. The overall look of your website is magnificent, as
well as the content!
Here is my weblog ... discount dental plans
My web-site :: best dental plans
Post a Comment