Showing posts with label black cats. Show all posts

Thursday, September 15

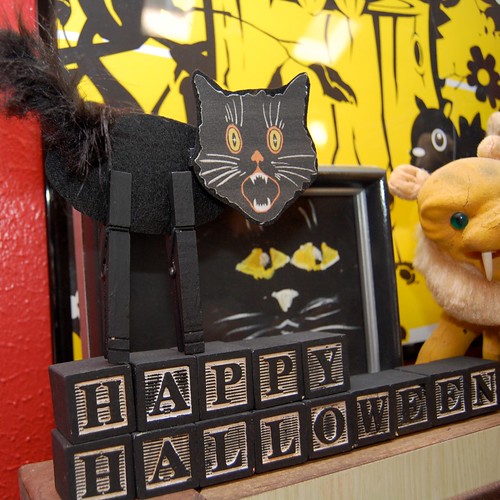
Black Clothespin Cat Party Favor


I tried really hard to wait until October to start the Halloween crafts, I really did. I figured if my Halloween decorations are already up, the pumpkins are all out at the grocery store and Target's Halloween department is brimming with orange and black goodness I could go ahead and start the creepy crafts. Today's craft is a double whammy, creepy and educational.


I am gearing up for my annual kids Halloween party. I already bought the goodie bags all I have to do is fill them. In years past I have made soap and crayons, this year I thought the kids were old enough for a little game. Clothespins are a great way for toddlers to practice their fine motor skills - all that squeezing to open and close the pin.


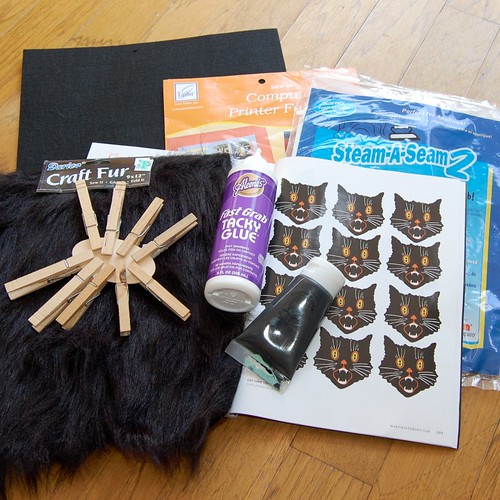
SUPLIES
Pre-stiffened Black Craft Felt
4 Wooden Clothespins
Black Crafty Chica Paint
Black Fun Fur
Martha Stewart Black Cat Face Template
Scissors
Aleene's Tacky Glue
June Tailor Fabric for Printers
Printer
Steam a Seam 2
Oval Shaped Wooden Disc


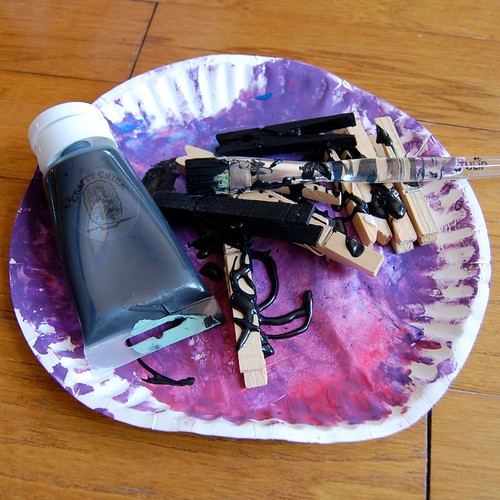
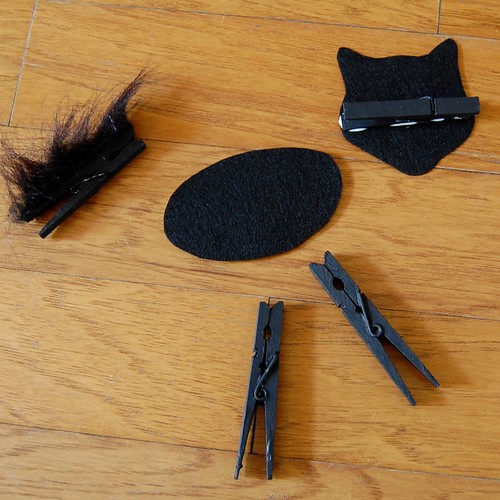
The first thing I did was paint all 4 of my clothespins black. Two pins will act as legs for the cat, one will be the tail and the other will hold the cats head.


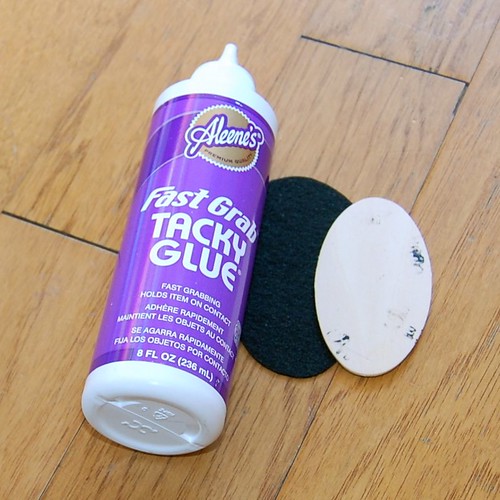
Next I cut my stiffened craft felt into the shape of a cat body. You could also use black foam or card stock for the body. The point is you want it stiff enough to hold it's shape. I found that I needed to glue a piece of wood to the back. I used Tacky Glue and a thin wooden oval from the craft department.


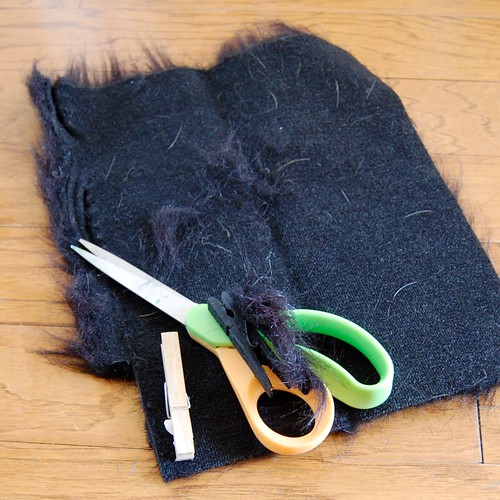
After your body is cut it is time to make the tail. Trace the shape of the clothespin onto the un-furry side of the fun fur. Next cut out out the small rectangle trying not to get fun fur all over the place. Using tacky glue attach the strip of fur to one of the clothespins.


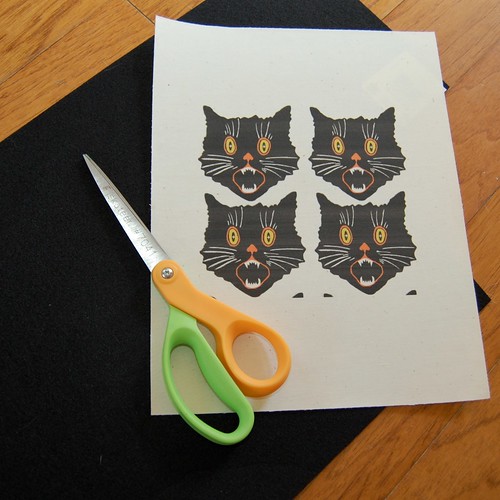
For the head I used a template from Martha Stewart's most recent Halloween magazine. Print out your head onto June Tailor fabric for printers. I enlarged the heads a bit. Peel the protective top coat from one side of your Steam a Seam and attach to the back of your cat head. Next cut a piece of stiffened felt about the size of the head. Peel the second backing from your steam-a-seam and attach to your felt. Cut out the shape of the cat head. Use a hot dry iron to fuse everything together.


Once your head is ready using Tacky Glue attach it to one of the clothespins.


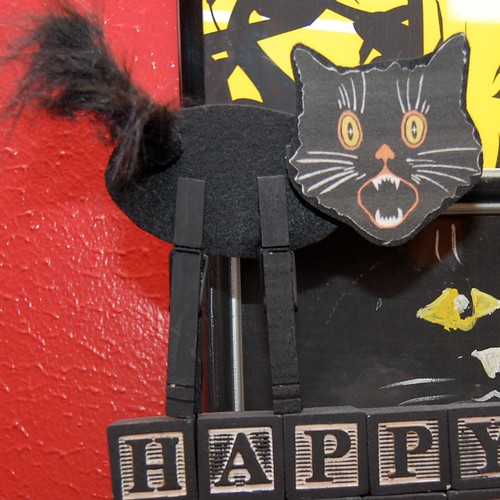
All that is left to do is assemble all the pieces or help your toddler do it. Now I just have to make like 30 more of these and I'll be ready!


*I would also like to mention if you kids are under 3 or still prone to putting things in their mouth this is not a great project. It does not take much for the metal clothespin center to pop out and become a choking hazard*

Visit us on Facebook!
Craft on! Click here for today's daily giveaway!

Thursday, October 22

Make Your Own Personalized Black Cat Bobble Head


What happens when I go and spend a week with my mother Fredda Perkins? We turn my daughter into a black cat bobble head! Mom and I have quite the creative synergy together and always manage to whip up something fun. I just had no idea that this visit would produce something this craft-tastical, it might be the best thing we have ever made together and we have been a craft team for over 30 years. Today for I Love to Create I am going to show you how to create your very own personalized, black cat bobble head!
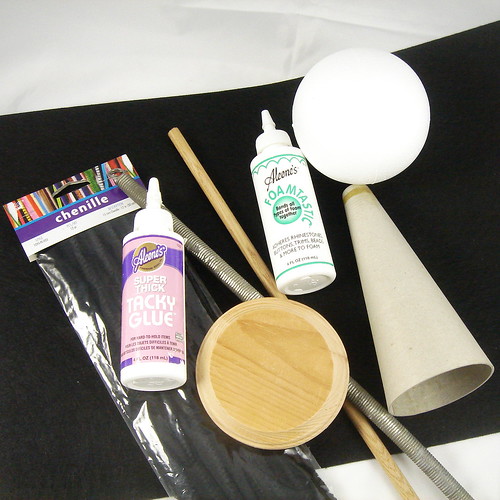

SUPPLIES
Dremel
Thin Craft Wire
Wire Clippers
Crafty Chica Little Paint Pack
Aleene’s Foamtastic
Tulip Fashion Glitter Black
3 orange balls from Pom Pom Fringe
Scissors
Straight Razor
Cone
2 Wooden Discs
Spring
Wooden Ball
Printer
Computer
Photo Paper for Computer Printer
Sandpaper
Craft Fur Black
Stiffened Craft Felt
Decorative wired ribbon
Pipe Cleaners
Small Wooden Dowel
Foam Ball
Paint Brushes
Aleene’s Original Tacky Glue
Bread Knife
Drill with bit the size of Dowel
Liquid Fusion
Straight Pins

BLACK-CAT-A-FY
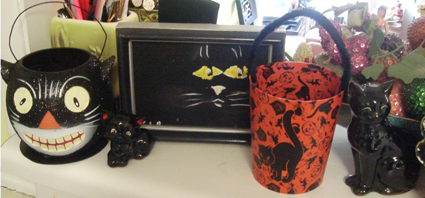
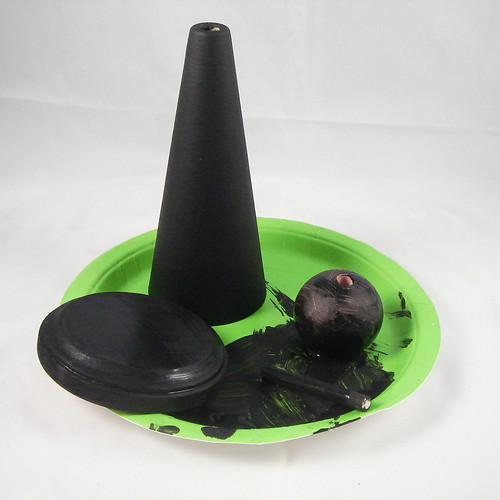
If you recall last week’s post on how to make a Hissing Black Cat Banner you will remember that I collect black cat figurines that I only display at Halloween. Therefore, we opted to make the bobble head a black cat. First things first. We painted our parts black. Using Crafty Chica paint in black I coated my cone, Foam ball, dowel, wooden disc and wooden ball. If your pieces are slick or already have paint on them use a piece of sandpaper to give them a little tooth.


MEASURE TWICE CUT ONCE
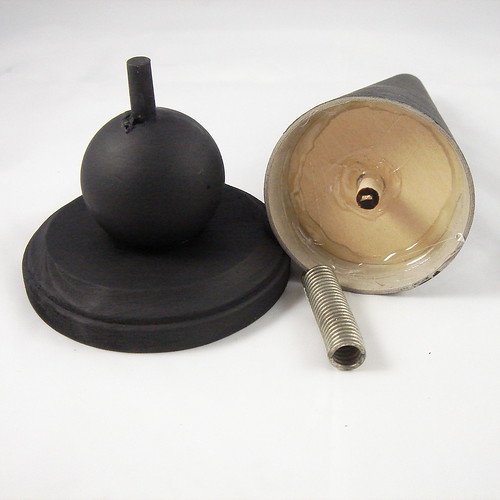
The size of your dowel will depend on the inside diameter of the spring you use. My mom stole our spring from an infrequently used screen door in her house (shhh don’t tell my dad). You need a dowel that will fit inside the spring. You need two pieces of dowel. One should be about 1 to 1 1/2 inches long. The other should be long enough to go though your wooden ball and extend into the wooden disk below then extend above the ball about 1 inch. Attach the cutting tool to your Dremel to cut the dowel to length or use a small saw. You'll also need a cutting disk on your Dremel to cut a 2 inch lengh of spring. Using a drill bit the size of your dowel, drill holes in both wooden disks and the wooden ball.

Once the paint has dried on your foam ball use a bread knife or some other cutting tool with serrated edges to cut off about 1/4th of the ball. Lay the cut side on a sheet of sandpaper and sand it til it is smooth and level.

GLUE TIME
Next glue your wooden ball onto your wooden base and glue your longer dowel piece inside making sure about an inch extends above the ball (it will hold the bottom of the spring) and into the hole in the wooden disk. One of your wooden discs should be small enough to fit inside your cone. Glue that disc into place and also glue your dowel into the center hole. Allow glue to dry.


EVERYTHING IS BETTER WITH GLITTER
We coated the cone with Aleene’s Tacky Glue since it is nice and thick and has good grab. From here we coated the glue with glitter to give our black cat a flocked or furry effect.
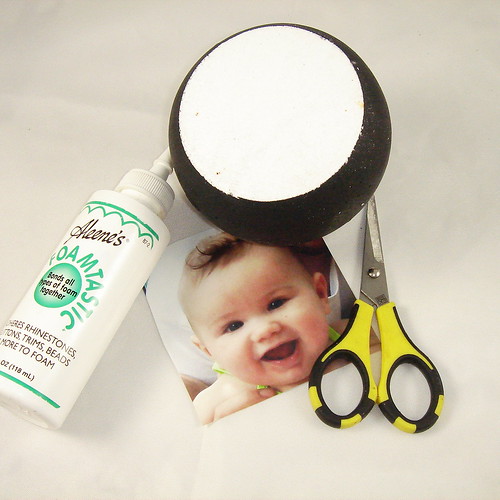

CHOOSE YOUR PRETTY KITTY
It was hard choosing just the right photo of Tallulah, but in the end we opted for one where we could very easily crop out her face and she had a pretty smile. We cut out wax paper(you can see through it) the size of the flat surface we had cut into our boam ball to use as a template. We printed the picture on photo quality paper. We placed the wax paper over the photo and once satisfied with the placement, we cut out the circle picture. Using Aleene’s Foamtastic Glue we adhered the photo to the foam ball and allowed to dry.
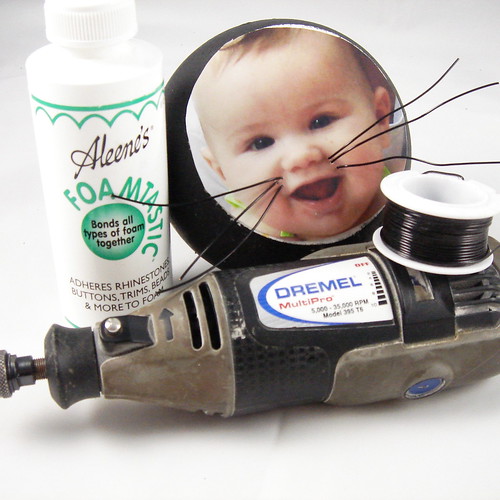

WHISKERS
Using the teensiest weeniest bit you can find for your Dremel drill 3 tiny holes on each cheek of your photo. Using wire clippers clip off 6 4” pieces of wire. Stick the wire through the holes and into your foam to secure. Do not use glue, as it will pool up on your photo. Bend and trim wires to desired length and style.
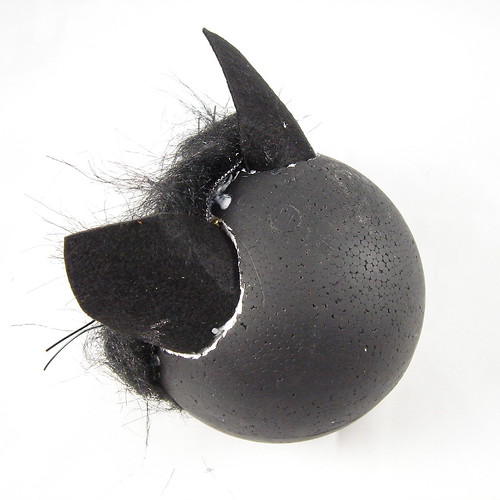

THE BETTER TO HEAR YOU WITH
Cut out two ears from stiffened craft felt. Mark where you want the ears on your foam bobble head. Using a straight razor carve a little slit where the ears will go. Fill the slit with Aleene’s foamtastic Glue and stick your ears in. Allow to dry. You may need to use thin nails or pins to hold the ears in place until dry.


FUN WITH FUR
We had a dickens of a time finding craft fur, save yourself the trouble and go to Hobby Lobby first. Cut your Craft Fur into strips and adhere to your bobble head with Aleene’s Foamtastic taking care around the face and ears. Once the glue has dried you can go back and give the kitty a haircut especially around the face.

ARMS AND TAIL
Using a drill we put a hole in either side of our cone and wired a pipe cleaner through. We cut out paws from the stiffened craft felt and attached with Liquid Fusion Glue. We also drilled a hole for the tail and used a chenille pipe cleaner since it was a bit puffier.
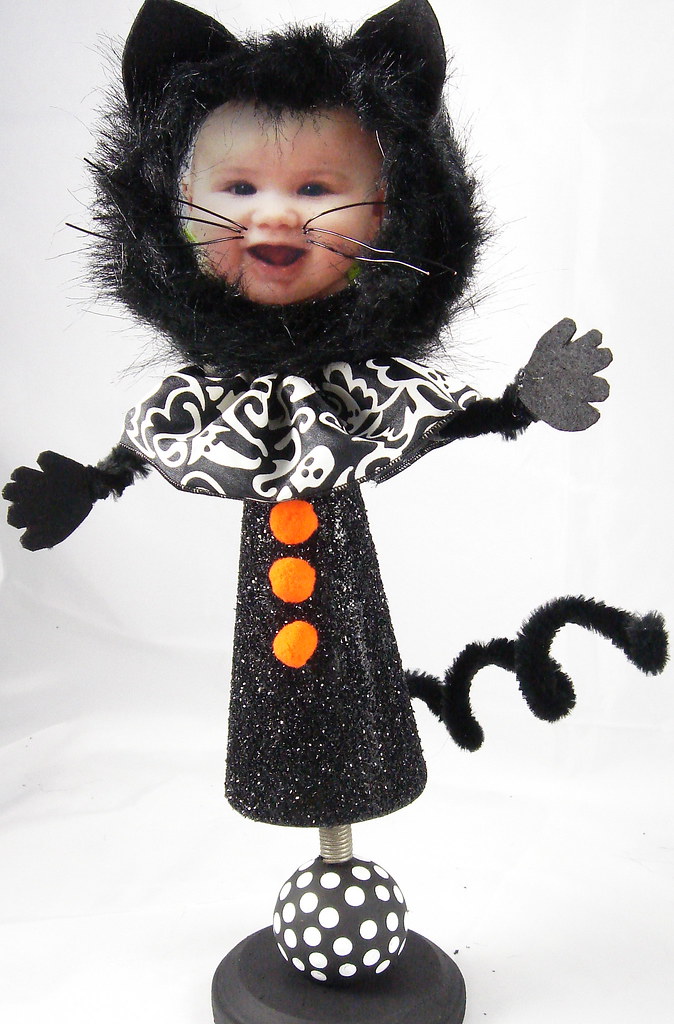

PUT IT TOGETHER
Once all your glue and paint are dry, put all your pieces together. You are going to need to carve out a small hole in the base of your foam ball in order to attach it to your cone. Again we used Aleene’s Foamtastic Glue to attach the ball to the cone.

We also made a ruffle collar using wired Halloween ribbon to hide where the two pieces connected. To ruffle the ribbon, just pull the wire on one edge making sure it doesn't pull through on the other end. We also added 3 pom poms from ball fringe as buttons. As an added bonus, once the black paint was dry I added polka dots to the wooden ball using a small dowel (the end of a nice new pencil works well too).
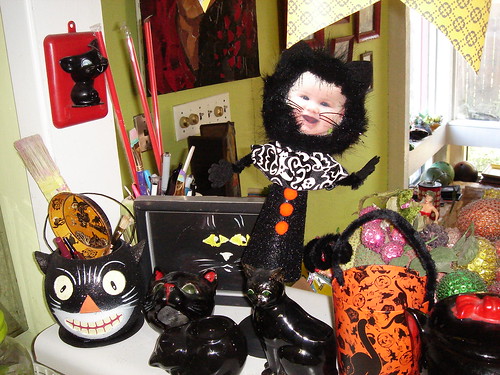

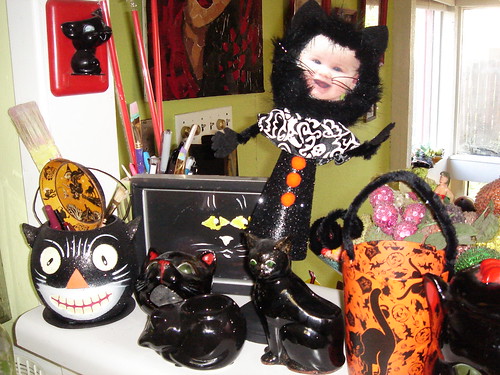
All that was left to do was display my new purrrrfect bobble head with the rest of my black cats. Tallulah fits right in and the bobble head is so cute I may leave this one black cat out all year round.

Thursday, October 15

Black Cat Halloween Banner


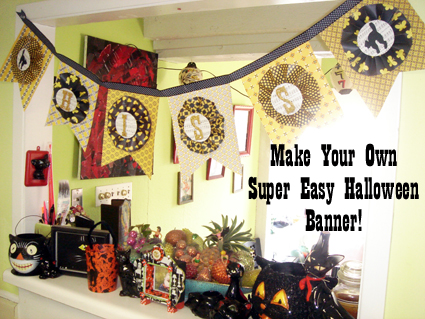
Today’s I Love to Create Column is a two for one special! Not only do I have a fun Hissing Halloween Banner how-to for you I also have a book review.


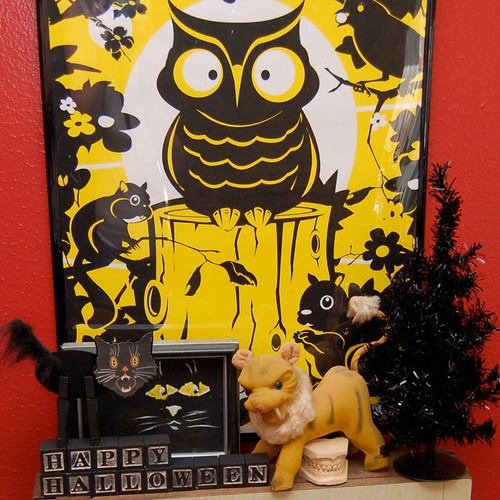
First things first let’s talk about the books. I have been a fan and a customer of Repro Depot for a good long while now so when I head they had a set of books and stationary coming out there was no doubt in my mind that they would be good. Good was a bit of an understatement. The two Repro Depot Pattern Books in Folk and Floral are chocked full of just that patterns. The fun part is all the patterns also come on a disc making it easy as pie to print these patterns out for craft projects like say a Hissing Halloween Banner. There are actually a few pages of crafty inspiration at the back of the book with ideas for the paper including place mats, greeting cards and light switch covers. I opted to work with all black and yellow and patterns, but there are tons of color options in the book. All the patterns and the colors do seem to have the distinct feel of crafting in the fall of 1973. Each book has oodles of patterns with little people, southwest designs, pears, roosters and even nuts. The forward is by Grace Bonney of Design Sponge giving Repro Depot and the pattern books two thumbs up and we know she has great taste. There is also a set of greeting cards available from the line. The blank cards are adorable as is or would be a great foundation for further embellishments (check out our how-to for Thank You and Christmas Cards).


SUPPLIES
Repro Depot Pattern Books
Printer
Printer Paper
Scissors
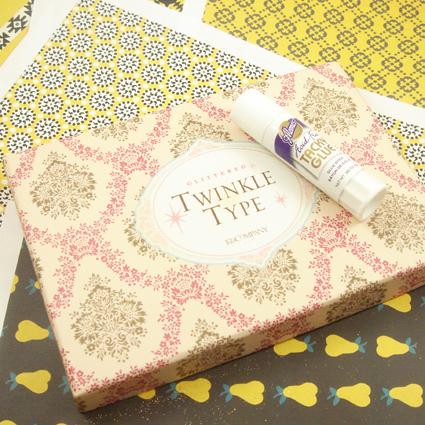
Twinkle Type Letters
Ribbon
Aleene’s Acid Free Tacky Glue Stick
Aleene’s Tacky Transparent Tape for Crafters
Aleene’s Hot Glue Gun
Aleene's Liquid Fusion Glue
Sheet Music
Craft Knife
Cutting Mat
Black Cat Silhouette

CHOOSE YOUR PAPER
It’s a hard choice but you need to choose a theme and color scheme for your banner that will dictate which patterns you choose. I opted for black, white and yellow patterns since my banner was going to have a black cat Halloween theme. Print your patterns onto 8.5 X 11 printer paper with your printer setting on best.


ROSETTES
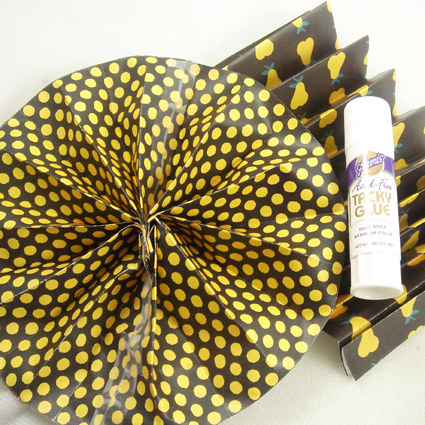
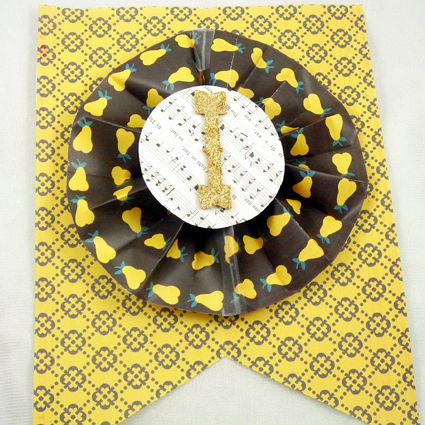
Yup, it’ an accordion fold just like you did in kindergarten. First trim the white edges off of all of your pattern sheets. Next cut your paper into two rectangular strips. Use your Aleene’s crafters tape to attach the two ends together. Next accordion fold the strips with the folds being about 1” wide. Once you have gotten to the end bring your accordion together and attach the two ends with tape. I also used a glue stick to make extra sure it stuck together. Thanks to everyone who posted instructions on Face Book about making rosettes. I also found the instructions on Paper Source and Dream Create Inspire helpful.

BANNER
Once you decide what shape you want your banner to be and you know that your rosettes will look good with them get to cuttin’. If you want your banner to look pretty from the front and back print out and cut two of each sheets.


MAKE MUSIC
My letters would get lost in the shuffle attached directly to the center of my rosette so I opted for some old sheet music to help make them pop. I used a roll of packing tape as my guide and traced and cut out 6 circles.

HISSING CATS
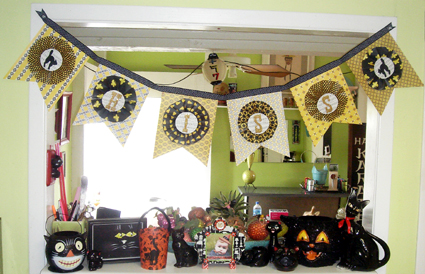
Since I was making this banner to go with my black cat collection not only did I want the banner to say “Hiss” I wanted to have pictures of hissing cats to illustrate the whole thing. Lucky for me Martha Stewart had these handy dandy hissing cat silhouettes on her website. I printed them out on card stock and placed them on top of black paper and cut out with a craft knife. Each cat came out slightly different, but I like it that way. I used my Aleene’s glue stick to adhere the cats to sheet music discs.


GET YOUR HISS ON
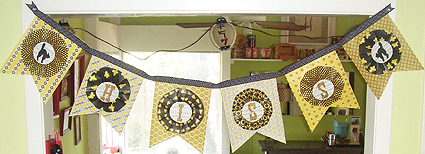
The next thing I did was use my glue gun to attach my rosettes to the banner pieces. Next I used my glue gun to attach the sheet music circles to the center of the rosettes. Last but not least I used my Aleene’s Glue Gun to attach my twinkling letters H-I-S-S to the center 4 circles of sheet music.


STRING AND HANG
I used a black and white polka dotted grosgrain ribbon to hang my banner. I put a thin line of Liquid Fusion glue across the top of each panel and the banner and laid my ribbon on top making sure the pieces were spaced out evenly. I cut the ends in a decorative fashion and hung in my kitchen with push pins.


I am pleased as punch with the way the banner looks and how it helps draw attention to my collection of black cats. Plus it gives me something fun to look at as I stand at my sink and do the dishes.

I'd love to hear about how you celebrate and decorate for Halloween!
Clicky Web Analytics
Pin It button on image hover

Subscribe to our newsletter

* indicates required
I am interested in products and inspiration for...
Close