Showing posts with label gift wrap design. Show all posts

Monday, October 31

Pretty Paper Flowers

I know it's Halloween, but once Halloween is over I start thinking about Christmas.  Today I'm sharing a few fun embellishments to make your presents look pretty.


They were fun and pretty easy to make.  I'll show you how I did all three.

The first one made by cutting out four wavy circles.  After cutting them I tried to curl the edges in a little and I used an ink pad to antique the edges of each layer.  I used Aleene's Tacky Dot singles to hold the layers together and to attach it to the present.  I love glue dots for paper crafting.  They are easy and clean.


I think it makes a really pretty gift topper.  I made some flowers like this to put on top of a jar when I made my neighbors honey butter last Christmas.


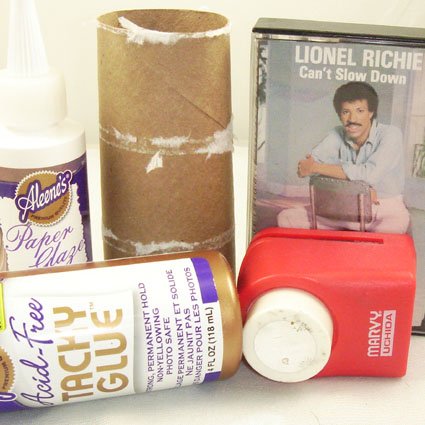
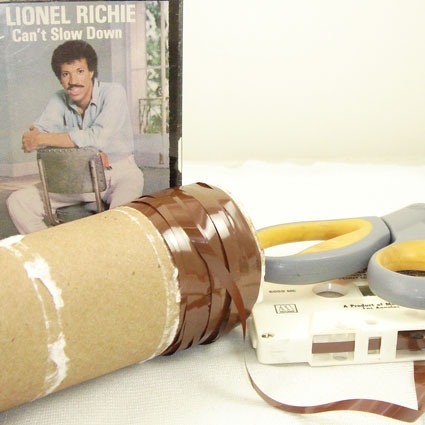
The second flower was done just like the felt flower I made HERE.  I cut a long strip of paper with pinking shears.  Then I cut slits down the entire strip and rolled it.  I cut a small square of Aleene's tacky double stick sheets for this one and planted the flower on it.  Both sides are sticky, so it essentially makes your flower a sticker to use when you want to.


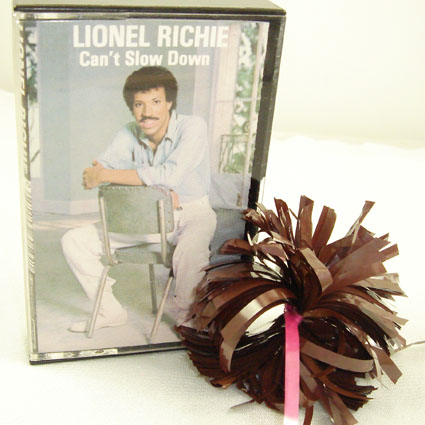
I added a few leaves and trimmed off the sticker part I didn't need.


For the last flower I took a scalloped paper punch and cut out two of the circles.  I antiqued the edges of both and cut slits in the top one, curling the edges inwards a bit.  Then I made a smaller circle to go on top of it.  I used the tacky dots on this one as well.


It could even be a to and from tag.


And now it's time to start the Christmas shopping!


Thursday, June 30

Recycled Robot Gift Wrapping


Recently we were invited to a robot themed birthday party for a 2 year old named Quinn. Never one to let a good theme pass me by, I decided to wrap my gift accordingly. Save up your old boxes, cans and toilet paper rolls and you can make your own.


SUPPLIES
1 Large box for body and to put gift inside
1 Small box for the head
Aleene's Tacky Glue
Scissors
Black Paper
Crafty Chica Silver Glitter
Tin Foil
Star Punch
Tulip Fashion Glitter Shimmer Transfer Sheets
3 Wooden Knobs
2 Empty Tin Cans
Tulip Glam it Up Crystals
2 Paper Towel rolls (or toilet paper rolls) for arms
1 Small roll (mine came from a package of cinnamon rolls) for the neck
Aleene's Tacky Tape


First you want to get all your robot parts ready for assembly. I wrapped the arms, body, legs and neck in tin foil. You can use tape or glue to fasten it. Be sure to put your gift inside the large box before you wrap it in foil.

I also got my wooden knobs ready by covering them in Tacky Glue and sprinkling with Crafty Chica glitter while the glue was wet. You can find these random sized knobs in the wood aisle at your craft store. Allow them to dry completely.


Using black construction paper, Tulip Glam it Up Crystals (which are already sticky backed) and Tulip Fashion Glitter Shimmer Sheets decorate your robot body. I cut out one large piece of purple glitter, several small black paper rectangles and then attached to my body and adorned with crystals.


Making the face is the same as the body. The design you choose is totally up to you. Once you have your face on the box using Tacky Glue add your glittered wooden knobs. I added one to each side of my robots head and one on top for good measure.


All that was left to do was glue everything in place. I used a hot glue gun/tacky glue combo. The hot glue allowed everything like arms and tin can legs to adhere quickly. Once the glue cooled I went over it with Tacky Glue to make sure it would all stay in place.


Our wrapped up robot fit right in with all the other bots about. Tune in next week for Robot Party Part2. Also want to make more recycled robots? Check out this project. Looking for more wrapping paper options? How about a wrapped lamp shade, cassette tape gift bow, customized ice cream carton, wrapagami, gift wrap trends, vintage wrapping paper and wrapped gift hula hoop wreath.


Visit us on Facebook!
Craft on! Click here for today's daily giveaway!

Thursday, December 16

Yule Tide Bubbles


Besides the word train, Tallulah probably says bubble more than any other word.  The girl loves her some bubbles what can I say.  We have recently run out and I keep assuring her that Santa will be bringing her more.  That being the case I decided to make Tallulah some special customized Christmas bubbles as a little stocking stuffer.


SUPPLIES
Paper
Dishwashing Liquid
Glycerin
Pipe Cleaners, Bubble Wands, Fly Swatters - you name it.
Empty Jar
Tacky Glue
Trim or Ribbon
Scissors
Tape
Water
Crafty Chica Paint
Collage Pauge
Straw

MAKE BUBBLES
There are oodles of recipes online for making bubbles.  I went with this recipe....
1/4 cup liquid dishwashing detergent
3/4 cup cold water
5 drops of glycerin
Most of the recipes I read swore by using Joy dishwashing liquid, but 7th Generation is what I had on hand.  A few suggested adding food coloring for colorful bubbles, but to me that translated into stained clothing so I opted for plain.
CUSTOMIZED CONTAINER
I decided to make a customized label for my bubble jar.  In a shallow dish I added dishwashing liquid, water and Crafty Chica paint.  Using a straw I blew bubbles and gently placed my paper in the paint bubbles.  I let the paper dry completely and then came back and added a second color.
Once the paint had dried I added a little text with my Bic Mark-It Permanent Markers.  I just left it simple with Bubbles - Bottled by Hand in the North Pole.  I then cut my label out and adhered it to my empty jar using Collage Pauge sparkle.
I didn't want to leave the lid out so I covered it in some left over bubble paper and added a decorative trim band with Aleene's Tacky Glue.
The bubbles are complete and all that is left to do is wait for Santa to deliver them!  If only making trains were this simple I would be set.

You could always make a customized wrapper for a ready made batch of bubbles.  Just soak the container of Magic Bubbles or what have you in warm water until label comes off then follow the instructions for adding a customized wrapper.

WRAP IT UP
Be sure to make extra bubble paper because it makes great wrapping paper too!


Check out more of my I Love to Create Projects.


FREE SHIPPING through December 13, 2010. Craft on! Click here for today's daily giveaway!

Thursday, September 10

Recycled Wrapping Paper and Cassette Tape Pom-Poms


Continuing with this week’s theme of wrapping paper I have a few fun and crafty ideas for you. Who knew that I Love to Create wrapping paper? Gather up your cassette tapes, tacky glue and newspaper next time you have a gift to wrap and follow these easy instructions.


My first gift wrap example was actually a happy accident when I made my lacey Hooptastical Earring Holder. When I dyed the lace using Tulip Fabric Spray Paint unbeknownst to me I was creating neon pink wrapping paper at the same time. I used the newspaper (I was especially excited about the picture of Debbie Harry), aqua bias tape and a pom pom I made to adorn the gift I brought to a mustache themed birthday party!


One of my favorite parts about the above gift was the Cassette Tape Pom Pom I whipped up instead of a bow. Making your own is as easy as a trip to the thrift store and the toilet.


SUPPLIES
Aleene’s Paper Glaze
Toilet Paper Roll
Cassette Tape
Scissors
Aleene’s Tacky Glue


TOILET ROLL WRAP
Remeber when you were in High School and would go wrapping? Well this is different, but toilet paper rolls are still involved. Cut the cassette tape and wrap around an empty tube of toilet paper several times.


CUT THE TAPE
After you have a nice thick wrap around the roll slide the bundle off the roll. Use another piece of cassette tape to cinch in the middle, tie in a knot. Using your scissors cut the loops on either end of your pom pom. Fray the edges out a bit.


LIONEL RICHIE WISHES YOU A JUMBO JUMBO BIRTHDAY
Cut out a picture from the cover of your cassette tape. I used Aleene's Paper Glaze to adhere my image to a hot pink disc. I then used Aleene's Tacky Glue to attach the charm to the center of my pom pom and also attach the entire thing to my wrapped gift. Can't Slow Down is the album that had "All Night Long" on it so all that is left to do is make a handmade card that says "Lionel Richie wishes you a jumbo jumbo birthday".

Since you know I love all music themed crafts, I have one more wrapping paper idea!


SUPPLIES
Vinyl Records
Clothespins
Pen
Scissors
Ruler
Aleene’s Tacky Glue


Rip apart the record jacket, or separate the front from the back. On the back of the front side draw four straight lines with your ruler. The lines should be 2 1/2 inches from the edges. These are going to be your fold lines. Cut four tabs from the corner fold lines. These will make the flaps that fold in and get glued down. Fold over all four lines. The cover should be folding in to look like a box. Start putting glue on the tabs and clothes-pinning them in place. Now wait over night! Repeat all 5 steps for the back part of the record jacket, except make the fold lines 2 5/8 inches in. See more how-to pictures here or pick up a copy of Pad: The Guide to Ultra Living.


Who wouldn't want to recieve a gift in this record box? Plus you can reuse it to store little toys, puzzle parts or paper clips!

Friday, August 7

Designer of the Month - Gabriela Delworth


Each month, here on the iLoveToCreate blog, we will putting the spotlight on fabulous artists and crafters who love to create! This month, we got in touch with crafty queen Gabriela Delworth and asked her a few questions to get to know her style, sensibilities, and crafty expertise! Here's what she had to say!

So Gabriela, what do you love to create?
I love creating a variety of things but my favorite medium is paper.

Do you have a favorite iLoveToCreate product that you can’t live without? How do you use it in your projects?
There are many ilovetocreate products on my list of favorites. Let’s start with the products I use to design my altered Marie Antoinette T-Shirts: I use Tulip® Photo Transfer Paper™ to transfer images onto T-Shirts. I use Tulip® Mini Fashion Iron™ to iron paper transfer images on T-Shirts. I use Tulip® 3D Fashion Paints, Tulip® Fashion Glitter™ and Aleene's® Fabric Fusion™ to embellish them. And I use Aleene’s® Original Tacky Glue® on my paper crowns, tiaras and all my paper projects.

Marie Antoinette T-Shirt with embellishments!

What’s your favorite project that you’ve created?
I am really happy with the way my altered Marie Antoinette T-Shirts turned out.

A pretty detail of her shirt.

Tell us about a time when you found inspiration in a very unlikely place.
I have to say that inspiration comes to me from many different sources, but the most unlikely would he the supermarket! There are enough colours and shapes to “dream” multiple craft projects at this place.

As we’ve seen on www.craftfail.com, not all projects go our way.
Tell us about a Project that you created that went terribly wrong.

I guess not allowing glue to dry completely on paper has been my “terrible wrong” experience.

What’s the best crafty tip you have up your sleeve?
My best crafty tip would be to be open and try different materials and products.
There is always a new technique or trend to be discovered.

Lots of crafty tips can be found on Gabriela's web site. Check out her great tutorials!

You have some mad crafty skills, but whose crafty skills do you admire?
I admire people that can sew and knit.

Based on your blog, it is evident that you are a very busy lady! How do you juggle the TV appearances, classes, cooking, and crafts that you do? What’s your secret?
My secret is to be organized and plan activities ahead of time. (Check out Gabriela on Youtube here)

You have great photos on your blog. What advice do you have for photographing your work for other bloggers?
My advice would be to invest in a good digital camera to start. And then practice or take photography lessons if possible.

Your gift wrap designs are impressive. What are some everyday supplies that you can recycle that are simple gift wrap solutions (like the cupcake wrapper rosettes)? We as well as many of our blog readers love recycled crafts!
I believe that “presentation is everything” and always try to transfer that on my gift wrap designs. Recycling and re-purposing is very important to me. I love to collect and save a variety of disposable materials. Some of them are cardboard, fabric trims, paper of all kinds, plastic, etc.

A beautiful gift wrap design by Gabriela. See more of Gabriela's gift wrapping samples here.


Thanks Gabriela for sharing with us! If you would like to be the iLoveToCreate Blog Designer of the Month, send us an e-mail at ilovetocreateblog@yahoo.com and share with us links or attachments of your work using iLoveToCreate products! We are looking for artists of all kinds from ceramicists to Chicano art lovers crafters who create in steampunk style!

Thanks for stopping by!
Clicky Web Analytics
Pin It button on image hover

Subscribe to our newsletter

* indicates required
I am interested in products and inspiration for...
Close