Showing posts with label headband craft. Show all posts

Tuesday, September 3

Bitty Bow Headbands (No Sew!)


Now that I have a baby girl it's been fun to throw in some girly projects among all the boys projects I'm usually working on.  These little headbands are super easy to make and don't even require sewing.
They add a little girly flair to any outfit.  Here's my little girl.  She's almost 3 months old and I love putting a headband on her with her crazy hair flying out all around it.
 

Thursday, April 18

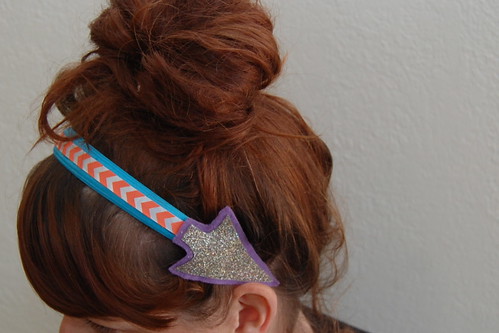
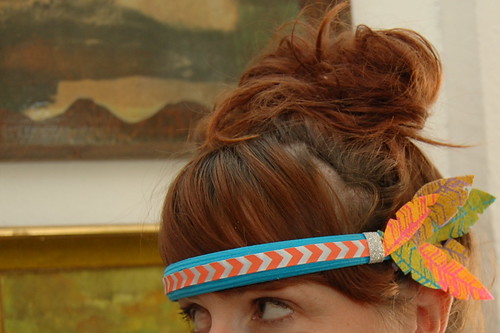
William Tell Inspired Felt Feather & Chevrons Arrow Headband How-To


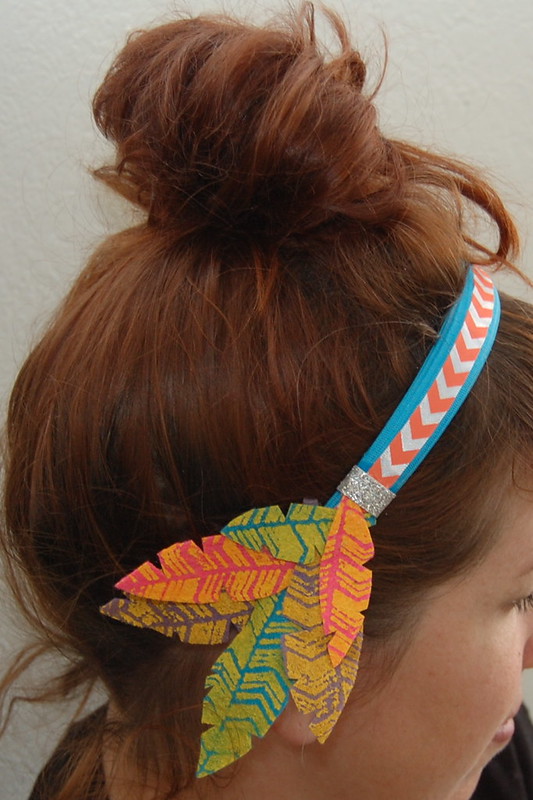
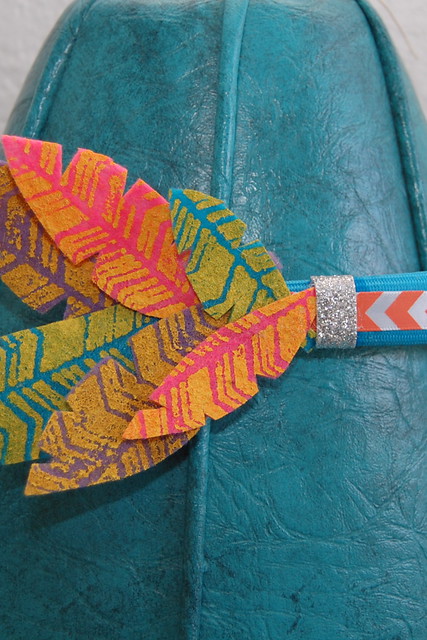
Chevrons, sparkle, arrows, felt, the color teal - what is not to love about this headband? Not to toot my own horn, but I'm pretty smitten on this doozie of an accessory. This is not the first time I have ventured into the world of feathered hair gear, you might recall a post I did for Craft Zine. Those feathers were made from digital scrapbooking elements. These feathers are made using a paper crafting mask for a spray as a stencil.

SUPPLIES

Tulip Soft Fabric Paint

Colored Felt

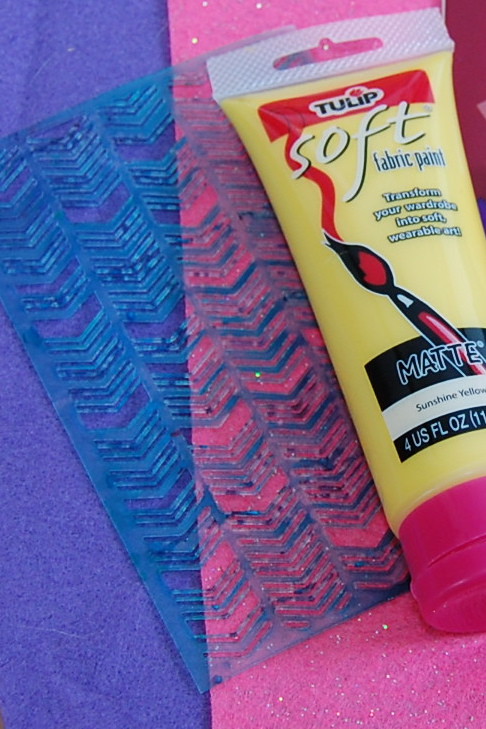
Mr. Huey Mask by Studio Calico in Chevron

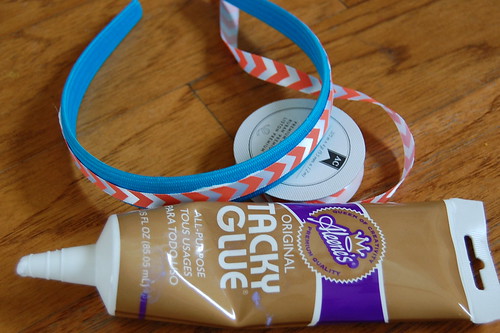
Aleene's Tacky Glue

Sponge Brush

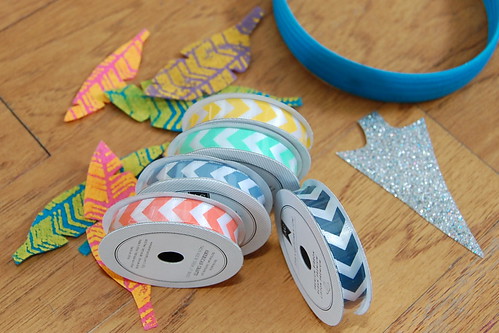
Dear Lizzy Ribbon by American Crafts

Scissors

Tulip Fashion Glitter Shimmer Transfer Sheets

Headband

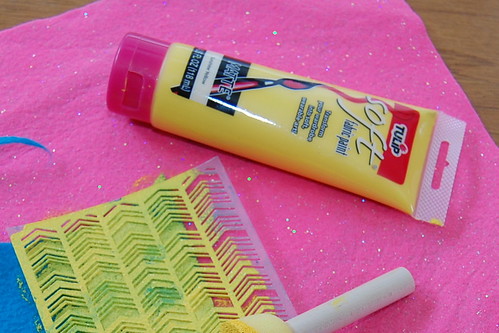
The first thing I did was stencil the chevron image onto my felt. I was inspired by a post on American Felt and Craft. Use a dry(ish) brush. A friend on Instagram commented that the pattern would work well for making felt feathers and the idea for a William Tell inspired headband was born.

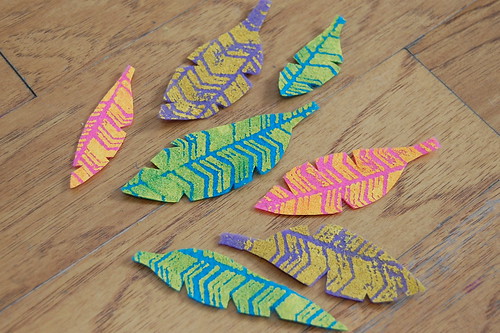
After my paint was dry I cut out 'feathers'. I went back with sharp small scissors and added details.

So many pretty ribbons to choose from, so little time. I went with more chevrons, because really can you ever have too many? I also cut out an arrowhead from my Shimmer Transfer Sheets.

Using Aleene's Tacky Glue I attached a strip of ribbon to my headband.

I decided to add a piece of felt as backing for my arrowhead. I attached both pieces using Aleene's Tacky Glue.

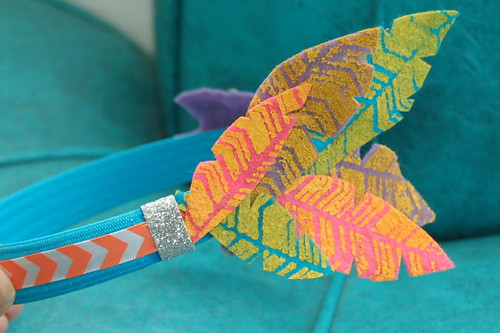
On the opposite side of the headband, again using Tacky Glue, I attached a cluster of felt feathers. I was thinking of William Tell. Ya know, the guy who shot an apple off someone's head with a bow and arrow.

I decided the feathers needed a little strip of silver sparkle.

You can wear your new arrow as a headband.

You can also go for the across your forehead look. Perhaps a good look for people a little younger than myself.

So whatcha think? I love using things like scrapbooking tools in new fun wearable ways.

Tuesday, September 25

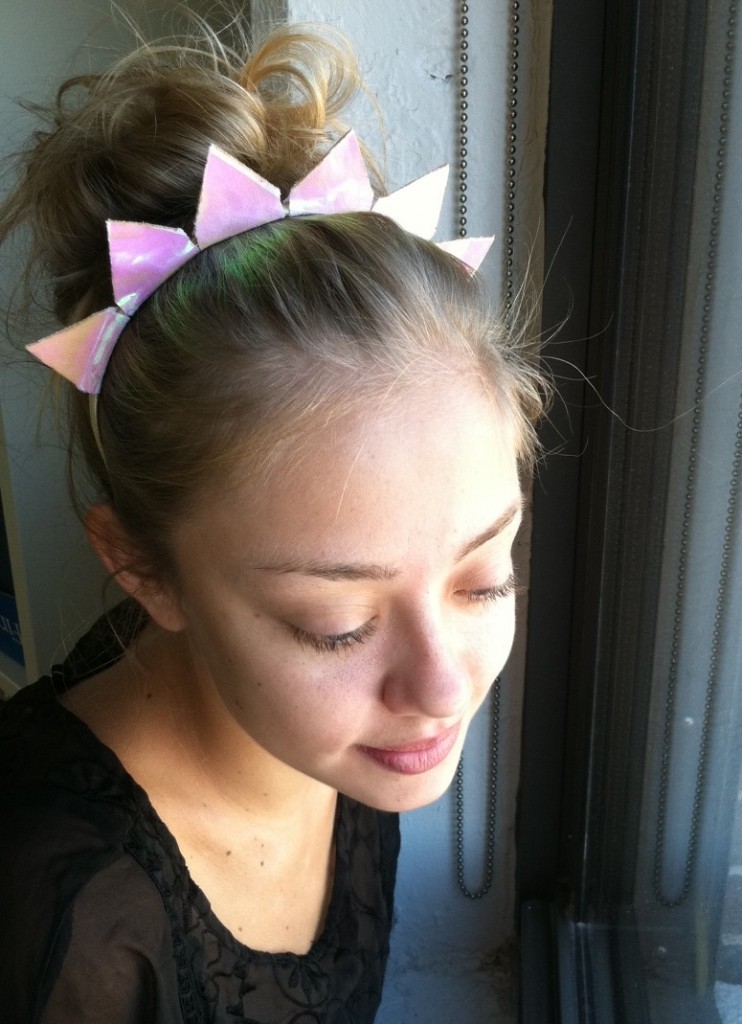
Happy, Shiny Pixie Headband!

I attended a photo shoot recently and was inspired to make this headband after I saw a similar one in the stylist's stash of goodies! While hers was glittery gold and mine is iridescent (I also doubt that hers was fashioned from an old T-shirt sleeve), it's the Lady-liberty-inspired shape that's so compelling to me.

I mean, it's so bright and sunshine-filled (and a little prehistoric?), and I have to admit, though I was begging for cool temperatures back in the heat waves of July (and couldn't be happier that nature has complied!), the shorter days are already threatening to change my mood. I'm already missing the sun! This happy, shiny, pixie headband brightens up the day wherever you are.

Materials:
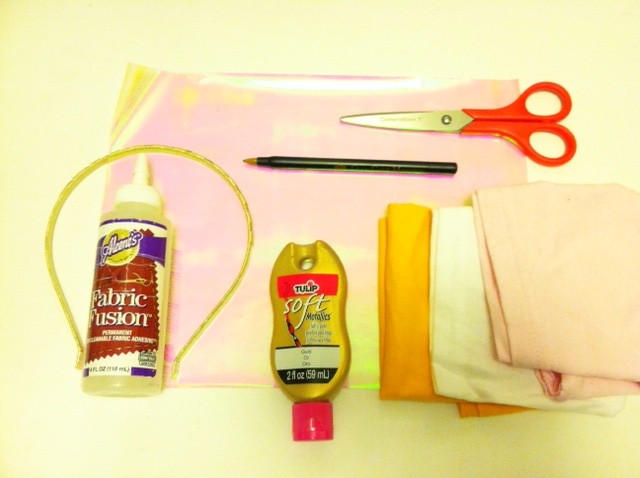
-T-shirt sleeve (or T-shirt scrap of equivalent size)
-scissors
-Tulip Fashion Glitter transfer sheets
-ballpoint pen
-ruler
-Aleene's Fabric Fusion
-warm iron and pressing cloth-blank headband (preferably metal rather than plastic)
-Tulip Soft Fabric Paint in gold metallic (optional)
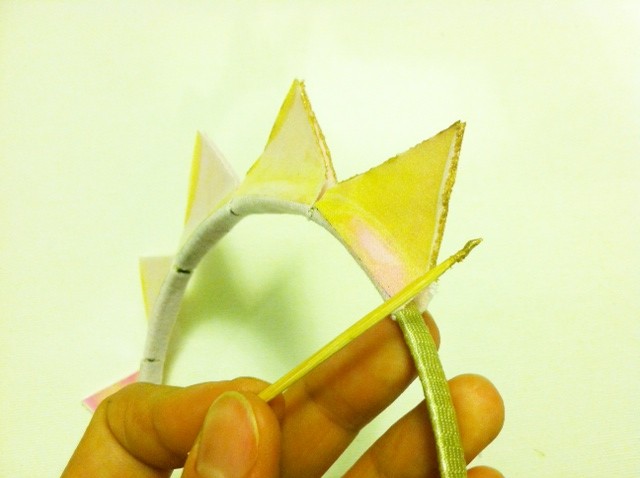
-toothpick (optional, to use as a paint applicator)


Make it:
1.
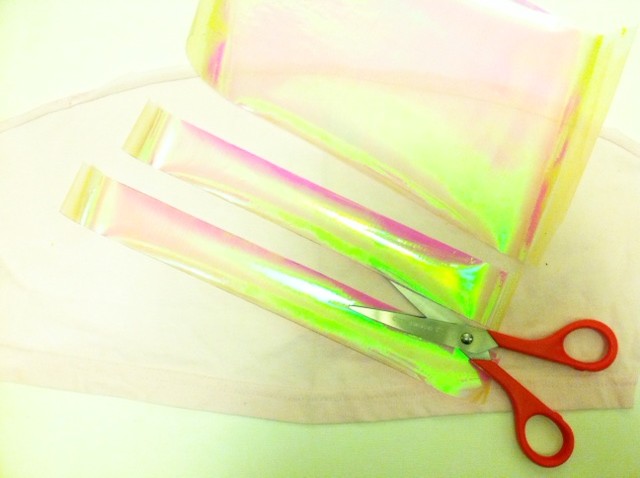
Cut out the underarm seam of the sleeve, and lay it flat, right side up. Measure, mark, and cut two 1 1/4"-wide to 1 1/2"-wide strips from the iron-on transfer sheets.

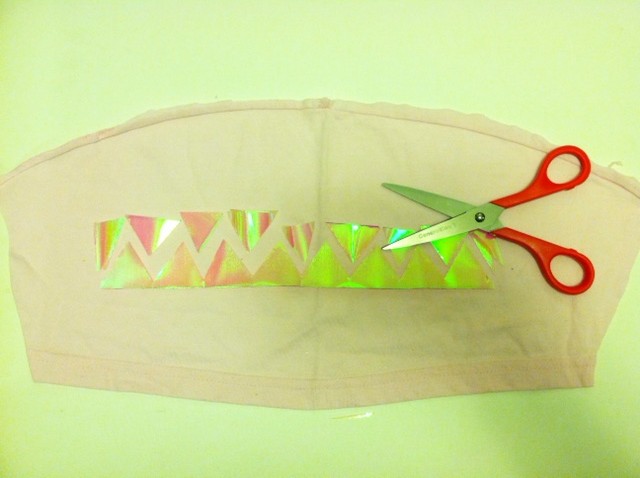
2. Sandwich the two strips together and cut out a series of triangles from one edge (through both layers), leaving a zigzag that runs the width of the strips.

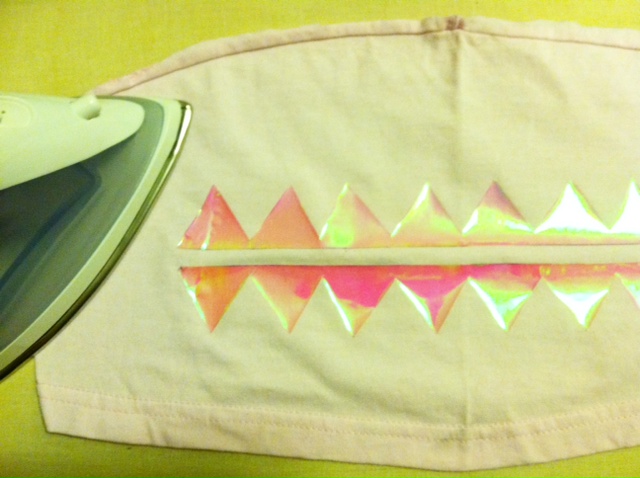
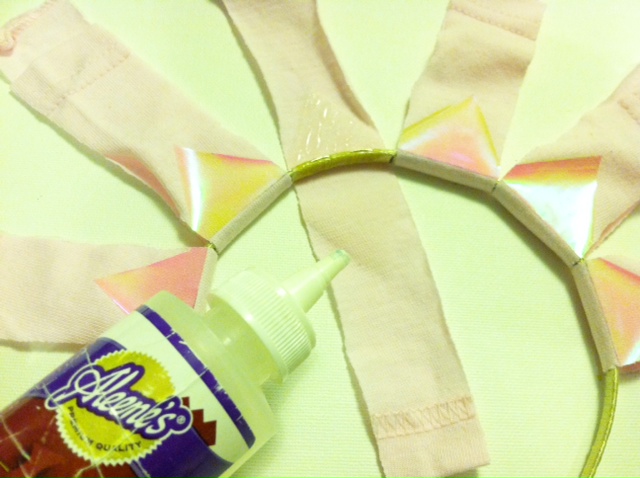
3. Separate the strips and align them along the straight edges, about 3/8" apart. Use a pressing cloth and iron the strips onto the fabric.

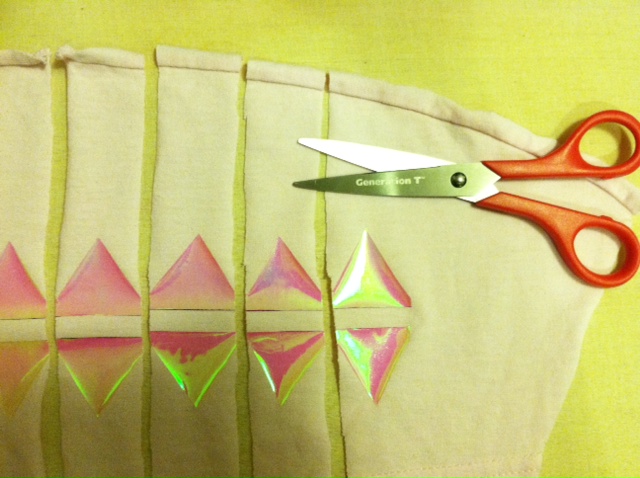
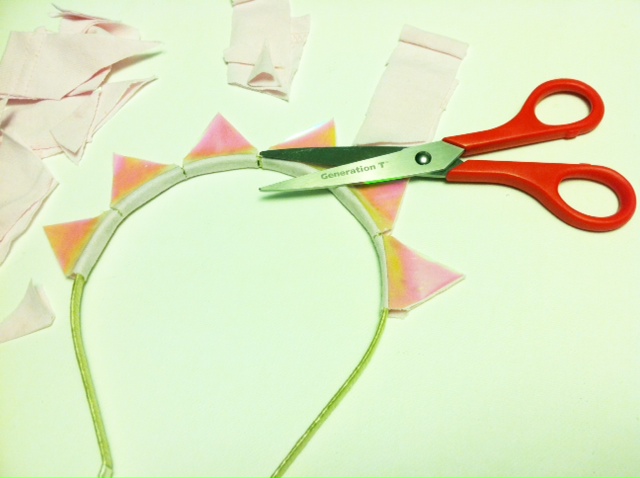
4. Make parallel cuts through the fabric, separating each pair of triangles from the row of zigzags.

5. Determine how many rays of sunshine you'd like (I debated between 5 and 6, and ultimately went with 6), and arrange them evenly around the arc of the headband. Working one ray at a time, spread fabric glue evenly along the inside of the headband, and wrap the flexible fabric piece around the headband, lining up the triangles. Apply glue evenly to the inside of the strip of fabric and press the triangles together (the triangles should seal beyond their edges).

6. Finish gluing each ray, and let them dry flat. (Note: If the fabric is pulling apart, use a clothespin or paperclip to pinch it while it dries.)

7. When the glue is completely dry, trim the fabric to the edges of the triangles.

8. As an optional finishing touch, apply the metallic paint carefully with a toothpick along the fabric edges of the rays. Let it dry.

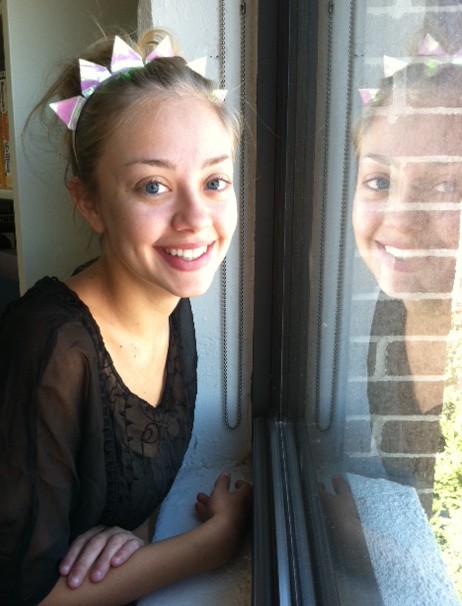
9. Try on the headband to spread a little sunshine both indoors and out!

Monday, September 24

Cool2Craft: Fabulous Felt!


Hey Aleene's fans! It's super cool! Cool2Craft TV September 24, 2012: Fabulous Felt

The Cool2Craft design team is crafting with felt! Tiffany Windsor is assembling a felted floral headband with Aleene's Super Thick Tacky Glue, EcoHeidi Borchers is transforming felt into a pretty floral iPad cover, plus much more! It’s easy to watch Cool2Craft right from your computer. Learn new techniques, chat with us while watching the show and ask questions about all your favorite Aleene's products!

Airing Monday September 24, 2012 9am Pacific/11 am Central/Noon Eastern. Go to Cool2Craft.com and you'll see the Livestream player and chat box where you can join right in. See you Monday!

Can't make the live show? No problem, you can drop by this week 24/7 at Cool2Craft.com to watch the show!

Visit us on Facebook! Get creative! Get inspired! Be cool!

Tuesday, April 10

No Sew Headbands

While I love to sew, I also like to throw in a project that doesn't require sewing because it reaches a lot of people who might not have a sewing machine.  These little headbands literally took 2 minutes to make and I used old t-shirts to make them.  You can make them for any age person.


Just gather some old t-shirts and get out your scissors.  I used Aleene's Peel and Stick Tape, but you could also use fabric fusion as well.  (I just like the no mess of dry adhesives.)

Now, I don't like to give an exact length of the headband because not only are head sizes different, but every knit fabric stretches differently as well.  Some are super stretchy and others are more tight.  This measurement was for a small baby.  You need one rectangle big enough to go around the head and another to wrap your seam.


Once your rectangle is the right size you'll cut a piece of the Peel and Stick Tape.  It's sticky on one side and has paper on the other.  Once it's in place you'll peel off the paper....


...and it'll look like this.  It's a thin layer of sticky adhesive.


Make a headband by attaching the ends.


Gather where the seam is and use the other rectangle to wrap around the headband.  Use the tape at the end to secure it.


That's it.  I was serious about the two minutes.  These are super comfortable for a baby, with no seams to even irritate them.  Plus, knits are so soft and they don't fray.  I plan on making a larger one for myself.


For the second headband I did everything the same, except I added an additional rectangle of fabric on the headband to look like a bow.


Then I decided to add some life to the knits by stamping them with fabric paint (same paint, but a new bottle).  I used the top of an eraser and pounced it all over the headband to create polka dots.


This way if it's a baby headband, there won't even be anything on the inside to irritate the skin.  The paint is all on the outside.


And there you have it.  You can use up some scraps or t-shirts AND have a few new headbands in a few minutes.


Thursday, November 11

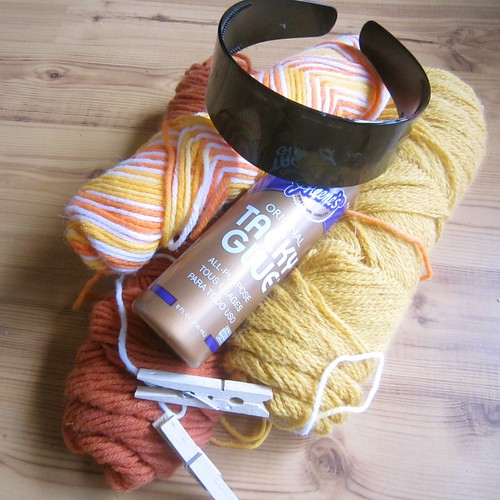
Cozy & Cute Yarn Headband


Yesterday I got inspired to make a yarn wreath. Looking at all the pictures of the adorable wreaths out there really got my creative juices flowing. However, in true form I looked at the wreaths and thought to myself: how can I make these wreaths wearable? I don't mean literally - I mean using the same techniques on something besides a wreath. Join me on my weekly I Love to Create journey as I bust out the yarn and Tacky Glue!


SUPPLIES
Yarn
Tacky Glue
Plastic Headband
Clothes Pins
Felt
Scissors
Acorns

Is there such a thing as sentimental yarn? This yarn belonged to my grandmother and I can remember her having it when I was a little girl knitting on an empty spool of thread will nails stuck in the top. I have always wanted to do something with the funky retro variegated yarn and a fall themed headband seemed perfect.


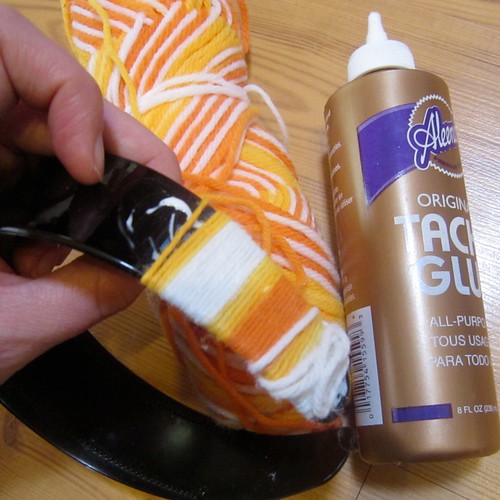
This project was super duper easy. I coated a section of my headband at a time with Tacky Glue and wrapped the yarn tightly around. The ends were a little tricky but that is where the clothes pins come in to hold all your handy work in place while the glue dries.


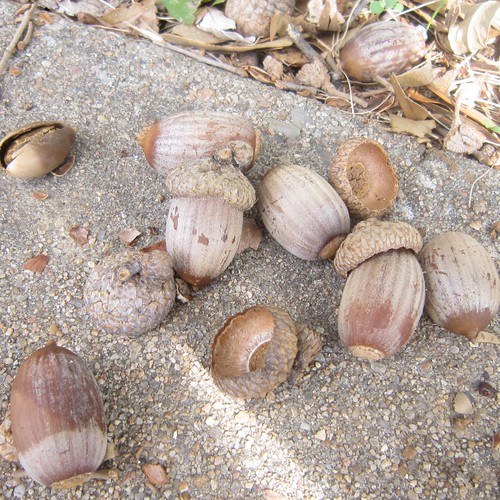
I wanted to incorporate some fall elements into my headband so I stole a few acorns from my neighbors yard. Shhhh don't tell. I used Tacky Glue to make sure their little toppers stayed on.


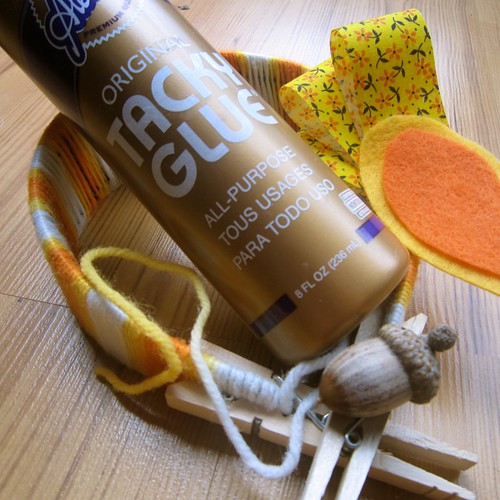
Nuts were not near enough pizazz for my special headband. I cut up felt, stapled ribbons and used Tacky Glue to make a cute little fall-ish arrangement.


Once the glue had dried on my arrangement all that was left to do was add it to my headband. I also trimmed up my yarn edges.


I know what I'm wearing to Thanksgiving dinner, at least in my hair.


Craft on!Click here for today's daily giveaway!

Thursday, March 4

How to Throw a Customized Birthday Part - Part 2


Birthdays come but once a year, so why not go all out? Last week I showed you how to make cupcake toppers, party favor magnets, banners and more. This week is part 2 of our series on how to throw a customized birthday party.


If you missed last week, let me catch you up. My daughter's name is Tallulah Fawn and I decided to throw her a customized, fawn themed 1st birthday party. Some people might say I went a little overkill, I say it's just right.
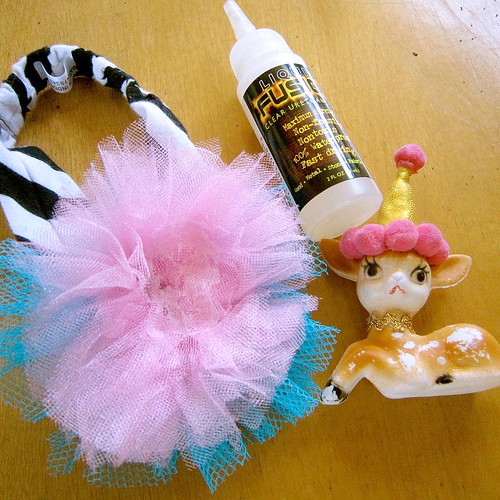


Literally from her head to her toes we kept up the fawn theme. Thank God for Grandma Perkins. She whipped Tallulah up the outfit of my dreams. Including a fawn in a party hat headband. The tulle was stitched to the headband and a wee little party hat for the crown was made. After that the tiny pom poms were glued to the gold lame party hat with Liquid Fusion Glue and then the fawn was glued to the headband.


Various deer vignettes were sprinkled throughout the house to keep things festive and in theme.


I decided one banner was better than two. Who knew you could buy paper already cut into the perfect size for making a chain banner in the scrapbook section of your local craft store? All that was left to do was to use my handy dandy Aleene's Glue Stick and some clothes pins to make the rainbow chain.
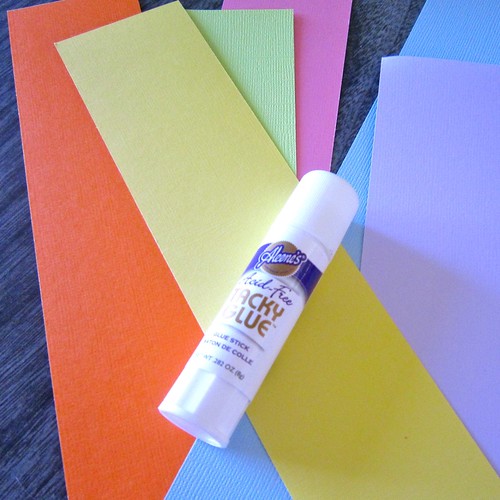


Ok so maybe it was more like 3 banners are better than 1.


The whole party production was a family affair. Not only did my sister Hope draw the amazing deer and gnome window decorations I showed you last week, she also was kind enough to loan us a piece of glittery taxidermy to welcome our party guests with.


I have taken a picture of Tallulah in the same chair every Sunday since she was born. Well not the first Sunday because I did not have the idea yet, but 51 out of 52 weeks is not too shabby. Anywhoo I hung all the pictures where the party guests could take a gander at Tallulah through her first year.
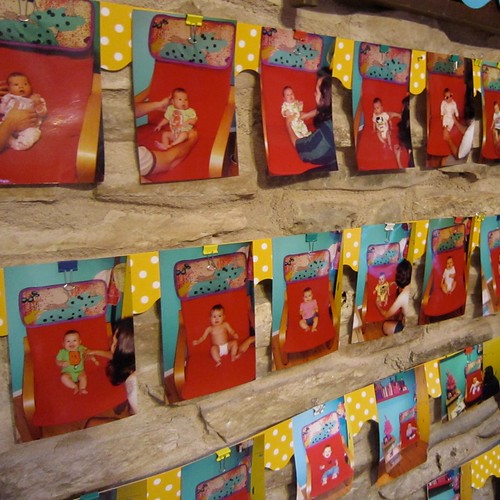


I'm now toying with the idea of doing a scrapbook with the pictures. I wish I had taken little notes of her weekly activities to add to this imaginary scrapbook.


Grandma Perkins to the rescue again. I had bitten off more fawnage than I could chew, so my mother stepped in to whip up a cupcake stand. Using cake rounds, scrapbooking paper, decorative scalloped edge trim and some Aleene's Glues she came up with something amazing. She even incorporated in Tallulah's birthday logo.


The cupcake stand matched the custom cupcake toppers I made perfectly!


Speaking of my mother and the birthday logo. Did you happen to notice in the pictures of Tallulah that she has a patch of her logo on her dress? Oh ya mom and her fancy embroidery machine made some serious magic happen.


Mmmm deer lollipop anyone? Not only did I use this adorable deer mold to make soap to put in all the goodie bags I also used it make fawn pops.
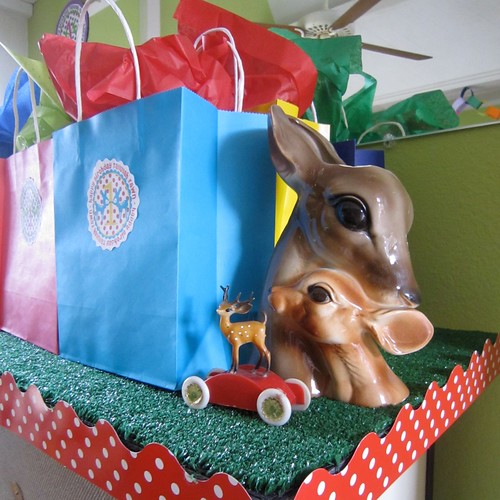


Plain goodie bags were spiced up with the birthday logo. All I had to do was print them, cut them and glue them to the bags with Aleene's Tacky Glue Stick. I filled them with Fun with Maisy: A Sticker Book (her best friend is a chicken named Tallulah), vintage Bambi (Little Golden Book)that my mother and I found at various Half Price Book Stores, fawn soap and bibs.


Did you really think they were plain bibs? I used a stencil from Stencil 101: Make Your Mark with 25 Reusable Stencils and Step-by-Step Instructions and Tulip Soft Fabric paint to put a fawn on each bib for all the wee attendees.


I had to keep one for the birthday girl, duh.
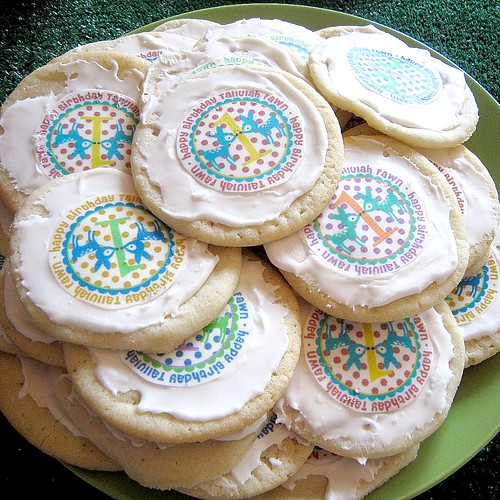


Between the cupcakes, fawn pops and cookie I should have put toothbrushes in the goodie bags. I sent the birthday logo to a local bakery who had a magical printer with edible ink that printed on sheets of fondant. All that was left for me to do (well actually my husband) was to bake and ice the cookies and stick the fondant logos on top.


So there you have it. I left no fawn stone unturned. Is it scary that I am already thinking of ideas for birthday number 2?
Clicky Web Analytics
Pin It button on image hover

Subscribe to our newsletter

* indicates required
I am interested in products and inspiration for...
Close