Showing posts with label kids craft. Show all posts

Saturday, September 12

Kids' Craft: DIY Homemade Flubber

DIY Homemade Flubber Recipe
Here's a fun and easy kids' craft that also doubles as a science experiment! Make homemade flubber (also known as gak) with just a few ingredients and this simple flubber recipe. Come find out how easy this craft is!

DIY Flubber Recipe

Wednesday, January 28

Glow-in-the-Dark Penguin Family Portrait

Glow in the Dark Penguin Family Portrait - a Dollar Store Craft
Need a cute project to make with the kiddos? This Penguin Family Portrait is the right combination of simple yet fun, using materials from the dollar store combined with Aleene's Clear Gel Tacky Glue and Puffy Paint Glow. And did I mention it glows in the dark?

Sunday, November 16

Turkey Glitter Globes

Every year at Thanksgiving while visiting family, in addition to family, food, and friends, there's always a little crafting with the kiddos! It's always so much fun to craft with my grandkids and do a little project together, so when I dreamed up these little glitter globes, I had them in mind.  Making these cute little glitter globes is a great interactive project to make together days ahead of Thanksgiving or on Thanksgiving day at the kids table. Let me show you how I made them!

Friday, May 30

Galaxy Glitter Goo


This week I'm at the iLoveToCreate Design Studio and Alexa asked me to whip up a batch of Galaxy Glitter Goo! I love it when I get assignments like this. This project is super fun to make for kids' sensory activities because it is super gooey and sparkly! And easy to clean up too!
Read on to see how to make it!

Thursday, March 15

Spring Break With the Kiddlets: Paper Plate Spin Art


This week I have been talking about different activities to do with your kids while they are home for spring break. So far we have made rainbow pasta, excavated dinosaurs from ice and opened a coffee shop. Today for I Love to Create I decided to bust out the paper plates and salad spinner I scored at the thrift store.


SUPPLIES
Salad Spinner
Crafty Chica Paints
Paper Plates
Tacky Glue Dots
Paper Plate Holder


Ever since I saw this idea on Pinterest I could hardly wait to find a salad spinner at the thrift store. I have been making spin art on everything I can fit in the basket: 7" records, small black tote bags and more. For Tallulah I thought I would go old school and use paper plates.


The first thing we did was squirt paint randomly onto paper plates. I used Crafty Chica paints and Tallulah stuck with her kiddlet paint.


Needless to say - Tallulah was in charge of all spinning. She loved watching the paint splat on the sides of the bowl. It was her happy accident that she got water on her plate before it entered the spinner. I think watering the paint down makes for a more interesting blurry effect.


The plates looked so cool when they were done I wanted to somehow display them. Hanging paper plates on my walls is not super high on my list. Coincidently on the same trip to the thrift store I scored some vintage fish shaped paper plate holders. I thought they would make great frames for our new art. I used Tacky Glue Dots to attach the plates to the holders.


Making spin art is way more fun than de-watering your clean lettuce!


I'm not saying I am going to leave these hanging on my walls forever, but at least until the end of spring break.

Visit us on Facebook!
Craft on!

Tuesday, December 27

VIDEO: Crafty Chica Empowerment Guardian Tutorial by Fahtz

This is Fahtz with glittered nails, a handmade bracelet and an art tiara - all of which she made at the Phoenix Craft Rave earlier this month!

This adorable little girl named Fahtz came out to our Phoenix Craft Rave last month and stayed for hours crafting! iLovetoCreate was one of our sponsors - which meant everyone got a FREE Crafty Chica Empowerment Guardian in their swag bag.
 Here is a video of Fahtz decorating her guardian - it is soooo cute, it will surely make you smile! And she certainly has the Crafty Chica spirit - from adding lots of glitter to cheetah print trim! Right on!

LINK

Visit us on Facebook!
Craft on!

Thursday, September 15

Black Clothespin Cat Party Favor


I tried really hard to wait until October to start the Halloween crafts, I really did. I figured if my Halloween decorations are already up, the pumpkins are all out at the grocery store and Target's Halloween department is brimming with orange and black goodness I could go ahead and start the creepy crafts. Today's craft is a double whammy, creepy and educational.


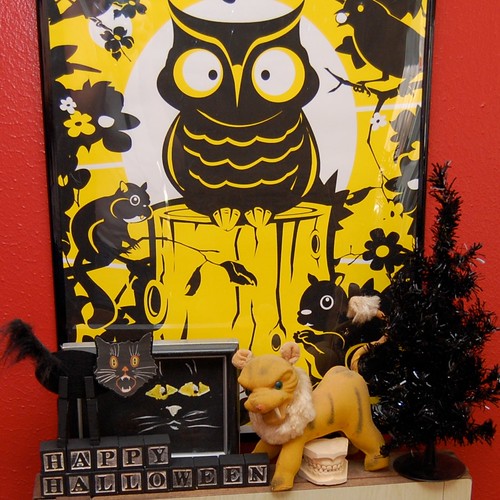
I am gearing up for my annual kids Halloween party. I already bought the goodie bags all I have to do is fill them. In years past I have made soap and crayons, this year I thought the kids were old enough for a little game. Clothespins are a great way for toddlers to practice their fine motor skills - all that squeezing to open and close the pin.
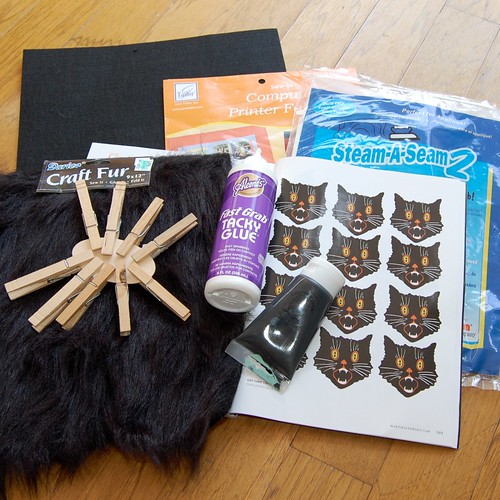
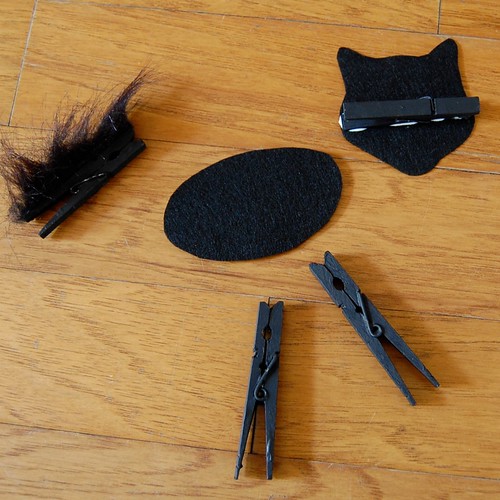

SUPLIES
Pre-stiffened Black Craft Felt
4 Wooden Clothespins
Black Crafty Chica Paint
Black Fun Fur
Martha Stewart Black Cat Face Template
Scissors
Aleene's Tacky Glue
June Tailor Fabric for Printers
Printer
Steam a Seam 2
Oval Shaped Wooden Disc


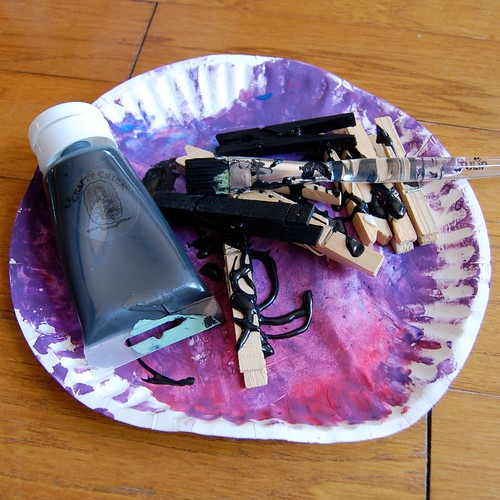
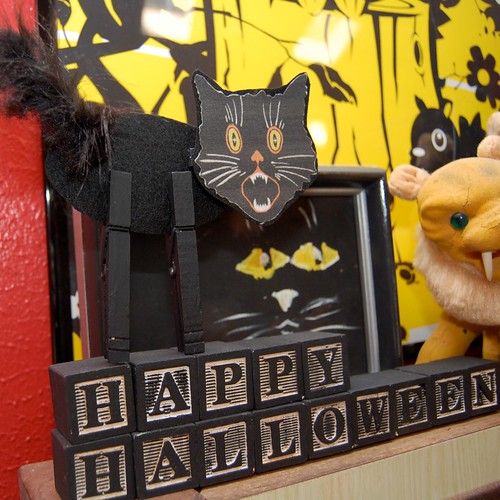
The first thing I did was paint all 4 of my clothespins black. Two pins will act as legs for the cat, one will be the tail and the other will hold the cats head.


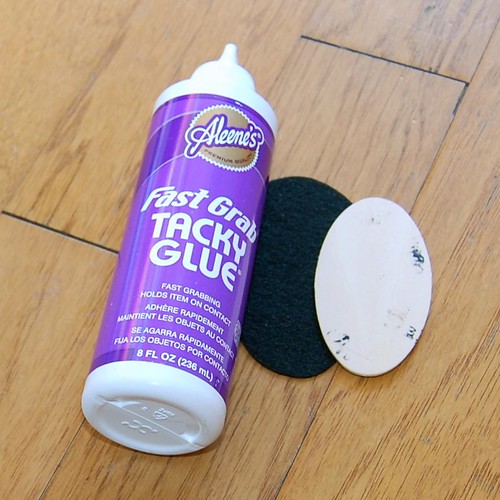
Next I cut my stiffened craft felt into the shape of a cat body. You could also use black foam or card stock for the body. The point is you want it stiff enough to hold it's shape. I found that I needed to glue a piece of wood to the back. I used Tacky Glue and a thin wooden oval from the craft department.


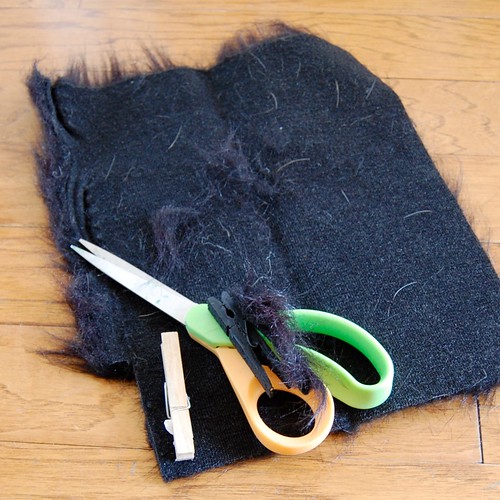
After your body is cut it is time to make the tail. Trace the shape of the clothespin onto the un-furry side of the fun fur. Next cut out out the small rectangle trying not to get fun fur all over the place. Using tacky glue attach the strip of fur to one of the clothespins.


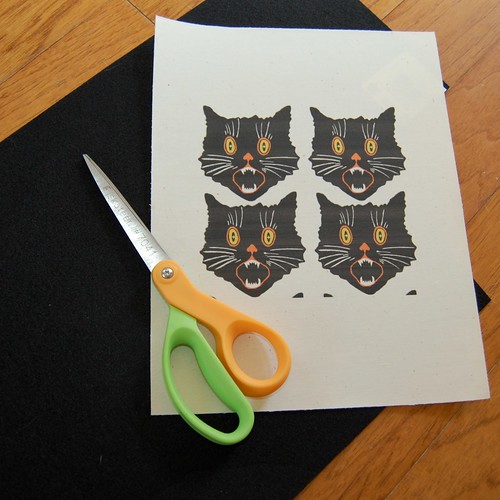
For the head I used a template from Martha Stewart's most recent Halloween magazine. Print out your head onto June Tailor fabric for printers. I enlarged the heads a bit. Peel the protective top coat from one side of your Steam a Seam and attach to the back of your cat head. Next cut a piece of stiffened felt about the size of the head. Peel the second backing from your steam-a-seam and attach to your felt. Cut out the shape of the cat head. Use a hot dry iron to fuse everything together.


Once your head is ready using Tacky Glue attach it to one of the clothespins.


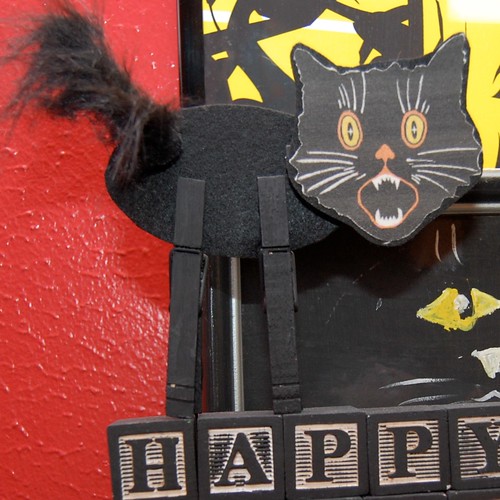
All that is left to do is assemble all the pieces or help your toddler do it. Now I just have to make like 30 more of these and I'll be ready!


*I would also like to mention if you kids are under 3 or still prone to putting things in their mouth this is not a great project. It does not take much for the metal clothespin center to pop out and become a choking hazard*

Visit us on Facebook!
Craft on! Click here for today's daily giveaway!

Wednesday, August 24

Back To School Craft - Marker Monster!

Marker Monster
Back To School Craft

The kids will love it if you make this adorable roll-up for their markers!
Go to the iLoveToCreate website to get all the details.
Have FUN with it!


Visit us on Facebook!
Craft on! Click here for today's daily giveaway!
Clicky Web Analytics
Pin It button on image hover

Subscribe to our newsletter

* indicates required
I am interested in products and inspiration for...
Close