Showing posts with label recycled jewelry. Show all posts

Tuesday, March 27

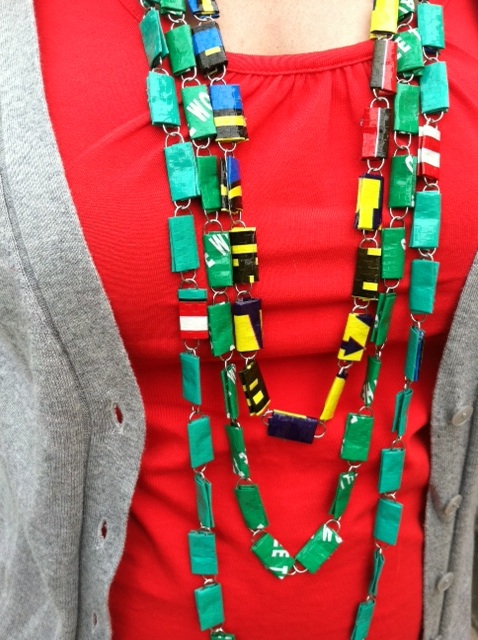
Upcycled Paperclip Chain Necklace!

Here's to a colorful and elegant twist on that old office cube classic: the paperclip chain. I was inspired to make it after spying a similar necklace that my friend Rebecca was wearing in the office a couple of weeks ago.

When she told me that she scored the amazingly simple accessory while on vacation in Cambodia earlier this year, that's when I experienced the creative flash of an I-could-so-make-that moment: Seeing as I won't be able to afford travel to Cambodia anytime soon (I wish!), I decided to set out on a far more affordable trip...to the local 99-cent store!
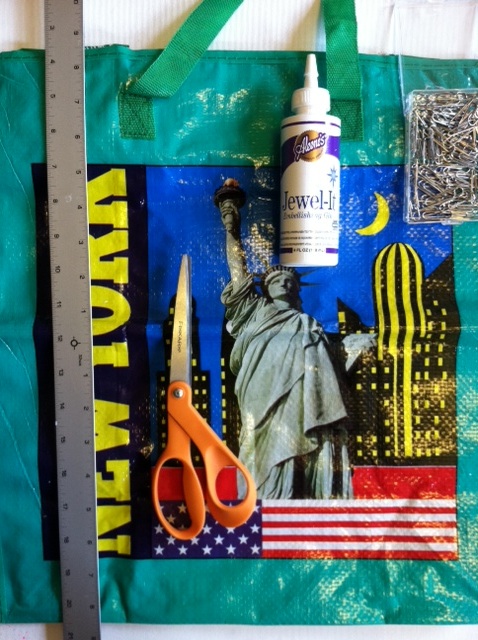

Materials:
-box of paperclips
-all-purpose scissors
-ruler
-woven plastic material (laundry bag from the dollar store, an Ikea shopping bag, all-purpose tarpaulin from the hardware store)*
-Aleene's Jewel-It Embellishing Glue


Make it:
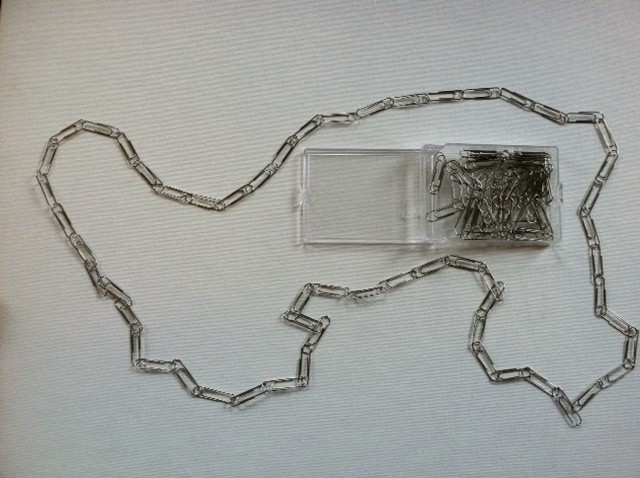
1. Link 38 to 48 paperclips in a chain. Hang the chain around your neck, see if you like the length, and add or subtract paperclips to your liking.
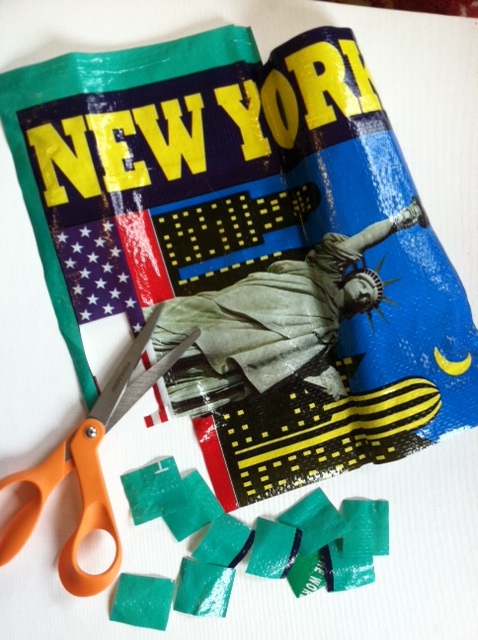
2. Measure and cut one 1 1/2" by 1 1/4" rectangle from the woven bag. Use that rectangle as a template to cut more rectangles. Cut as many rectangles as there are paperclips in your chain.
3. Select one rectangular piece. Fold the long sides in 1/4" and crease. Then fold the piece in half lengthwise, crease it, and unfold. Fold the two short ends into the center line and crease again.
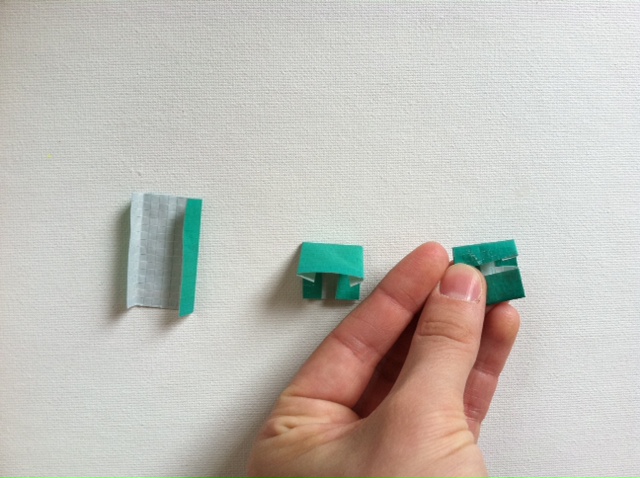
4. Refold the center crease, pinching the piece around the center of a paperclip in the chain to create a sort of "bead."
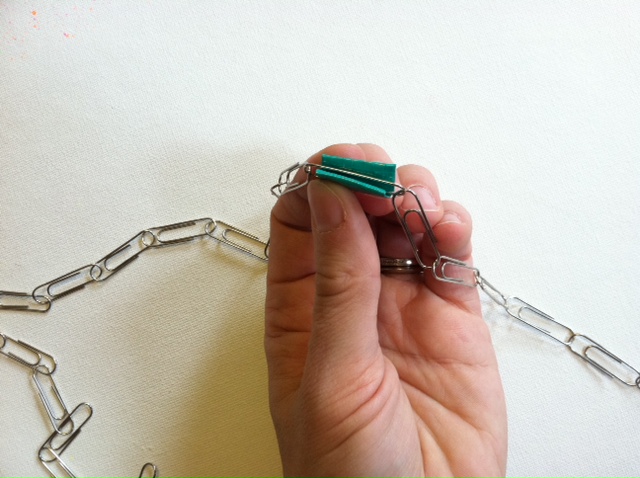
5. Squeeze the glue generously along the open edge (the motion is sort of like mustard on a hotdog). Pin it in place with a spare paperclip to dry.
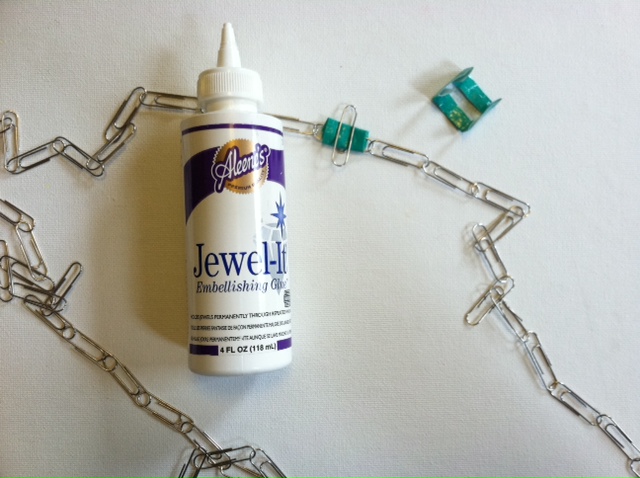
6. Repeat with the remaining rectangular pieces until every link on the paper chain is covered by a bead. Let the beads dry completely before removing the spare paperclips.
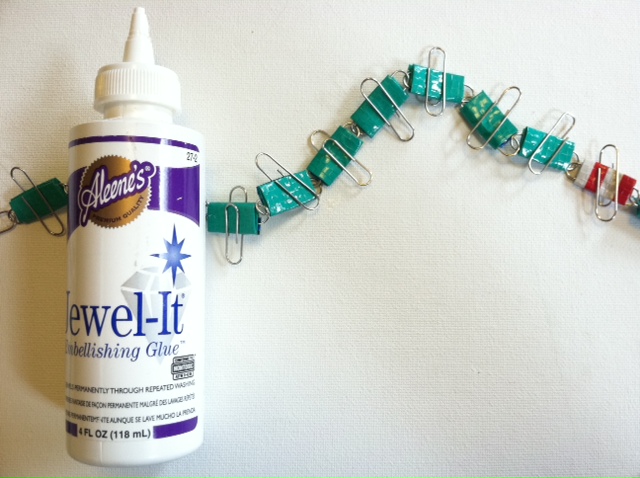
7. Remove the paperclips, touch up any finicky beads with an extra dab of glue, and repeat the entire process as many times as desired to create multiple colorful chains.
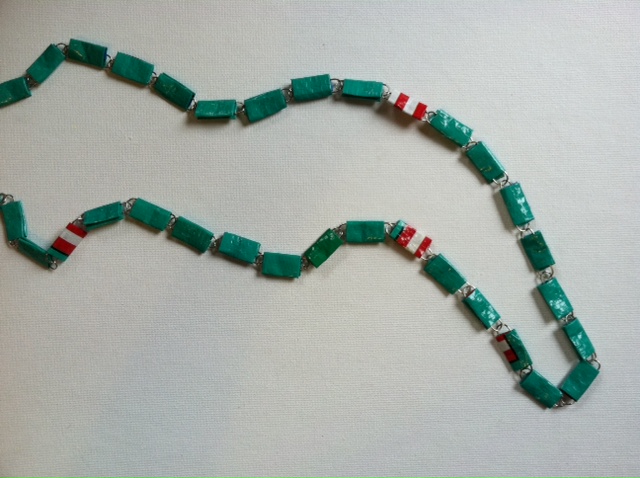
8. Drape them around your neck, and off you go!
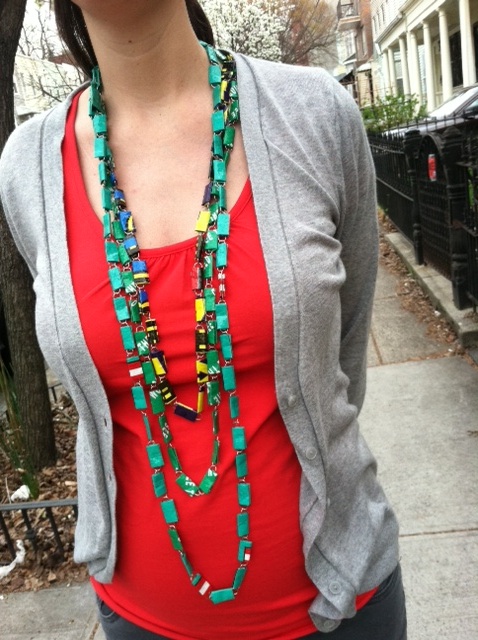
Happy National Craft Month!! 

*Incidentally, these necklaces are made from the same sort of bags that Rami made his chic challenge-winning Project Runway All-Stars dollar store dress from, below! What a cool material to play with.


All photos by Megan Nicolay except for the Project Runway screenshot, via SheKnows.com.


Visit us on Facebook!
Craft on!

Friday, March 5

Jingle Jangle Jewelry

All this month in honor of March being National Craft Month, we will be bringing you a cool craft idea on this blog to inspire you! This week, all the projects are Awesome Accessories! Enjoy!


Recycle and you’ve got something new! Take apart an old necklace or other jewelry to create this unique ensemble. The Aleene’s® Jewelry & Metal Glue is perfect for gluing metal to metal and metal to leather!

Supplies
Aleene's® Jewelry & Metal Glue™
Freezer paper
Assorted chains
Needle nose pliers
Necklace closure
Leather sheet scrap, brown
Metal pieces: circles, leaves, and medallion - Cheryl took apart a purchased necklace
Tape
Wire cutters
Leather lacing
Beads, assorted sizes – colors to coordinate
Awl
Cardboard
3/8” antique gold jump rings
Wire, 24-gauge gold
Earring wires
Large semi-precious stone
Hammer
Soldering wire
Scissors
Seed beads, desired color
Round nose pliers

Necklace
1. Take necklace apart saving all jump rings and chains. Lay large leaf on leather sheet then cut around shape, leaving a scant ¼” border. Lay medium metal circle on leather and cut exact size.
2. Use wire cutters to cut a 4” length from soldering wire. Use needle nose pliers to form swirl to fit leaf, trimming ends as needed.
3. Lay swirl on hard surface such as concrete, marble etc. Use hammer to flatten.
4. Cover a small piece of cardboard with freezer paper, shiny side up. Tape edges to back.
5. Lay lace medallion on covered surface. Carefully apply a thin bead of Jewelry & Metal Glue to back of large circle then press onto center of medallion. The freezer paper will allow medallion to be removed when dry.
6. Squeeze a thin bead of glue around inside of circle then press in small beads. Glue stone in center. Apply glue to tips of metal leaves then press in place layering as shown. Let dry.
7. Glue small circle to leather round. Let thoroughly dry. Use awl to create holes along opposite sides on inside of ring. Insert jumps rings and close. Squeeze glue into center of ring then pour in seed beads. Lightly press with finger. Let dry. Any beads not adhered can be shaken out.
8. Apply a thin bead of glue to sections on back of larger leaf. Carefully press onto leather. Glue flattened swirl in place. Glue small beads in swirl. Let dry.
9. Use wire to create wrapped loops on some beads. Insert wire, form loop with round nose pliers then wrap excess around a few times close to bead. Use wire cutters to trim excess. Use awl to form a small hole at end of large leaf. Insert wire of bead through hole of bead then form wrapped loop.
10. Assemble necklace by adding sections of chain connecting with jump rings as needed. Thread lacing as shown and add closure.

Earrings
1. Glue filigree leaf to leather. Let dry. Trim edges. Create solder wire swirl and flatten. Glue in place.
2. Glue circle to other leaf, glue bead in place then fill in remainder with seed beads. Let dry.
3. Add a bead to each with a wrapped loop. Make a wrapped loop at other end then insert earring wires.
Clicky Web Analytics
Pin It button on image hover

Subscribe to our newsletter

* indicates required
I am interested in products and inspiration for...
Close