Showing posts with label Aleenes fabric fusion. Show all posts

Friday, April 17

Appliqué Tote


What do you do when you are an appliqué hoarder? You shut it down, that's what you do! But, what happens when you love all of those appliqués? That was my dilemma with my fabric stash and appliqués. I decided instead of tossing them I would glue them all on one tote bag! It created one bright bold statement that really represents my personality! I'm really happy I tried this idea! You just have to use Aleene's fabric fusion and put on some fun music and enjoy the therapeutic process of choosing designs and gluing them down.

See below to see how I did it!

Saturday, August 23

No Sew Lace Trim Shorts


Denim is always huge for summer and it pairs well with most everything. So why not take those distressed shorts and add a touch of lace to create a new look for an old favorite. Using Aleene’s Quick Dry Fabric Fusion you can add a lace trim in minutes with a no sew technique that’s as strong as thread. Click through to see how easy it is!

Tuesday, September 25

Happy, Shiny Pixie Headband!

I attended a photo shoot recently and was inspired to make this headband after I saw a similar one in the stylist's stash of goodies! While hers was glittery gold and mine is iridescent (I also doubt that hers was fashioned from an old T-shirt sleeve), it's the Lady-liberty-inspired shape that's so compelling to me.

I mean, it's so bright and sunshine-filled (and a little prehistoric?), and I have to admit, though I was begging for cool temperatures back in the heat waves of July (and couldn't be happier that nature has complied!), the shorter days are already threatening to change my mood. I'm already missing the sun! This happy, shiny, pixie headband brightens up the day wherever you are.

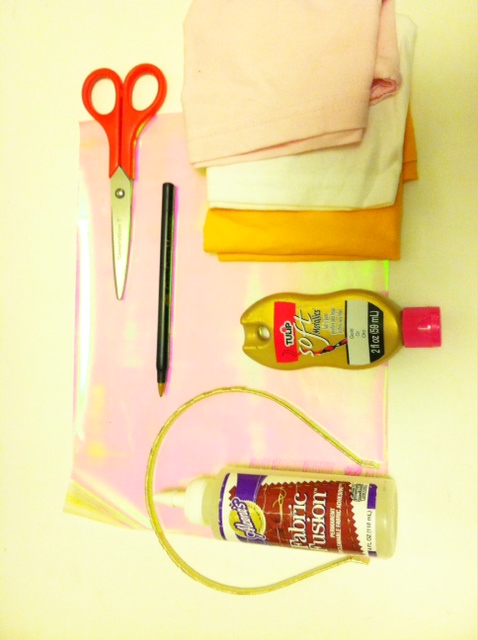
Materials:
-T-shirt sleeve (or T-shirt scrap of equivalent size)
-scissors
-Tulip Fashion Glitter transfer sheets
-ballpoint pen
-ruler
-Aleene's Fabric Fusion
-warm iron and pressing cloth-blank headband (preferably metal rather than plastic)
-Tulip Soft Fabric Paint in gold metallic (optional)
-toothpick (optional, to use as a paint applicator)


Make it:
1.
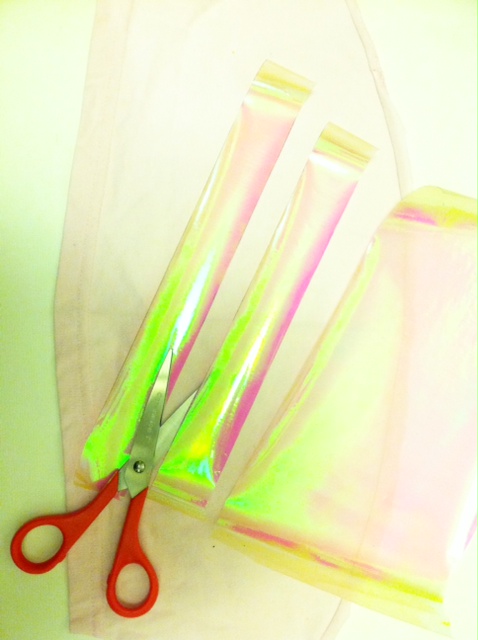
Cut out the underarm seam of the sleeve, and lay it flat, right side up. Measure, mark, and cut two 1 1/4"-wide to 1 1/2"-wide strips from the iron-on transfer sheets.

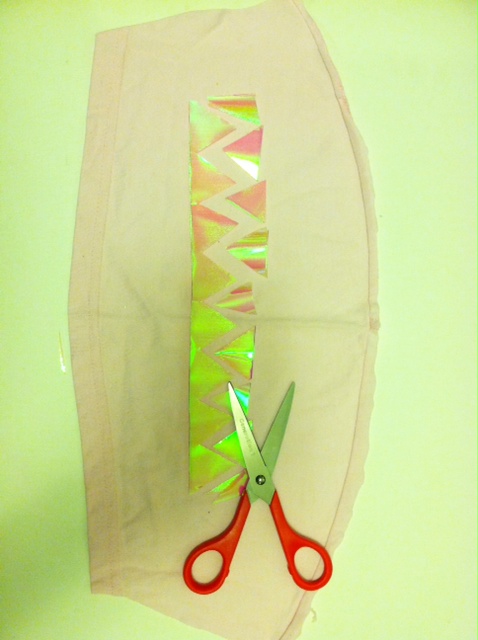
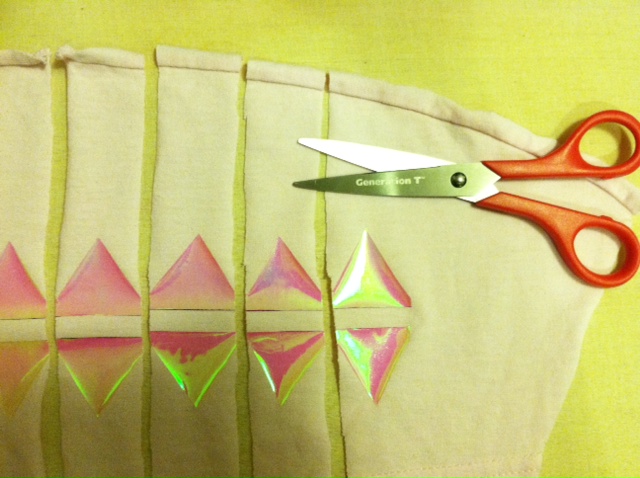
2. Sandwich the two strips together and cut out a series of triangles from one edge (through both layers), leaving a zigzag that runs the width of the strips.

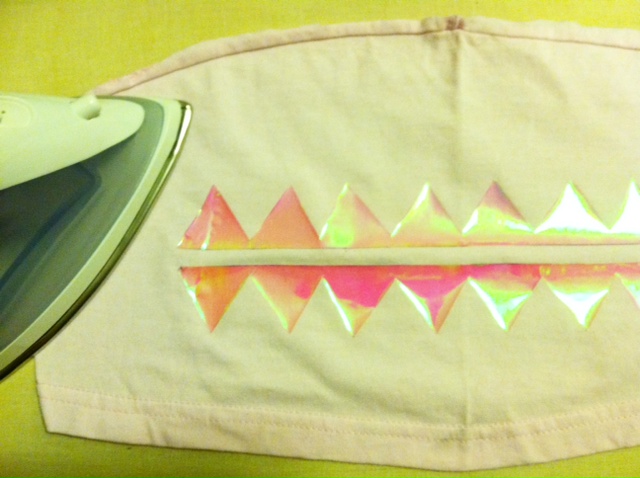
3. Separate the strips and align them along the straight edges, about 3/8" apart. Use a pressing cloth and iron the strips onto the fabric.

4. Make parallel cuts through the fabric, separating each pair of triangles from the row of zigzags.

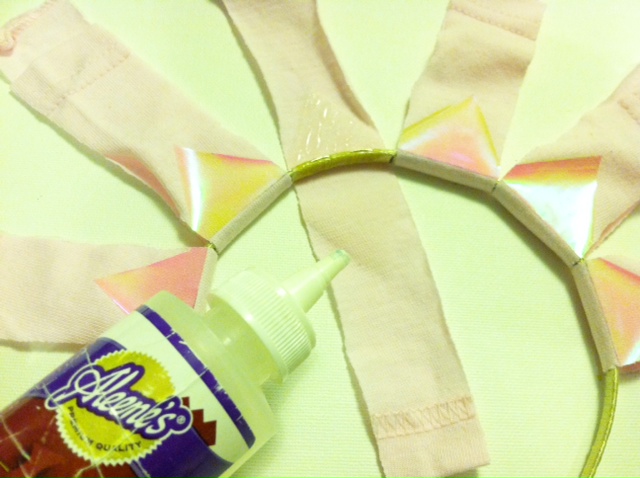
5. Determine how many rays of sunshine you'd like (I debated between 5 and 6, and ultimately went with 6), and arrange them evenly around the arc of the headband. Working one ray at a time, spread fabric glue evenly along the inside of the headband, and wrap the flexible fabric piece around the headband, lining up the triangles. Apply glue evenly to the inside of the strip of fabric and press the triangles together (the triangles should seal beyond their edges).

6. Finish gluing each ray, and let them dry flat. (Note: If the fabric is pulling apart, use a clothespin or paperclip to pinch it while it dries.)

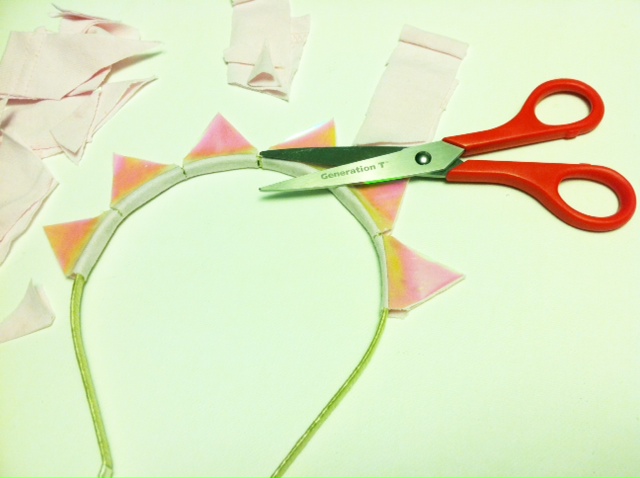
7. When the glue is completely dry, trim the fabric to the edges of the triangles.

8. As an optional finishing touch, apply the metallic paint carefully with a toothpick along the fabric edges of the rays. Let it dry.

9. Try on the headband to spread a little sunshine both indoors and out!

Thursday, July 14

Digi Scrap Headband


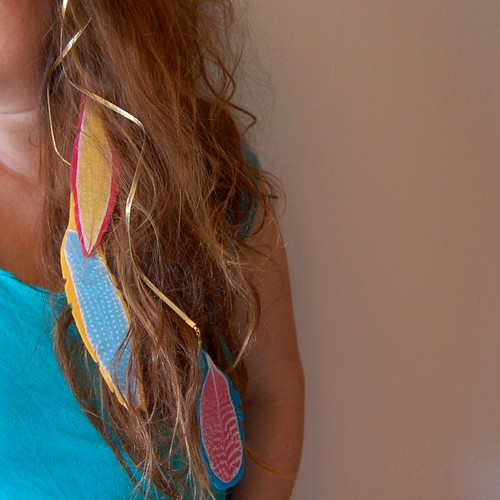
I have recently started dabbling in the world of digital scrapbooking. It was only a matter of time before I made the leap into a hybrid project - AKA printing up digital scrapbooking images and making something tangible with them. This week I did it twice. I'm gonna show you how to make a headband today for I Love to Create and if you jump over to Craft Zine I'll show you how to make a feather hair clip.


SUPPLIES
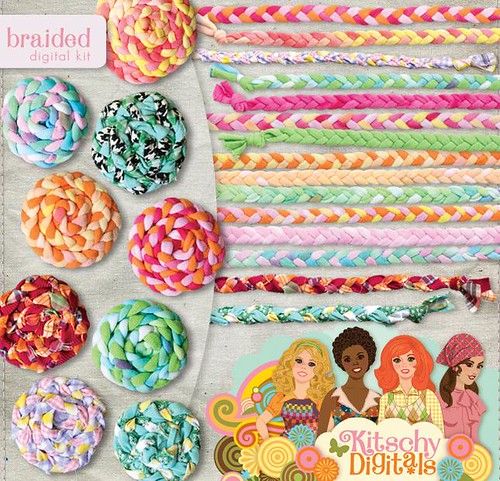
Braided Digital Kit by Kitschy Digitals
Fabric Fusion Glue
Printer Fabric
Felt
Scissors
Scalloped Edge
Stuffing
Piece of Cardboard
Embroidery Thread
Embroidery Needle
Headband
Clothes Pins
Cotton Fabric


The first thing you need to do is decide on which digi scrap item you want to work with. I have a bit of a craft crush on Danielle Thompson and her line of digi scrap goodies called Kitschy Digitals so I went with her Braided Digital Kit.


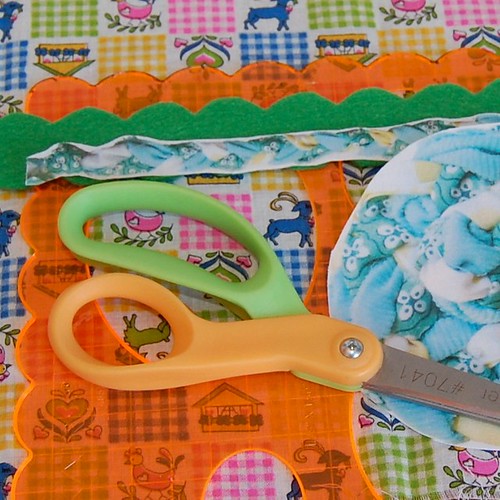
Using fabric that goes through your printer by June Tailor I printed up a braided rosette and braided strip for my headband. Next I cut my images out. Using a scalloped edge I also cut out a piece of green felt.


The next thing I needed to do was to stuff my braided rosette. I cut out a circle of cotton fabric that was the same size as the digi scrap rosette. I also cut out a circle of cardboard slightly smaller than the circles of fabric. Putting like sides of fabric to like sides I started stitching around the edges of the circle with embroidery thread. When the circle was about half way sewn up I inserted my cardboard circle to act as a flat base for my rosette. I continued stitching up the hole in my circle a little more and when there was only a small hole left I filled the little puff with stuffing. Once I had my desired amount of puff I finished stitching everything shut.


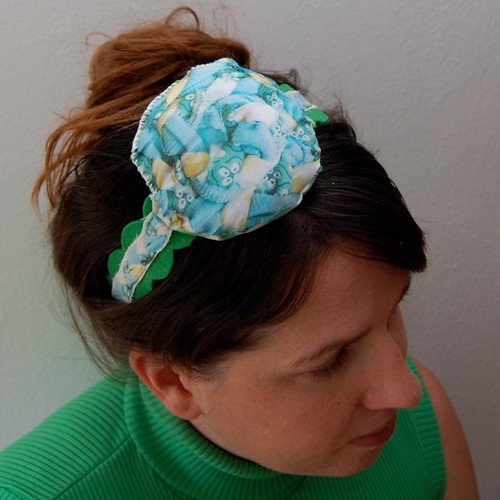
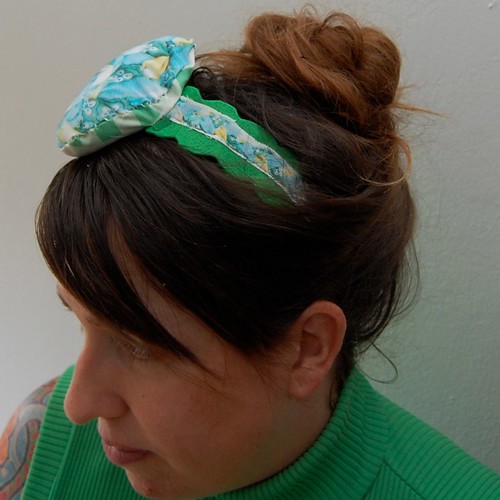
Now you should have all of your pieces. The first thing I did was glue my green felt to the headband using Fabric Fusion Glue. Once that was in place I glued my digi scrap braid on top of the felt. All that was left to do was use more Fabric Fusion Glue and attach my braided rosette.


I held everything in place with clothes pins while the glue dried.


My new headband is ready to roll. I love that I can use all these fun graphics in my digital scrapbooking designs and in my wardrobe. More bang for your buck right!

Have you done any fun hybrid projects with digital scrapbooking goodies? I'd love to hear about it and get inspired.


Visit us on Facebook!
Craft on! Click here for today's daily giveaway!

Wednesday, June 8

ILoveToCreate Teen Crafts: Tie-Dye Tulip socks


Tie-Dye Tulip socks

ILoveToCreate Teen Crafts
Tie Dye Tulip Socks
Avalon Potter
"Teen crafted, mom approved."

I have a confession to make; I have a knee high sock obsession. They fill my drawers, they are scattered across my room, and they are even on my feet right now! I had been trying out an idea with tie dye and I had so much left over I scoured my room for something else to dye. After I had dyed the socks and another white shirt I put it the wash and anxiously awaited the result. When I saw the original shirt I realized it was not going to work out so I grabbed my socks and thought up a new design!

Materials:
One Step Tie-Dye Classic
Scissors
White knee high socks
Aleenes fabric fusion
Needle
Thread
White shirt (Use an old white shirt since you will be cutting it)
Ruler

Tools:
Washer
Dryer


Instructions:

1. Follow the instructions in the kit for the folding technique on your pair of socks.

2. Next for your shirt follow the swirl technique instructions in the kit.

3. Let the shirt and socks sit for 5-6 hours as per instructions. Take the rubber bands off and wash and dry them.

4. Take your shirt and cut off the seam on the bottom (this will be the flower). It should be about 12 inches long and ¾ inch wide. You will need two pieces.


5. Tie a knot at the end of the strip and begin twisting and rolling the strip around the knot, dabbing glue as you roll.


6. Continue rolling, twisting and gluing until you reach the end then attach the end to the back of the flower.


7. Sew the back of the flower to the top of the sock.

8. Enjoy wearing your amazing tie dye socks!


Clicky Web Analytics
Pin It button on image hover

Subscribe to our newsletter

* indicates required
I am interested in products and inspiration for...
Close