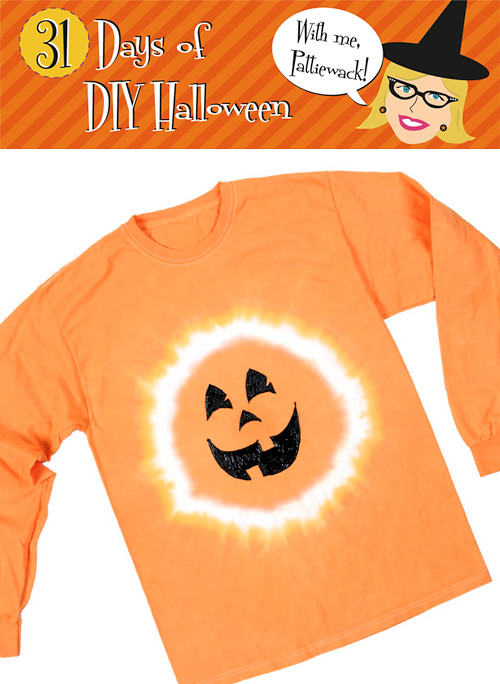
Don’t you love this Halloweenie pumpkin shirt? I do too! Believe me I could say otherwise because we made 135 of these fun shirts for a craft store chain to put in all their stores. Allee and I had buckets of dye, piles of shirts, and tables lined up with tie-dyed shirts ready for their faces. Cheryl Ball painted every single one with 3-D paint for their happy faces. The iLoveToCreate team really rocked it!
Materials:
– Tulip® One-Step Fashion Dye™ in Orange
– Tulip® Fashion Form™
– Tulip® 3D Fashion Paint™ in 65038 Black
– Tulip® Surface Cover™
– Plastic wrap
– Paper towels
– Scissors
– Chalk pencil or chalk sharpened to a point
– T-shirt – white – 100% cotton
Instructions:
1. Wash T-shirt to remove sizing; do not use fabric softener.
2. Cover work surface with Surface Cover and lay damp T-shirt flat on prepared surface. Starting just above center of shirt, pinch fabric and pull up into a tube shape. Tightly wrap a rubber band from dye box around fabric, about 4” below top point. Wrap another rubber band 2” below the first rubber band.
3. Wearing gloves from dye box, add water to Orange dye bottle to line indicated on bottle. Replace cap tightly and shake bottle until dye is completely mixed.
4. Squeeze Orange dye onto the first part of tube shape, completely covering with dye. Skip the 2” section between rubber bands then squeeze dye onto remainder of shirt. Cover shirt with plastic wrap and let set 6 to 8 hours or longer for most intense color.
5. Carefully cut rubber bands off of shirt and rinse shirt in warm water until excess dye is removed and water runs clear. Wash separately in a large load of water with hottest water suitable for fabric and a small amount of laundry soap. Dry separately.
6. Lay shirt on work surface and place Fashion Form between layers of shirt. Print out Jack-o-lantern face pattern and trace over pattern lines with chalk. Place pattern chalk side down on shirt and rub hand over the back of paper to transfer design in chalk onto shirt.
7. Start flow of Black Slick 3D Fashion Paint on paper towel to get a feel for bottle, using an even pressure on bottle for a smooth line. Outline then fill in each facial feature with Black Slick. Let dry flat.
Craft on! Click here for today's daily giveaway!


No comments:
Post a Comment