Here's a nice little idea to make and give away for Mother's Day, or just make two and keep one for yourself! My dresser is where I go to every morning to put on my jewelry and get ready for the day, so I jazzed it up a little bit with this vanity frame that I can place my favorite jewelry on, a little twig of babies breath, some burlap roses, and little notecards and sentimental memorabilia. Oh, and I'm always looking for scissors to cut out tags, so I added a place so I could poke them, too.
Showing posts with label aleene's liquid fusion. Show all posts
Wednesday, April 29
Tuesday, September 16
Wine Bottle Pendant Lamps
It seems that lately I've been hearing an awful lot about wine bottles. Being someone who doesn't partake myself I decided that I'd work with Perrier bottles. But no one told me that there was a distinct learning curve when cutting glass bottles. A quick trip to the hobby store and a few attempts these beautiful pendant lamps came together!
Tuesday, August 26
DIY Fabric Lined Drawers
Hey everyone! Tanner Bell here, I'm super excited to share with you this easy DIY featuring Liquid Fusion Spray adhesive. You're going to love how simple this is to make and will have to use this tutorial to customize all your drawers.
Friday, August 15
Wood Surround Glass Block Nightlight Featuring Liquid Fusion!
When you have an adult parent and child with ADD walking through the home improvement store together you're bound to get some crazy ideas. For instance, we came to the store to purchase something totally different for a totally different project but left with a couple of glass blocks and furniture grade oak boards. Why? Because I said to my dad, "wouldn't those things make a killer nightlight?"
As it turns out, it was also a great project to test out one of iLoveToCreate's newest products... Liquid Fusion!
Tuesday, August 5
DIY Vintage Yardstick Homework Desk
Looking for a unique solution for a little boy needing a homework desk to fit in a little space it was decided that DIY was the best solution. To make it all the more unique and interesting, we used vintage yardsticks as the desktop!
Thursday, June 12
Esther Williams Inspired Swim Cap DIY
My daughter is on swim team and though she adores it, her blonde hair is does not. She needed a swim cap. No daughter of mine was going to wear a plain boring hat - oh no. In the spirit of Esther Williams I took her swim cap to an all new crafty level.
Wednesday, July 27
ILovetoCreate Teen Crafts: Fun Feathered Fascinator
Visit us on Facebook!
Craft on!Click here for today's daily giveaway!
ILovetoCreate Teen Crafts
Fun Feathered Fascinator
Copyright 2011 Avalon Potter
Recently I have noticed a fashion trend toward feathers. They are on clothes, jewelry, they are even glued into people’s hair! I didn't feel like the little skinny feather in your hair made much of a statement, so I made this week’s project as an over the top salute to the new feather trend. It’s fun, crazy, and creative so I hope you have as much fun making it as you do wearing it!

Supplies
Aleene's Liquid Fusion
Aleene's Jewel-It Adhesive
Tulip® Glam-It-Up!™ Iron-On Studs™
Multicolor felt bird scrapbook sticker
Black plastic headband
Feathers (Hot Pink, Yellow, Green, Red)
Instructions
1. Attach three feathers together by applying Liquid Fusion to the bottom of the feathers. It should be spread slightly so it has almost a fan effect but no gaps between the feathers. Let dry for 2-4 hours.

2. Next take your felt bird and lay out your seven crystals around the tail to the head. It should go in this order: purple, light pink, red, orange, dark yellow, light blue. Then put a dark blue on the eye. Put a dab of Jewel-It on each crystal, apply to the felt bird in pre-determined spot. I used glue since the felt was made of man made fiber. Allow to dry for 10 minutes.

3. Use the Liquid Fusion to glue you felt bird to the bottom of the feathers and let set for a few minutes before the next step. Now on the back of your feathers apply a line of glue on the middle feather and attach to the side of the headband. Let dry for 2-4 hours.

Wednesday, May 25
ILovetoCreate Teen Crafts: Beads and Flowers Tye Dye Headband
Visit us on Facebook!
Craft on!Click here for today's daily giveaway!

Avalon Potter for ILovetoCreate Teen Crafts
Beads and Flowers Tye Dye Headband
"Teen crafted, Mom approved."
When I attended the CHA convention in Los Angeles for ILoveToCreate I got to use a great new product; Beads in a Bottle. Beads in a Bottle comes out in dabs of paint but dries like perfectly rounded beads. Everyone that saw this product just fell in love with it. Beads in a Bottle was so fun to use and so simple, I knew there had to be more I could with it than just make beads. This week I was planning to do a tie dye project with a headband. I could not find my tie dye kit, so instead I grabbed my Beads in a Bottle. While I was making the beads, I was rushing through and they were not turning out right. Finally I just chose to wipe the whole thing off. After I tried to wipe the paint off, I noticed how it looked like tie dye. I was so pleased with the effect, I decided to use it for my project this week. My mom calls this a craftastrophe turned into a crafty success!
Materials
Tulip Beads in a Bottle semi precious colors
2" thick white fabric covered head band
Paper towels
Aleene's Liquid Fusion glue
Large and small felt flowers with rhinestone accents in green, pink, and purple (wide enough to fit head band)
Instructions
1. Take your first Beads in a Bottle color and apply a few medium sized dots anywhere on the headband. This will be the test to determine how long to leave the paint on it.
2. After a few minutes take a paper towel and wipe the dots off going in the same direction. If it turns grayish and wipes right off it needs a little more time to dry or if the bottom sticks it needs a little less time to dry. Once it spreads evenly without coming off or sticking too much, you can start making semi-circles with the paint dots, arching the dots and randomly adding dots to the surface.
3. Let all of the dots dry for the appropriate amount of time then wipe them across the head band in one fluid motion like the ones you practiced with.
4. In any empty spots, fill in with whatever color you like using the same technique as before.
7. Once you have finished with adding and wiping off the beads, the headband should have a tye dyed/camouflage appearance to it.
8. Attach flowers to center of headband, working from edge to edge, using smaller flowers on thinner segments of the band and larger in the center.
10. Let the liquid fusion dry before wearing.

Thursday, May 5
Crafty April Showers bring Rolled May Fabric Flowers
I love the look of rolled fabric flowers. I love how easy they are to make even more. There are a million and one tutorials out there on how to make them, but I thought today for I Love to Create I would add to the pile with a few new spins on the classic.
The basics of rolled flowers goes like this... Get a long strip of torn fabric that is about 2"s wide. How big your flower is depends on how long your strip is. Be sure to tear the fabric and not cut it. The rough edges and stray threads are half the fun. Fold your strip in half wrong sides to wrong sides. When you first start rolling make your roll really tight and add a few drops of Fabric Fusion Glue. After the initial tight roll start twisting your fabric as your wrap it around the roll add Fabric Fusion Glue as you go. Still confused? My Sparkle has some really easy to follow step by step pictures.
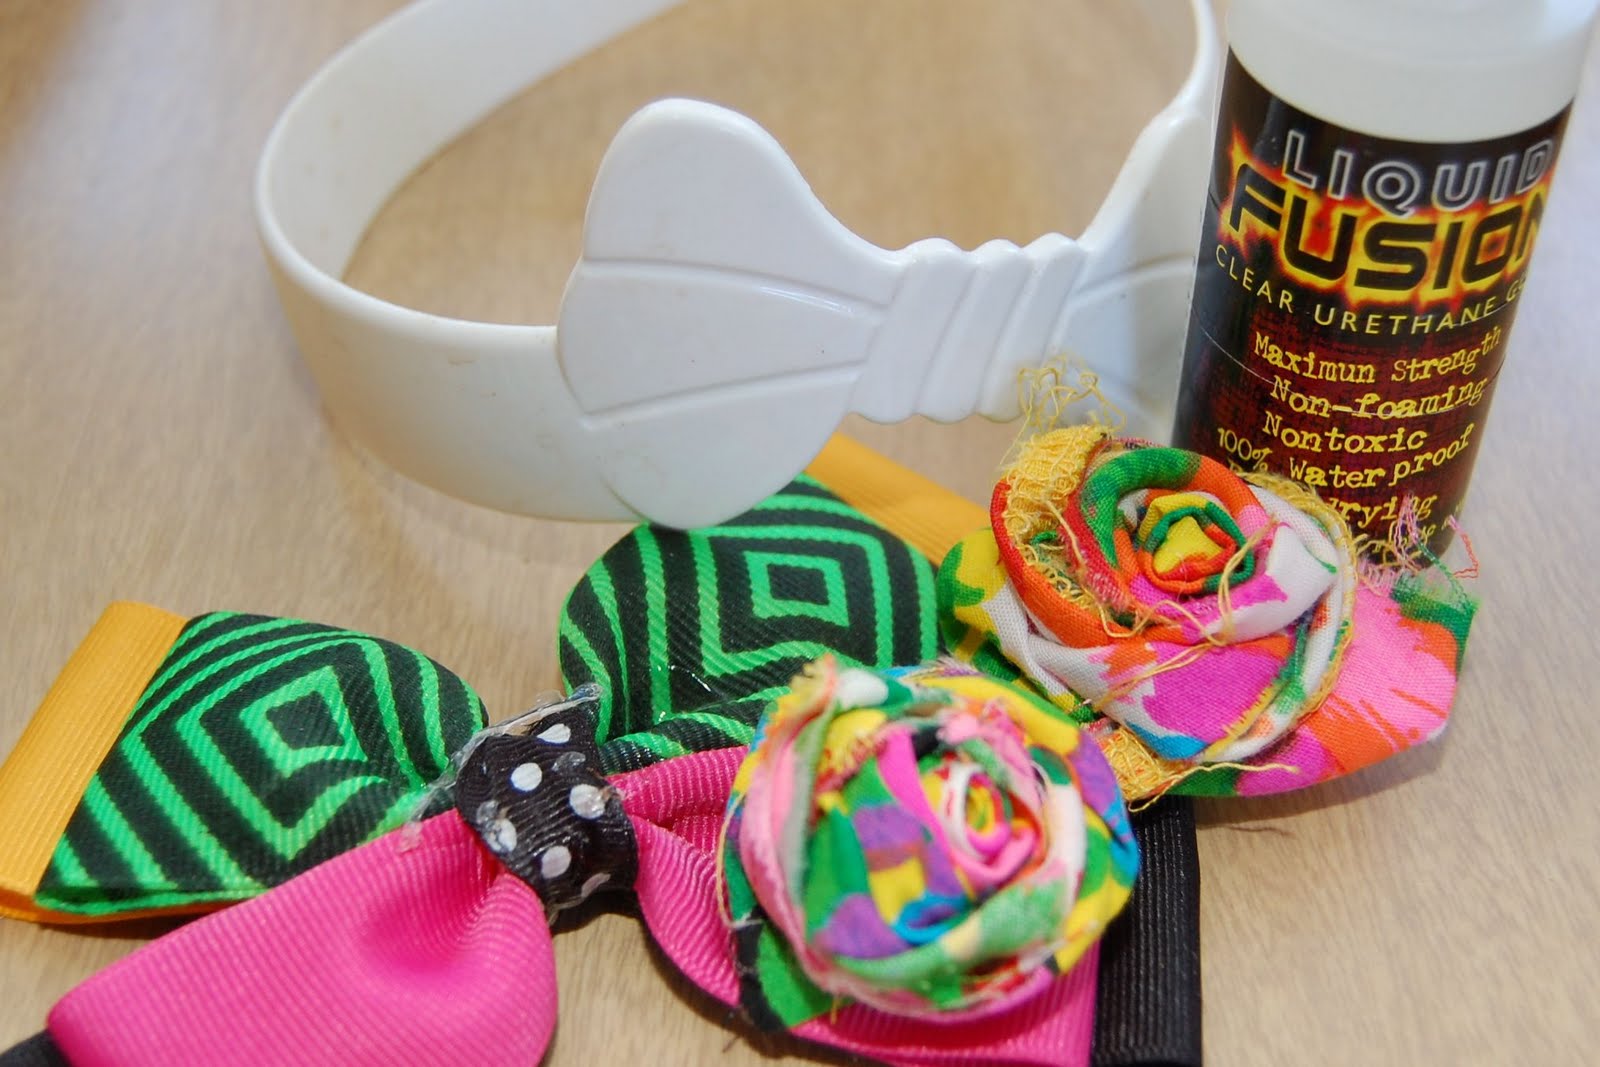
First there is the basic fabric flower. Just roll and go. That is exactly what I did to make a bright and kitschy headband. There is nothing wrong with using a solid colored fabric, but I prefer a pattern myself. You might recognize these flowers from the fabric I used to make my suitcase lap top case. I just happen to have a slew of 80's bows I found at the thrift store and a white plastic headband on hand.
Put them all together and that is where the hair magic happens. I used Liquid Fusion Glue to attach the bow and flowers to the headband.
Another popular motif with the rolled flowers is the bib necklace. This is where I first spied rolled flowers and it was true love ever since.
I made my rolled flowers just as before, but this time I wrapped them in colored thread and coated the bottom with Fabric Fusion Glue a second time to keep the thread in place. I love the way the teal, yellow and hot pink pop against the black and white flowers.
After my flowers were ready I used Liquid Fusion Glue to attach them to a black bib.

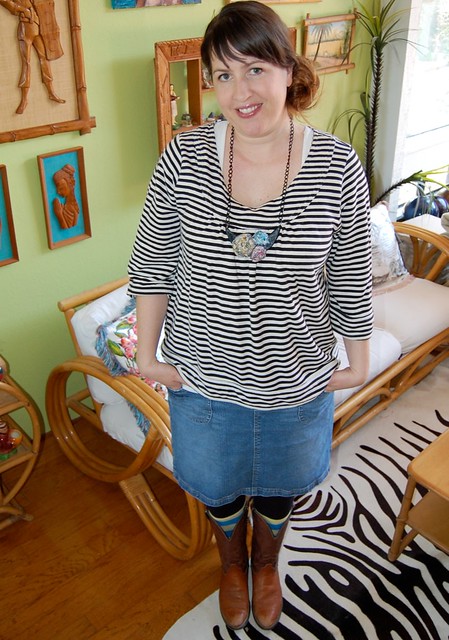
All that was left to do was add a couple of jump rings and black chain.
Crazy quilts + rolled flowers = true love 4/ever. I decided to make my own fabric my using Fabric Fusion Glue to attach several small squares of fabric. Once the glue was dry and I had a long strip of patchwork fabric that I rolled into a flower.
Somewhere along the way I picked up this vintage piece of sequined floral felt. I cut out the leaves to use with my patchwork rolled flower and saved the flowers to use on another project.
Ta-da patchwork rolled flower hair clips with sequined felt flowers. Speaking of felt, special shout out to Jen from Hell Razor for sending me the adorable mustard hair bow.
I have to say this is my favorite one out of the bunch.
For my last trick I thought I would tweak the technique I used to make ribbon flowers. Tear a strip of fabric and slather with Tulip Soft Fabric Paint randomly. Tulip Spray Dye would work well too.
Once the paint is dry roll into a flower and secure with Fabric Fusion Glue. I decided to make this flower into a pearl encrusted brooch.
Are you excited to get your flower roll on? Can you hardly wait to rush out and start ripping, rolling and gluing fabric strips? I warn you they are addictive, which is ok since they are really easy.

Check out more I Love to Create projects by Jennifer Perkins right here.
Visit us on Facebook!
Craft on! Click here for today's daily giveaway!
Thursday, April 7
Mid-Century Modern Knitting Needle Clock
A few years ago I was on the hunt for the perfect mid-century modern clock. I wanted something atomic, colorful and unique. Actual vintage clocks can be pricey and often times don't work so I thought about how to make my own. On a trip to the Round Top flea market I saw a dealer selling oodles of colorful knitting needles and it all became clear to me.
SUPPLIES
Knitting Needles
Wooden Disc
Clock Face
Saw
Pen
Yarn
Clock Mechanism
Wooden Balls
Dremel Tool
You might recognize this clock face as it has made a crafty appearance on the blog before as a picture frame. I decided it was better suited for it's original purpose in life, a clock.
My mom helped out quite a bit with this project since she lives for any excuse to use her power tools. The clock needed a backing so we used a piece of board I had in my studio. We traced the clock twice and using a small saw cut out the wooden circles.
Once we were sure the circles would fit up inside the clock face (look at the thrift store to find one) we also needed to cut out squares in the center to fit the clock mechanism inside.
We attached the two circles together using Liquid Fusion Glue and also glued them inside the vintage metal clock face.
Using the cutting tool on a Dremel we removed the metal tips of 4 of the knitting needles.
Where the metal tips once lived we glued on wooden balls. Some of the holes were not the right size for the knitting needle and so using a drill we bore out the holes to make them larger. Once the beads fit on the knitting needles we attached them with Liquid Fusion Glue.
Lucky me my friend Vickie Howell has the mother load of Caron yarn and was nice enough to give me a few skeins to do fun things like crochet and make clocks with.
The 4 wooden ball tips were wrapped in yarn and held in place with a dab of Liquid Fusion Glue.
Using a Dremel we drilled holes the size of our knitting needles all the way around the edge of our clock into the wooden discs. We placed the 4 knitting needles with yarn wrapped balls at strategic points.
Using Liquid Fusion Glue we inserted the rest of the needles all the way around the clock, trying to keep them spaced out evenly.
Once the glue had dried I set the time on my clock and hung it on the wall in my dining room. Now I have my very own customized mid-century modern clock.
Wanna see some more I Love to Create Projects? How about another clock project involving vinyl records and silk screening?
Visit us on Facebook!
Craft on! Click here for today's daily giveaway!
Thursday, March 31
Brooch Bouquet Topiary
I have a large collection of pins that don't do much of anything except collect dust. Recently I was inspired by some adorable bridal bouquets I saw on the Amy Atlas blog and thought there has to be a more creative way to display my collection. Out of the jewelry box and onto the dining room table is what today's I Love to Create post is about.
SUPPLIES
Craft Moss
Terra Cotta Pot
Collection of Pins
Foam Topiary
Floral Pins
Foam topiary bases come in various sizes and shapes. I chose a double stacked model since I have a lot of pins. I found mine in the floral department of my local craft store. As you might guess they come pretty plain looking, so I needed to fix that. I used Crafty Chica paint in green to cover the wooden poll in-between the foam balls.
Once my green poll was dry I started inserting my collection of vintage pins into the foam. Occasionally I used floral pins to help really anchor things down. I could have used glue, but there is that off chance that I might want to wear one of these pins again some day.
I'm a big fan of using oddball objects as planters, but the base of this topiary was made to fit inside a terra cotta pot. A plain brown pot was not a fitting home for my colorful collection of pins so I busted out the Crafty Chica Paint.
I needed to hide that icky green foam so a little Liquid Fusion Glue and some moss fixed that right up.
Once my pot was dry I placed my topiary inside. Now I have a colorful floral display that shows off my collection way better than any jewelry box and the best part is it never needs watering. Do you have a slew of pins? Got any other fun suggestions about how to display them?
Looking for some other fun ways to display your collections? What about wearing them?
Visit us on Facebook!
Craft on! Click here for today's daily giveaway!
Subscribe to:
Posts (Atom)