Showing posts with label hair fascinator DIY. Show all posts

Wednesday, May 8

Make a Tie Dye Flower Fascinator


You may recall the tie dye t-shirt purse I made just the other day.  There was a fair amount of leftover fabric, so I decided to use it for another project.  Waste not, want not! It's so easy to make these fabric rosettes using Aleene's Fabric Fusion Peel and Stick sheets.  This would be so pretty in black and white with a rhinestone brooch in the center.  I love women in hats!  This is a great way to dip your tootsies into the hat wearing pool without feeling like Eliza Doolittle at the races.  Yes, I'm on a mission and so far, I'm feeling pretty good about it.  Who knew tie dye could be so chic?
You will need
Tie dyed cotton fabric strips
Coordinating feathers
Silk or fabric flower in contrasting color
Neutral color felt
Wire or plastic headband
Aleene's Tacky Glue
Scissors
 Ruler
1.  Trace and cut felt circle and cut a smaller felt oval.  2. Cut fabric into 6 strips (about 1.5" wide and 10" long). 3. Place felt oval and circle on Peel and Stick Sheets, peel off backing.  You may need to use more than one sheet to cover felt. 4.  Fold strip in half, start your rosette in the center of the felt circle by pressing strip edge down on adhesive and winding fabric in a spiral. 
5.  Keep winding, adding new strips as you move along. 6.When you get to the edge, wrap final strip around bottom of rosette to conceal. Use a little Aleene's Fabric Fusion tape here! 7.  Place headband on center of flower.  Attach the oval felt section over headband to secure flower.  8. Add a dab of glue to the end of your feathers, slide under the oval felt and press.  Allow to dry.
9. Use Fabric Fusion sheets to attach a smaller silk or fabric flower to the center of your rosette.  I love the bold contrast of this citron yellow against the softer blue and green. 10.  Press down to secure flower.  
Would you wear a fascinator?  What color palette would you choose?  Do tell!
For more DIY fashion and style, visit my new site DIY Doyenne and for an array of fabulous fashion savvy products and projects, visit iLoveToCreate.com!

xoxo,
Madge

Wednesday, October 19

MAYA IN THE MOMENT: Day of the Dead Hair Accessories


My mom, The Crafty Chica, has a new product line out at Michaels Stores through November 11! I thought I'd use some of her supplies to make some Day of the Dead  hair accessories.
The first one I made is this headband!
 You'll need a headband and a piece of felt. Plus the design stuff. Here is a link to all the Crafty Chica products! I used the Flocked Iron On and ironed it to a piece of glittered canvas. I then added feathers and gems.

 Once you finish the design, glue it to the headband and glue the piece of felt to hold it in place.

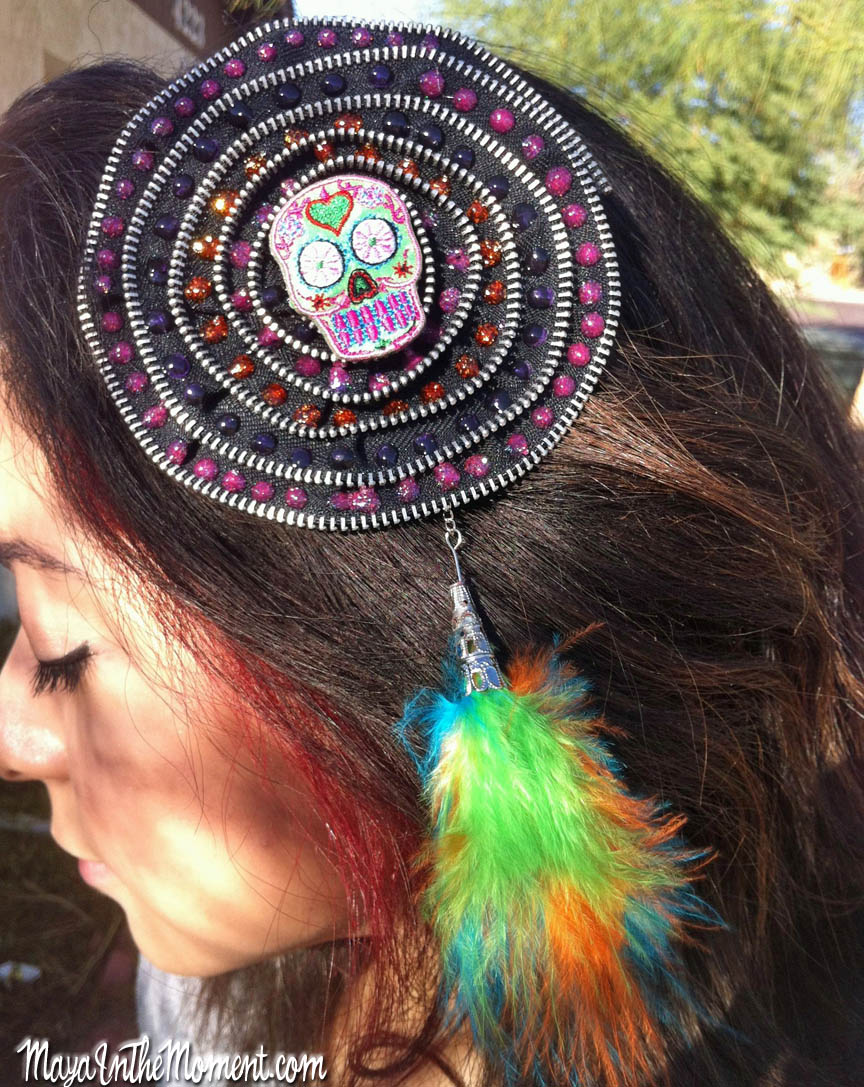
Here is my other project, a hair clip! I had a headband with a big zipper thingy that I didn't like, so I revamped it into a hair clip!
 I added Beads in a Bottle and glued the Crafty Chica applique in the center and added a dangling feather!

 This is a JUMBO hair clip - but if you want you could make it a pin or wristlet...The main objective is to have fun and be bold and colorful!


Visit us on Facebook!
Craft on!

Wednesday, March 3

Midnight in the Garden Hair Clip

All this month in honor of March being National Craft Month, we will be bringing you a cool craft idea on this blog to inspire you! This week, all are projects are Awesome Accessories! Enjoy!


Accent your ensemble with a little midnight-colored glamour from Tulip® Glam-It-Up!™ PDA: Personal Dazzle Assistance™! Get stuck on this floral hair clip with a little help from Aleene’s® Fabric Fusion™.

Midnight in the Garden Hair Clip
Designed by Allee Marderosian

Materials List
– Aleene's® Fabric Fusion™ Permanent Dry Cleanable Fabric Adhesive™
– Tulip® Glam-It Up™ PDA: Personal Dazzle Assistance
26637 Clear Red Black
– Painter’s tape
– Hair clip of choice OR large bobby pin
– Thin wire – approximately 4” long
– Cotton fabric – black – 5” square
– Button – black
– (2) Clothespins
– Fine-tip marker pen
– Scissors
– Leather pieces – red, black – approximately 8” x 10” each
– Silver chain – approximately 20” long
– Pattern (Click here for pattern)

Instructions
1. Cut out patterns. Place leather pieces right side down on work surface and lay pattern pieces on leather pieces. Use marker pen to trace around pattern pieces then cut out.

2.Place red floral pieces one on top of the other, adjusting the top piece so petals are aligned in between petals of bottom piece. Glue together with Fabric Fusion and let dry. Refer to photo.

3.Referring to photo, position tops of black stem pieces under red flower pieces and glue in place. Let dry.
Glue black circle at base of flower as shown then glue button on top. Tape and use clothespin to hold glued areas together until dry.

4.Double over length of chain twice to create two loops, each about 4” in length, and let the remainder of chain hang to the side. Run thin wire through tops of loops to hold together and twist wire to secure. Cut bottoms of loops to create four hanging strands and cut off excess length from chain on side to length desired.

5.Cut a 1½” square from black fabric and apply Fabric Fusion on one side. Flip floral piece right side down on work surface and position top wired part of chain arrangement on back center of floral piece. Lay black fabric square glue side down on top of wire to secure. Lay tape across to hold until set then remove tape.

6.Referring to photo, stick PDA black crystals down centers of black stems and around black circle. Add additional black crystals extending from black circle halfway up each red petal, then add red crystals onto the remaining halves of petals. Stick a clear crystal in middle of button.

7.Glue hairclip or large bobby pin to back of flower piece. Secure with tape until dry. Tip: For added security, glue a strip of black fabric across bottom of pin.
Clicky Web Analytics
Pin It button on image hover

Subscribe to our newsletter

* indicates required
I am interested in products and inspiration for...
Close