Showing posts with label quilting. Show all posts

Thursday, February 26

QuiltCon - How the Modern Quilt Movement Converted Me


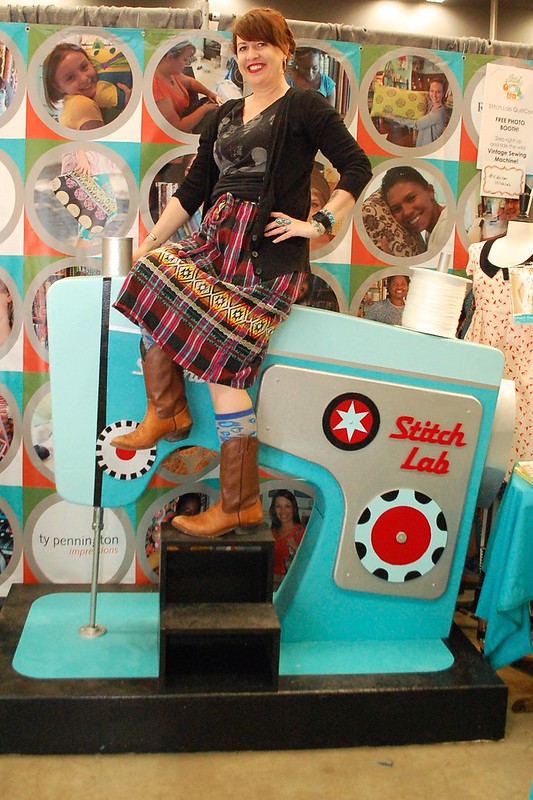
Riding the Sewing Machine in the Stitch Lab Booth
Quilts typically conjure images of old ladies, that is until you attend QuiltCon. I know this phrase is completely over-used, but these are not your grandma’s quilts. This is not your grandma’s quilt show for that matter. I doubt my grandmother ever bought a fat quarter at the same place where you could get a tattoo or take a picture straddling a giant bucking sewing machine. The Modern Quilt Guild is changing people’s perceptions of quilts, especially mine.


Thursday, February 23

Fabric Scrap Shoes


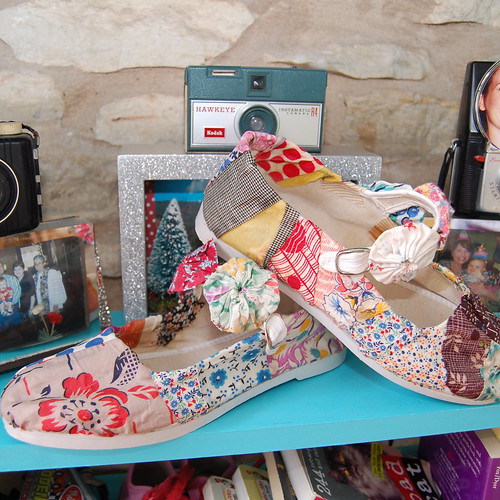
This is not my first time at the shoe making rodeo. Typically I have made pairs for my children (booties and chucks), but from time to time I whip up a pair for myself (whale slip ons and cameo mary janes). After a recent trip to Nordstrom where I was eyeballing a pair of colorful Toms I had new shoes on the brain. Today over at BlogHer I spotlighted the most adorable pair of Toms made to look like owls and it sealed the deal - I must make myself some new shoes.


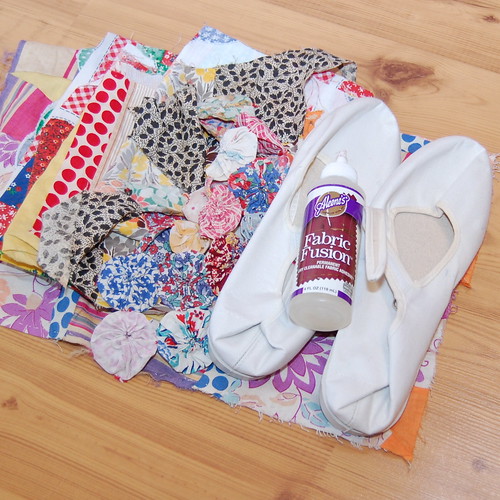
SUPPLIES
Plain Shoes (I got mine from Pearl River)
Quilting Yo-Yo's
Fabric Scraps
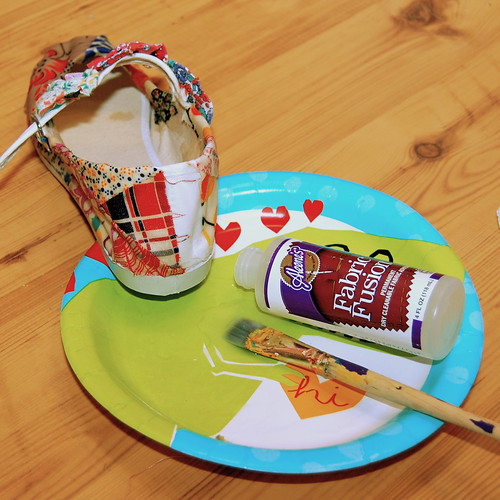
Fabric Fusion Glue
Paint Brush
Scissors
Water


The first thing I did was raid my stash of fabric scraps. I don't hardly sew a lick, but nothing gets me more excited than coming across a bag of vintage quilting fabric scraps at a flea market. I have used the scraps to make ping pong ball necklaces, bracelets and more. Anywhoo, get your scraps together. The more random the better as far as I am concerned.


Using Liquid Fusion glue I started attaching my scraps to my plain white shoes. I diluted my glue with water and applied it with a paint brush. I would trim, glue and brush as I went. There is no right or wrong way. The more wet the fabric is the easier it is to mold to your shoes.


One tip is to fold the strips over the edges of the shoes to give it a nice finished look.


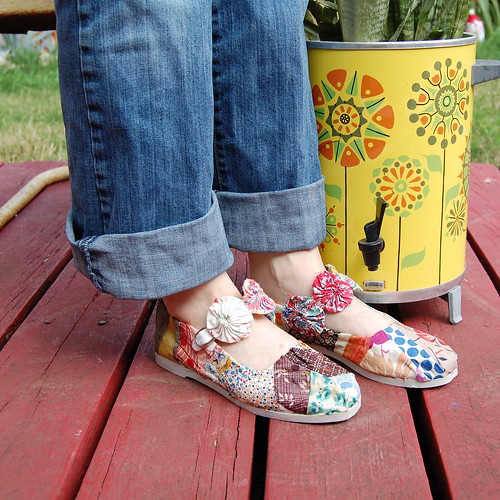
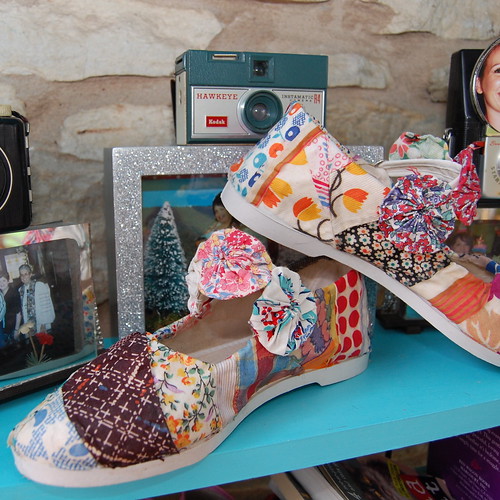
Rather than covering the straps in scraps I opted for some vintage quilting yo-yo's that I had.


After the shoe is completely covered how you want it allow the shoes to dry completely.


After the shoes are dry they might be a little stiff. A few rounds in the washing machine and some everyday wear should help with that.


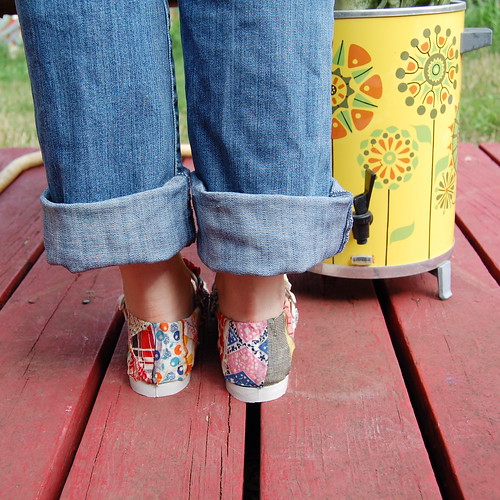
I could have spent $40 at the mall, but I like my own custom quilted pair of shoes even better.

Visit us on Facebook!
Craft on!

Thursday, November 25

Cute Quilted Kiddo Coat


I know, I know two weeks in a row of kid's clothing - but can you really have enough? I have spent the week with my mother who has recently visited The Houston International Quilt Show, so she was busting with ideas. One of those fabulous ideas I decided to share with you today for I Love to Create.
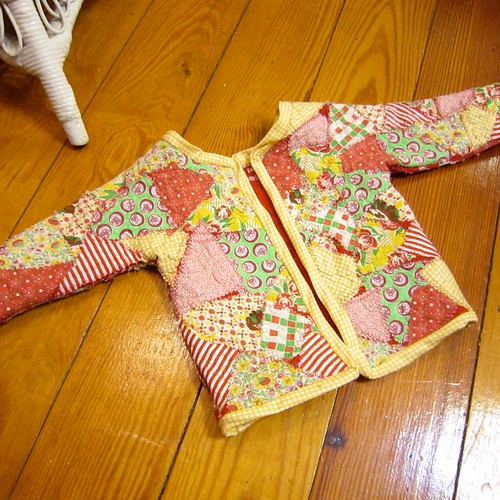

I love the look of patchwork crazy quilts so when my mom told me about this adorable jacket she had seen made at the quilt show I was totally on board. Grab some fabric scraps and let's get busy.


SUPPLIES
Fabric Scraps
Pinking Shears
Sewing Machine
Sweat Shirt
Scissors
Aleene's No-Sew Fabric Glue
Iron
Pins
Thread
Velcro


TAKE ME DOWN TO THE TRIANGLE CITY
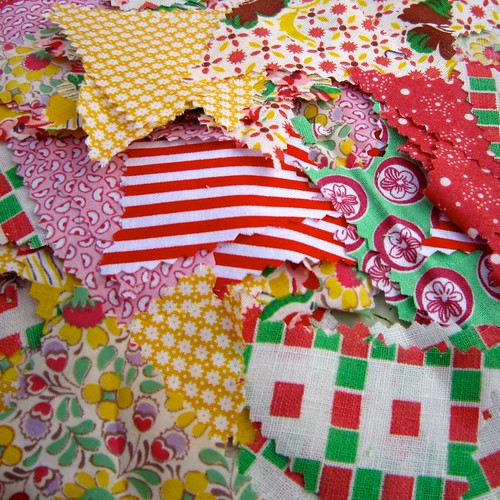
Scalene, isosceles, right - whatever kind of triangle floats your boat. I used my pinking shears and vintage feed sack fabric to cut a pile of different triangles. If you don't have feed sack light-weight quilting fabric works like a charm.
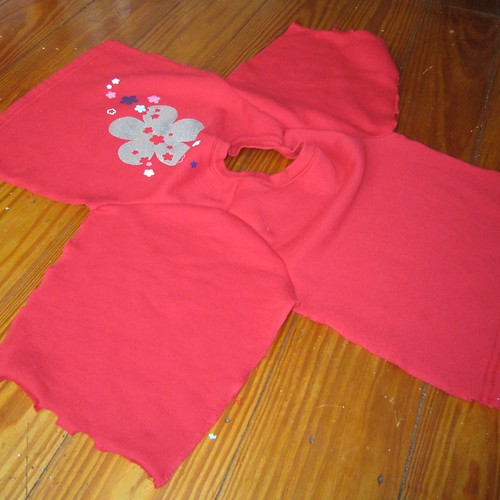

SWEATSHIRT DECONSTRUCTION
Next you are going to cut your sweat shirt up. Cut up the side seams and continue up the sleeves. Cut the cuffs and if there is a ribbed bottom cut that off as well.


PATCHWORK PARTY
Using your Aleene's No-Sew Fabric Glue place your triangles in a random pattern all over the sweatshirt. It's ok if there is a little sweatshirt peeking between the triangles. The glue will wash out, but hold your triangles in place long enough to stitch them on.
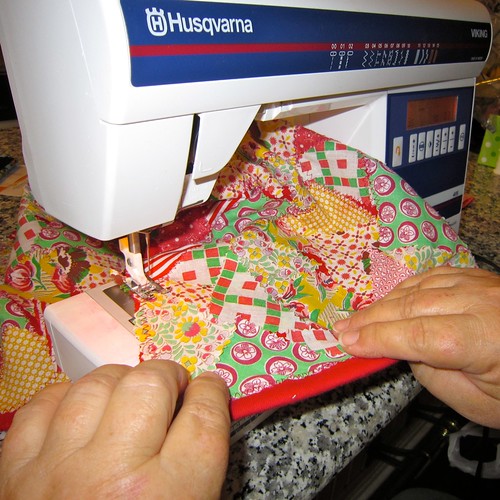

ZIG-A-ZAG-DO-DA-ZIG-A-DEE-A
Using a zig zag stitch on your sewing machine and a contrasting thread sew all the edges of all your triangles down. Also stitch around all the edges.


LOOK MA, I'M QUILTING
Place your jacket on the sewing machine. Drop your feed dogs and using a straight stitch on your machine free quilt all over you jacket. The more random the better.


GRAB YOUR SCISSORS
Cut the ribbed neck out of your sweatshirt and cut your sweatshirt up the front.


PUT THE SWEATSHIRT BACK TOGETHER AGAIN
Pin your sweatshirt back together and using a straight stitch put it back together again. Using bias tape (we made our own) trim the edges of your jacket.
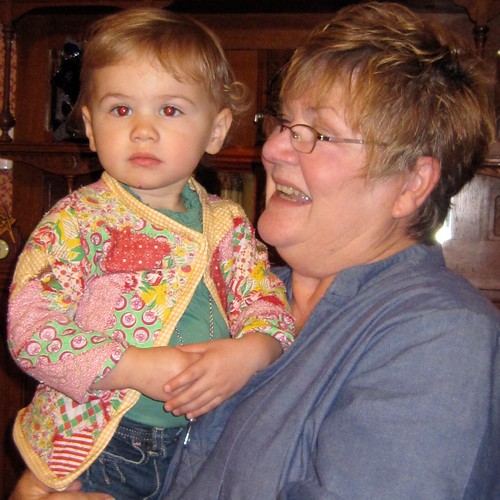

I have to give my mom the infamous Fredda Perkins most of the credit for this adorable jacket. Grandma comes to the crafty rescue yet again! I kinda want an adult size version of this jacket for me.

Craft on!Click here for today's daily giveaway!

Clicky Web Analytics
Pin It button on image hover

Subscribe to our newsletter

* indicates required
I am interested in products and inspiration for...
Close