Showing posts with label stocking stuffer. Show all posts

Sunday, August 16

DIY Sunglass Cases


When Scott and I were in Amsterdam this year, we were so excited to go to the Van Gogh Museum.  It was a tremendous experience, with the beautiful works of Vincent Van Gogh including masterpieces such as Almond Blossom, The Bedroom and of course, Sunflowers! 


After the tour, we ended up in the museum store where I found this little fabric rectangle in a plastic pouch for cleaning your glasses.  The pattern on the fabric is a print of Sunflowers, and I thought it would be fun to have, since I probably clean my glasses about a dozen times a day.... I know.  
Neat freak.
 Then I got the idea that the fabric would be perfect to make a little pouch for my sunglasses.  Plus, it would be handy to have a pouch made from the same fabric I can use to clean my glasses.


All I needed was a good adhesive to glue two sides together, right?  So I reached for my stash of super-duper fast and easy to use Aleene's® Instant Tacky 1/4" Double-Sided Tape.


Now if you don't have one of these glass cleaner cloths, you can pick them up in tons of stores, usually by the cash register.  Or, you can cut a piece of fabric or felt into a 6 x 7 inch rectangle with pinking shears.  Step #1 is to apply the tape on one of the short ends of the fabric (6-inches).  Then cut a piece of tape 3-1/2 inches long and apply from the corner, half-way up the longer side. It kinda makes an "L" shape.


Step #2 is to peel off the red liner from the tape.  
So far, so good :)

Step #3 is to fold the fabric in half and press the edges of the pouch together firmly with your fingers to insure the adhesive is set.
That's all there is to it, and I love my simple little glasses pouch.  It fits in my skinny cross-body bag, I use it all the time, and I think it's a great idea for a stocking stuffer or teeny gift for someone.

I hope you are enjoying my DIY journey and keep coming back for more ideas, tips, how-to's, and projects to 
craft, create, and decorate.


See you in the next post! 

Check out other PattieWack social media


 YouTube and Instagram!


Thursday, December 8

Recycled Board Book Lacing Cards


Welcome to our week long series on handmade stocking stuffers. First up we have recycled board book lacing cards. Sure you could buy lacing cards, but why not make your own with one of those countless board books you have flopping around with a broken spine.


SUPPLIES
Beat up Board Book
Sheep(ish) Yarn
Large Plastic Needle
Scissors
Crop-a-Dile
Aleene's Paper Glaze


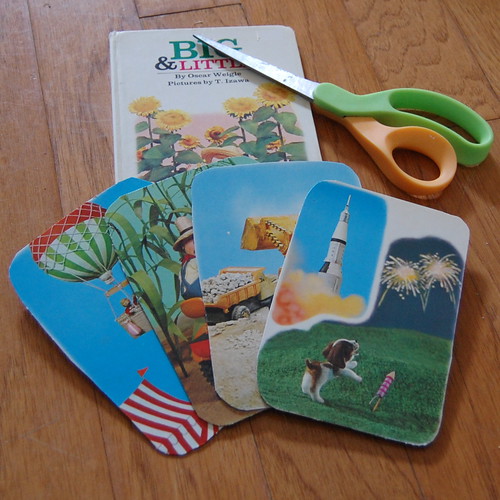
The first thing I did was choose my book and cut out my cards. You are going to want to choose a board book with thick cardboard pages. After some serious toddler wear and tear I have several books that are falling apart and begging to be made over. Once you have your book, cut out the images you want to use as your lacing cards.


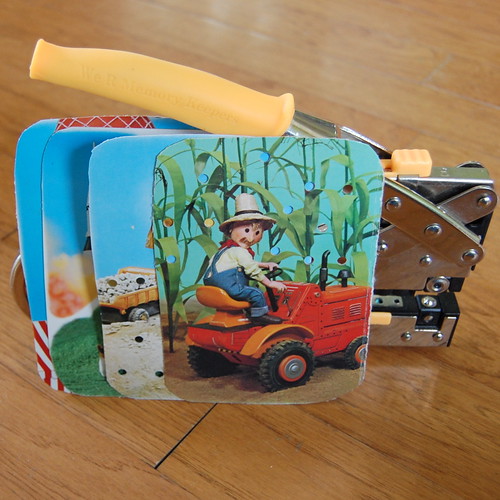
I used a Crop-a-Dile to punch holes in my cards, but you could also use a drill. Place the holes wherever you want.


To seal the edges and keep them from splitting I used Aleene's Paper Glaze. Allow to dry completely.


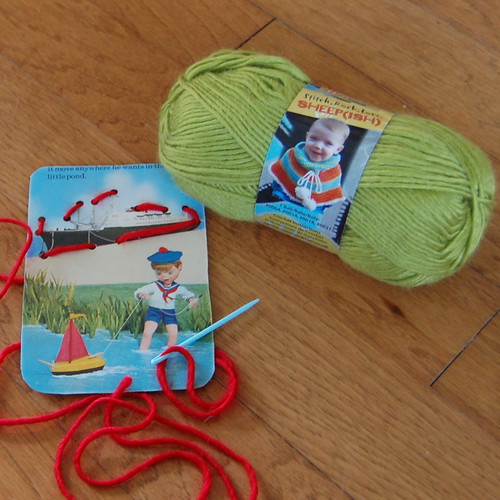
All that is left to do is cut some strands of yarn. I used my friend Vickie Howell's yarn Sheep(ish). You will also need a large plastic sewing needle. Be sure to supervise the wee one doing the sewing if they are still prone to putting small things in their mouth.


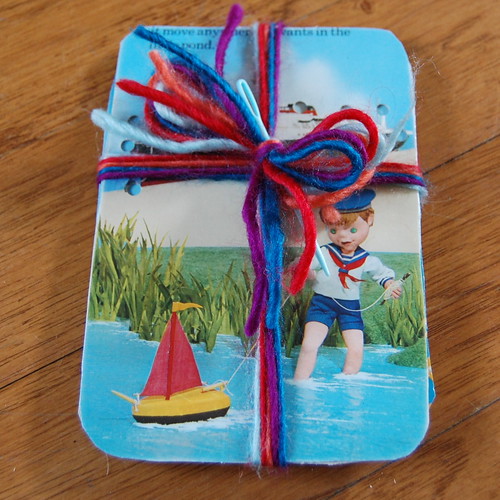
I wrapped my set of cards up with colorful strands of yarn and all that is left to do is pop it into a stocking.

Check back every day for the next week for more handmade stocking stuffer ideas. Be sure to check out my other Christmas craft ideas here.

Visit us on Facebook!
Craft on!

Monday, December 20

Ideas for stocking stuffers: Bracelets!

Talavera bracelet (wood hearts covered with paper.) Directions.

The decorations are set in place, the gifts are all wrapped - all you need now are creative items to fill those roomy stockings. Sure you can add gift cards and candy, but how about a little handmade love too?

Bracelets will work wonders for the girly girl in the family, and we have just the plan! Any of these wrist warmers will make a fashion statement, so why don't you give one or two a try?
Wood bracelet covered with rope. Directions.
Blank metal bracelet embellished with crystal buttons and beads. Directions.


Zipper pulls! For the industrial woman in your life! Directions.
Faux porcelain jewelry set. Directions.
Forged foil bracelets. Directions.
Mexi-glitter Bracelet. Directions.

Visit us on Facebook!
Craft on! Click here for today's daily giveaway!

Thursday, December 16

Yule Tide Bubbles


Besides the word train, Tallulah probably says bubble more than any other word.  The girl loves her some bubbles what can I say.  We have recently run out and I keep assuring her that Santa will be bringing her more.  That being the case I decided to make Tallulah some special customized Christmas bubbles as a little stocking stuffer.


SUPPLIES
Paper
Dishwashing Liquid
Glycerin
Pipe Cleaners, Bubble Wands, Fly Swatters - you name it.
Empty Jar
Tacky Glue
Trim or Ribbon
Scissors
Tape
Water
Crafty Chica Paint
Collage Pauge
Straw

MAKE BUBBLES
There are oodles of recipes online for making bubbles.  I went with this recipe....
1/4 cup liquid dishwashing detergent
3/4 cup cold water
5 drops of glycerin
Most of the recipes I read swore by using Joy dishwashing liquid, but 7th Generation is what I had on hand.  A few suggested adding food coloring for colorful bubbles, but to me that translated into stained clothing so I opted for plain.
CUSTOMIZED CONTAINER
I decided to make a customized label for my bubble jar.  In a shallow dish I added dishwashing liquid, water and Crafty Chica paint.  Using a straw I blew bubbles and gently placed my paper in the paint bubbles.  I let the paper dry completely and then came back and added a second color.
Once the paint had dried I added a little text with my Bic Mark-It Permanent Markers.  I just left it simple with Bubbles - Bottled by Hand in the North Pole.  I then cut my label out and adhered it to my empty jar using Collage Pauge sparkle.
I didn't want to leave the lid out so I covered it in some left over bubble paper and added a decorative trim band with Aleene's Tacky Glue.
The bubbles are complete and all that is left to do is wait for Santa to deliver them!  If only making trains were this simple I would be set.

You could always make a customized wrapper for a ready made batch of bubbles.  Just soak the container of Magic Bubbles or what have you in warm water until label comes off then follow the instructions for adding a customized wrapper.

WRAP IT UP
Be sure to make extra bubble paper because it makes great wrapping paper too!


Check out more of my I Love to Create Projects.


FREE SHIPPING through December 13, 2010. Craft on! Click here for today's daily giveaway!
Clicky Web Analytics
Pin It button on image hover

Subscribe to our newsletter

* indicates required
I am interested in products and inspiration for...
Close