Showing posts with label vickie howell. Show all posts

Thursday, September 27

Yarn Halloween Pom Pom Banner Tutorial

I'm kinda addicted to making yarn pom poms lately. This could be because I don't know how to do much else with yarn, but it is also because pom poms are so stinkin' cute. Pom pom banners are even cuter yet, so let's make one shall we.

SUPPLIES

Yarn I used Sheep(ish)

Aleene's Tacky Glue

Measuring Tape

Scissors

The first thing you need to do is make a ton of pom poms. There are about a bazillion ways to do that and even pom pom makers. I wrapped yarn around my four fingers. I made an even amount of black and white pom poms and green, teal, orange, black, purple and white pom poms.

I measured the area where I wanted my banner to hang and then draped enough orange yarn to fit the space. I divided the length of my yarn by the amount of pom poms I made and for my banner glued alternating pom poms every 17"s.

Once my glue was dry all that was left to do was hang my banner! I love the way it looks and ties in all my favorite Halloween colors. I'm thinking I might make more to put in Halloween party goodie bags for babies. I know my kids spent a good part of the afternoon tossing, stirring, sweeping and gathering my pom poms.

Check out more Halloween themed posts here. You can find more I Love to Create tutorials here.

Thursday, September 29

Creepy Creature Canisters


Excuse last week's neon bachlorette interruption, it is back to all Halloween all the time around here. This week for I Love to Create I present you with some creepy creature canisters.


SUPPLIES
Set of Canisters
Sheep (ish) yarn
Felt
Scissors
Aleene's Tacky Glue

I love recovering old canisters and making them into something new. Remember my wallpaper covered canisters from last year? This time I went the yarn route. I had a set of 3 canisters from Ikea just waiting to celebrate Halloween properly.

This project is so super duper easy. All you need are some canisters which I see regularly at the thrift store. Round or square will work. Next you will need some Tacky Glue, my preference is some sort of fast grab. I am in love with the colors in my friend Vickie Howell's new yarn line Sheep(ish) so I grabbed a ball of blue, green, orange and got to wrapping.


Starting at the top or the bottom wrap your entire canister in yarn. You will need a dab of glue when you finish to keep your yarn from unravelling. I wrapped the starting piece of yarn to hold it in place.


Once your canister is totally wrapped it is time to adorn with felt and more yarn. You could use white yarn for ghosts or mummies, brown yarn for werewolves, green yarn for witches - the options are endless. Now what kind of sweet treats shall I put in my canisters?


Check out more Halloween fun here and more I Love to Create posts here.


Visit us on Facebook!
Craft on! Click here for today's daily giveaway!

Thursday, June 9

Yarn Wrapped Antler Mobile


When my dear friend Vickie Howell asked me to be a part of her blog tour to help promote her new line of yarn Sheep(ish) I said "hells to the yes" and then gulped about what I was going to make. My crochet skills are minimal at best and I make clocks out of knitting needles. What was I going to do with yarn? Once I got my hot little hands on a stash and saw all the fabulous colors my mind started churning. Caron sent this cute little embroidery hoop with "yarn swatches" from the line. I kept staring at all the colors and then I started waving the embroidery hoop in front of Baxter and he seemed to enjoy it even more than I did. Clearly I was not going to be whipping up a pair of booties with the yarn so I thought of another way Baxter could enjoy looking at the yarn - a mobile! All I needed was an antler and I was ready to roll. Yup, I said antler.


SUPPLIES
Small Antler
Pom Pom Maker
Aleene's Fast Grab Tacky Glue
Drill
Vickie Howell Sheep(ish) yarn
Scissors
Clear Fishing Line
Large Eye Plastic Needle


The first thing to do is drill holes in your antler. I recommend doing this outside as it can be kind of stinky. If you have issues with using an antler you could also use a branch. I drilled a hole in each of the points of my antler.


Using the short yarn samples from the embroidery hoop I started wrapping and gluing them to my antler using Aleene's Fast Grab Tacky Glue. The Fast Grab part is important or you could be holding yarn in place while your glue dries for a very long time.


I wrapped and glued and wrapped and glued until my antler was entirely covered with yarn stripes.


Using black and white Sheep(ish) yarn, a pom pom maker and scissors I made 4 pom poms to hang from the points of my yarn wrapped antler.


Using 4 different colors of Sheep(ish) yarn cut at 4 different lengths I strung them through the holes in my antler and tied a knot on the end. I used a large eye plastic needle for stringing. I gotta tell ya at this point I was tempted to just keep this on my kitchen table as a centerpiece it looked so colorful and arty.


Once my long yarn strings were attached to the mobile I tied them to my black and white pom poms.


The last step was to tie some monofilament around my antler so that I could hang it from the ceiling.


Baxter seems to enjoy his new mobile and spent a good 15 minutes laying bed looking at it this morning which in baby time is like hours.


The Sheep(ish) blog tour continues tomorrow on Craft Zine. Check out more of my I Love to Create projects here. Also check out all these free patterns on Vickie's blog you can make with Sheep(ish).

Visit us on Facebook!
Craft on! Click here for today's daily giveaway!

Thursday, May 27

Birthday Crown-Bands!

DSC01094

My daughter Clover's 1st birthday is on friday which in our house means, time for a celebratory accessory! I thought about sewing her a Fabric Birthday Crown like the ones I made earlier this year for Craft Apparent but decided it might be fun to work up a sassier, no-sew version that would work well on her smaller head. Since Miss Clo is a little light in the hair department, she (read, I) loves headbands. Enter, the Birthday Crown-Band!

To commemorate her big 0-1, I used some hot pink vinyl along with fabric I had left over from her birth announcement collage. Whatever you have laying around your craft stash will do, though! Whip one up in no time flat and let the headgear hilarity begin!

DSC01084

Materials
1/8 yd Vinyl
1/8 yd Contrasting Fabric
1/8 yd Iron-On Adhesive
Small piece of Tulle
Hot Glue & Gun OR Needle & Thread
Scissors
Pen
Iron
Ruler or Straight Edge
Glitter Paper
Alphabet Scrapbooking Letter
Headband

How-To
  • Cut out 5"x 10" strips of vinyl, fabric and iron-on adhesive.
  • Following the iron-on adhesive manufacturer's instructions on the package, adhere the wrong sides of fabric and vinyl together.
  • Use a ruler and pen to draw the the points (see below) of the crown on the fabric side of the piece. Cut out.
  • Draw and cut out the number on glitter paper that corresponds with the year your child is celebrating. Glue on to center of vinyl side of piece, Fabric Fusion. If desired, glue a scrapbooking letter of your child's initial on top of the number. Let dry.
mosaic9844994058b57a849e8c012188b9d9c363e4d746
  • Roll piece into cylinder shape; use Fabric Fusion to glue in place. Let dry.
  • Glue Glam-it-Up Crystals to each crown point.
  • Using hot glue or needle & thread, attach a tulle bunch to headband. Repeat for crown to tulle. Let dry, then let your little royal bask in their birthday glory!
DSC01097


Crafat.Rock.Love,

Wednesday, May 19

2nd Annual List: 25 Signs that You Love to Create!

2nd Annual List of 25 Signs that You Love to Create

1. Instead of taking clippings of plants for your garden, you take swatches of lace and fabric for future applique opportunities.

2. You've started referring to craft bloggers in conversation by their first names, even though you've never met them.

3. Your most cherished childhood memory is of raiding grandma's button tins.

4. You buy a pair of shoes solely based on the fact that they'll look amazing displayed against your newly painted walls.

5. You're thrilled by the fact that you can pull up a 40% off coupon on your iPhone, when you're at the local Hobby Lobby.


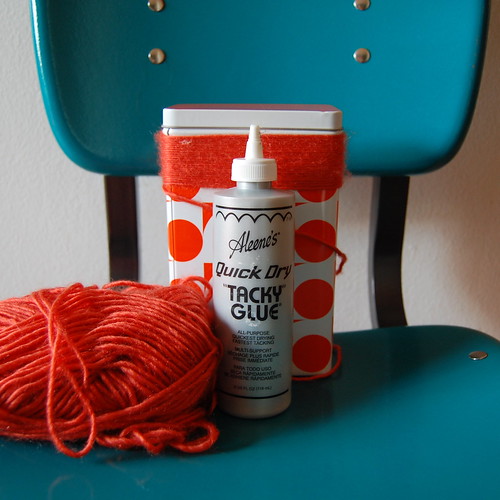
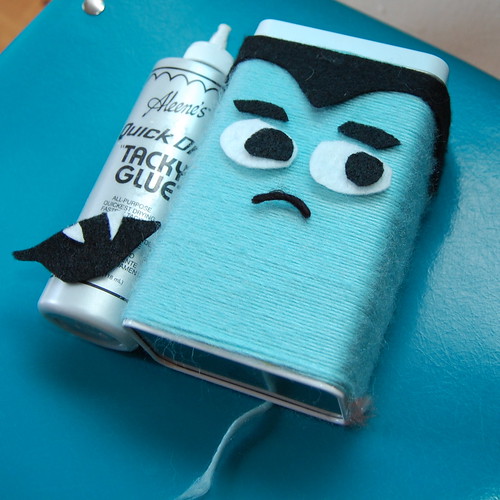
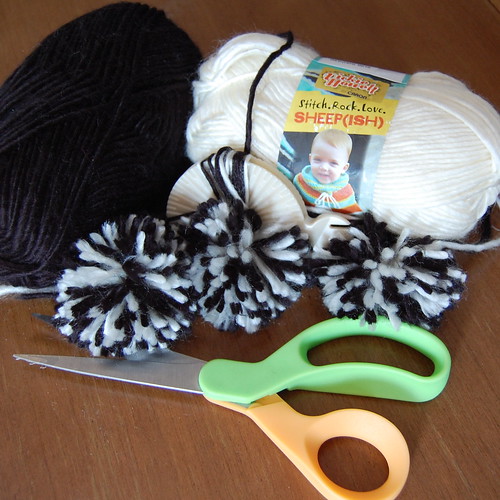
6. You hoard fabric, glitter, paint, yarn and paper...you know, just in case any of those things should suddenly become unavailable to the masses.

7. Some people see plain fabric, you see a challenge.

8. You organize movie nights based on the craft-based content of the films. Character's knitting? Check. Fantastic quilt a part of the set? Excellent. Oh wait, they're garrish, feathery head dresses in a scene? Even better!

9. You convince your family that a road trip to see Mt. Rushmore, the Grand Canyon and Yosemite would PALE in comparison to a vacation encompassing the Rhinebeck Sheep & Wool Festival, Maker Faire, the Houston Quilt Festival and the Craft SuperShow!

Spotted: Crochet Tagging on S. Lamar in Austin!

10. Dinner conversation at your house consists of debates about the relevance of traditional graffiti vs. yarn bombing.

11. You purposely choose a dress in a pale color that will look terrible on you, because you like the challenge of dyeing it the perfect shade to contrast with your hair.

12. You consider the day of the Project Runway's "Fashion Week" episode, a holiday.

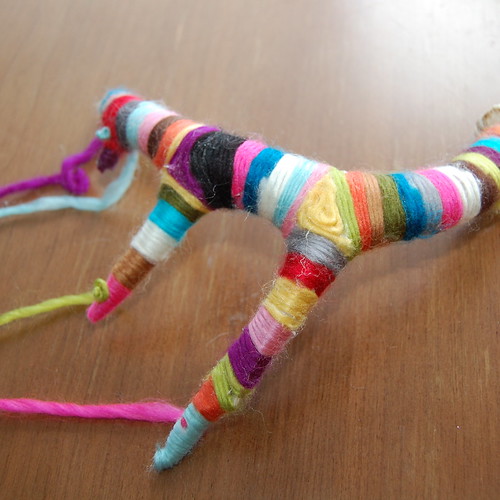
13. If something can be ripped into strips, it's not safe around you because you immediately want to knit, crochet or weave with it.

Setting up for newspaper yarn demo

14. You're a "fan" of at least 10 craft related pages on FaceBook (including of course, I Love to Create's.)

15. You signed up for a Twitter account specifically because you can't bear to miss out on up-to-the-minute crafty gossip.

16. When a friend tells you a piece of good news, your mind wanders mid-story as you begin mentally planning the the design of the "Congratulations" card you'll make for him.

17. You plan the color scheme of an entire room in your house, based on a stack of your favorite Amy Butler and Alexander Henry fabrics that you'd like to have displayed on a shelf.


18. Collage Pauge is right up there with toothpaste and hand soap, as a must-have staple in your home.

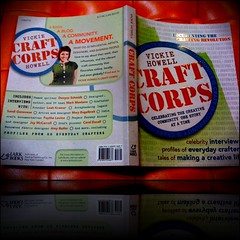
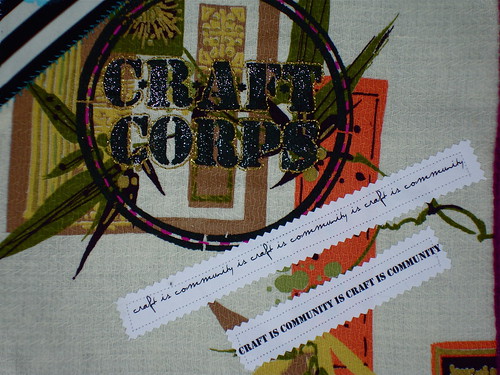
19. You've not only read the interviews in Craft Corps, you've taken notes in the margins and highlighted your favorite, inspirational quotes. Ok, this may be more my personal wish than an actual sign. Humor me, though.

Craft Corps book Proof of Life!

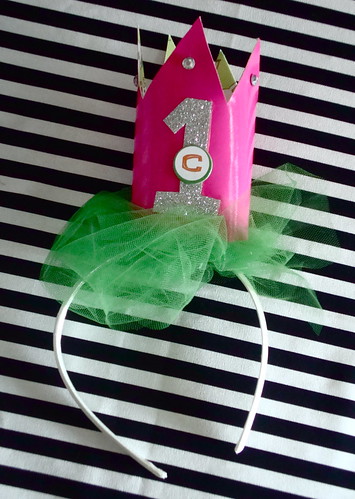
20. You feel that one person's buttons & zippers are another person's necklace and headbands.

21. You may not know that Malawi is in Africa, but you sure as heck know that MJ Trim is in New York! I probably wouldn't admit to that one though, if I were you.

22. There's nothing like the smell of Tacky Glue and Fabric Paint in the morning!

23. Who needs ocean sounds and bird chirping? You feel that the hum of your sewing machine is a perfect form of audio relaxation.

24. You have bumper stickers on your car that say things like, "Heavens to Etsy!" and "All Hail Handmade!"

25. You're constantly in need of a manicure because of a perpetual case of "crafter's hands".

Got more signs? Post 'em here!

Craft.Rock.Love,
Vickie

Wednesday, May 12

Virtual Exhibit: Craft Corps Art Piece Call for Submissions!

DSC00996

Over the past few days I worked on making a fabric collage in honor of Craft Corps and all of the amazing people I've gotten to chat with (for the book) or read about (on the website). I knew the focal point would be the call-to-action, stenciled logo to represent the project itself but I wanted to overall piece to reflect at least a little of my story in creating Craft Corps. Included in my collage are sewn, stenciled, embroidered, painted, printed, crocheted and pieced bits--all little nods to those who've shared a glimpse of themselves within the book's pages.

DSC01003

As I finished, I got to thinking. How would any of the 2200+ Facebook Fans, the 300 crafters on the website or the more than 90 creative beings featured in the book tell their own "Craft Corps Story" via the one thing that all bonds us together: craft. I decided that I'd really like to find out!

Make Your Own Art Piece!
So, my crafty compadres, I implore you to join me in participating in the Craft Corps Virtual Exhibit! Following the guidelines below and using I Love to Create's Craft Corps stencil kit and ANY other materials you choose to work with--wood, paper, fabric, yarn, beads, clay, whatever--make an art piece that reflects your creative passion. It doesn't have to be perfect; it just has to be you.

DSC00997

Details
  • Pieces can be made out of any medium that suits you as long as they fit within the guidlines outlined below.
  • E-mail a photo of your finished Craft Corps piece to contests@vickiehowell.com by August 1, 2010.
  • I'll create a Virtual Exhibit via photo gallery of everyone's submissions to share with the public, debuting later in August!
  • The public will be invited to vote on the pieces, via web poll.
  • The winners will recieve one of the prizes below.

Craft Corps Stencil Kits--Available for $5 in 6, color combinations!
  • Piece must not be larger than 24" high or wide.
  • Piece must be able to be hung on a wall.
Grand Prize:
$200 worth of craft supplies (courtesy of I Love to Create), craft books (courtesy of Lark Books) and yarn (courtesy of NaturallyCaron.com).

Runners Up Prize:
Two more people will win a signed copy of Craft Corps: Celebrating the Craft Community One Story at a Time along with their choice of one of the following:
OR
All entries will recieve a "Proud Craft Corps Member" button, be featured over the coming months on the Craft Corps website AND be elligiable to have their piece shown at a future, live exhibit (details TBA)!

Even if you don't consider yourself an artist, I hope you'll consider creating something for the exhibit. All you need is a little craftiness and the Craft Corps spirit, to be a part of a collective statement on creativity, community and general kick-arsness (the latter because I was getting too sentimental for my own comfort level ;-)).

So go on now; grab yourself a stencil and get to it! I look forward to seeing (and sharing) your submissions.

Good luck and have fun, you talented people, you!

Craft.Rock.Love,

P.S. Looking for inspiration? Read the stories influential designers & everyday crafters in Craft Corps, the book!

Wednesday, May 5

Hands Made Modern

Hands Made Modern

With Mother's Day just a few days away I made myself a present--one that reflects both my personal style and the extreme pride I feel for the 3 amazing, little beings who inducted me into Club Mom. These painted & embroidered hand prints are made modern with the use of graphic print backings and transitional colors. It's a simple, clean project made (in part) with messy hands. Mama's, honor yourself with a little craft time this year by making your own kids' hands modern!

Materials
8"x10" Piece of of Graphic, Home Decor Fabric
Sponge Brushes
Embroidery Hoop & Needle
Embroidery Floss in colors: Black, Light Grey & Orange
Frame

How-To
  • Lay fabric on a flat surface. Use sponge brush to spread a layer of paint on the oldest child's hand; firmly press hand against fabric; lift hand straight off.
  • For subsequent kids' handprints, repeat the last step only layering print off-center from the previous one and using lighter shades of paint for each one. Let dry.
Note: If you're working with babies the print will likely be a blobby mess. Embrace it and let it go. As long as you get the general size of the hand, then the memory's captured and can be cleaned up with the next step.

My Children's Handprints: Ages 10, 8 and (almost) 1
DSC00969
  • Iron fabric if necessary; place in frame. Hang with pride.
DSC00975

Tip: Take a photo or scan finished piece into your computer. Make prints of your hand-y work for family members, or shrink it down to use as card fronts!

Craft.Rock.Love,

Wednesday, April 28

Quick-Fix Toy Decals

DSC00109

I've recently been turned on to buying toys from thrift stores. In the past, this was I practice I admittedly turned my nose up at--I mean, I've been buying second-hand clothes and housewares for myself since high school, but for some reason used toys for my babies made me sad. I realized though, that it was only if the toys looked overly tired that it bothered me.

My friend Jennifer clued me in to the fact that you can often order replacement parts from toy store manufacturer's website for super cheap (I got all new accessories for the toy house above for under $7!), and my friend Noelle turned me on to the wonder that is the Magic Eraser which easily rids plastic of scuff marks. Now, the only solution I needed was for fixing the icky, torn stickers that most, thrift-y toys seem to have. So, I came up with these quick-fix, vinyl decals!

Is all of this effort worth it, you're asking? Well, the bigger toy in this post retails for around $80--and when all was said and done, my refurbished version cost less than $20. You be the judge. :)


Materials
Tracing Paper
Oil Cloth or Vinyl
Pencil
Craft Knife
Scissors

Thrifted Toy Before (With Torn Stickers)
DSC00902

Close-Up of Before
DSC00900

How-to Toy Refresh Decals
  • Create a decal pattern by laying a piece of paper over area of toy where torn sticker is; use a pencil trace the needed shape. Cut out paper pattern.
  • Trace around pattern onto oil cloth or vinyl; cut out to create decal.
  • In a well-ventilated area, spray back of decal with Fast-Grab Tacky Spray; press piece in place on toy.
  • Since most stickers on toys go in indented areas, it's likely that the decal will not fit perfectly in its new home. To fix this, take a craft knife and trim off excess.
  • Repeat process for as many decals as desired.
Thrifted Toy After (With Oil Cloth Decal Replacements)
DSC00903

Close-Up After
DSC00905

Another Toy After Decals
DSC00110

Ok, now I'm off to the thrift store again!

Craft.Rock.Love,
Vickie
Clicky Web Analytics
Pin It button on image hover

Subscribe to our newsletter

* indicates required
I am interested in products and inspiration for...
Close