Showing posts with label Aleene's tacky dots. Show all posts

Wednesday, July 3

How To Decorate A Summer Hat!


It's summertime! That means bring your summer fashion game. It also means protecting yourself from the harsh sun rays. That doesn't mean you can't do in style! 
Here's an easy diy on how to decorate your summer hat! With this project, you can make several decorated ribbon bands to go around your hat, giving it different looks whenever you want!
 

SUPPLIES:

 First, measure your hat, then cut your ribbon according to size. Make sure to cut your ends with pinking shears!

Shimmer sheet: Place it glue side up on the ironing board and set your ribbon on top. Use a pressing cloth to carefully iron it in place. Cut off the extra. Repeat for the rest of the length of the ribbon.

For the gems, put the Tacky Dots   on the back of the gems, then simply place them on the ribbon! After this, place a tacky dot on the back of your hat to connect the ribbon. I used one, but for security you can place them around the hat.

Other ideas - Use Puffy Paint, paint or stencils and glitter!
 
Go enjoy your summer! Mayainthemoment.com


Tuesday, March 5

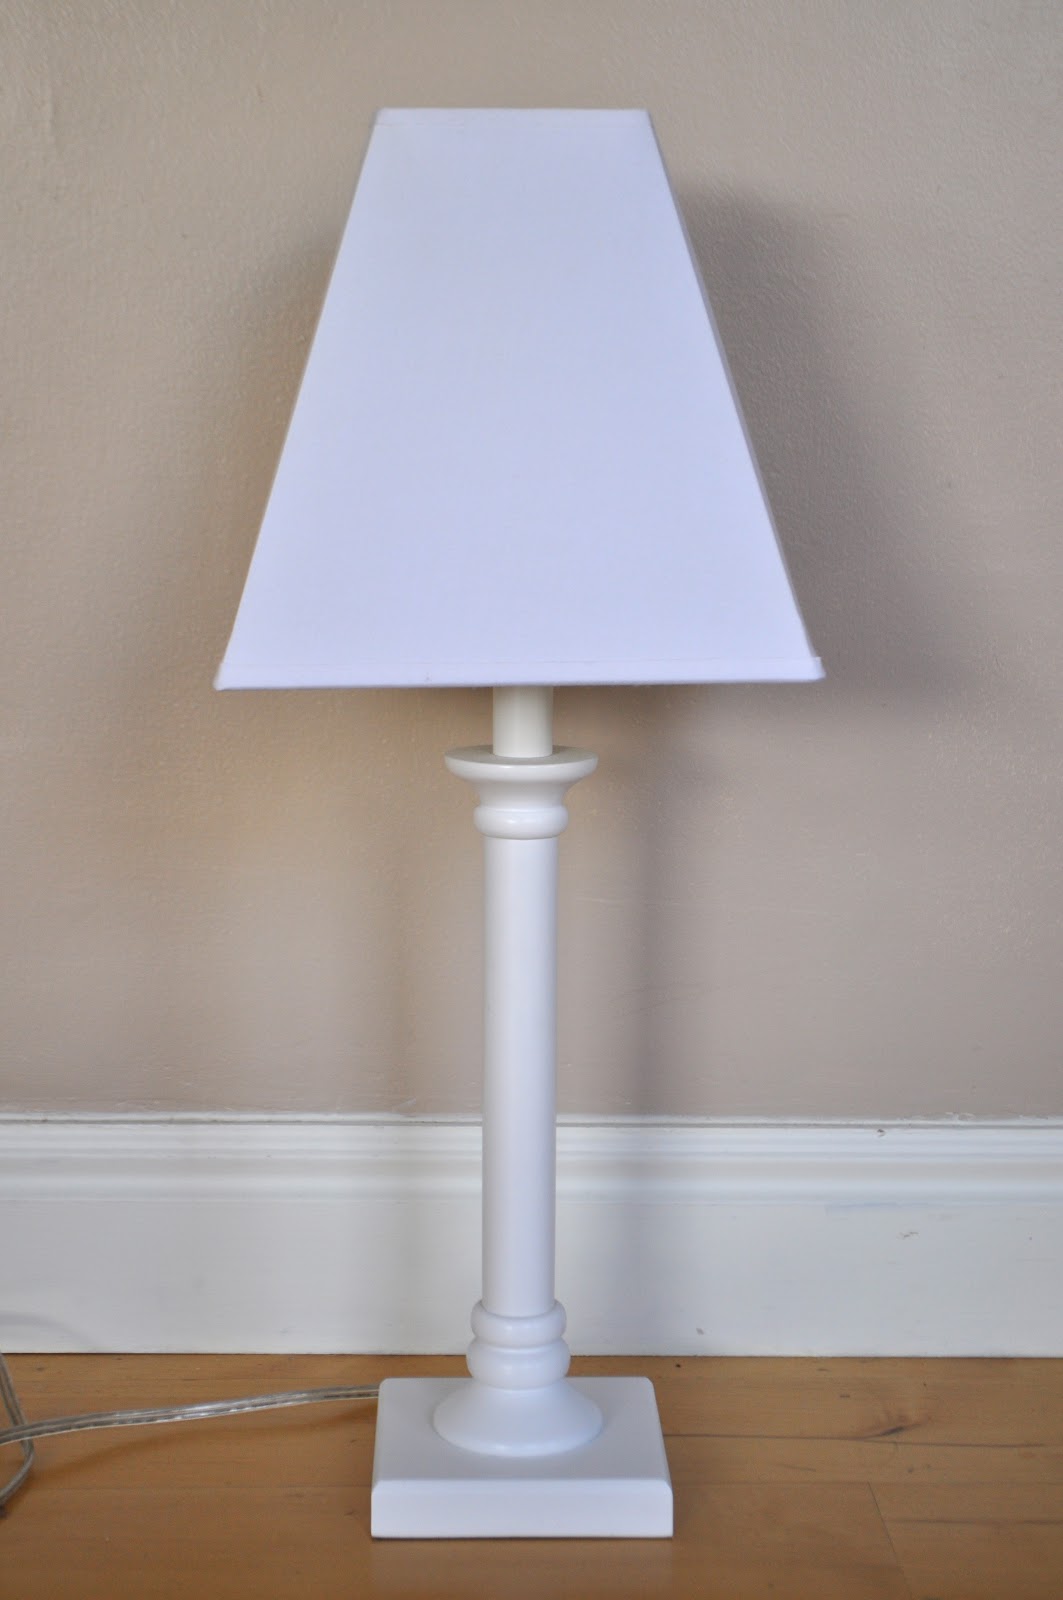
Polkadot Glittered Lamp Shade

As I'm slowly working on a few little projects for my girl nursery I must admit that I'm excited to be able to use a little glitter here and there.  I wanted to make this little white lamp I used with both of my boys seem a little more girly.....


.....so I put glitter polka dots on it.  It was a pretty easy project.


Here's how it went down.  I took got out my Aleene's tacky dots and my glitter.  


The glue dots have a clear plastic film on both sides.  I peeled off one side of the film like this....


....and then I pressed it into my glitter.


I shook off the excess glitter and was left with this.  I peeled off the dot and placed it on the lamp shade.  Peeling them off can be a little tricky since you don't want them to stick to themselves.  I tried to be patient as I pulled them off.


I figured that would be a lot easier than putting them on the lampshade first and then sprinkling the glitter on the whole shade.  Plus, if I touched the dots first they might loose some stick and not hold the glitter as well.

I made sure to clean off the shade well first.  It was a bit dusty and the dust would also have ruined the project, making the dots fall off.


Now the lamp is still fairly neutral in color, but a little more girly for the nursery.

Thanks for visiting.


Friday, November 2

Thanksgiving Gratitude


Hello to all our Aleene's fans! Tiffany and Heidi here :)

We want to personally invite you to watch Monday's Cool2Craft TV with us! Cool2Craft TV November 5, 2012: Thanksgiving.

The Cool2Craft girls are sharing Thanksgiving gratitude projects. Heidi is creating a Thanksgiving Scarecrow Pick that the kids will LOVE helping to create. With Aleene's Tacky Dots, there's no wet glue mess for the kids. Plus we'll be sharing pumpkin and leaf table decor, gratitude banners and jewelry ideas!

Learn new techniques, chat with us while watching the show and ask questions about all your favorite Aleene's products! Drop by our chat room during Monday's show and mention that you saw this post on the iLovetoCreate blog for your chance to win Aleene's Tacky Glue!

Airing Monday November 5, 2012 9am Pacific/11 am Central/Noon Eastern. Go to Cool2Craft.com and you'll see the Livestream player and chat box where you can join right in. See you Monday!

Visit us on Facebook! Get creative! Get inspired! Be cool!

Thursday, April 5

Baby Easter Basket


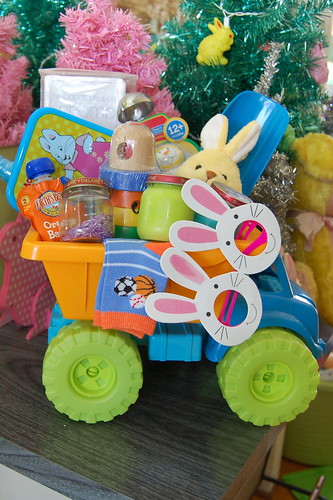
Last week for I Love to Create I made a toddler themed Easter basket for Tallulah and this week I am showing you a few options for the extra wee ones. This is technically Baxter's second Easter, but he was only about a month old last year. This year he is old enough to get a basket full of goodies and maybe even hunt for an egg or two. I was inspired by a post I saw on Modern Parents Messy Kids where they made activity oriented Easter baskets. Now that Baxter has been diagnosed with a fairly severe peanut allergy it is not like I can load the kids baskets up with candy. They don't need candy anyway, but now that we are living in a nut free world it seems like every chocolate Easter bunny is no longer a friend but a foe with hidden nuts. The suggestions I have for my baskets will entertain your kids for a lot longer than a piece of candy and there is no risk of a sugar buzz.


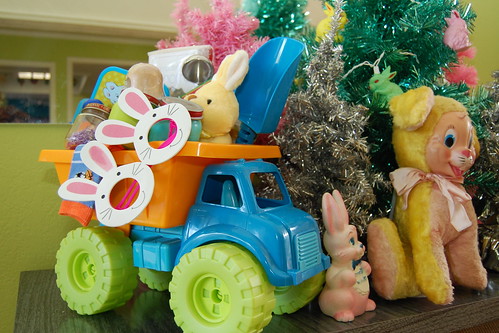
Even your Easter basket should be something fun to play with. Tallulah got the sand pail and Baxter gets a dump truck. Make your basket functional and not something cheap that will get thrown out. Heck, make your own out of recycled paper if you want. Anyway, both kids will get to use their baskets soon enough in the new green turtle sandbox their grandmother got them that I have filled with...wait for it....pink sand.


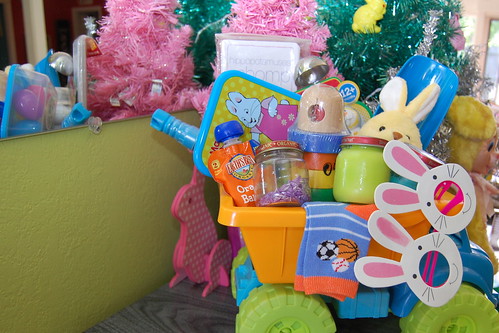
Like Tallulah not everything in Baxter's Easter Basket is handmade. Here are a few suggestions for baby baskets...

Bubbles (he is a little young for them, but his sister will help)
Socks (Can you really ever have too many?)
Stuffed Bunny (his sister was getting one so I thought he might like something to cuddle)
Bunny Glasses (futures so bright, I gotta wear bunny shades)
Ikea stacking rings (I have a plush version that is getting a little flacid)
My First Crayolas (he always watches Tallulah color longingly)
Board Book (nothing says Easter like pictures of cute puppies)
Flash Cards (who does not like to learn about animal sounds)

Ok, onto the stuff I did make!


Tallulah probably paints every single day. Poor Baxter just gets to sit on the sidelines and watch most of the time. Occasionally I will give him some pudding and put him on a piece of posterboard or in the tub and he has such a good time. Usually he just paints with chocolate pudding, but for Easter I decided to expand his color options.


Using empty baby food jars I used my trusty cheap pudding, but this time I chose vanilla and added food coloring. Nothing fancy, but I know he will love playing with this. I'll set him up outside one hot day soon and just hose him off when he is done. If he does not lick himself clean first.


Have you ever noticed most plastic Easter eggs have 2 small holes on both ends? I'm not sure why, but they do. These holes inspired me to try a version of a project I have seen on Pinterest where you engage a child's sense of smell.

SUPPLIES
Plastic Easter Eggs
Glue Gun
Aleene's Tacky Dots
Spices


I applied 2 Tacky Dots to both sides of the inside of my Easter Egg. Next I shook a separate spice into each egg. Use strong easy to smell spices like curry and cinnamon. I closed my egg and shook the spice around then opened up and dumped out the excess. Plenty of spice stuck to my glue dots. Next use a glue gun to seal your egg closed. I just did a blind smell test with husband and they totally work. A half dozen fit perfectly inside a small Max and Ruby tupperware.


Baxter is a little old for rattles, but I couldn't resist making one of these jars of rice. I have seen them all over Pinterest and Modern Parents Messy Kids made some for their baby basket. You can use the food coloring and alcohol method like I did with the pasta I dyed for Tallulah or you can just spray fabric dye from Tulip.


SUPPLIES
Rice
Tulip Spray Dye
Baby Food Jar
Aleene's Tacky Glue

I spread my rice out on a paper plate and sprayed with fabric dye. I let the rice dry and then tossed and sprayed again. All that was left to do was fill an empty baby food jar and glue the lid on.

Hopefully Baxter and Tallulah will spend hours upon hours quietly entertaining themselves with their baskets and the contents. Then again, maybe not. I should also mention that you should supervise all these activities with your wee ones. Things like glass rattles should be investigated on grass or carpet not cement or hardwood. You get the drift. Have fun and happy Easter!

Here are a few other suggestions of fun goodies to make for your babies Easter basket: stenciled onesies, customized bibs, sensory bottles, grandparent's puzzle, pull toy, booties.

Visit us on Facebook!
Craft on!

Monday, December 12

A Mess-Free holiday with Aleene's Dry Adhesives


Some of the best crafty bloggers around were sent some of our brand new Aleene's Dry Adhesives (now available at Michaels stores) to try out on their blogs! We wanted to share with you their super crafty and clever projects they came up with!

1. Santa Tags and Gift Toppers with Oopsie Daisy
2. Silly Gingerbread Man Gift Card Holders from Silly Pearl
3. Paper Ephemera Feathers from The Country Chic Cottage


4. Christmas Hershey Kisses with Craftaholics Anonymous
5. Christmas Ball Chandelier from Brassy Apple
6. Gingerbread Lunch Sack from Dollar Store Crafts

7. Corrugated Cardboard Snowman Ornaments from Crafts by Amanda
8. Deckled Flower Notecards from Fiber Flux
9. Sheet Music Art from Sand & Sisal


10.
Holiday Gift Tags from Craft Test Dummies
11. Gift Bag Toppers from Dollar Store Mom
12. DIY Holiday Photo Cards from SAS Interiors

13. Easy Christmas Frame Décor from Brown Paper Packages
14. Easy Party Food Signs from Mad in Crafts
15. Homeade Gift Tags with The V Spot
16. No-Sew Snowflake Window Curtain from In my Own Style


There's some pretty awesome ideas! Which one is your fave?


Visit us on Facebook!

Craft on!

Tuesday, December 6

Paper Christmas Ornaments

I wanted to share a couple of paper ornament ideas today.  The beauty of paper ornaments is that they are really inexpensive, but still beautiful.  I used Aleene's Tacky Dot Roll for everything I made here.  Dry adhesives are PERFECT for these projects because they aren't messy and you don't have to wait for the glue to dry.  I also pulled out some textured paper I'd been saving to make the ornaments.


For the first ornament I cut strips of paper about one inch wide.  One strip was 3 inches long.  Two were 4 inches and two were 5 inches.  I attached the strips together at the top with two tacky dots.  This ornament was really easy and is one you could even make with kids.


You can string it up by itself...


...or add a ribbon for more drama.


After the little ornament I tried something a little more challenging.  I made a paper star for the top of our tree.  I found a great tutorial for it HERE, but I recommend using the tacky dots to make it fast and easy.  (I trimmed the ends a little differently and used it on top of the tree rather than as an ornament.)  It's the first star I've had that actually stays upright on the tree.  Yay!


And now we're ready for Christmas!


Thanks for reading.


Craft on!

Thursday, November 17

Fun Festive Fall Window


I'm kind of a nut about decorating for Halloween. Christmas is a close second. Easter and Valentines day even have their own decor around these parts. It was high time that I started showing fall and Thanksgiving the decorating respect they fully deserve. Today my daughter Tallulah and I whipped up a window to celebrate the season. Just don't tell her what I did with her crayons during nap time.


SUPPLIES
Tacky Dots
Scissors
Crayons in fall colors
Wax Paper
Iron
Pencil Sharpener
Tulip Soft Fabric Paint in Brown
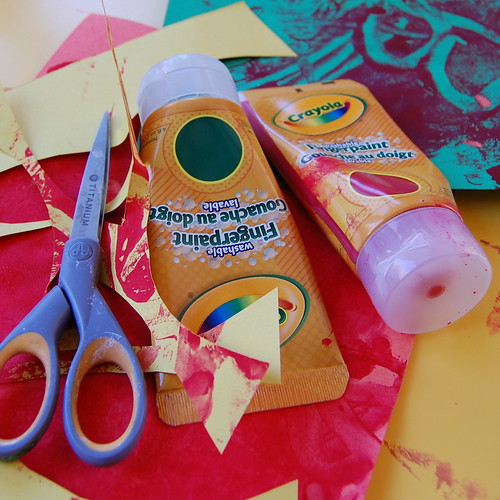
Finger Paints
Construction Paper
Paint Brushes
Crafty Chica Fabric Marker


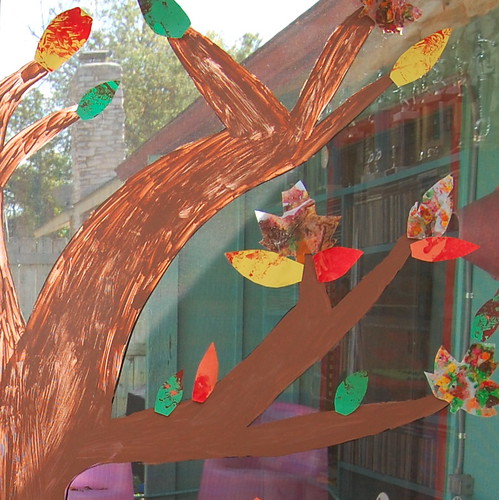
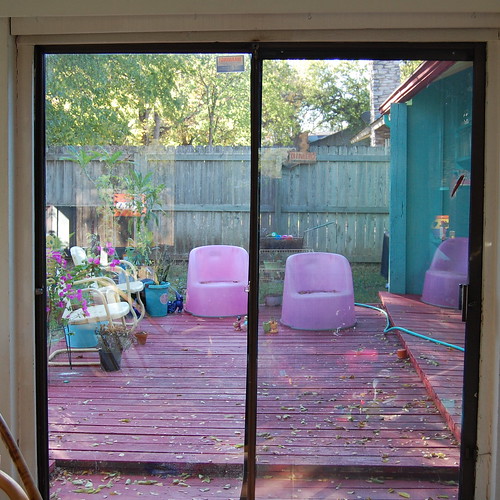
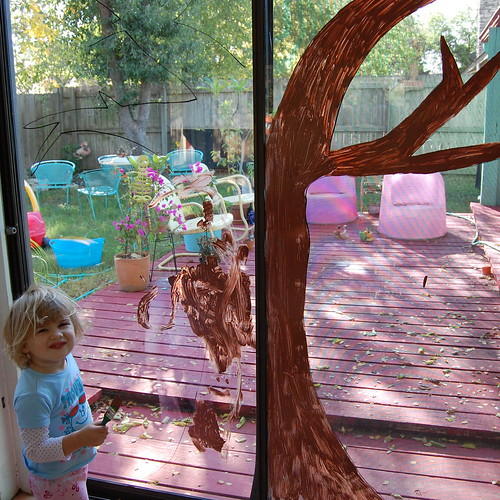
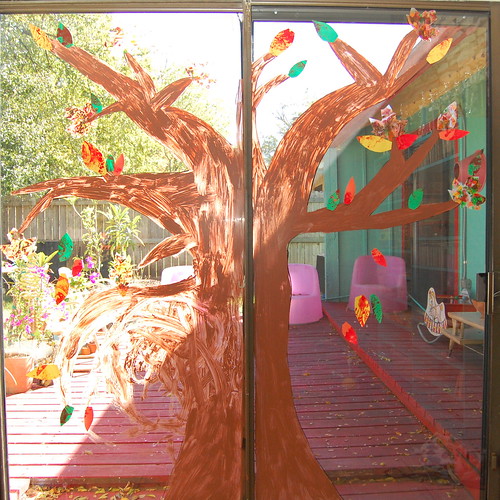
Using a Crafty Chica Fabric Marker (because it was what I had on hand) I drew a tree on one of the sliding glass doors in my house. Next Tallulah and I used Tulip Fabric Paint to fill in the tree. Yup, they both work on glass. You might check a small corner to test on your own windows.


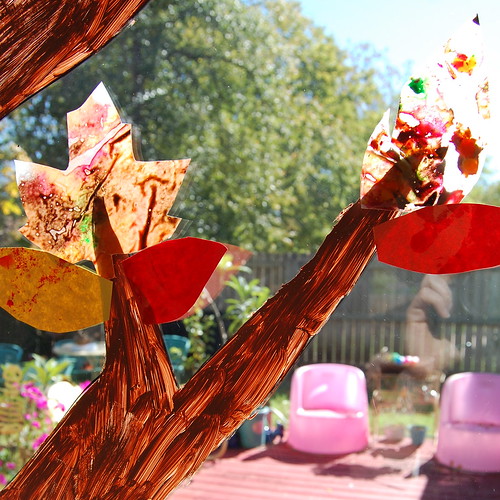
To make the stained glass leaves you will need crayons, wax paper and an iron. I stole a few crayons in autumn shades and using my eyeliner sharpener whittled them down to nubs. I then sprinkled the shavings between two sheets of wax paper. Using a low heat iron melt the shavings between the paper. When everything is cool cut out a few fall leaves.


Tallulah helped make the second batch of leaves. I gave her some construction paper in fall colors and some red finger paint and let her have at it. When the paint was dry I cut out leaf shapes from the paper.


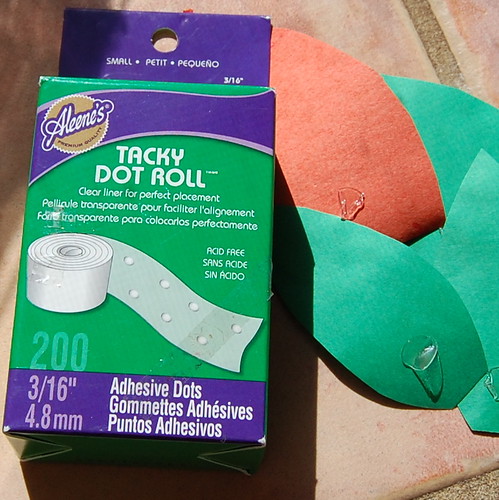
All that was left to do was to add my leaves to the tree using Tacky Dots. I put some in the branches and few falling to the ground. The crayon shaving leaves look great with the sun shining through them.


Fall has finally made it to Austin, TX. We may have had to help it along a bit, but it is here. Next week when I take all my Christmas stuff down from the attic I will just use a straight razor to scrape away most of the paint and a little Windex on the rest. Cute, festive and easy.

P.S. If you want to use window markers that would work too. I decorated for a birthday party with them once. Check out more I Love to Create posts here.

Visit us on Facebook!
Craft on!

Monday, October 31

Pretty Paper Flowers

I know it's Halloween, but once Halloween is over I start thinking about Christmas.  Today I'm sharing a few fun embellishments to make your presents look pretty.


They were fun and pretty easy to make.  I'll show you how I did all three.

The first one made by cutting out four wavy circles.  After cutting them I tried to curl the edges in a little and I used an ink pad to antique the edges of each layer.  I used Aleene's Tacky Dot singles to hold the layers together and to attach it to the present.  I love glue dots for paper crafting.  They are easy and clean.


I think it makes a really pretty gift topper.  I made some flowers like this to put on top of a jar when I made my neighbors honey butter last Christmas.


The second flower was done just like the felt flower I made HERE.  I cut a long strip of paper with pinking shears.  Then I cut slits down the entire strip and rolled it.  I cut a small square of Aleene's tacky double stick sheets for this one and planted the flower on it.  Both sides are sticky, so it essentially makes your flower a sticker to use when you want to.


I added a few leaves and trimmed off the sticker part I didn't need.


For the last flower I took a scalloped paper punch and cut out two of the circles.  I antiqued the edges of both and cut slits in the top one, curling the edges inwards a bit.  Then I made a smaller circle to go on top of it.  I used the tacky dots on this one as well.


It could even be a to and from tag.


And now it's time to start the Christmas shopping!


Clicky Web Analytics
Pin It button on image hover

Subscribe to our newsletter

* indicates required
I am interested in products and inspiration for...
Close