Showing posts with label Tulip Soft Paint. Show all posts

Wednesday, June 3

DIY Lemon Shirt

Happy Wednesday! I am so excited to show you how I create this yummy Lemon shirt! It's so bright and refreshing you will prolly want to peel them off and eat them! I have sorta been on a "fruit" kick lately. Seriously, fruits are so much fun to paint especially watermelons. I will say after doing this lemon shirt I am in the mood to do a lime shirt now. I might just have to do one with both! Whatddya say!

Let's get started.

Sunday, December 21

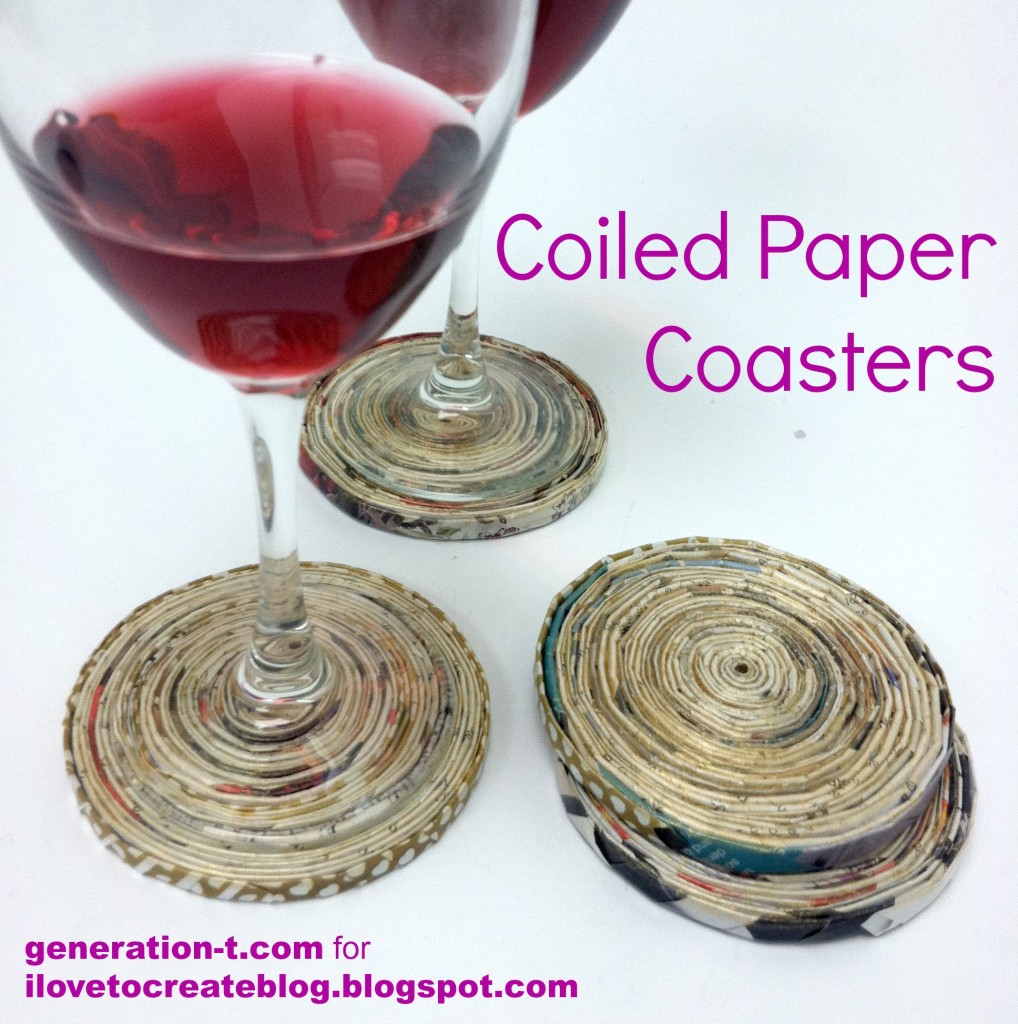
Coiled Paper Coasters

Coaster finish5a generation-t.com What to do with all those holiday catalogs clogging up the mailboxes? Turn their pages into items (like coasters...) that help celebrate the holidays! Post-Christmas, you can use up any leftover wrapping paper to whip some up before New Year's even--the sky's the limit.


megan-nicolay-blog-footer-1

Friday, December 13

DIY Shoes: Peppermint Flats

I can't resist painting on shoes - especially when I find awesome blank canvases on clearance at the store. I came across a pair of boring black flats for under $5. I could buy them and leave them black suede and go on with normal life OR have my way with them. Which do you think I chose?

Monday, September 16

Retro Halloween Tabletop Decor

 
Paper mache cones lend themselves to all manner of retrofabulous DIY projects, like these DIY Retro Tabletop Decor objets d'art.  That's a fancy pants way of saying, stuff you can use to decorate for Halloween.  I like these cones because they can be interpreted a lot of different ways, as Halloween party hats, Halloween trees or if you add black cardboard circles to the bottoms and take the felt balls off of the tops, fabulous witch's hats!  There are so many yummy trims out there that would be perfect for these, from rick-rack to rhinestones to lace ribbon.  If you want to take this further, make each hat slightly different but color coordinated.  Add black glitter to give them a little more sparkle.  These make delightful tabletop centerpieces for a party!  Tulip Soft fabric paint works like a dream on the paper mache and dries to a perfect matte finish.  Tacky Glue and a glue gun make quick work of adding trim.  This is a great girl's night in project too.  Have a glass of wine while the glue dries and then dive right in!

Tuesday, July 23

How to: Paint a Cityscape with Tape

Though my motivation was nursery decor (inspired particularly by my son's love for taxis and trucks -- hey, we live in Brooklyn!), this technique could easily be applied to any shapes that benefit from a grid-like treatment -- like robots, or alphabet tiles, or basic shapes. I was inspired by the geometry of the landscape where we live, but your cityscape could be urban or rural (or suburban, for that matter!). The tape technique works like any resist--I love the batik-like result, and the effect, as I mentioned, could be applied to any subject matter, to suit any room in the house!

Monday, June 17

DIY Dolce and Gabbana Inspired Shoes

 Ever since I bought these cork wedges a few years ago, I've been planning on adding some painted details to the sides.  Time got away from me, but as soon as I saw the Dolce and Gabbana Sicilian Folk Art Collection for Spring/Summer, I knew I had to get these babies painted up!  Inspired by folk art carved and painted details on antique wagons, the D and G version of these shoes are stunning  Haute Couture artworks  They're also on "sale" for 1600 dollars...which is still light years beyond my budget.  Sigh.

Our house is decorated in what I call Folk Art Chic, with tons of little details like these.  I even have a Folk Art Chic Pinterest board!  I knew exactly what I wanted to do.  Since the shoes were cork, I used Tulip Soft Fabric paints and a little Aleene's Spray Acrylic sealer.  It took under an hour to turn a plain pair of wedges into a fashion statement of my own.  Using stencils for the flowers made quick work of those larger details.  If you look at the originals, you'll see that they're not perfectly perfect, they're meant to look handmade.  That took a lot of pressure off of me when painting, and I've got to say, I think these details turned out even more precise than the originals!  

What you need:
Cork or fabric wedges (try to find some that are solid cork and not just a thin layer wrapped around the wedge)
Tulip Soft Fabric Paint in yellow, red, green, white and turquoise
Aleene's Spray Acrylic Sealer Matte Finish
Tulip Flexible Body Art Stencils in Fantasy
Scissors
Painter's tape
Small detail paint brushes

1.) Tape of bottoms and tops of shoes exposing only the cork.  Use your fingernail to press tape into the grooves and seal.  2.)  Start with the yellow arcs, these go along the top of shoe first, then add white dots using the tip of your paintbrush.  3.)  Fill in the open spaces in your arcs alternating between blue and green paint.  4.)  Paint tops and bottoms of both shoes.  Allow to dry before next step.

5.) Cut large and medium size flowers from stencil.  Place large flower stencil on the center of the largest area on the outside of each shoe.  6.) Use a stipple or stiffer brush to stencil red paint into petals.  Allow to dry to tacky before removing stencil.  Repeat for second shoe.  Use the smaller stencil on the insides of shoe to add a slightly smaller red flower in the center of the largest area as in picture. 7.) Add a yellow dot to the center of each flower with a tiny white accent. You can opt to draw the outline for the vines/leaves on with a pencil if you prefer, then paint the green details.  A finely tipped paintbrush works best.    8.) Remove tape and commence dancing!  Hooray!

That's all there is too it!  I am so seriously smitten with these shoes and I can't wait for an excuse to wear them.  Is grocery shopping out of the question?  Hee.
Did you like the D and G Sicilian Folk Art Spring/Summer collection or was it a little too over the top for your taste?  Do tell!
Visit iLoveToCreate on Facebook and share your creations!
For more fashion and style inspiration, visit me at DIY Doyenne!
Cheers,
Madge

Tuesday, April 9

R2D2 Toms Tutorial


While I was perusing pinterest the other day I came upon some hand-painted R2D2 Toms.  I knew my boys would flip over them and I already had some gray plain Toms for one of them.  They were destined to become R2D2 Toms and I set out to make some myself.

I pulled out the Toms and some pictures of R2D2 to look at while painting.


I taped off the front half of the shoe and used my Tulip soft fabric paint in metallic silver to paint the toes.


Then I painted the upper half white.


I used my Tulip fabric markers to draw in the shapes.


 I used the blue marker to color in the shapes.


The blue worked really well on the white, but it didn't show quite as well over the silver, so I got out my 3-D paint pens for the rest.


After the paint dried I went back and outlined all the black one more time and called them done.


Now I just have to wait for my son to wake up and see them all done in the morning.  I can't wait!

Tuesday, April 2

Super Simple Star Wars Tees

My boys have recently really gotten into Star Wars and they were begging to make some of their own Star Wars tees.  Here's what we came up with.  They were pretty quick and easy to make.


I googled to find an image that would work for each shirt.


For the Darth Vader tee I cut out his silhouette on freezer paper and ironed it onto the shirt.  (If you are new to freezer paper stenciling you can find a video tutorial HERE.)  I painted Vader with my Tulip soft fabric paint.


After Vader was dry it was time to give him a light saber.  The new Tulip Holographic Transfer sheets are actually what inspired these tees in the first place.  When I saw them they just screamed, "Light sabers!" to me.  All you do is cut out the sword, place it where you want it on the shirt, lay a thin piece of fabric over it and iron it for 40 seconds.  Then you're set.


We've already washed the tees a couple of times and the swords are holding strong.  They've been a hit.


For the Yoda tee I cut out his silhouette and then used the silver Tulip spray paint to spray around the edges of Yoda.


It didn't take much.  After it dried we peeled off the paper and added a green light saber.


My little man was quite pleased with his Yoda tee.


And there you have it.  Two quick, easy tees for the Star Wars love in your life.


May the force be with you.

Wednesday, March 6

Happy Go Lucky Shamrock Jewelry Set!

March is my birthday month and I'm happy that it is also St. patrick's Day - maybe it will bring me good luck! To try and tilt the odds in my favor, I made my very own four leaf clover jewelry set that I'm calling the "Happy Go Lucky" set. Either way, I want to live my life in a happy way, but I welcome all the luck I can, lol.

We have a big box of leather scraps in the garage and that's what I used to make these pieces. I wanted something heavier than paper, but lighter than clay and I I didn't have time to sit and wait for airdry clay, etc. Plus, it was cool to work with a different material. It takes a bit of getting used to but I really liked it!

OK, let's do this!

SUPPLIES: You'll have to do an image search for "shamrock outline" and print off the shape in different sizes.

- Leather (thinner is better, easier to cut!).
- Sharp scissors or craft knife.
- Bowl of water.
- Gems or buttons to go in the center of the shamrock.
- Jump rings, earring hooks, necklace chain, needle nose pliers.

Transfer the design to the leather using carbon paper or just cut out the shape and trace.

Cut around the shape.

Place in water to soak, about five minutes (until leather is soft). Cut out the shapes, and bend the leaves up to look like a real shamrock, let the pieces dry completely. you can tell because they will go from dark brown to light brown. You can set them in direct sunlight or use a heat gun to speed up the process. They'll dry in the way that you shaped them!

Use the Fast Grab to attach the jump rings to the back. It's super thick so the rings will stay in place as you paint the rest of the piece. Paint the front and back with the Soft Paint. Let everything dry.

This is my favorite part, add the Shimmer paint. You have to add a few coats and you have to let them dry in between. You could always apply loose glitter but I didn't want any loose glitter flakes to get on my skin. Use the glue to add a button or gem in the center.

Or you can use Puffy Paint...

Add the jewelry hardware and you're all done! 

Thanks for reading my project, I hope it brings you lots of luck! Please leave a comment if you like it and please share it with all your friends. Come visit me on my Facebook page too if you want! http://facebook.com/mayainthemoment
Clicky Web Analytics
Pin It button on image hover

Subscribe to our newsletter

* indicates required
I am interested in products and inspiration for...
Close