Showing posts with label halloween craft ideas. Show all posts

Monday, October 15

DIY Retrofabulous Halloween Masks


DIY Retrofabulous Halloween Masks
Margot Potter for iLoveToCreate
“These are your grandmother’s crafts, ya gotta problem with that?”

I found these vintage inspired paper mache masks at Target and my only regret is that I didn’t buy every last mask.  Alas, they’re sold out locally and I’m kicking myself for not getting more.  If your local Target is sold out don't fret, you can find similar masks made of fabric and paper at craft chains and costume supply stores.  It’s so easy to dress them up with inexpensive glitter, gems, feathers and decoupage using Aleene’s Tacky Glue, Fabric Fusion tape and decoupage medium.  These also look fabulous painted or covered with sequins or ribbon, so make them your own.  I love them for Halloween, but they’re so fun you could use them for Home Décor year round!  You can give these masks even more vintage appeal if you remove the stretchy straps and attach a painted dowel and satin or lace ribbons.  

Watch the video on Knoxville's WBIR Channel 10 Live at Five at Four here!

Materials
3 paper mache masks (I got mine at Target)
Hot pink feathers
Various sizes faux rhinestones
Vintage sheet music (we have lovely packs of old book pages at our website)
Wired silver tinsel
Chunky silver glitter
Traci Bautista Collage Pauge Matte

Tools
Round nose pliers
Awl or drill with 1/16” bit


Sparkle Kitty Mask
Cover mask with a thick layer of Tacky Glue using a sponge pouncer.  Working over a paper plate or cardboard folder, douse mask with chunky glitter.  Tap off excess.  Dump unused glitter back into jar.  Allow to dry.  When mask is dry, use an awl or a drill to create three holes on both sides of nose.  Cut each wire tinsel stem in half, turn a small loop in the end and thread into hole, dabbing back of hole with Tacky Glue to secure whiskers.  Allow to dry.  Purrrfection!


Circus Showgirl Mask
Cover mask with a thick layer of Tacky Glue using a sponge pouncer.  Working over a paper plate or cardboard folder, douse mask with fine fabric glitter.  Tap off excess.  Dump unused glitter back into jar.  Allow to dry. When mask is dry add faux rhinestones.   Squeeze out a small amount of glue on a paper plate.  Dip each crystal in glue and add varied sizes around eyes and top of mask.  Glue three features to back top of mask.  Allow to dry.  Now you’re ready for the center ring!


Divine Music Mask
Working in small sections, tear pieces of sheet music and adhere them on to surface of mask using decoupage medium  Brush medium on mask, add paper, add more medium. Old paper tears easily and works very well for this technique.  (Old book pages or sheet music will work, if you’re thinking of using new paper try printed tissue or stamping text on plain tissue.)  Allow decoupage medium to dry completely.  Squeeze a bead of glue around edges of mask and eye holes.  Work in sections.  Sprinkle chunky silver glitter over glue and tap off excess working over a paper plate or cardboard folder.  When all glue is covered, dump unused glitter back into jar.  Allow to dry.  Attach a Fabric Fusion tape strip across the top at the back of your mask, peel off top of strip to expose adhesive.  Working from your crepe paper spool, adhere paper making small folds as you move across tape.  See photo for details.  When you reach the end of the mask, cut off excess paper on both sides.  I feel a song coming on!

Tuesday, October 25

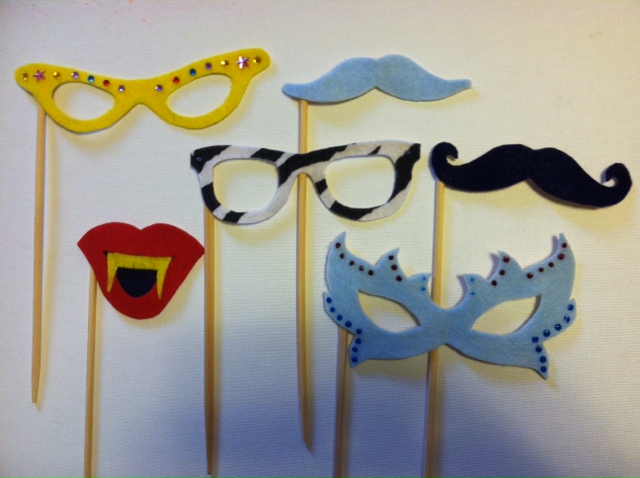
For Halloween: Costume-on-a-Stick!

'Twas the week before Halloween and all through the haunted house,
every creature was stirring--

the zombies, the mummies, the vampires, the flappers, the secret agents--

even the mouse.

But if you're the one caught without a disguise,
make a costume-on-a-stick to cover your mouth or your eyes!


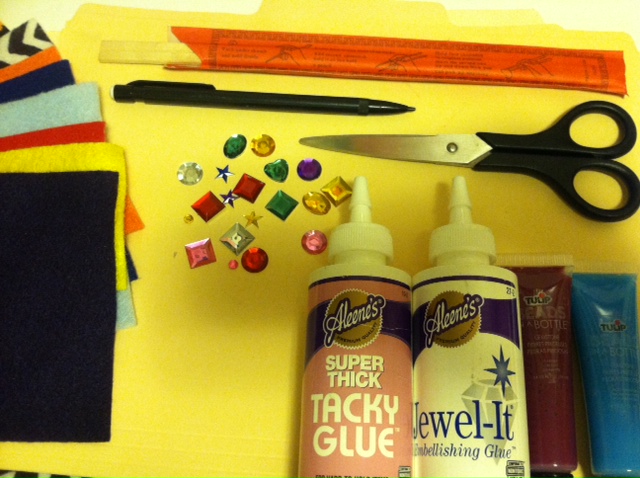
Materials:
-Pencil
-Paper (optional)
-Manila file folders
-Scissors
-Felt pieces in a variety of colors and patterns
-Aleene's Super Thick Tacky Glue
-Aleene's Jewel-It Embellishing Glue
-Fake jewels
-Tulip Beads in a Bottle
-Wooden chopsticks


Make it:

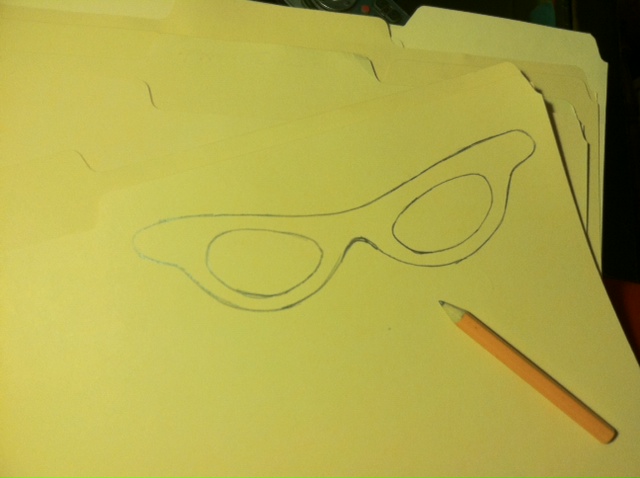
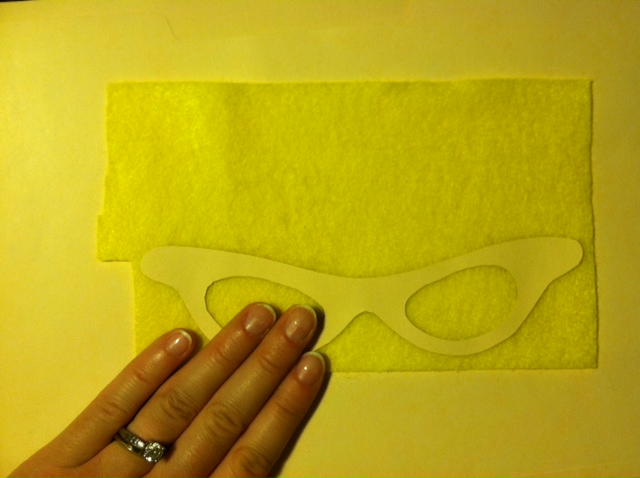
1. Draw the outline of a pair of glasses, a mustache, or other shape on a manila folder. Optional: Sketch it out on a piece of paper first to use as a template (this way, if it's a symmetrical shape, you can fold it in half to make sure both sides match), then cut it out and trace it onto the folder.

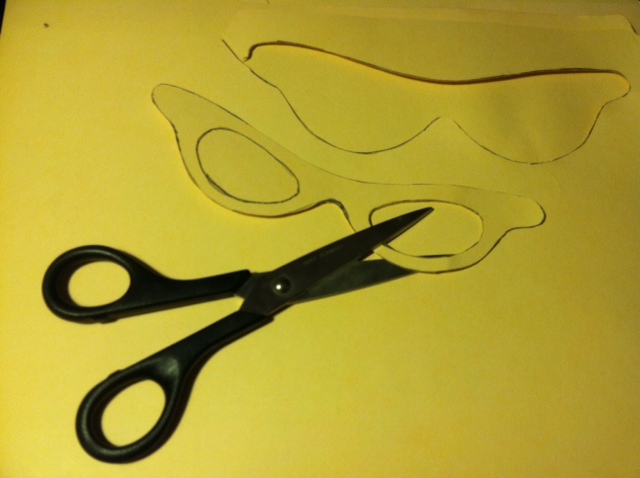
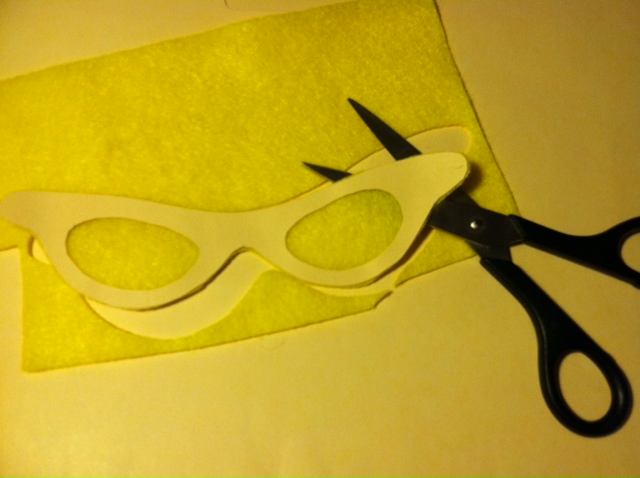
2. Use scissors to completely cut out the shape(s).

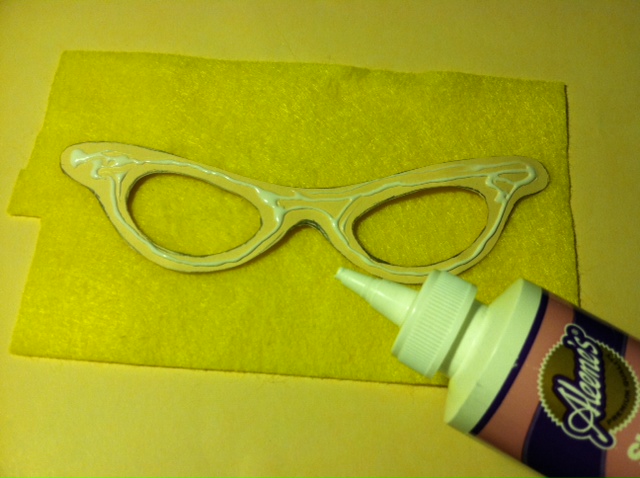
3. Spread glue generously over the back of the folder shape.


4. Press it firmly onto a piece of the desired felt color. Let the glue dry.

5. Cut out the felt piece, using the folder edges as your guide.

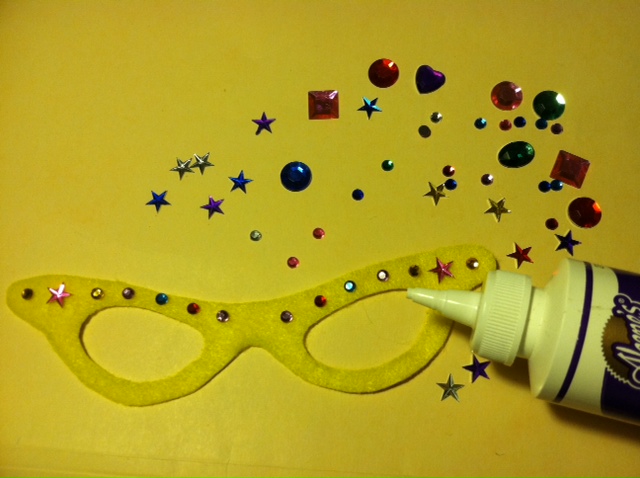
6. Use jewelry adhesive to decorate the front with fake jewels...

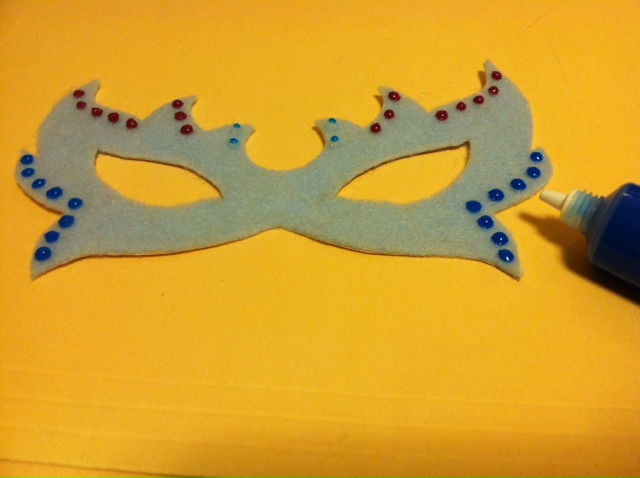
...or use Beads in a Bottle to create 3D embellishments! Let the embellishments dry.

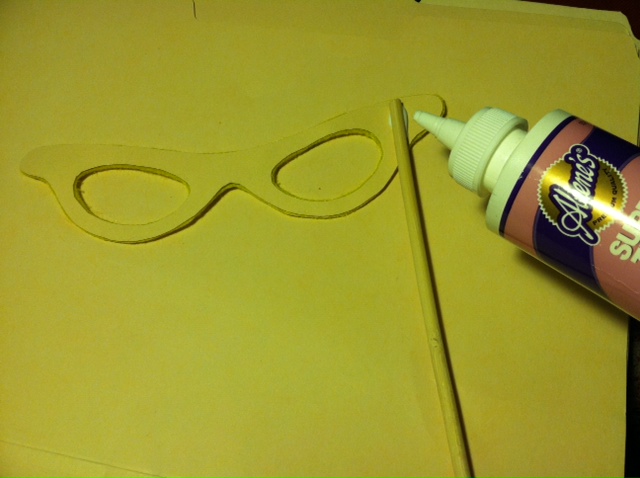
7. Flip the disguise over and squeeze a line of glue along one side. Press the top of one chopstick so it extends vertically from the bottom. Let it dry.

8. Repeat as many times as you like to make cat-eye glasses (shown), wayfarers, masquerade masks, vampire fangs, and mustaches galore. Now what are you waiting for? Go undercover!

Happy haunting from Generation T!


Visit us on Facebook!
Craft on!

Thursday, September 29

Cool2Craft TV - Monday October 3, 2011


Cool2Craft TV for October 3, 2011: Halloween

Join host Tiffany Windsor for a new episode of Cool2Craft TV. This week's show theme is Halloween. EcoHeidi Borchers creates a Happy Halloween Rolled Beads Necklace with Aleene's Fabric Fusion Adhesive, Candace Jedrowicz creates a Whimsical Articulated Skeleton and Tiffany creates a Pumpkin Patch Fabric Napkin featuring Aleene's Fabric Fusion Adhesive and Aleene's Fabric Fusion Peel & Stick Sheets. It's terrifically tacky and creatively cool!

It’s easy to watch the Cool2Craft TV Channel right from your computer. Airing Monday October 3, 2011 9am Pacific/10am Mountain/ 11 am Central/ Noon Eastern. Go to http://cool2craft.com and find the Livestream player and chat box. See you Monday!

Visit us on Facebook!
Craft on!Click here for today's daily giveaway!

Tuesday, June 28

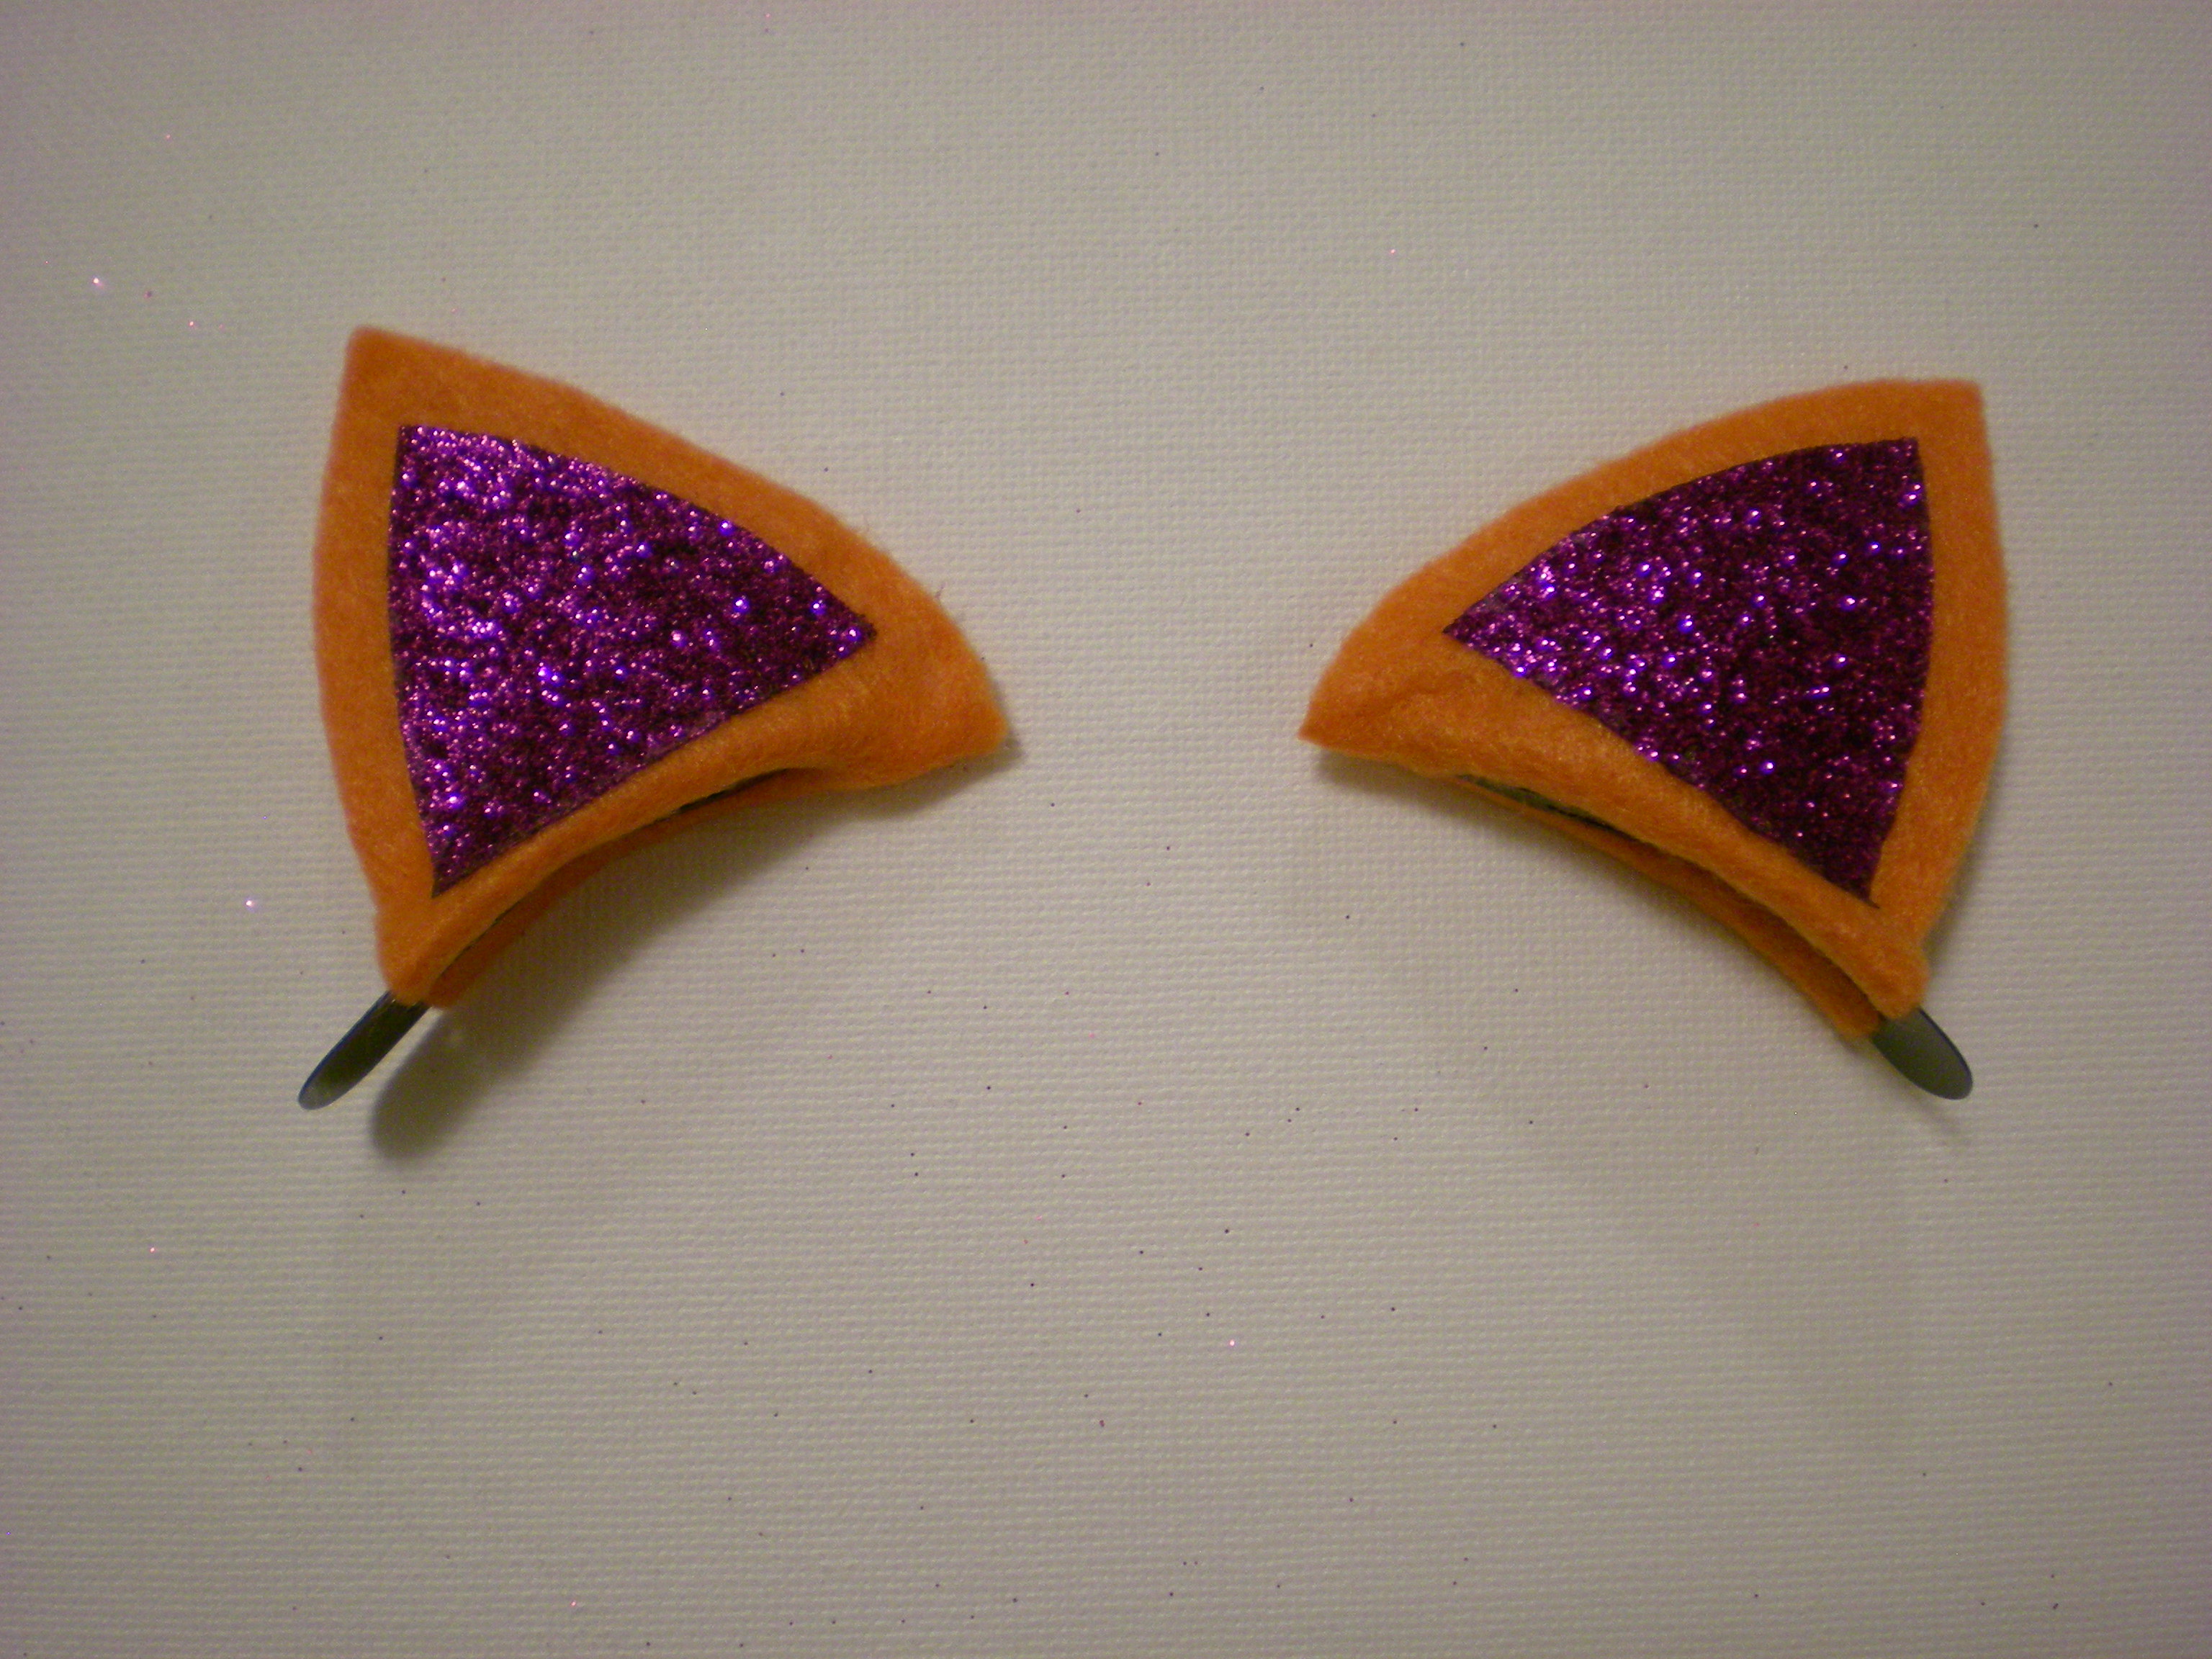
How to: Sparkle Kitty Ear Barrettes!

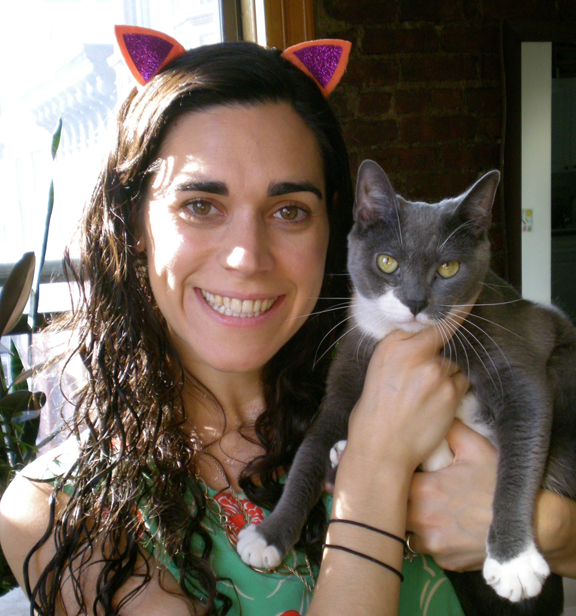
Today, it's clip-on cat ears for when you're feeling a little bit feline! The occasion? Well, to be perfectly honest, I set out making these for my niece's 5th birthday (she happens to love cats--her cat, Mo, in particular), but I didn't finish them in time (yes, despite the fact that they only take about 10-15 minutes to complete!). It turns out, though, that there was a higher power (called glitter) at work and the delay was well worth it: I recently got a delivery of Tulip's new iron-on glitter sheets and I realized that the delay was meant to be (because what would these ears be without the sparkle?--I know the Crafty Chica would be proud.)


Save these for Halloween if you want, but why wait? I wholly believe in wearing fun accessories whenever the mood strikes--because, hey, some days you just feel like a cat and here's the perfect accessory to let you indulge. And talk about fun in the sun--these ears sure do sparkle!

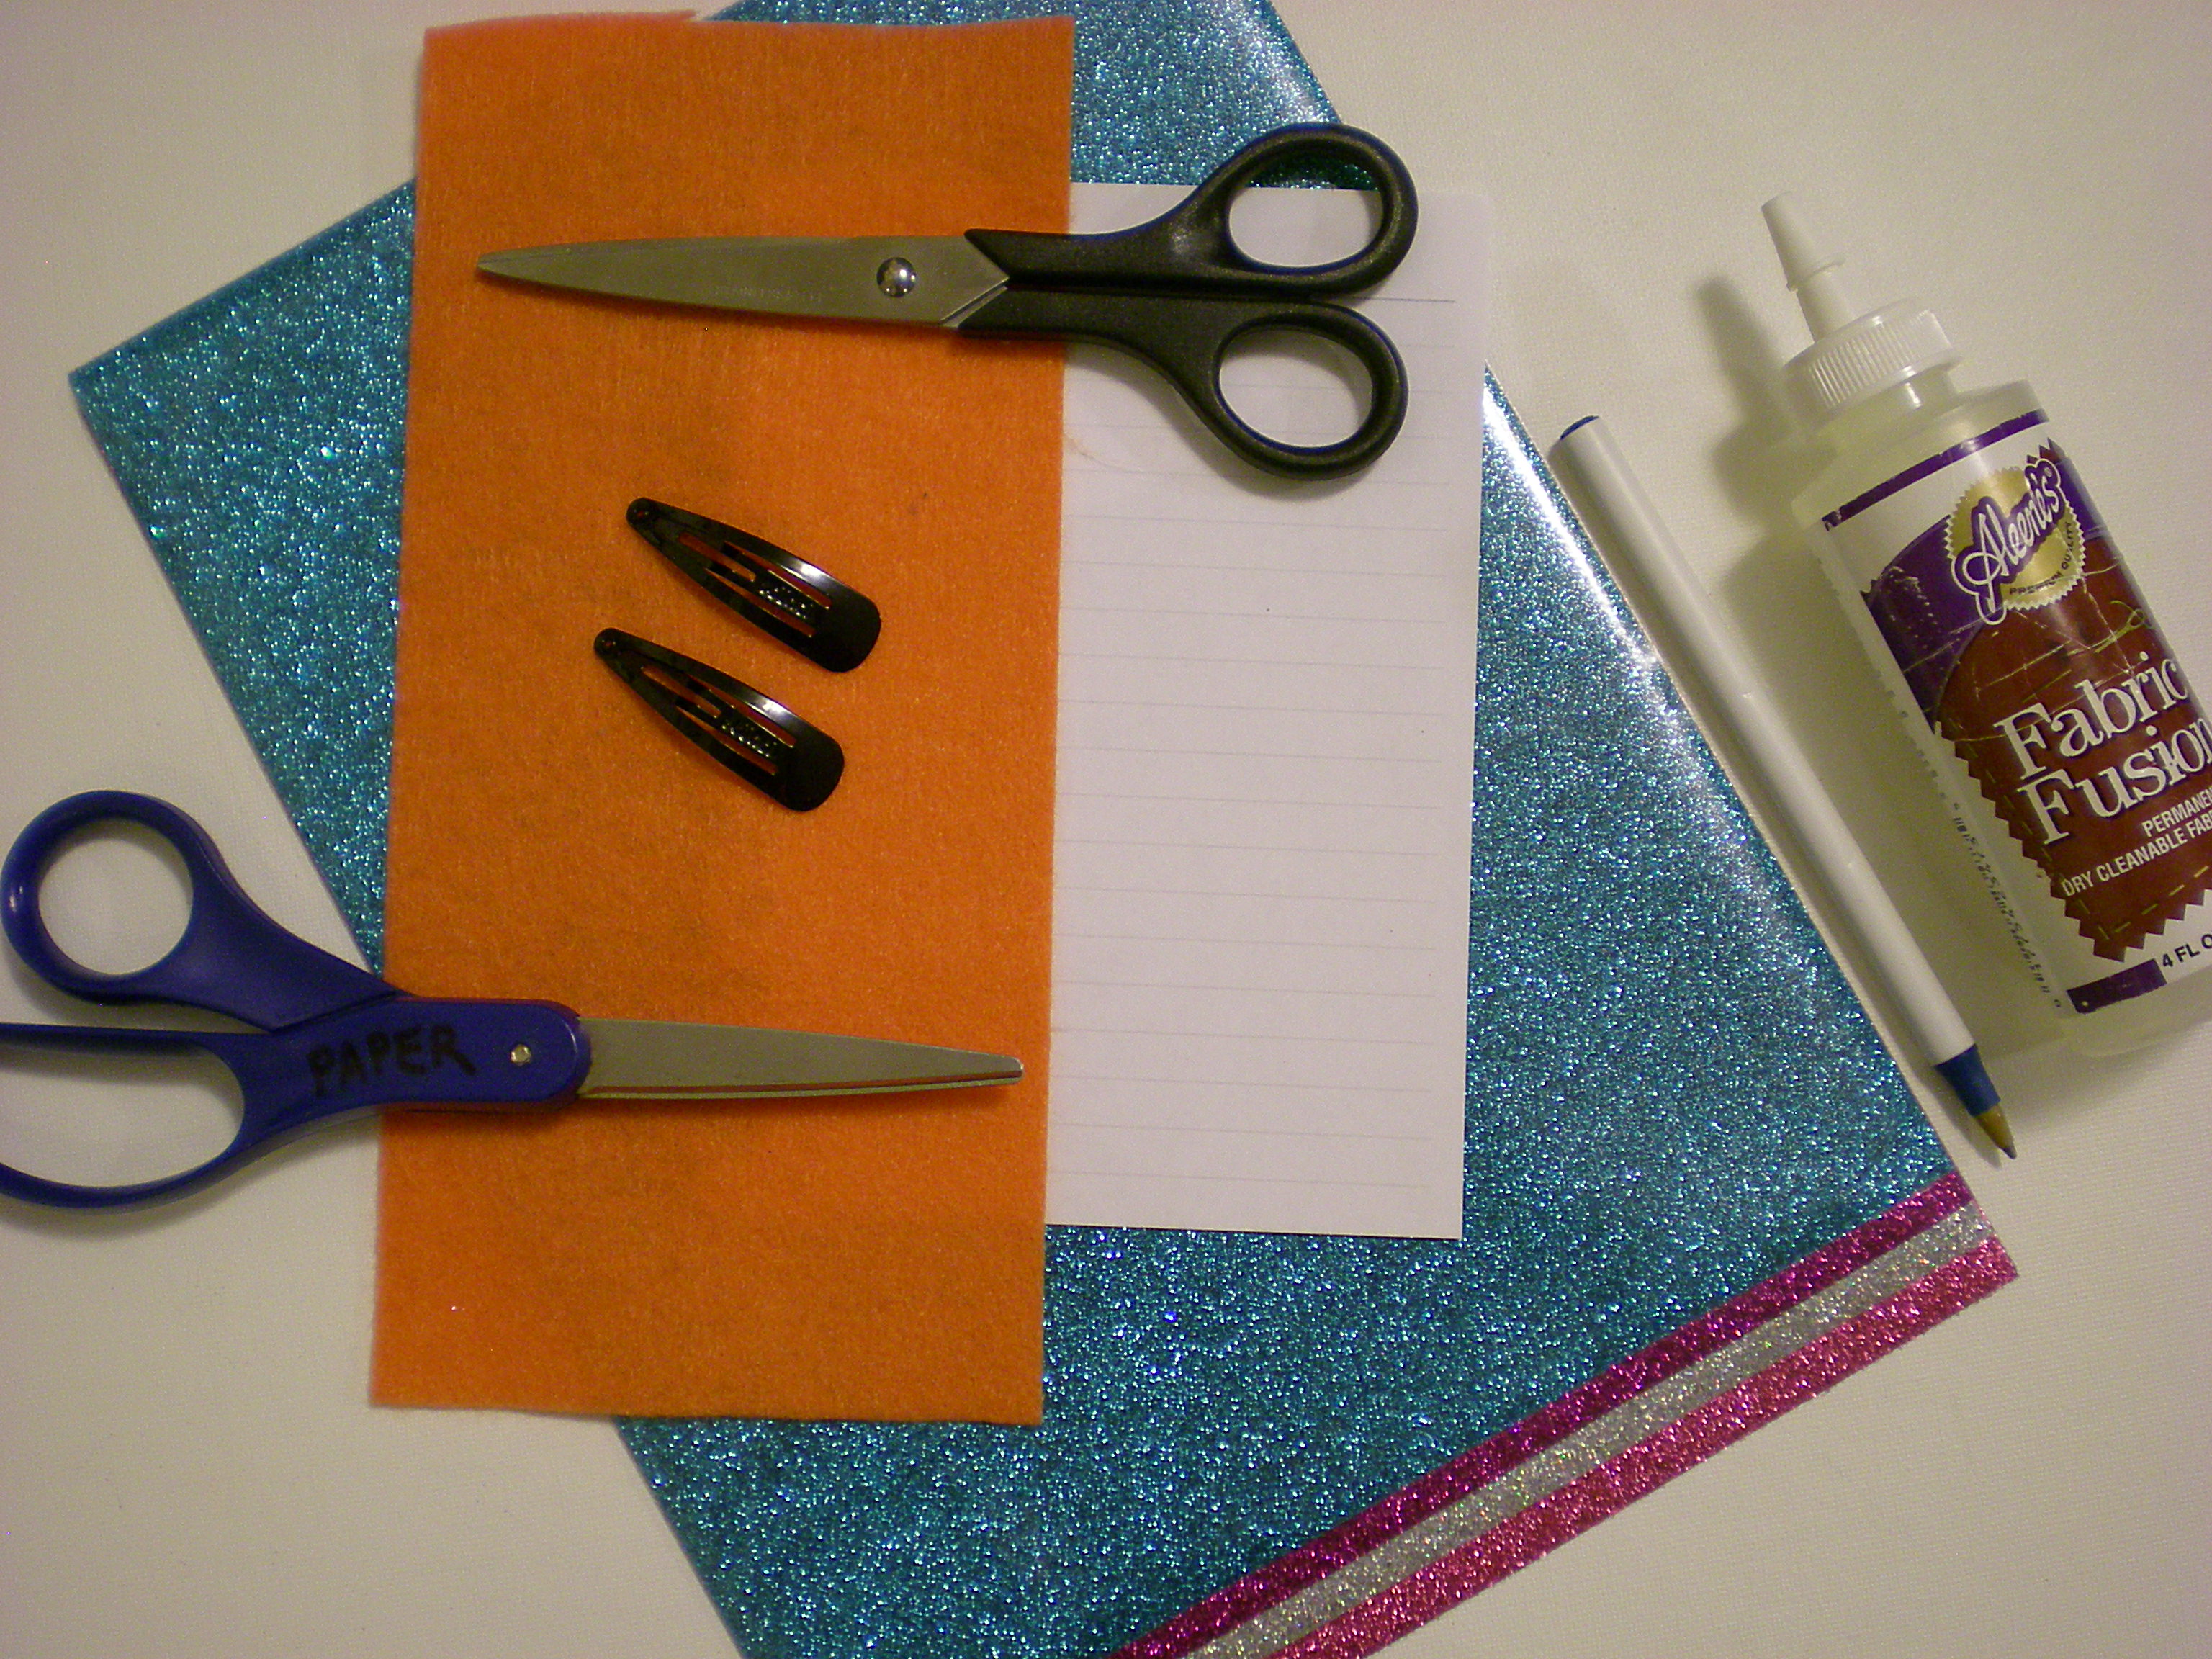
Materials:
-Pen or pencil
-Scrap of paper
-Colorful felt
-All-purpose scissors
-Fabric scissors
-Metal snap barrettes
-Aleene's Fabric Fusion fabric glue
-Tulip Fashion Glitter Shimmer Transfer Sheets
-Pressing cloth
-Iron


Make it:
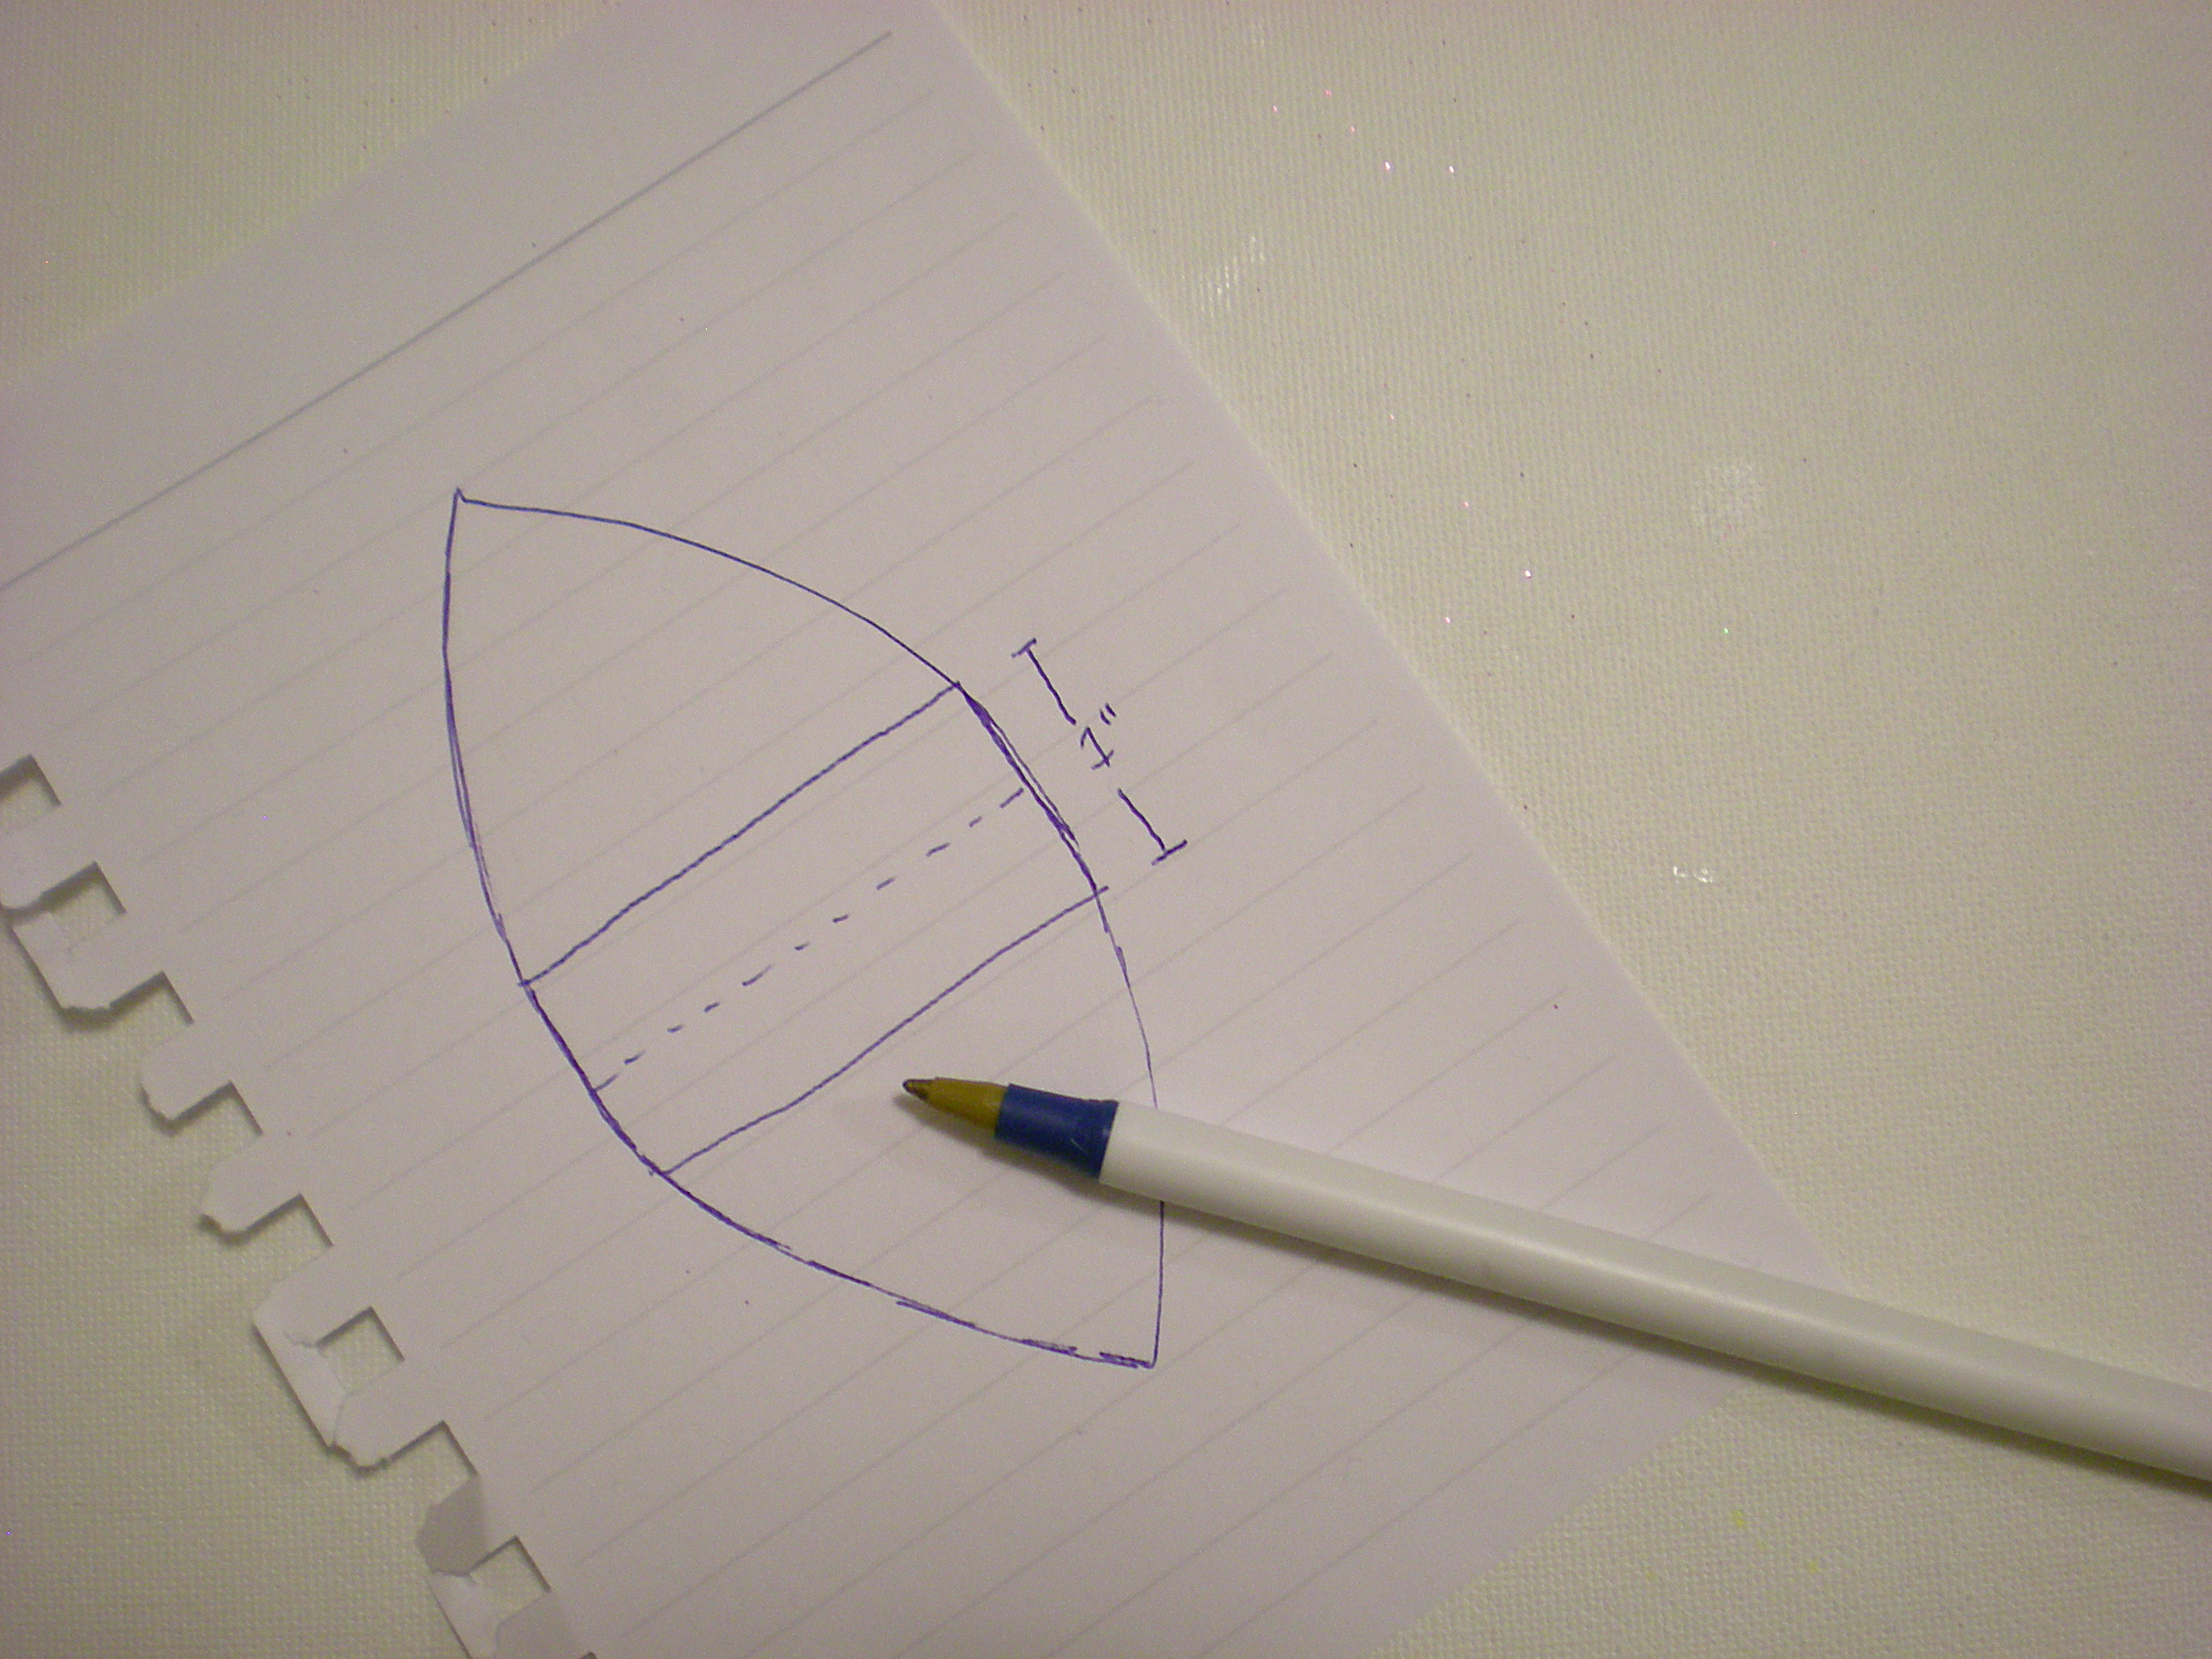
1. Use the pen and paper to sketch out a slightly rounded triangle, about 2" high. Add 1/2" at the base of the triangle and then mirror the shape below it to create the template. Cut it out with the all-purpose scissors. (You can also fold the paper at the base after you've drawn the top triangle and the extended base, and cut around the shape through both layers.)


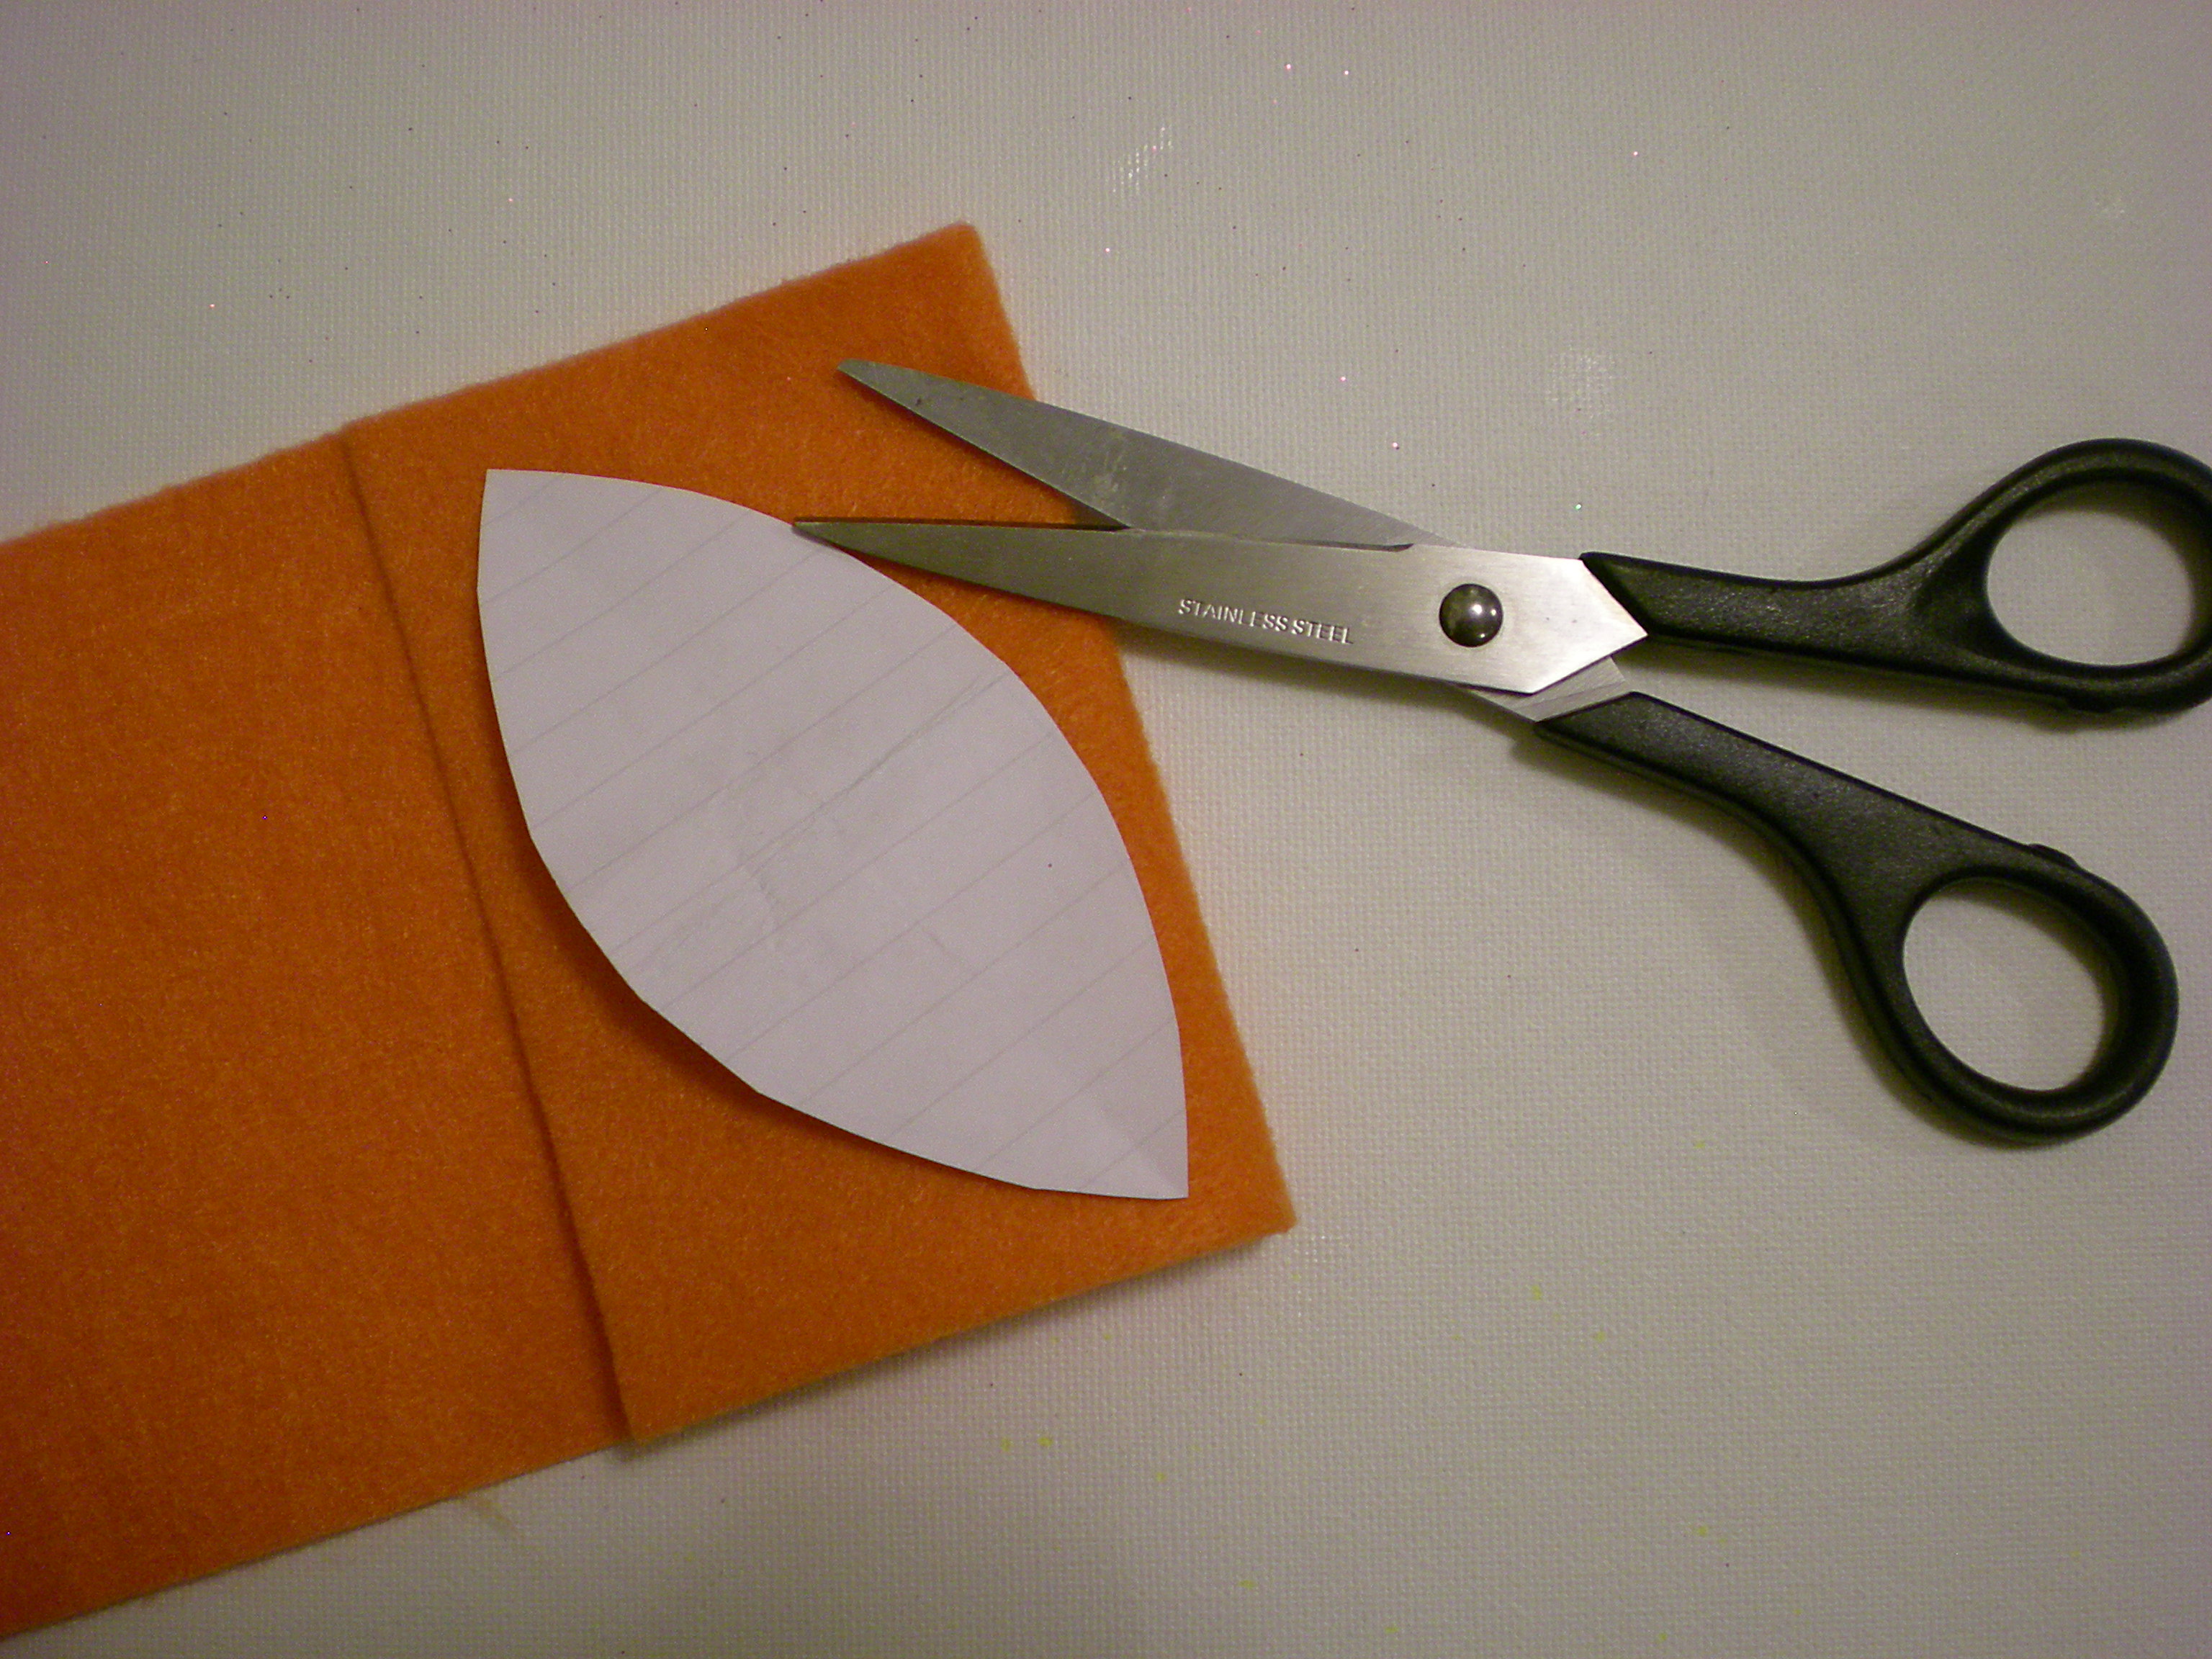
2. Fold over the felt and lay the template on top of the folded section. Use the fabric scissors to cut around the template, through both layers.


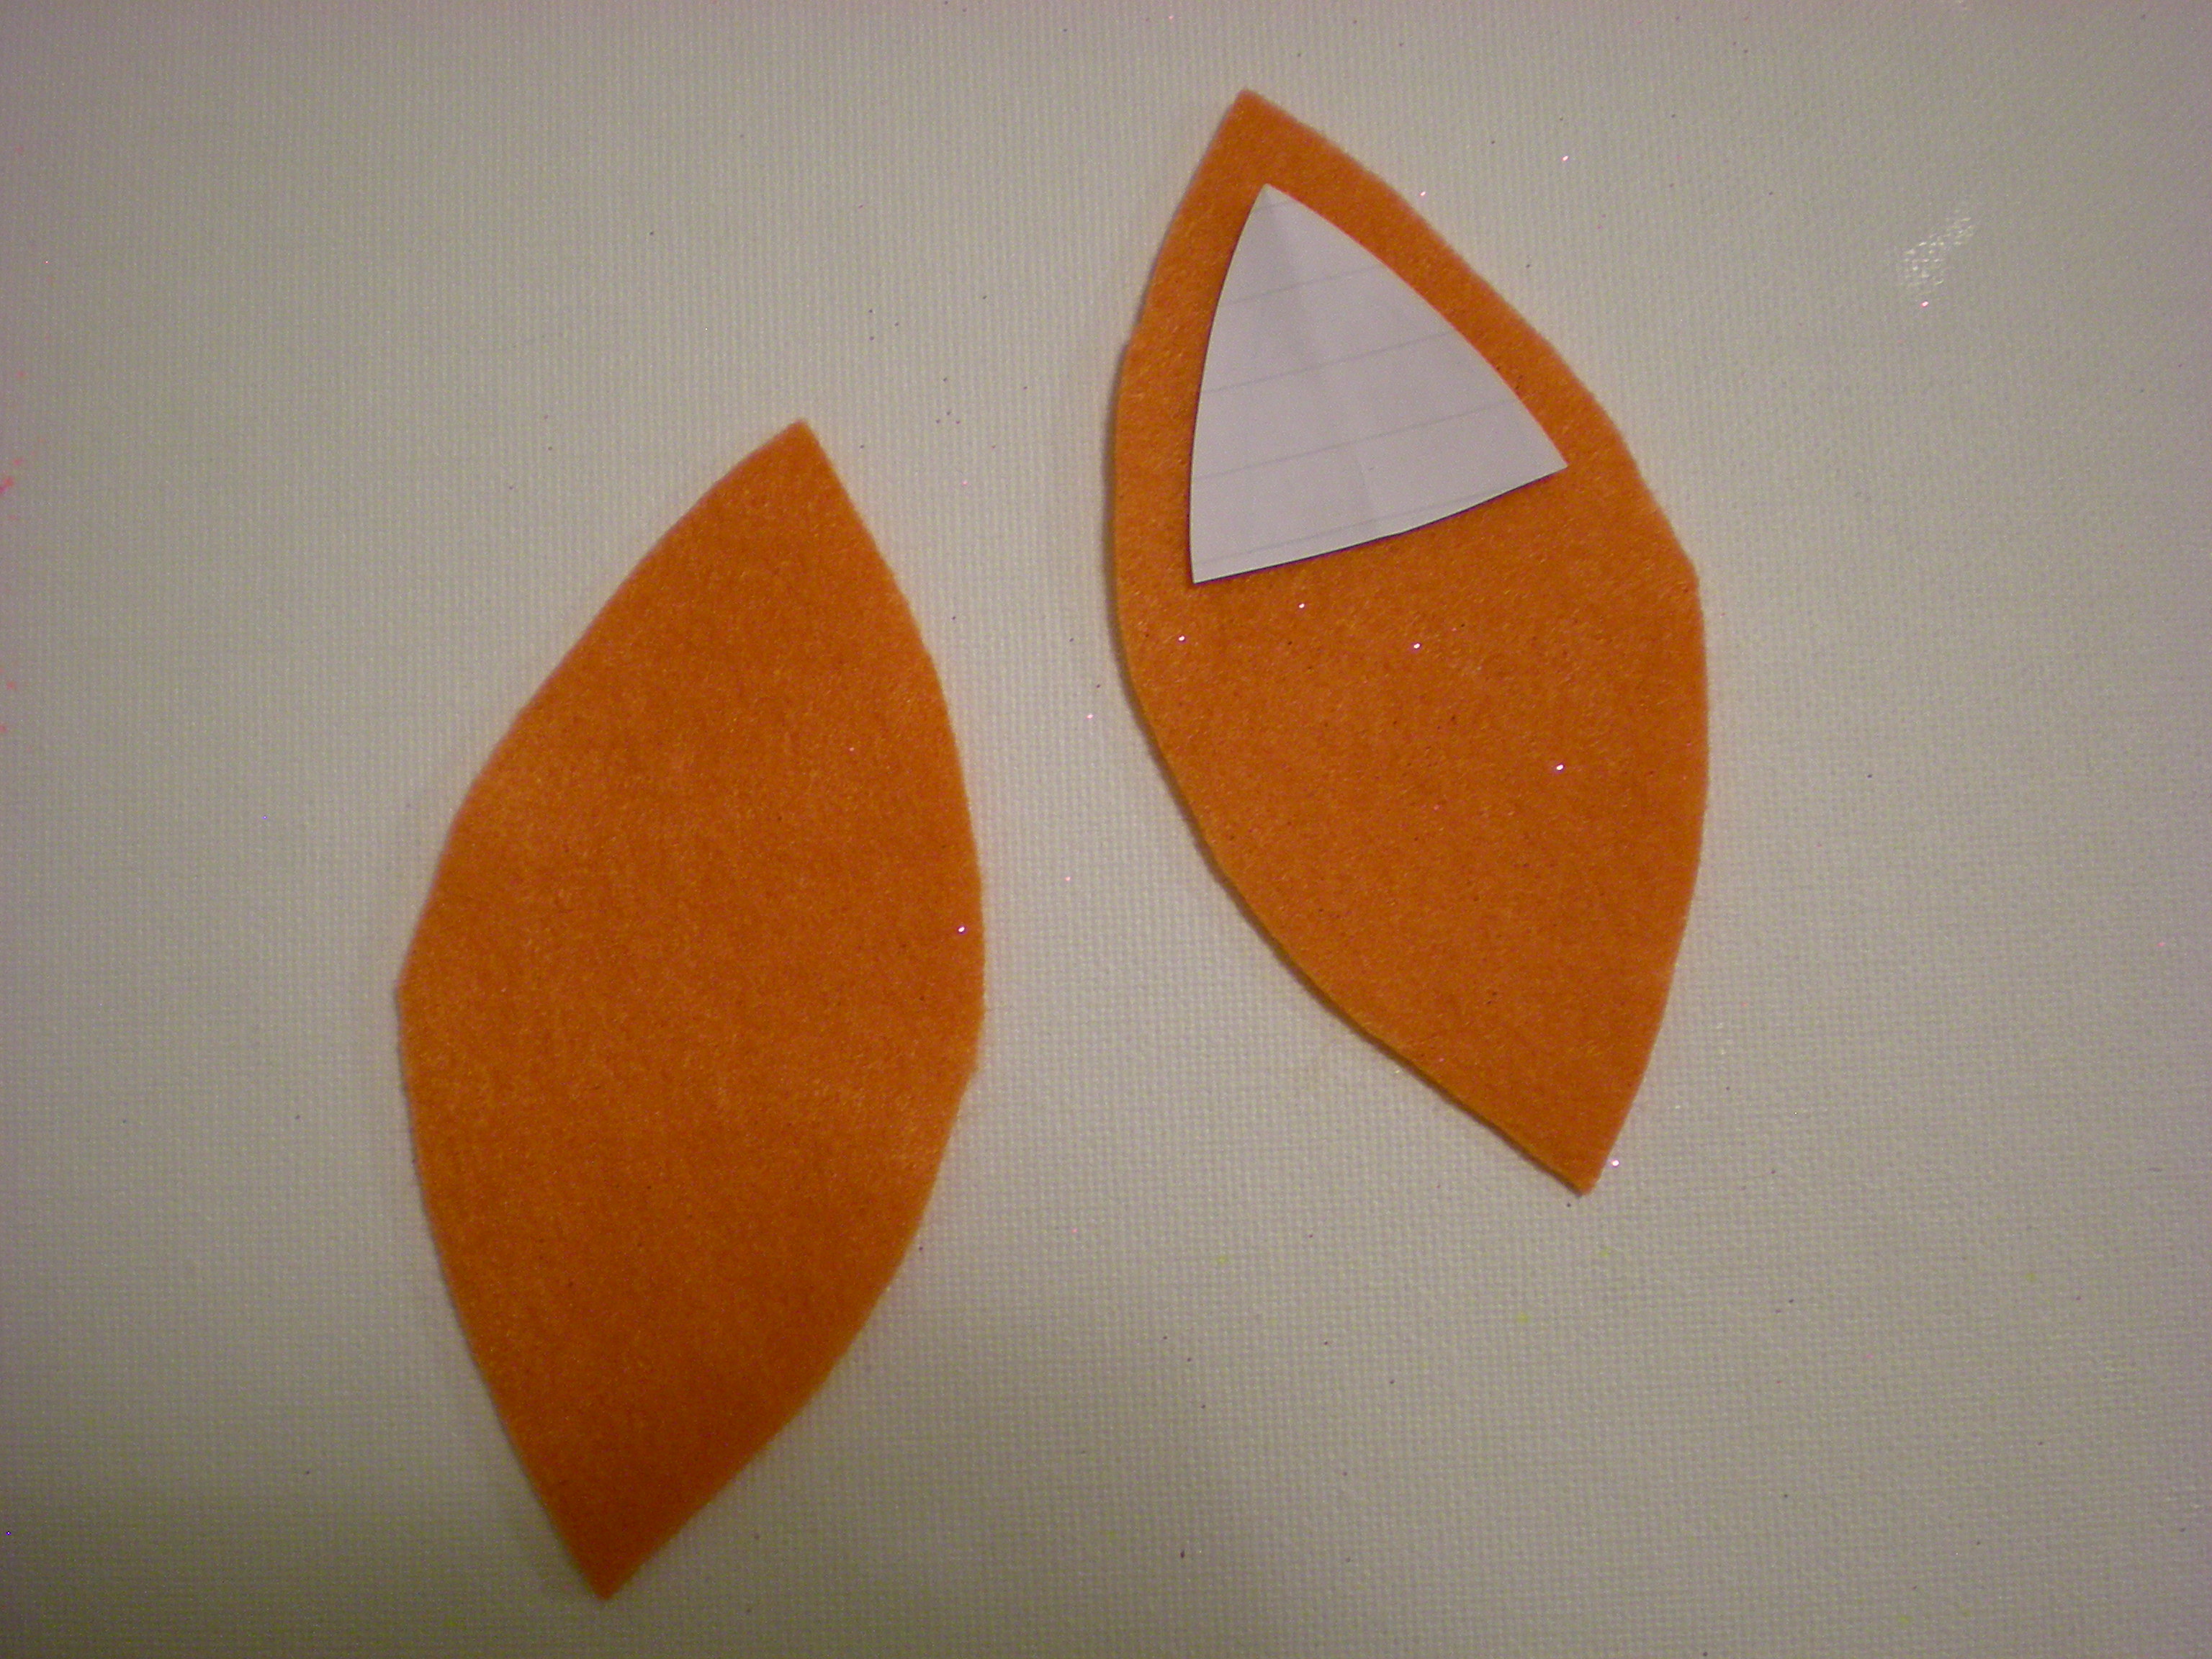
3. Mark and cut a second template, in the shape of a rounded triangle, about 1/4" smaller on all sides than the original triangle in Step 1.


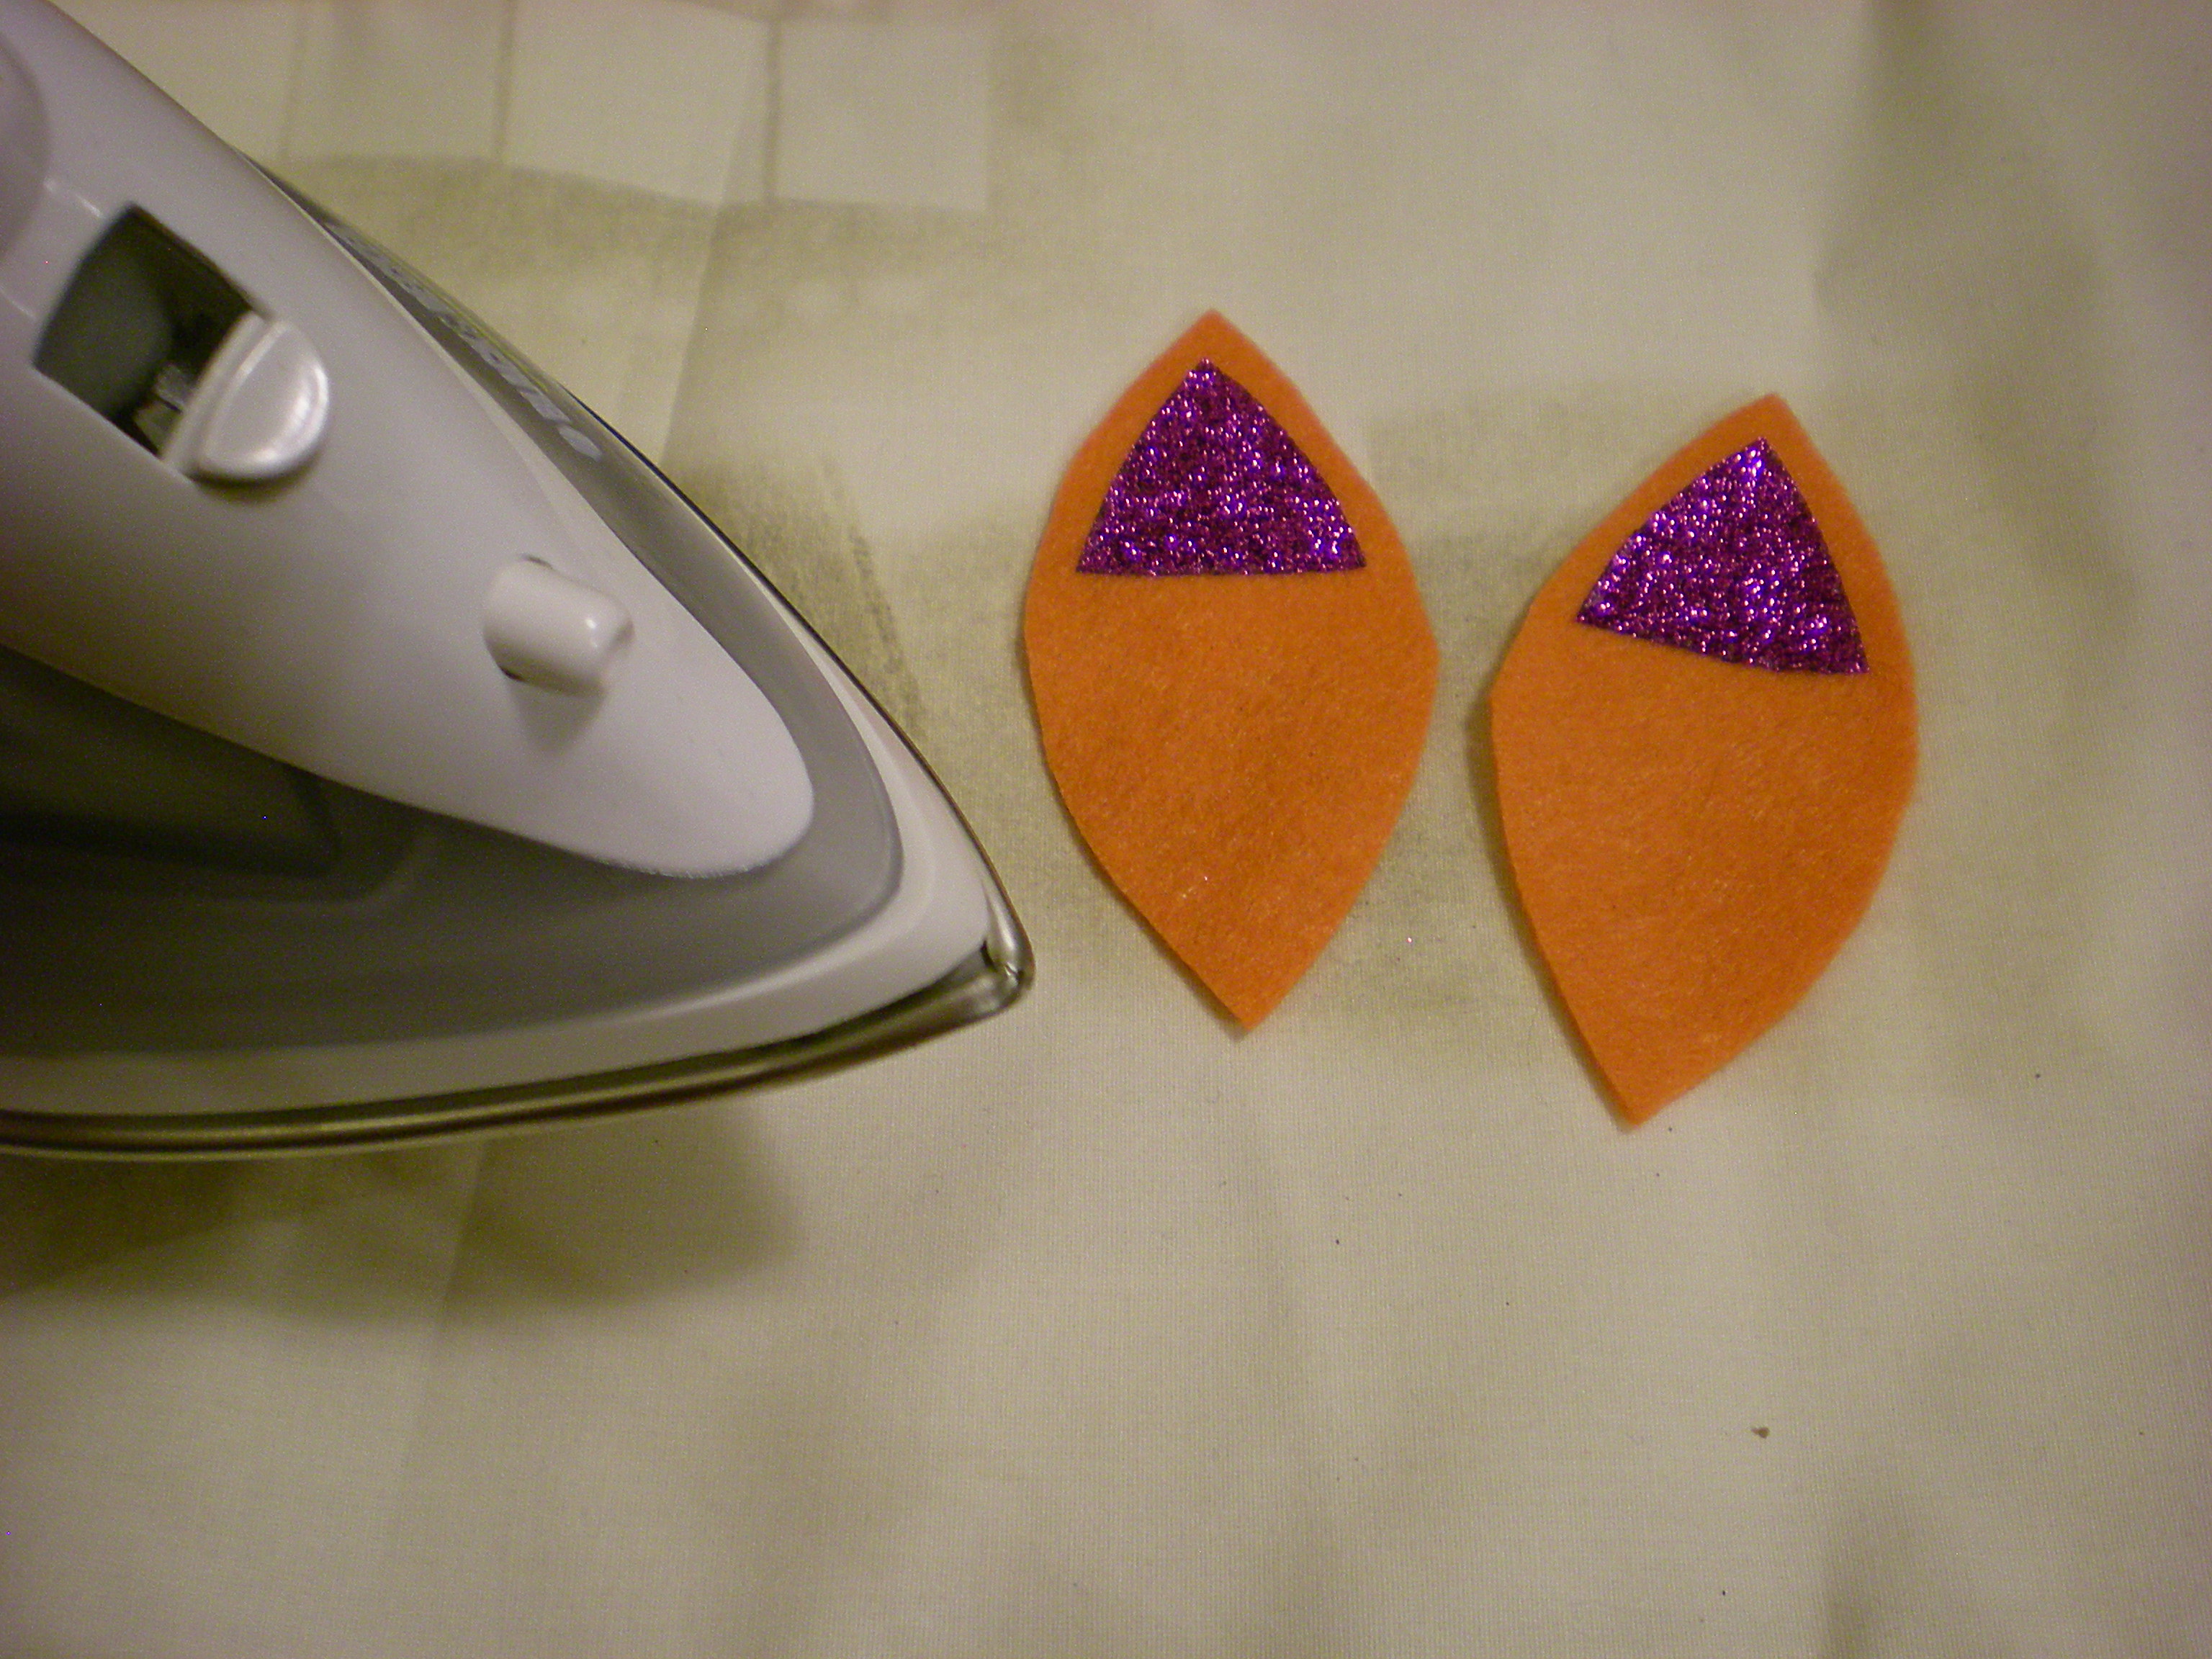
4. Select a color from the iron-on glitter sheets and trace the second template twice onto the shiny surface. Use the all-purpose scissors to cut them out. Peel away the shiny surface layer and arrange them on the felt ear pieces. Lay a pressing cloth over the ears, and press firmly with the iron for about 40 seconds. (Repeat if necessary to set the glitter transfer.)


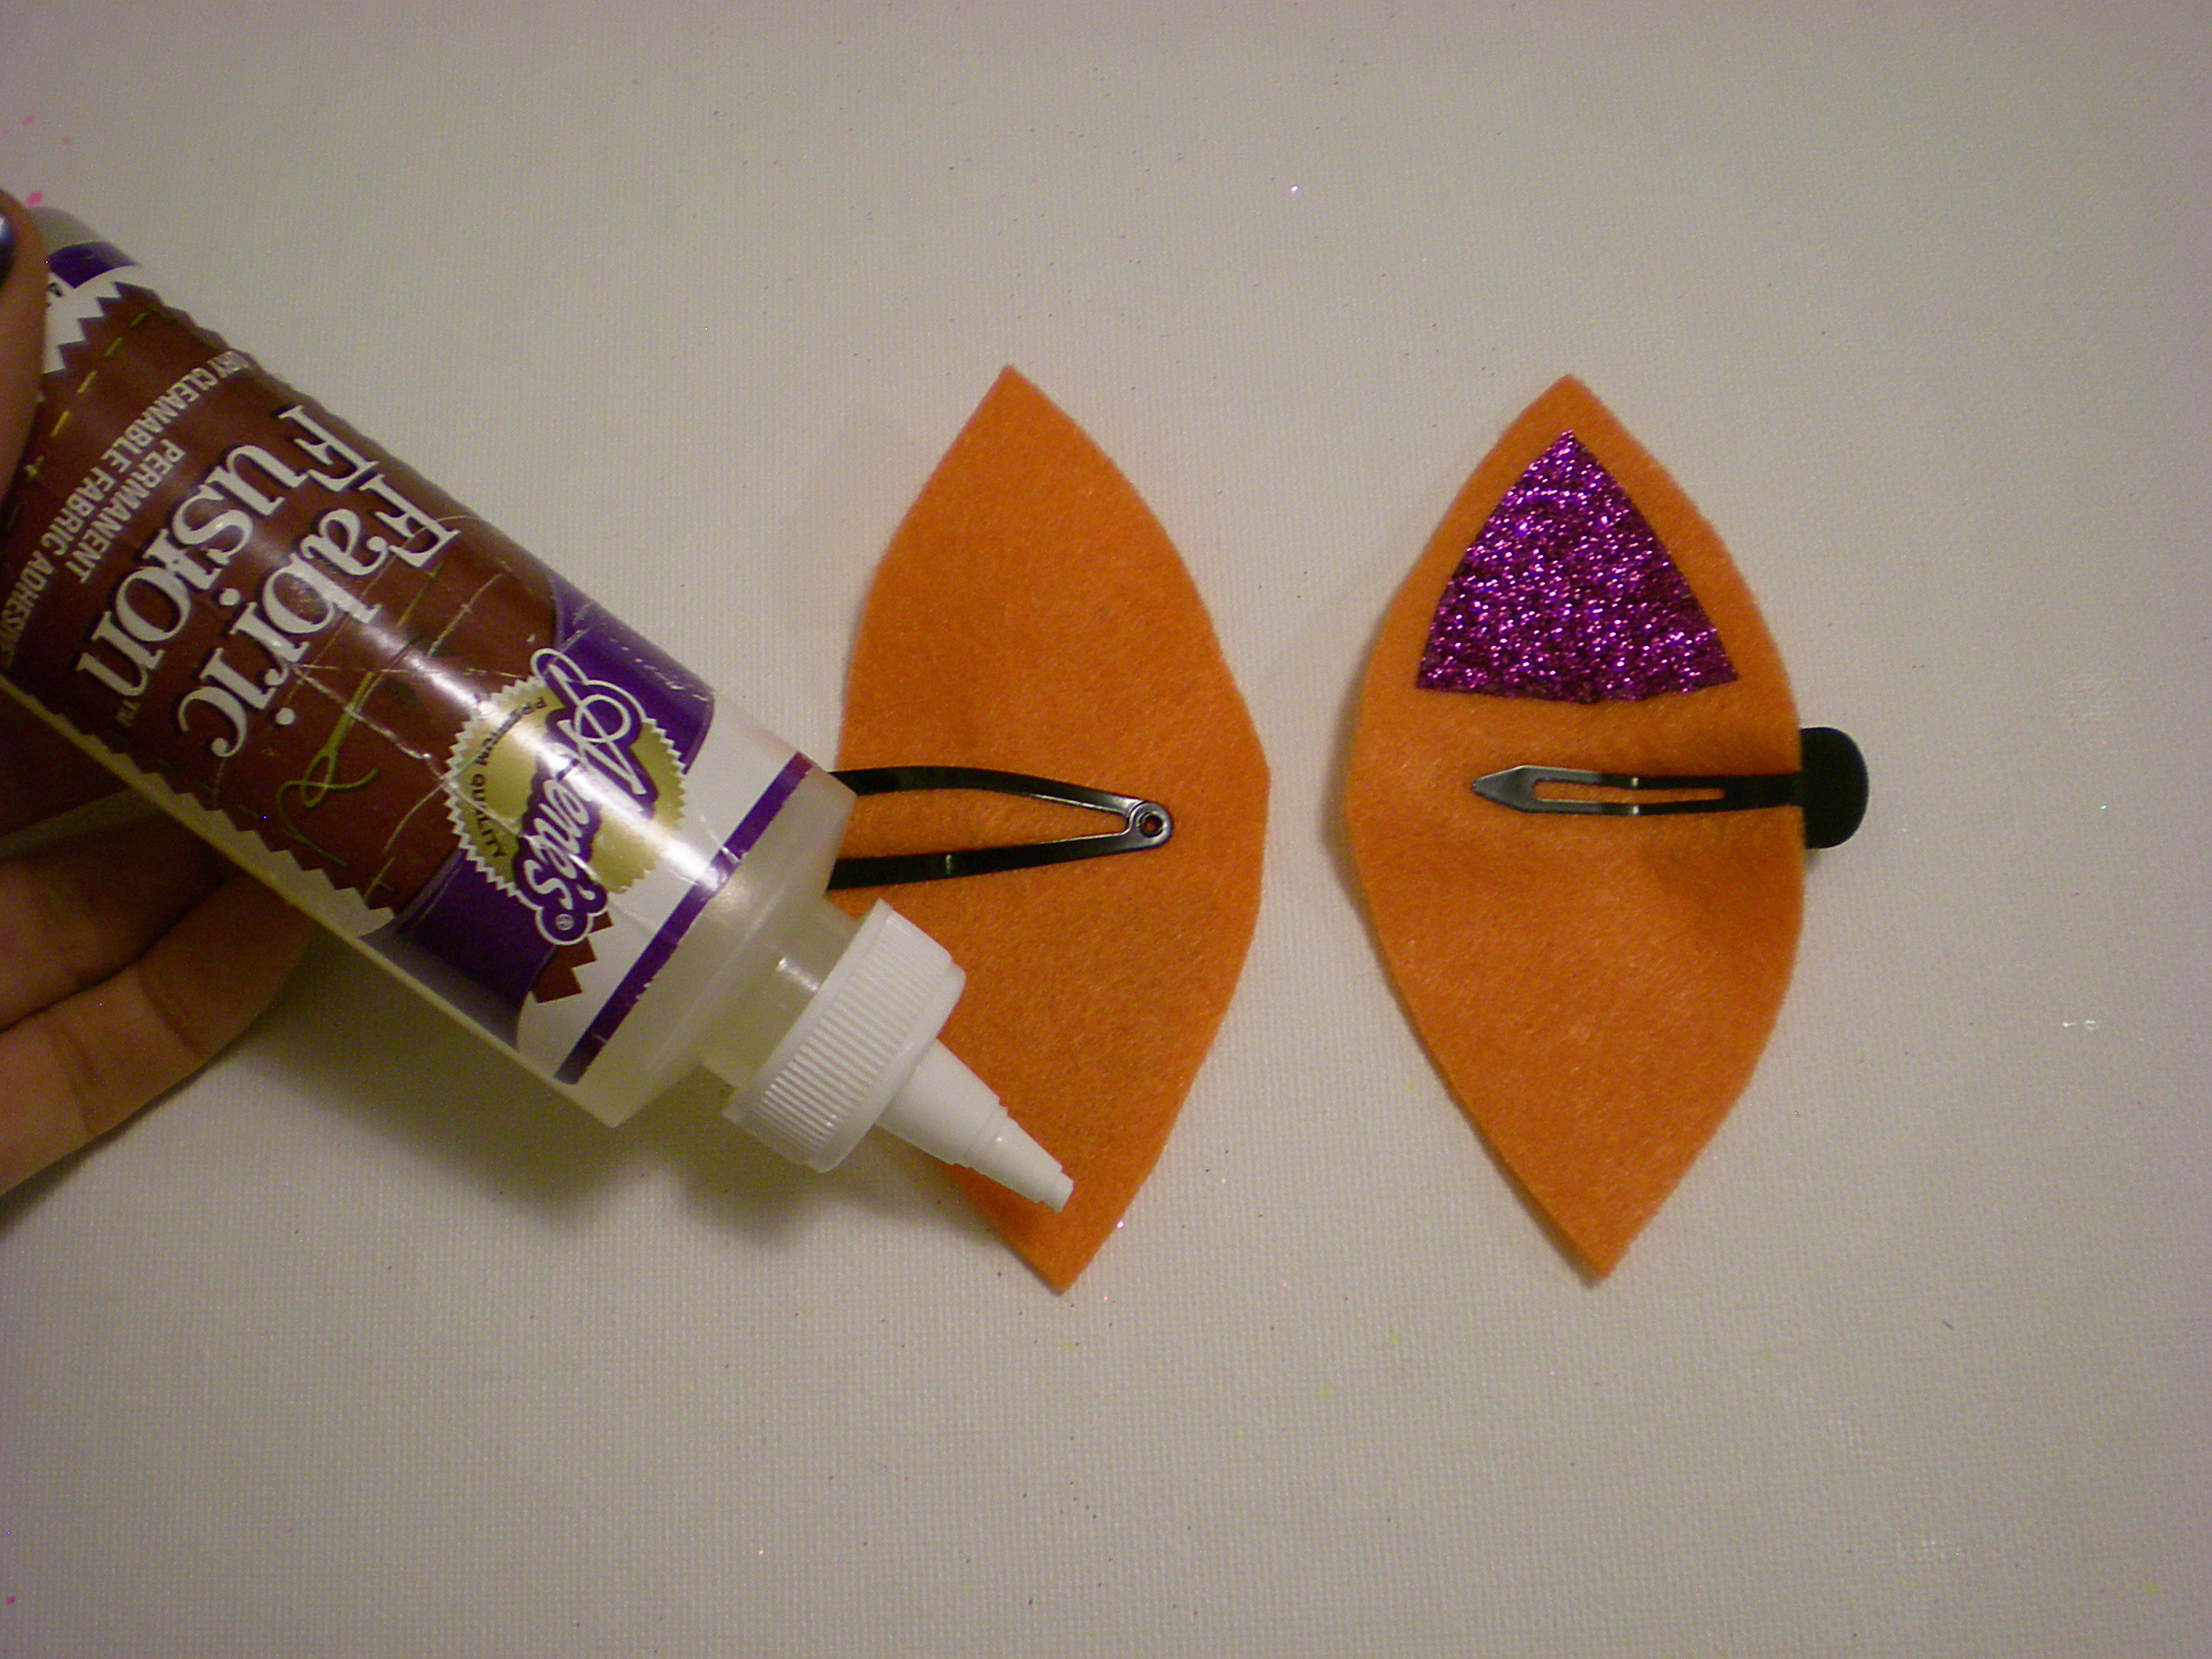
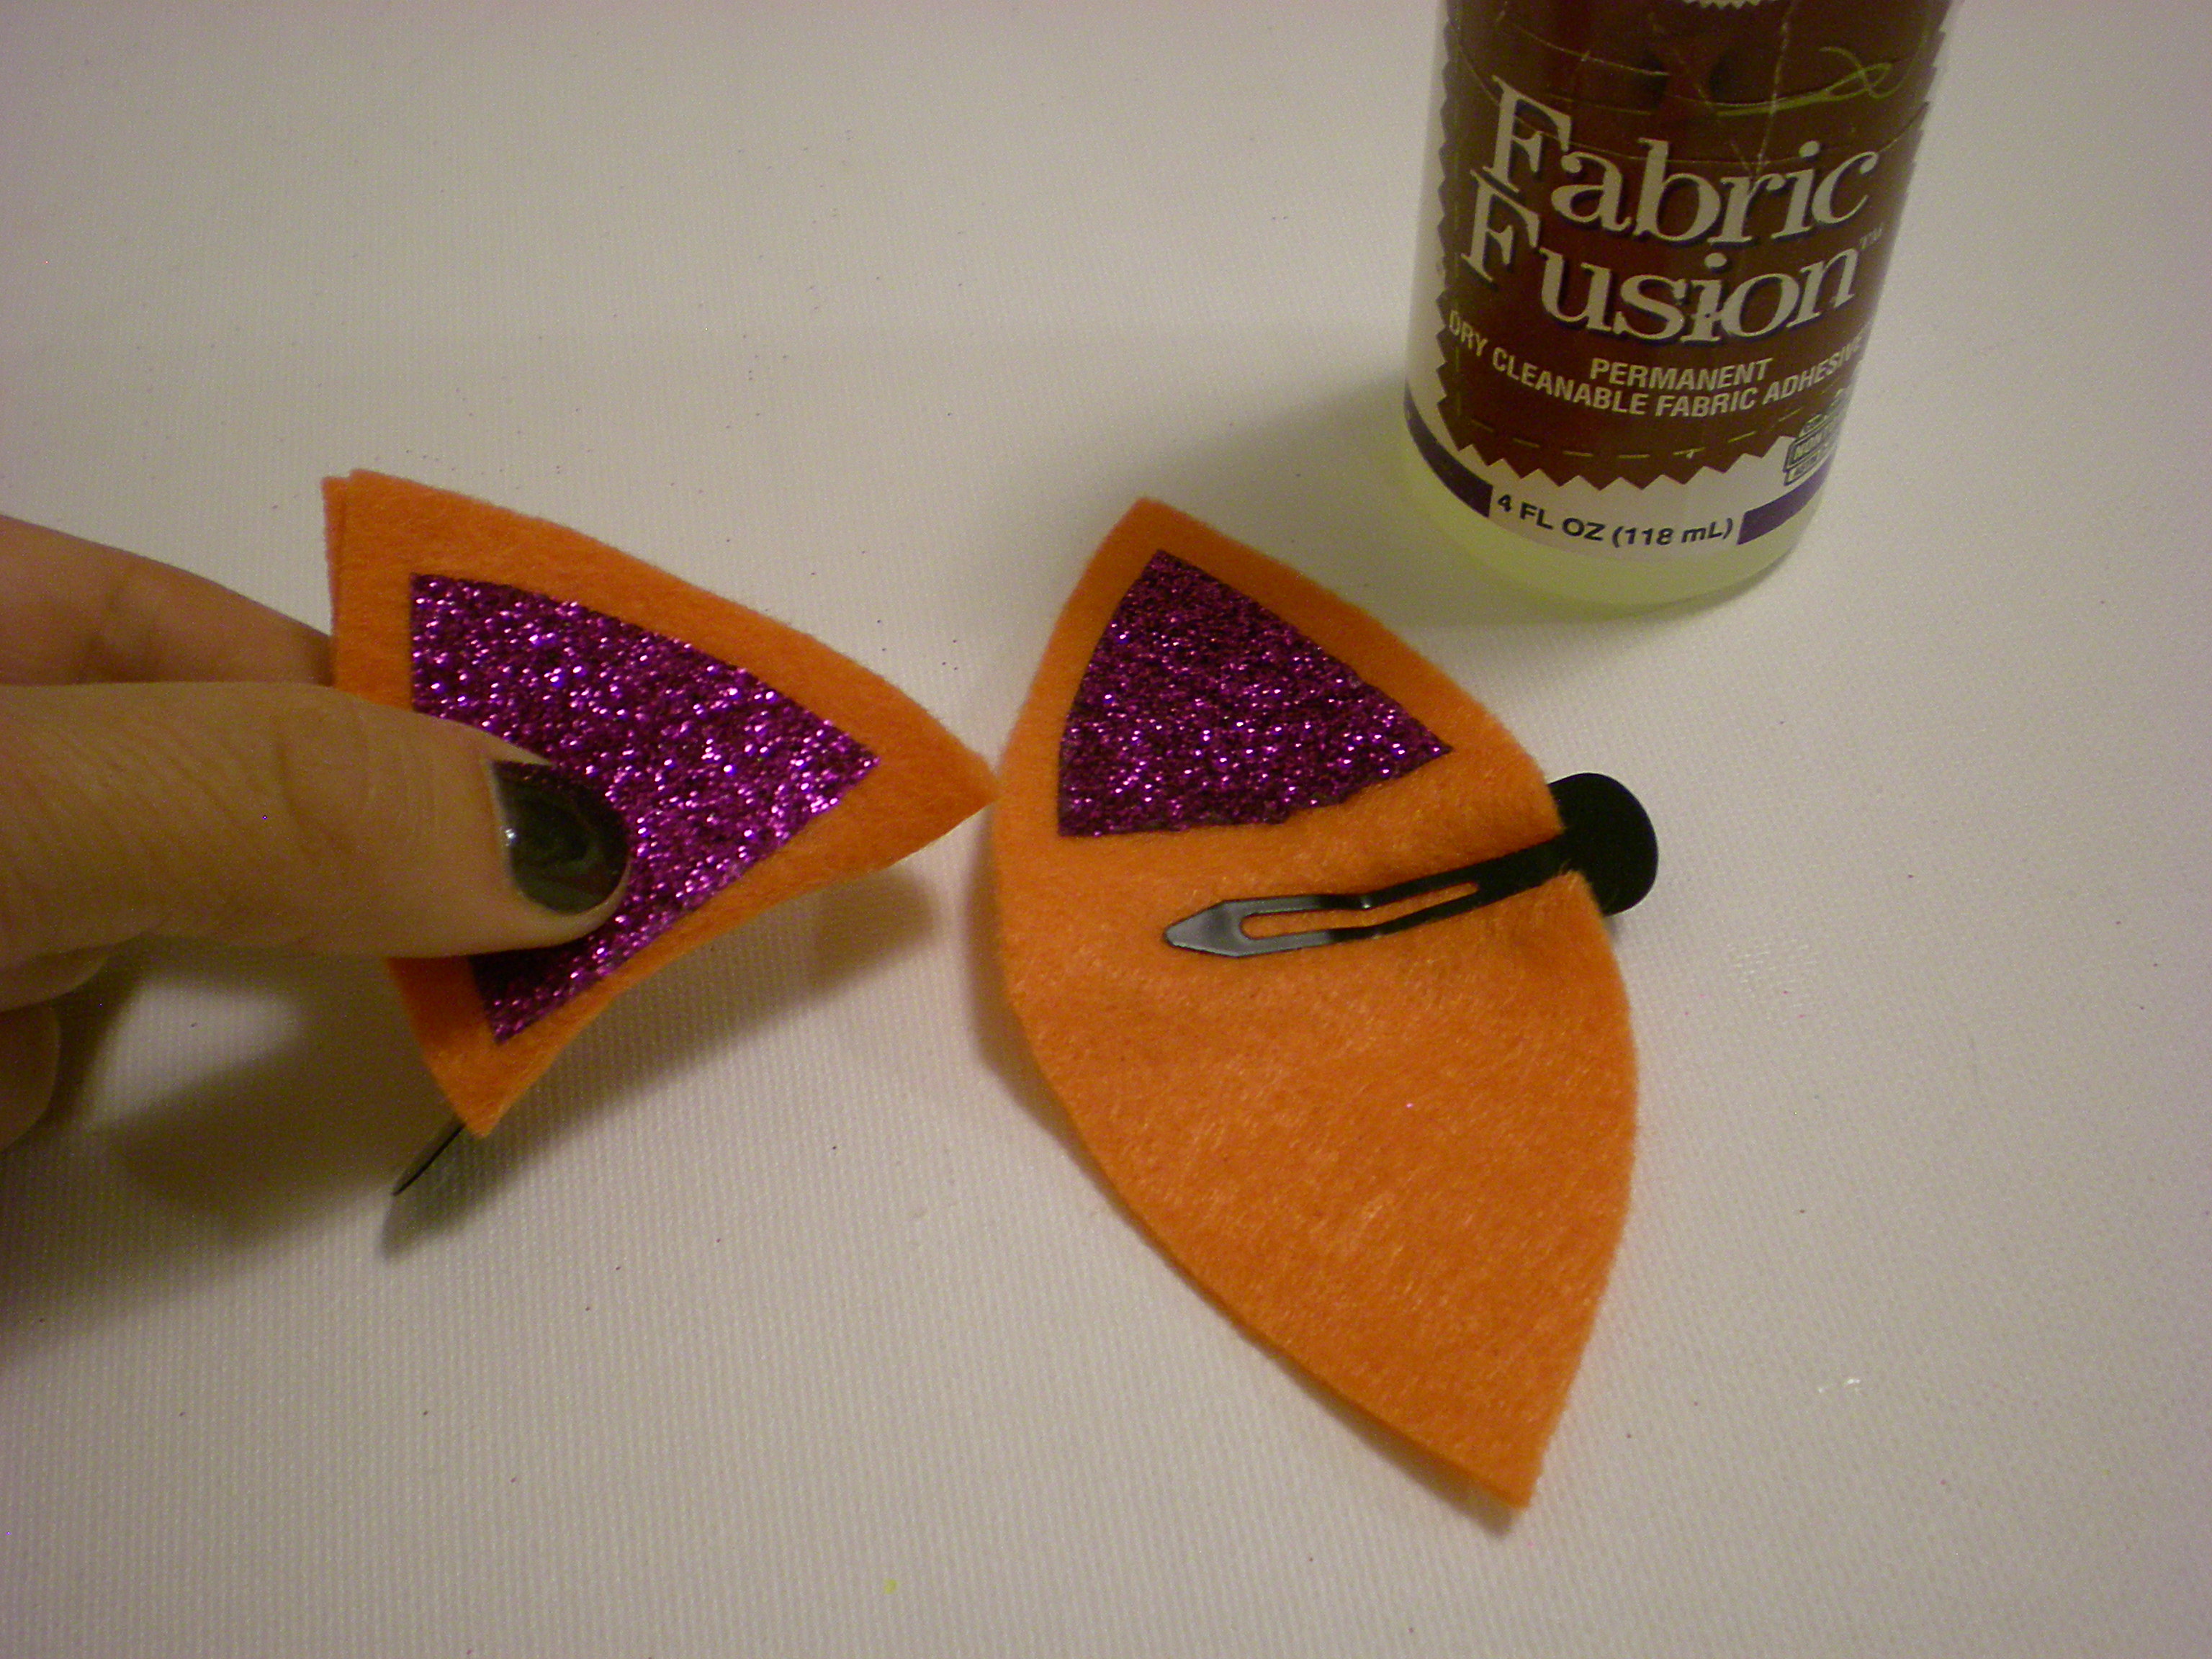
5. Clip the metal barrettes in the center, on each side of each felt ear piece, so that the top of the barrette corresponds to the wrong side of the ear piece and vice versa. Generously apply fabric glue around the edge of the wrong side of the ear piece. (Felt absorbs a lot of the glue, so don't hold back!)


6. Fold the ear piece around the top of the barrette to seal the glue, and repeat on the second barrette.


7. Let dry. Optional: Clip the layers together with extra barrette clips while the glue dries!


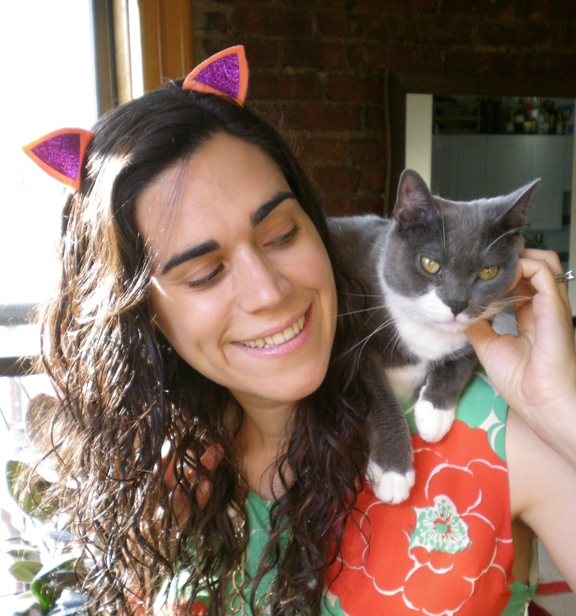
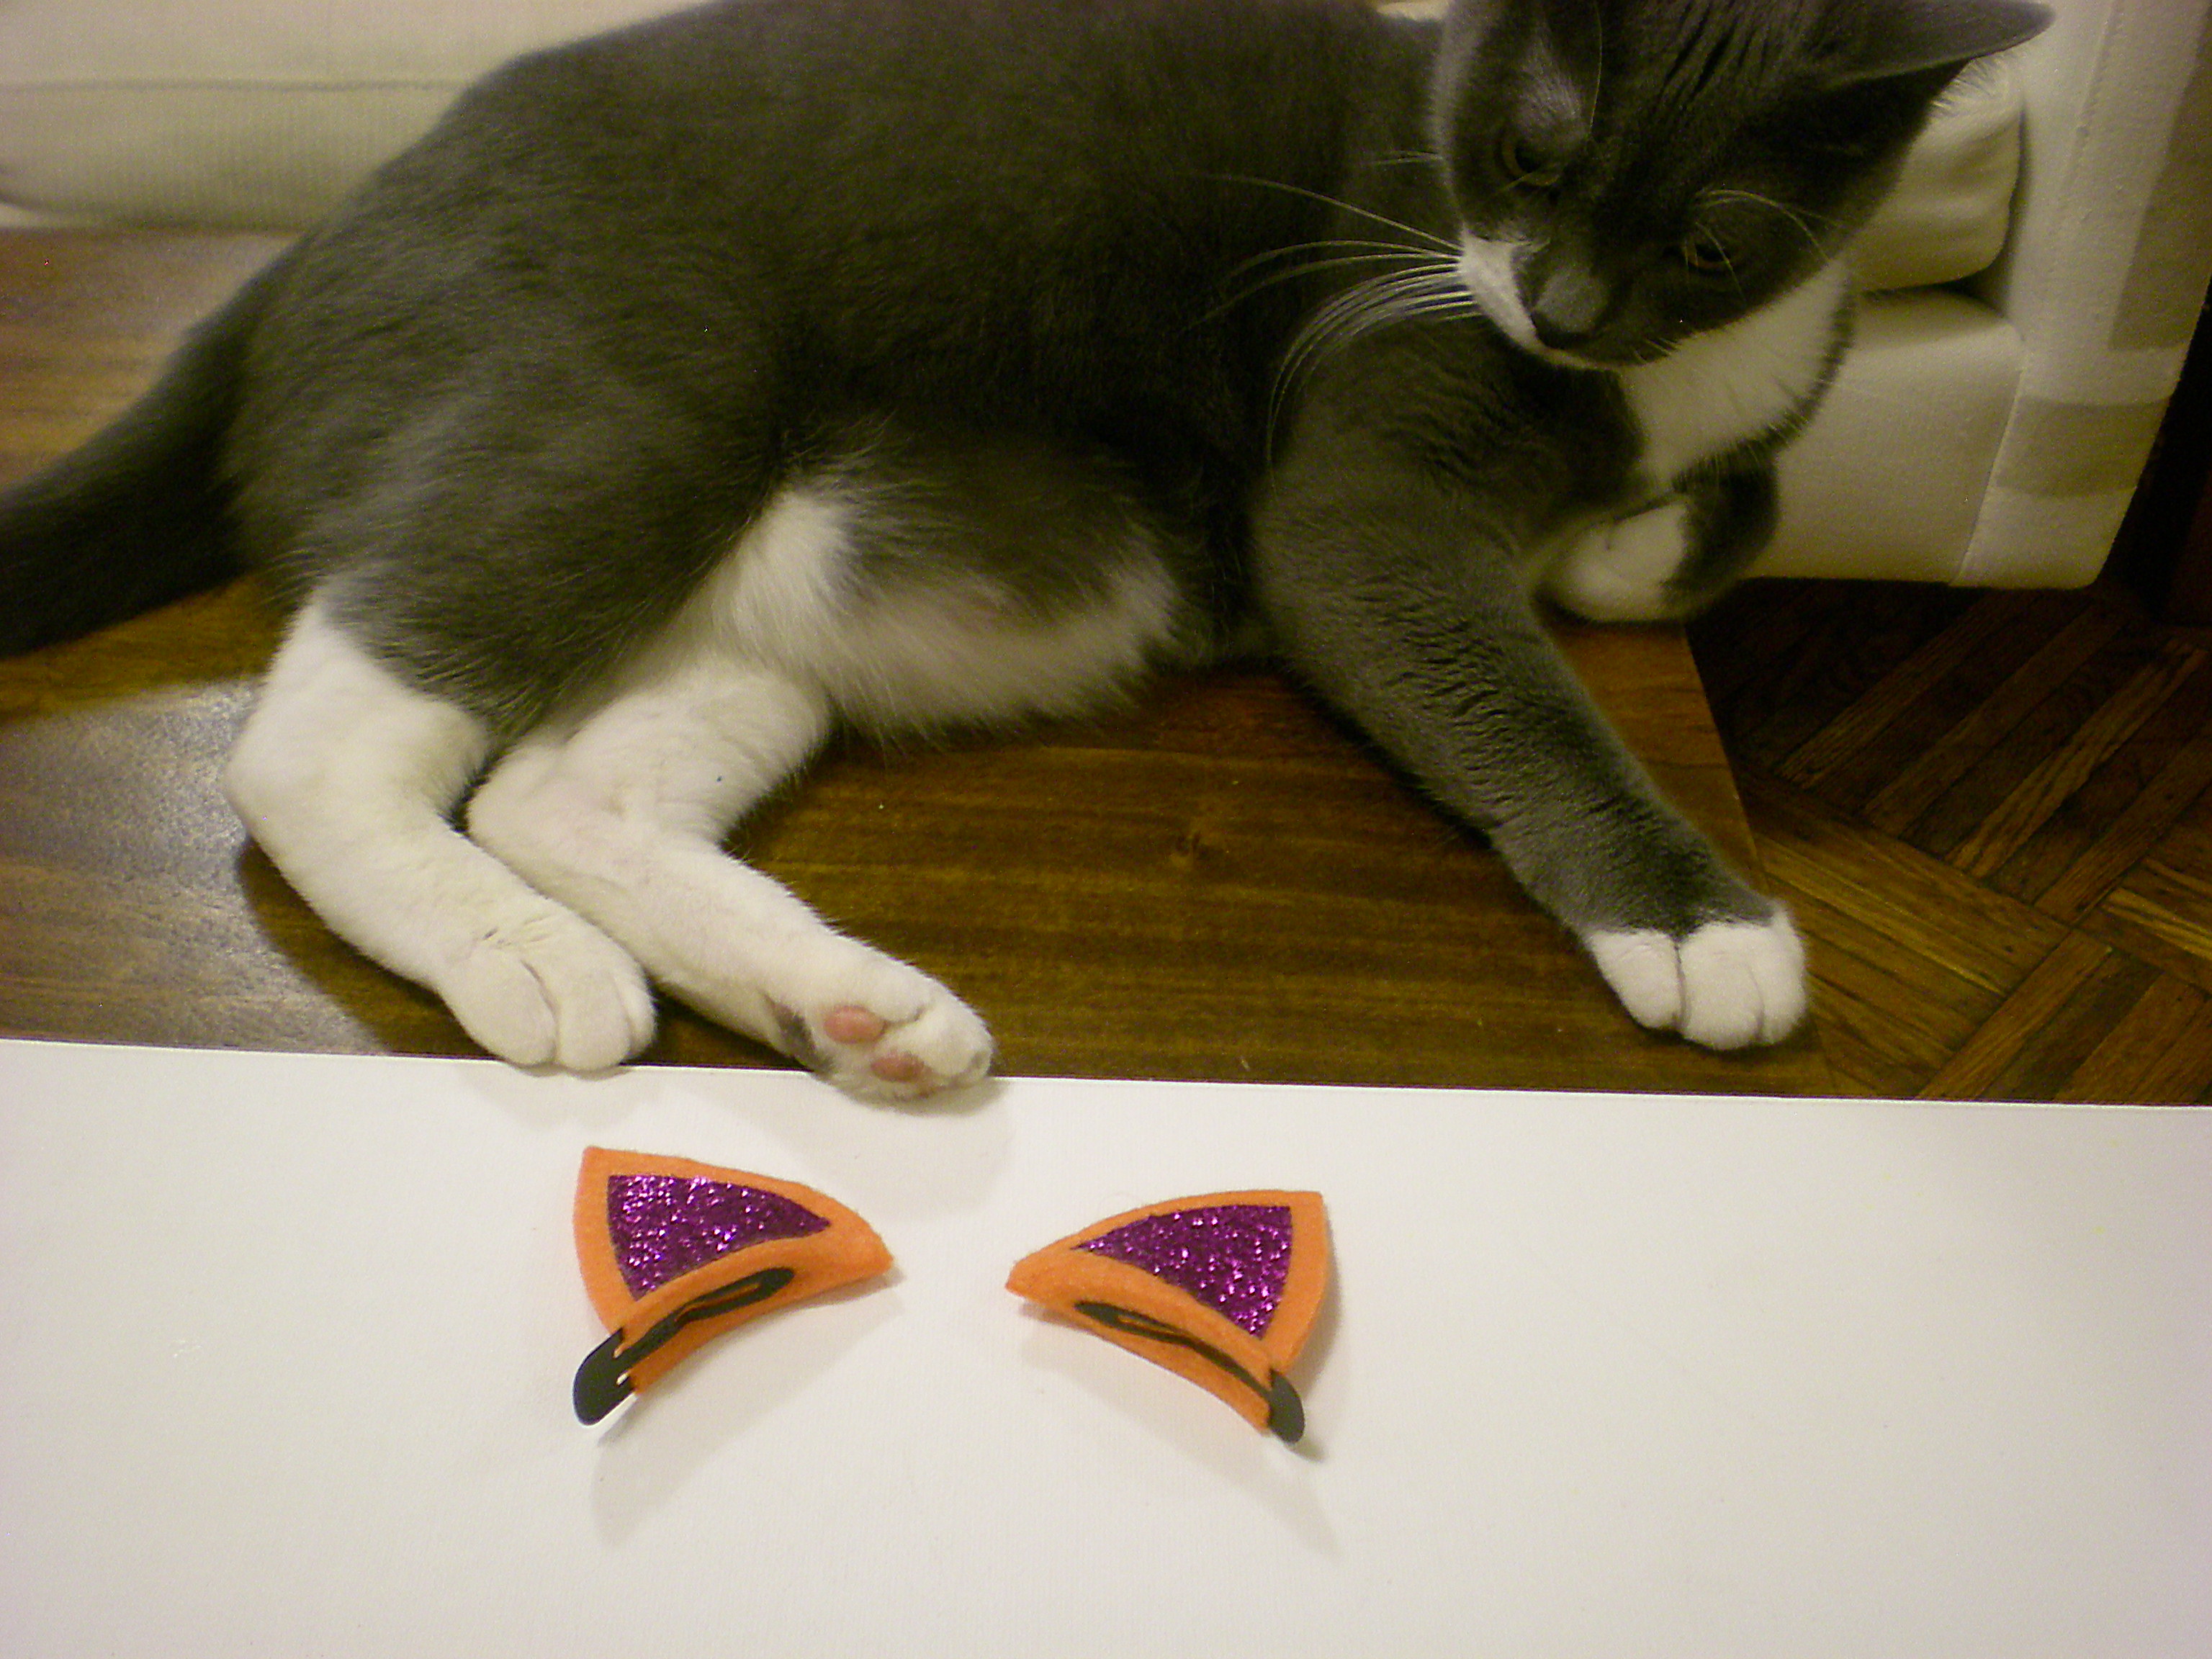
8. Quick! Try them on before the actual cat who's been helping you craft gets a little too interested and starts batting them off your workspace!

(Special thanks to Tulu the cat for "helping.")


Visit us on Facebook!
Craft on!Click here for today's daily giveaway!

Friday, October 29

31 Days of DIY Halloween - Halloween Black Cat

trick or treat cat
This sleek icon of the holiday is accented with Dark Black Concepts™® and Dark Purple highlights, and bright French Dimensions™ candy corn. What a treat!

Supplies:
– Duncan® Concepts® Underglazes for Bisque and Majolica
CN 253 Dark Black
CN 263 Dark Grape
– Signature Brushes
SB 807 No. 6 Fan Glaze
SB 808 No. 4 Round
– French Dimensions™
FD 258 Pure White
FD 265 French Straw
FD 266 French Papaya
FD 269 French Plum
– Clear Glazes
IN 1001 Envision Clear Glaze
– Sponge, dampened
– Duncan mold; A Cat DM 2304
– Scissors
– Pencil
– Carbon Paper
– Contact® Paper
– Foil Paper
– Patterns (click here for pattern)

Instructions:
1. Clean greenware, using TL 401 Cleanup tool. Smooth ware with damp sponge. Fire to shelf cone 04.
2. Remove dust and condition ware, using dampened sponge.
3. Trace letters on Contact Paper, using carbon paper and pencil. Cut out with scissors.
4. Remove paper backing from Contact Paper. Press letters down on cat to avoid lifting.
5. Apply 3 coats of CN 253 Black to entire cat, using SB 807 #6 Fan Glaze, leaving spine of cat, inside of ears, eyes and all curves blank. Let dry between coats.
6. Apply 2 coats of CN 263 Dark Grape to all other areas that were left blank, using SB 808 #4 Round. Let dry.
7. Remove letters. Outline with FD 266 French Papaya.
8. Add candy corn using FD 266 French Papaya, FD 265 French Straw and FD 258 Pure White by squeezing out paint one color at a time in shape of candy. Refer to photo for placement. Let dry.
9. Add random dots on background, using FD 269 French Plum. Let dry completely.
10. Apply 2 coats of IN 1001 Clear Glaze to letters and 1 coat to remainder of cat, using SB 807 #6 Fan Glaze.
11. Let dry. Stilt and fire to shelf cone 06.

Tuesday, October 12

31 Days of DIY Halloween - Fright Night Tee

boo shirt

If you look close, the scary skeleton hand is making a “peace” sign, and the rest of this designs says the rest.  And if you look even closer, you’ll see the fun little monster faces painted with 3-D paint that glows in the dark!  They’re made with Tulip Multi-Surface Stencils, and they were way easy to do. 

Materials List
– Tulip® Fashion Glitter™
23556 Purple Jewel
– Tulip® Multi-Surface Stencils™
Faces
– Tulip® Glam-It-Up!™ Iron-On Fashion Designs™
Skeleton Peace
– Tulip® Glam-It-Up!™ Iron-On Crystals™
Pumpkin
– Tulip® Fashion Glitter Bond™
– Scissors
– White chalk – sharpened to a point
– Foil
– Scratch paper
– T-shirt – black
– Pressing cloth
– Cardboard to fit inside shirt
– Small paint brush
– Iron
– Crayon

Instructions:

1. Prewash T-shirt; do not use fabric softener. Dry in dryer and iron smooth.
2. Flip over pattern then use chalk to trace along pattern lines. Position pattern, chalk side down, on shirt. Hold in place then run a finger along pattern lines transferring chalk to fabric.
3. Place shirt on ironing board. Remove heavy backing sheet from Skeleton Hand Crystal design and position where shown. Cover with pressing cloth then iron in place following package instructions. When cool, peel off top sheet.
4. Use crayon to fill in “B” with Pumpkin Iron-On Crystals. Press tip of crayon to top of crystal – the crayon wax will hold crystal just long enough to position in place. Place all crystals then carefully cover with pressing cloth. Iron in place following package instructions.
5. Insert cardboard into shirt to prevent seepage.
6. Squeeze a puddle of Glitter Bond™ onto foil. Working quickly, use paintbrush to apply an even coating onto one “O”. Immediately pour Purple Jewel Glitter over wet adhesive. Pour excess glitter onto scratch paper. Glitter can be returned to container and reused.
7. Repeat step with other “O”. Let thoroughly dry then use paintbrush to remove all remaining excess glitter.
8. Use scissors to carefully cut apart faces from stencil design leaving as much border possible around each. Peel off paper backing removing inside pieces. Place where desired on shirt. Squeeze a small puddle of 3D Natural Glow paint onto foil. Tap flat end of wedge sponge into paint then swipe paint over stencil making sure not to go past outside edges. Repeat with all face designs. Carefully remove stencil. Let dry.


If you need more Pattiewack, you can come see me at http://www.pattiewack.com/ !

Craft on!Click here for today's daily giveaway!

Monday, October 4

31 Days of DIY Halloween - Bony Grip Mug

halloween day 4

My morning coffee will taste great in this scary mug with a bony grip. If you want to make your own, look no further than this Duncan Oh Four™ Bisque Geometrix Mug Tri-Handle. Rely on the Concepts® Underglaze for Bisque and Majolica colors for a gripping good time anytime of the year.

– Duncan Concepts® Underglazes for Bisque and Majolica
CN 244 Really White
CN 253 Dark Black

– Dinnerware Bisque Designs
21786 Geometrix Mug Tri-Handle 5" x 5" x 3"

– Signature Brushes
SB 806 No. 6 Round, SB 807 No. 6 Fan Glaze, SB 808 No. 4 Round

– Pure Brilliance® Clear Glaze
– Sponge
– Pencil
– Graphite paper
– Foil
– Patterns (below)


Instructions:
1. Wipe ware with damp sponge to remove any dust.
2. Place graphite paper around mug with pattern over it. Trace over lines with pencil.
3. Pour puddle of Really White on foil. Using No. 6 Round brush, apply 3 coats of Really White on skeleton hand. Let dry after each coat.
4. Pour a good amount of Dark Black on foil. Using Fan Glaze brush, apply 3 coats of Dark Black inside cup. Let dry between coats.
5. Using No. 4 Liner brush, apply Dark Black between fingers and joints.
6. Using Fan Glaze brush, apply 3 coats of Dark Black to fill in remainder of mug. Let dry after each each.
7. Stilt and fire to cone 06.

Craft on! Click here for today's daily giveaway!

Sunday, October 3

31 Days of DIY Halloween - Terrifyingly Terrific Towels

halloween day 3
I totally want these in my bathroom and I'm hoping my guests will scream with delight over these Halloween towels! Turn ordinary towels into freakishly fun room accents with ribbon, felt and a little pizzazz from Tulip® 3D Fashion Paint™ and Tulip® Glam-It-Up!™ Iron-On Crystals™.

Terrifyingly Terrific Towels

Materials List:

– Aleene's® Fabric Fusion® Permanent Dry Cleanable Fabric Adhesive
– Tulip® 3D Fashion Paint™ in 65038 Black
– Tulip® Glam-It-Up!™ Iron-On Crystals™ in 23123 300 Clear Pack
– Felt – colors to match towels
– Sewing machine with black thread
– Satin ribbon – black – 1½” wide – 1 yard per towel
– Pinking shears
– Paper towels
– Toothpicks
– Tulle – black – ½ yard
– Foil
– White chalk sharpened to a point
– Crayon
– Towels – desired Halloween colors
– Sewing pins
– Ruler
– Scissors

Instructions:
1. Cut a 6” wide length from tulle. Double over, creating several layers and holding with pins as needed. Use machine to sew two rows of gather stitches down center. Gather up fabric to fit across one end of towel then pin in place on towel to secure.

2. Center ribbon right side up over gather stitches on tulle then sew through all layers down both sides of ribbon.
Measure and cut a 2½” x 2¾” piece from each color of felt using pinking shears to cut out. Use chalk to draw desired letter in center of felt as shown. Start flow of Black Slick paint on paper towel using an even pressure on bottle for a smooth line. Fill in each letter with a thick, even line of paint. Let dry.

3. Squeeze a thin bead of Fabric Fusion onto back edge of felt piece, smooth with fingers then press into a different color of felt as shown. Let dry then use pinking shears to trim excess felt, leaving a ¼” or so border showing.

4. Apply glue to back of felt piece, center over ribbon and center of towel then press in place. Repeat step with remaining towels. Let dry.

5. Squeeze a small puddle of Fabric Fusion onto foil. Working in sections at a time, use toothpick to add a small dot of glue for each crystal. Touch top of crystal with tip of crayon and position into glue – it will hold it just long enough to transfer crystal in place on glue. Repeat along length of ribbon on each towel as shown. Let dry.

Saturday, October 2

31 Days of DIY Halloween - Wickedly Charming Pillow

halloween-day-2
I went absolutely mad for this wickedly charming pillow, perfect for spookifying your home this Halloween! Team up Aleene’s® Fabric Fusion™ and Tulip® Glam-It-Up!™ Iron-On Studs™ with ribbon, felt and tulle to make a pillow that’ll have your family screaming with delight!

Wickedly Charming Pillow

Materials List:
– Aleene's® Fabric Fusion® Permanent Dry Cleanable Fabric Adhesive
– Tulip® Glam-It-Up!™ Iron-On Studs™
– Tulip® 3D Fashion Paint™ in 65038 Black
– Tulip® Cordless Heat Setting Tool™
– Ribbon – 1½ yards (or enough to tie around pillow and tie bow) – 1” wide – lime
– Ruler
– Pinking shears
– Sewing pins
– White felt – 1 sheet
– Black pillow
– Fabric – 4” strip by circumference of pillow – lime
– Sewing machine with matching thread
– Paper towels
– Scissors
– Tulle – ¼ yard – orange
– Crayon
– Pencil

Materials List:

Instructions:
1. Find center of ribbon and place on right side of pillow then pull ends to other side and tie a bow. Place a pin just before bow on each side to mark for wording. Untie and remove ribbon, carefully keeping pins in place.

2.Fold tulle over lengthwise, creating several layers. Sew two lines of gather stitches down center through all layers. Gather tulle to fit ribbon between pins, pinning in place to secure. Sew down both sides of ribbon then remove gather stitches.

3. Use pinking shears to cut lime fabric into strip wide enough to show 1” of tulle extending from top and bottom edges and long enough to reach ends of gathered tulle and fit between pins on ribbon. Apply a thin bead of Fabric Fusion along both edges on backside of fabric piece and one down center. Press in place over tulle piece as shown. Let dry.

4. Trim tulle to desired width then tie ribbon piece around pillow.

5. Measure and cut six squares in desired size from white felt, using size of pillow to determine proportional size of squares.
Squares will need to fit on ribbon across front of pillow as shown.

6. Working on one square at a time, use crayon to position Iron-On Studs into a letter to spell out “WICKED”. The wax on the crayon will hold stud just long enough to transfer to felt square. Turn on Cordless Heat-Setting Tool following package instructions. Touch tip of hot tool to top of stud and hold for two seconds. Remove heat tool and let stud cool, then touch stud with fingernail making sure it has adhered, if not add one or two more seconds. Add one letter from one color to each square.

7. Apply a thin bead of Fabric Fusion around back edge of felt square, smooth with finger and then press in place. Start with “W” then equally space remainder of letters across ribbon as shown. Let dry.

8. Start flow of Black Slick paint on paper towel using even pressure on bottle for a smooth line. Add faux stitching lines as shown. Keep tip of bottle wiped often for clean lines. Add all stitching and let dry.

9. The ribbon can be removed after the holiday.

Friday, October 1

31 Days of DIY Halloween - Wild Child Pumpkin

halloween day 1

I love how Cheryl Ball turned a simple decorative pumpkin into wildly fun décor with vibrant fabric and Collage Pauge™ Instant Decoupage™! Add extra attitude with Tulip® 3D Fashion Paint™ and Tulip® Glam-It-Up!™ PDA: Personal Dazzle Assistance™.

Wild Child Pumpkin

Materials List:
– Tulip® Fashion Glitter™ in 23560 Black Fine Jewel
– Tulip® 3D Fashion Paint™ in 65038 Black
– Tulip® Glam-It Up!™ PDA: Personal Dazzle Assistance™ in 26637 Clear Red Black
– Collage Pauge® Instant Decoupage
– Aleene's® Fast Grab™ Tacky Glue
– Paper towels
– Pinking shears
– 1” foam brush
– Pumpkin
– Foil
– Scissors
– Tulle – 4” x 18” wide strip
– Scratch paper
– Small paintbrush
– Fabric – ¼ yard – bright pink – or desired color

Instructions:
1. Use scissors to cut fabric into about 1” squares.

2. Squeeze a puddle of Collage Pauge onto foil. Working in small sections at a time, use dry foam brush to apply an even coat to surface of pumpkin. Tap foam brush onto a piece of fabric then place into adhesive, then brush on another coat. Add another piece of fabric slightly overlapping the first then apply more over top. Repeat step until entire pumpkin is covered. Let dry.

3. Start flow of Black 3D Fashion Paint on paper towel using an even pressure on bottle for a smooth line. Place scratch paper on work surface. Working in sections at a time, paint on zebra stripes as shown. Immediately pour black glitter over wet paint then pour off excess onto scratch paper. Repeat step, letting paint dry if needed before moving to new section. When thoroughly dry, use small paintbrush to brush off excess glitter.

4. Squeeze a small puddle of Black 3D Fashion Paint onto foil then use small brush to paint stem of pumpkin. Let dry.

5. Peel skeleton design from plastic backing sheet then press onto a piece of pink fabric. Use pinking shears to trim into square as shown.

6. Peel off single clear crystal from backing sheet then press into place throughout design. Add black crystals to stem.

7. Use Fast Grab to glue fabric square to front of pumpkin as shown.

8. Tie a bow of tulle around stem

Thursday, October 22

Make Your Own Personalized Black Cat Bobble Head


What happens when I go and spend a week with my mother Fredda Perkins? We turn my daughter into a black cat bobble head! Mom and I have quite the creative synergy together and always manage to whip up something fun. I just had no idea that this visit would produce something this craft-tastical, it might be the best thing we have ever made together and we have been a craft team for over 30 years. Today for I Love to Create I am going to show you how to create your very own personalized, black cat bobble head!


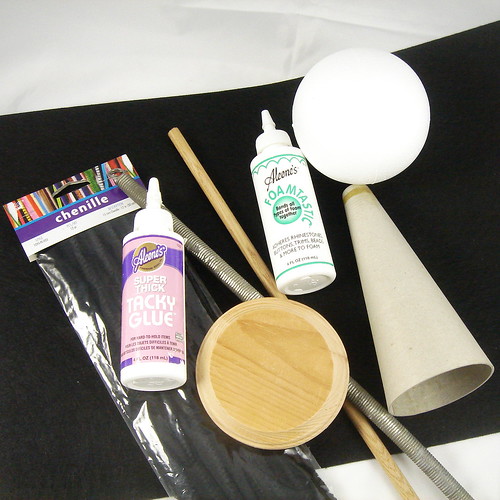
SUPPLIES
Dremel
Thin Craft Wire
Wire Clippers
Crafty Chica Little Paint Pack
Aleene’s Foamtastic
Tulip Fashion Glitter Black
3 orange balls from Pom Pom Fringe
Scissors
Straight Razor
Cone
2 Wooden Discs
Spring
Wooden Ball
Printer
Computer
Photo Paper for Computer Printer
Sandpaper
Craft Fur Black
Stiffened Craft Felt
Decorative wired ribbon
Pipe Cleaners
Small Wooden Dowel
Foam Ball
Paint Brushes
Aleene’s Original Tacky Glue
Bread Knife
Drill with bit the size of Dowel
Liquid Fusion
Straight Pins


BLACK-CAT-A-FY
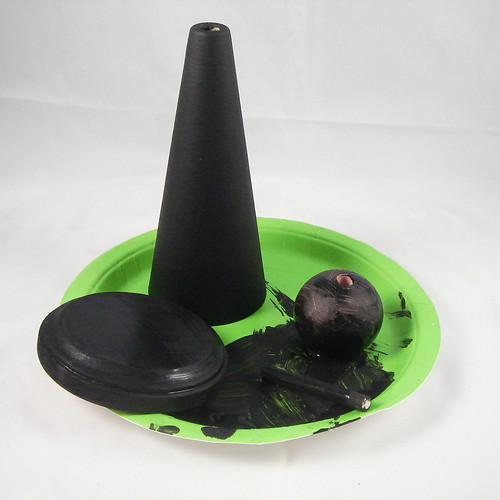
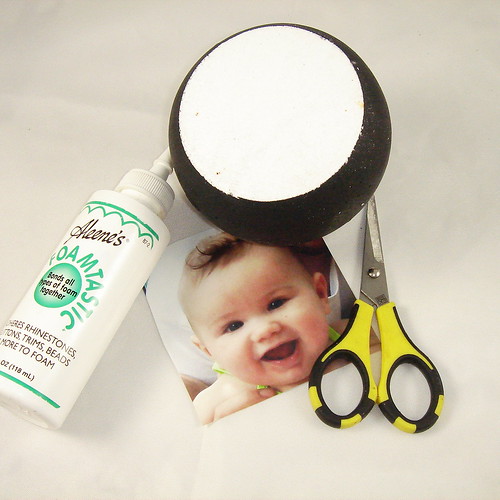
If you recall last week’s post on how to make a Hissing Black Cat Banner you will remember that I collect black cat figurines that I only display at Halloween. Therefore, we opted to make the bobble head a black cat. First things first. We painted our parts black. Using Crafty Chica paint in black I coated my cone, Foam ball, dowel, wooden disc and wooden ball. If your pieces are slick or already have paint on them use a piece of sandpaper to give them a little tooth.


MEASURE TWICE CUT ONCE
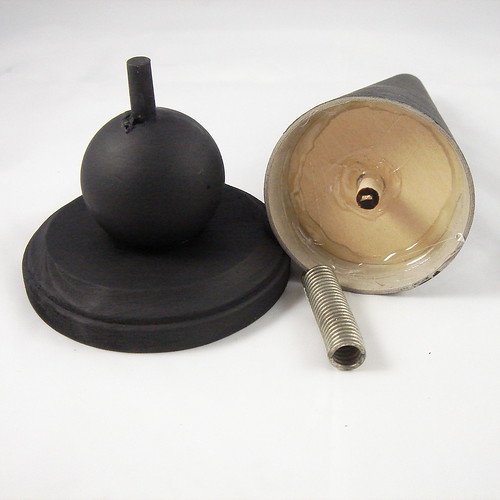
The size of your dowel will depend on the inside diameter of the spring you use. My mom stole our spring from an infrequently used screen door in her house (shhh don’t tell my dad). You need a dowel that will fit inside the spring. You need two pieces of dowel. One should be about 1 to 1 1/2 inches long. The other should be long enough to go though your wooden ball and extend into the wooden disk below then extend above the ball about 1 inch. Attach the cutting tool to your Dremel to cut the dowel to length or use a small saw. You'll also need a cutting disk on your Dremel to cut a 2 inch lengh of spring. Using a drill bit the size of your dowel, drill holes in both wooden disks and the wooden ball.

Once the paint has dried on your foam ball use a bread knife or some other cutting tool with serrated edges to cut off about 1/4th of the ball. Lay the cut side on a sheet of sandpaper and sand it til it is smooth and level.

GLUE TIME
Next glue your wooden ball onto your wooden base and glue your longer dowel piece inside making sure about an inch extends above the ball (it will hold the bottom of the spring) and into the hole in the wooden disk. One of your wooden discs should be small enough to fit inside your cone. Glue that disc into place and also glue your dowel into the center hole. Allow glue to dry.


EVERYTHING IS BETTER WITH GLITTER
We coated the cone with Aleene’s Tacky Glue since it is nice and thick and has good grab. From here we coated the glue with glitter to give our black cat a flocked or furry effect.


CHOOSE YOUR PRETTY KITTY
It was hard choosing just the right photo of Tallulah, but in the end we opted for one where we could very easily crop out her face and she had a pretty smile. We cut out wax paper(you can see through it) the size of the flat surface we had cut into our boam ball to use as a template. We printed the picture on photo quality paper. We placed the wax paper over the photo and once satisfied with the placement, we cut out the circle picture. Using Aleene’s Foamtastic Glue we adhered the photo to the foam ball and allowed to dry.


WHISKERS
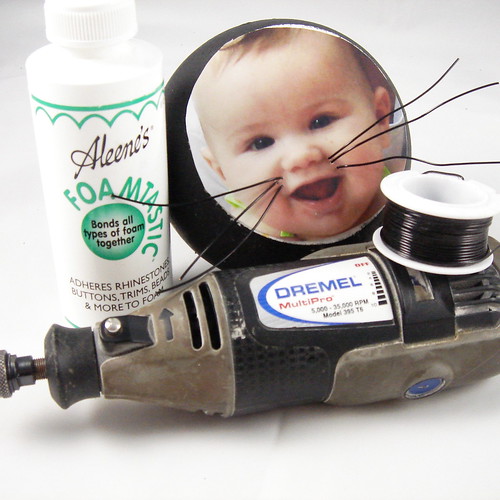
Using the teensiest weeniest bit you can find for your Dremel drill 3 tiny holes on each cheek of your photo. Using wire clippers clip off 6 4” pieces of wire. Stick the wire through the holes and into your foam to secure. Do not use glue, as it will pool up on your photo. Bend and trim wires to desired length and style.


THE BETTER TO HEAR YOU WITH
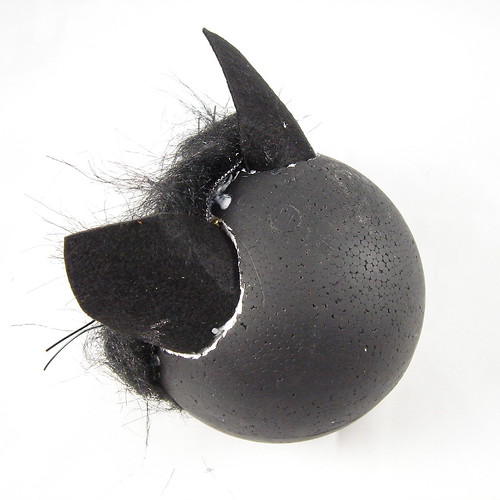
Cut out two ears from stiffened craft felt. Mark where you want the ears on your foam bobble head. Using a straight razor carve a little slit where the ears will go. Fill the slit with Aleene’s foamtastic Glue and stick your ears in. Allow to dry. You may need to use thin nails or pins to hold the ears in place until dry.


FUN WITH FUR
We had a dickens of a time finding craft fur, save yourself the trouble and go to Hobby Lobby first. Cut your Craft Fur into strips and adhere to your bobble head with Aleene’s Foamtastic taking care around the face and ears. Once the glue has dried you can go back and give the kitty a haircut especially around the face.

ARMS AND TAIL
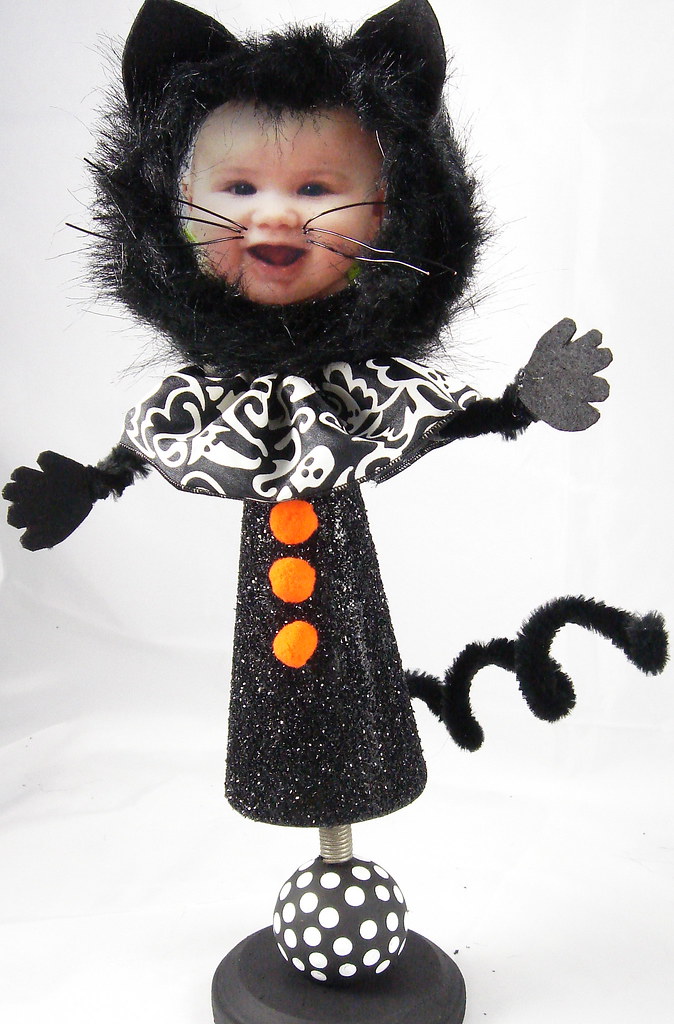
Using a drill we put a hole in either side of our cone and wired a pipe cleaner through. We cut out paws from the stiffened craft felt and attached with Liquid Fusion Glue. We also drilled a hole for the tail and used a chenille pipe cleaner since it was a bit puffier.


PUT IT TOGETHER
Once all your glue and paint are dry, put all your pieces together. You are going to need to carve out a small hole in the base of your foam ball in order to attach it to your cone. Again we used Aleene’s Foamtastic Glue to attach the ball to the cone.

We also made a ruffle collar using wired Halloween ribbon to hide where the two pieces connected. To ruffle the ribbon, just pull the wire on one edge making sure it doesn't pull through on the other end. We also added 3 pom poms from ball fringe as buttons. As an added bonus, once the black paint was dry I added polka dots to the wooden ball using a small dowel (the end of a nice new pencil works well too).


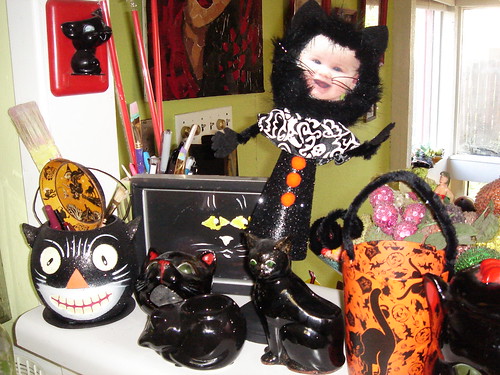
All that was left to do was display my new purrrrfect bobble head with the rest of my black cats. Tallulah fits right in and the bobble head is so cute I may leave this one black cat out all year round.
Clicky Web Analytics
Pin It button on image hover

Subscribe to our newsletter

* indicates required
I am interested in products and inspiration for...
Close