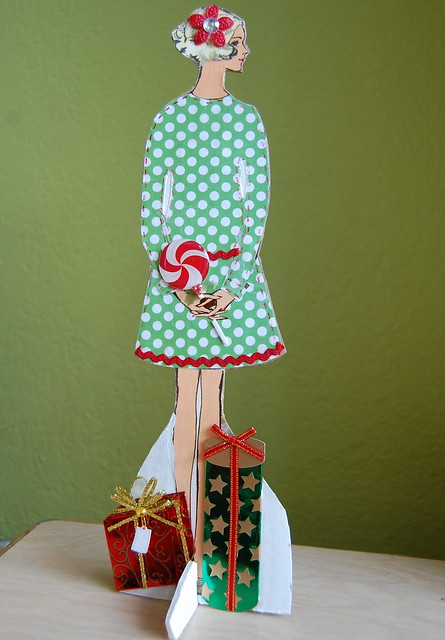

Ya, ya, ya I know I did a project using my vintage pattern girls just a few weeks ago. So sue me. She was fall themed, had a fabric dress and was in a frame. This new and improved Christmas cutie has a fresh spin on the same illustrations and it is the perfect project to kick off all the Christmas crafting you have planned.
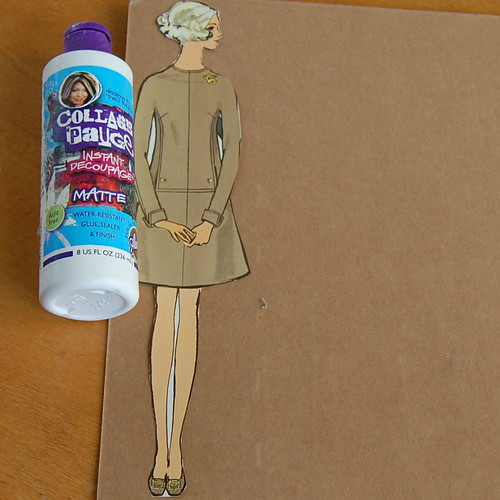
SUPPLIES
Vintage Sewing Pattern Image
Scissors
Aleene's Quick Dry Glue
Rick Rack
Scrapbooking Paper
Foam Board
Chip Board
Collage Pauge
Tracing Paper
Pencil
Red Pen
Jolee's Scrapbooking Elements
Crafty Chica Paint White
Craft Knife
Paint Brush
Let me start by saying just because you don't have a vintage pattern book does not mean you can not play along. Pick up a vintage sewing pattern at the thrift store to use for the graphic. Choose a full length picture of a model from a magazine. Better yet have a friend take a picture of you to print out and use!
Once you have your desired image to make into a wee little stand up cut her out. Place your image on a piece of foam board, cardboard or chipboard and decoupage. I used a combination.

At some point either before or after you cut out your image trace the dress. This will give you a pattern to work with. I suggest using a fairly simple design. Also, a lesson I learned the hard way is you should cut out the hands to glue on separate. I'll explain in a minute.
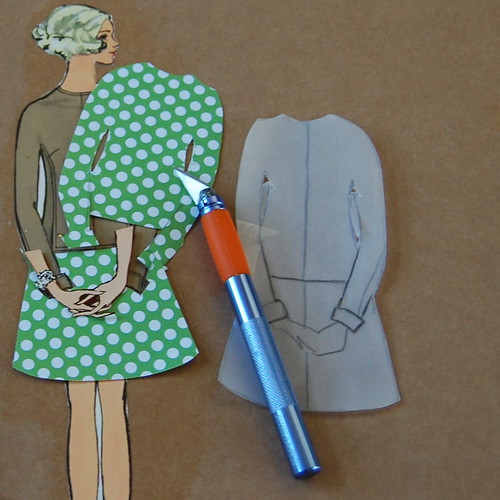
After you have your pattern made from tracing paper you can place it on scrapbook paper or thin fabric to make a new and improved dress. Use a craft knife to cut out the detailed spots like between the arms and body. This is where I should have cut out her hands completely before I decoupaged her to chipboard. No worries, I just stole hands from another image. This way you don't have to do all the tedious knife work around the hands you can just stick them on top of the new outfit.
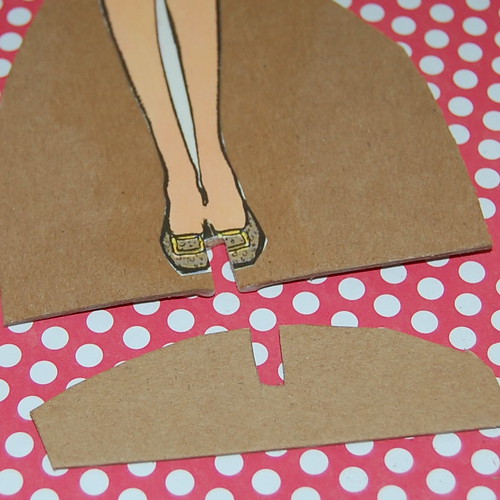
The next step after getting your dress decoupaged in place is cutting out your stand up. Leave a wide base at the bottom. This picture lies a little bit. I did cut a slit in the center, but I used a small piece of foam board instead of chipboard as the second part of the base. The foam board is thicker and helps her stand better.
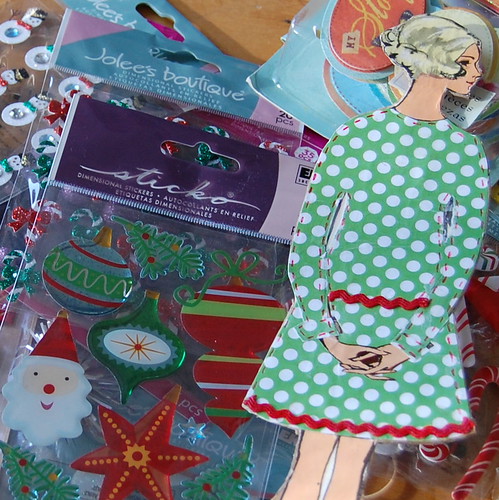

Now for the fun part! Using various vintage bits and pieces, scrapbooking elements, pens and sewing notions you can gussy up your stand up. I used Aleene's Fast Dry Tacky Glue to hold everything in place.
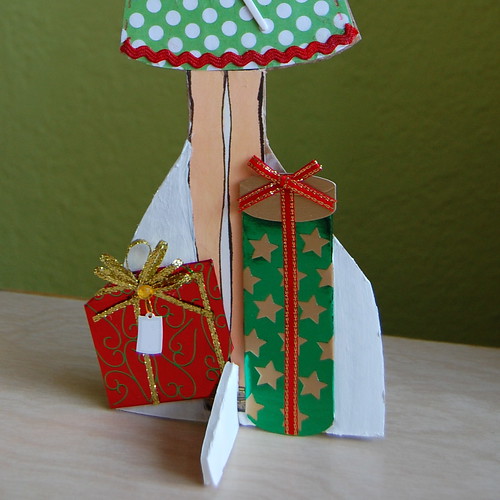
I finished things up by painting the backside and base white with Crafty Chica paint. I used a few wrapped gifts around the base to make things extra festive.

Set your Christmas Cutie anywhere to add an extra touch of kitschy cheer. I can't wait to make a whole slew of these lovely ladies. I also see a shelf sitter version in my future! Love to know if you make your own version.
Visit us on Facebook!
Craft on!


2 comments:
Good idea!
I am going to share a link to this project on my blog www.themagicbean.typepad.com on Fri Nov.30th in a round up of retro Christmas craft projects. I'd like to share a main project photo to encourage people to click through. Is that OK? Thanks.
Post a Comment