

Happy Hump Day! I know it's Fall and almost Halloween but I just felt the need to post something bright, whimsical and fun. You know, something that you can look at and it instantly makes you feel good inside. I will show you today how much fun Tie-Dye and Fabric markers can be. I am really happy with today's neon lampshade and I know you will love it!
Let's go make a LAMPSHADE!


What you'll need:
*Lampshade
*Tie-Dye
*Bowls
*Brushes
*Tulip Fabric Markers
*Beads in a Bottle <---- Optional
*Tie-Dye
*Bowls
*Brushes
*Tulip Fabric Markers
*Beads in a Bottle <---- Optional

The first thing you need to do is grab your bowls and squirt some dye in them. You don't have to add a lot at one time because a little goes a long way.

When you purchase your Tie-Dye pack it will come with instructions on how to mix it. It is really simple. The bottles come with dye powder in them and you simply add water. If you want a visual, check this post out.

You can use any brush for this project. I like to use a round thick brush when I am trying to create a "water color" effect. The thicker the brush the more it will hold in it.
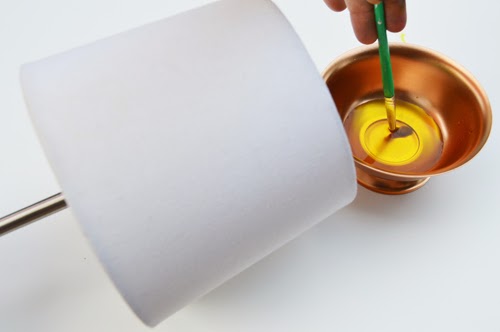
The first thing you will do is place your lamp flat on any surface and dip your brush in the tie dye liquid.

It is very important to load your brush with lot's of die. I like it to almost drip off of my brush. You will notice as soon as a drop hits the lampshade it will expand quickly outward.

This is what my first color looks like. I added green right above my yellow since they go great together. You will get shades of lime green doing this. It's important to use shades that compliment each other.
Example:
Red + Blue = Purple
Yellow + Green = Lime Green
Red + Yellow = Orange
Pink + Yellow = Neon Orange
Red + Blue = Purple
Yellow + Green = Lime Green
Red + Yellow = Orange
Pink + Yellow = Neon Orange
You get it!

How gorgeous is this lampshade already.

The next thing we will do is grab your Tulip Fabric Markers. I am using the pack that has NEON shades in them. If you don't want to use markers you could use the beads in a bottle instead.

You will use the marker color that goes with the Tie-Dye color. The markers should add a "soft" line that separates each color. I am not looking for hard, dark lines.
IMPORTANT: When you apply your fabric markers make sure you do this when the lamp shade is still wet. This is really important because we want the colors to "marry" each other and this won't happen if the lamp shade is dry.

I hope you enjoyed this tutorial! I can only imagine beautiful, happy lamps like this all over the world making everyone smile.
What colors or pattern's will you use in your lampshade? Let us know in the comment section. Don't forget to share all over the inter-webs because the reality is, everyone needs a Neon Tie-Dye Lamp and it's up to YOU to bring it to their attention.
Huge glittery hugs, JADE
14 comments:
As someone who loves tie dye, I have never seen a tie dye article on a lamp shade. Nice stuff. I bet a lot of girls will be doing this one.
This is a fun idea. I don't know if I would personally choose to use so many colors, but there are some great tips on here that I could use to create my own sort of dyed lamp shade. Thanks for sharing!
Tie Dyed Shop: So glad you enjoyed it!
Stacia: I agree! This one is bright and FUN but you could take it down a few levels and add warm, rich colors! That would be REALLY nice! Glad you enjoyed it <3
I am happy with your article, Fajartoto think your website is pretty good. Many articles are very useful for everyone. I am sure your website will grow in the future. Fajartoto will always support your website, hopefully more advanced. keep the spirit... thanks
agen togel terpercaya
togel online
fajartoto
situs togel online
bandar togel terbaik
bandar togel terpercaya
judi roulette online
situs togel terbesar
bocoran togel sgp
live draw hk
It's so beauty
https://tie-dye-store.com/
Your willingness to address diverse perspectives and present a balanced view on complex topics is geometry dash commendable, and I am grateful for the broadened understanding it has afforded me.
Hello, wish you a happy and productive day. You can play some games with me for fun at papa's scooperia ( fun and exciting ice cream restaurant management game)
Emoji Kitchen - By selecting an emoji, users are presented with a variety of mashup options, blending the chosen emoji with others to create unique, often humorous, new designs.
Basketball Stars is a one-on-one game, meaning you’ll be facing off directly against another player without the assistance of teammates.
Creating a neon tie-dyed lampshade is such a fun project that adds a splash of color and joy to any room! It’s amazing how a little creativity can brighten your space. Retro bowl
moto x3m
is nice
By balancing study and fun, students can maintain their motivation and creativity. If you are looking for some fun moments, don't forget to try fnf game! This rhythm game not only brings fun experiences but also helps improve reflexes and concentration. Take time for yourself to explore music and creativity in fnf game, because a comprehensive experience will bring greater success in both study and life!
Post a Comment