Showing posts with label fabric markers. Show all posts

Thursday, August 27

Coloring Book Page Gerber® ONESIES® DIY


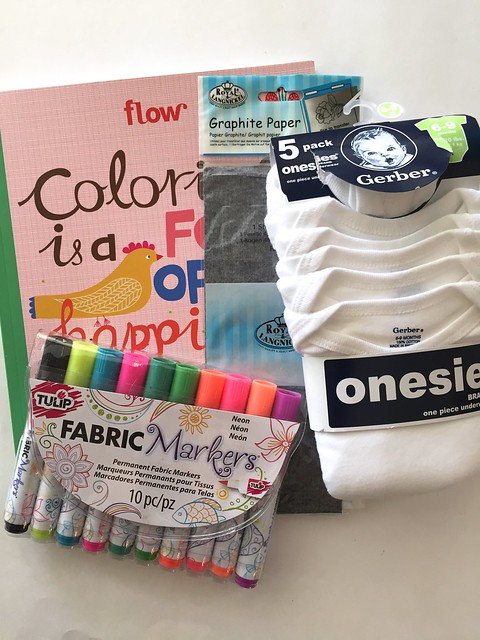
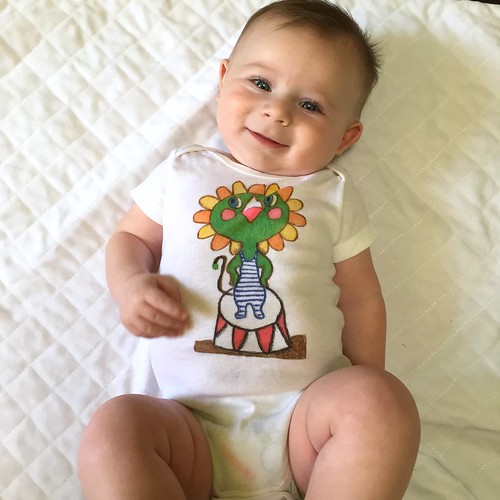
Helen Dardik has long been one of my favorite illustrators. I have had her prints hanging in my children's rooms since before they were born. When I saw that she had contributed to a coloring book for Flow Magazine I jumped at the news stands. These doodles were just too cute to keep bundled up inside the book, I needed to share the love with my friends and family. I needed to bring another little in my life over to the Helen side. Enter my adorable nephew Wylder and his new Gerber® ONESIES®  that I made using my coloring book and Tulip Fabric Markers.

Wednesday, August 19

DIY- Patterned Baby Onesies

Happy HUMP day! I seriously wish I had a baby that I could put these cute onesies on. What I am really wondering is why I didn't think to do this when my now 15 year old was a baby! Well no worries, Jaderbomb is here to save the day. You no longer have to buy those boring store bought onesies because today I will show you how to make your own with minimal products. What makes this project awesome is the fabric markers! Not just any fabric markers, Tulip fabric markers! Who's ready to get started...I know I am! I will be showing you how to make 4 different designs that everyone will LOVE!

Monday, July 20

Doodled Journal Covers


I seem to have a thing for notebooks, sketchbooks, journals, basically anything paper. What I love best about them (aside from everything) is being able to personalize them, to make them your own. Many journal or sketchbook covers are fabric which makes them perfect for decorating with drawings or doodles using fabric markers. For lighter colors you can easily use the regular fabric markers but for dark colors Tulip’s Opaque Fabric Markers work perfectly! With back to school right around the corner, decorating a new sketchbook or journal is a perfect way to get ready for the new school year. Let’s get started!

Tuesday, April 21

Zentangle® Sneakers


If you're crafty I'm sure you've heard of Zentangle®. I spent the longest time, and I do mean LONGEST trying to resist the doodling fad. But one day I decided to borrow a book from the library when I couldn't find anything else I wanted to take home. 


I got after it wit a piece of pink construction paper and my purple glitter pen. It looked like a tween was working it but it was so much fun. That was 1 week ago. And now I'm obsessed with two different notebooks and a good gazillion black markers to doodle my Zentangles® with. It seemed only  natural that I'd get after a pair of sneakers before too long. I held out 7 whole days!

Sunday, March 29

Secret Message Bracelet, DIY

 Want to send a secret message to the one you love, family or friend?
 Here is a great way to sneak a message into a bracelet. 
When they wear the bracelet, it will always remind them of you.

Wednesday, March 11

DIY Doodle iPad Case

Hey everyone! Tanner Bell here, today on the blog I'm going to share with you how to create a fun Doodling iPad Case. You wouldn't believe how fun this DIY Video tutorial is with Tulip's Fabric Markers. 

Promposal T Shirt


Prom season is quickly approaching! If you are  planing to ask some to come as your date, you will definitely want to ask in a creative way! The term for asking someone to prom is "promposal" and there are so many awesome ways to do it! Today i'll be sharing a really fun DIY Promposal T Shirt! 

Wednesday, February 25

DIY Book Covers From Old T-Shirts

Hey everyone! Hope you're doing well and staying warm. It's snowing like crazy here in Tennessee. Today on the blog I'm using the new Electric Neon Fabric Markers! These are so much fun to doodle and sketch with. Let's jump into today's tutorial.

Wednesday, February 18

Learn to make a Watermelon Pillow

I don't know about you but with all this cold weather I had the urge to do something that reminds me of sun, summer and grilling! I seriously can eat watermelon's every single day with a sprinkle of salt. I have this yummy watermelon salsa that I make and I can't wait to make some now!

Today I am going to show you how to make this fun, summery watermelon pillow using Tulip fabric markers. We are not using any fabric markers, we are using the new electric neon markers!!! I can't stress how much you need to get these. Kids love them as much as adults. The markers have a nice brush tip and makes coloring in things super easy. Not just that but the pigment is fabulous! Let's get started! 

Tuesday, January 6

Hand Drawn Oxford Sneakers

header-hand-drawn-oxfords-dreamalittlebigger

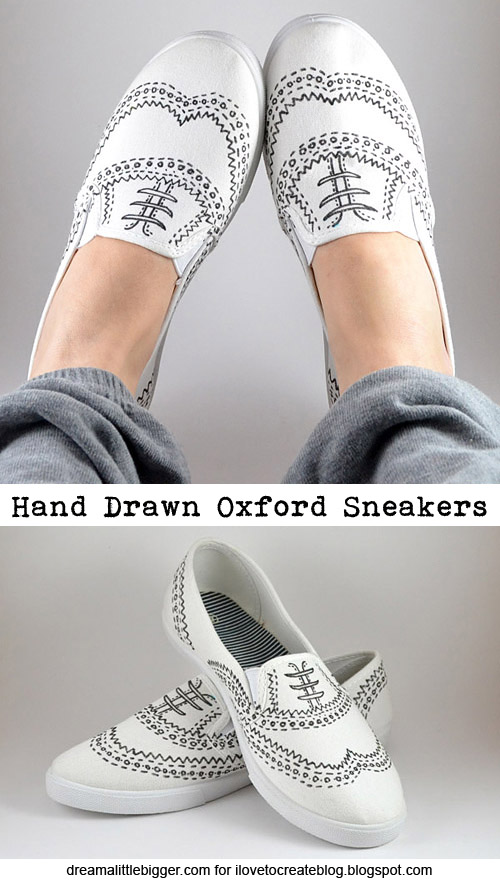
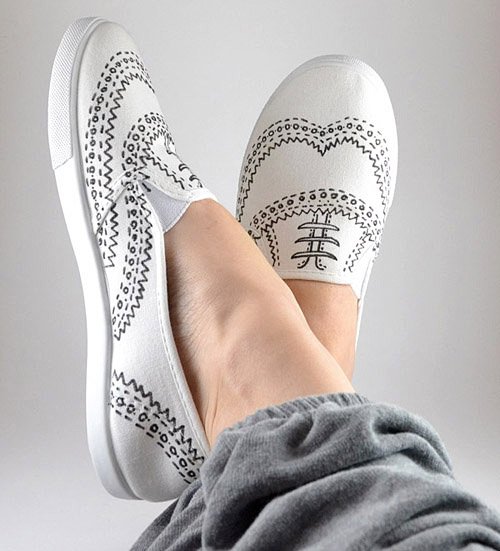
You might recall that I have a bit of a "thing" with shoes. I love them and I often window shop for them online. One of my very favorite pair of shoes that weren't DIY are my ASPCA kitty cat Vans. Perhaps I'm just a Vans fan because when I saw these oxford drawn sneakers at We Heart It I was instantly smitten. And when I couldn't find them to buy I went DIY of course!


011-hand-drawn-oxfords-dreamalittlebigger

Tuesday, March 4

Neon Watercolor Shirt with Tulip Fabric Markers


Since I'm the social media specialist for a craft company, I see lots of projects and gets lots of ideas on DIYs I think would be fun to try! Every now and then, I actually take a break from posting and actually create something.  This is one such time!  Inspired by the cool Tulip Fabric Marker watercolor technique Pattie created last year, and my love of neons and geometrics, I bring to you this fun tee I whipped up in about an hour!

Monday, February 10

Neon Geometric Clutch DIY


Create fabulous neon stripes using the Tulip Neon Fabric Markers on a super chic Neon Geometric Clutch with this simple DIY tutorial. I’m using a fuzzy faux shearling fabric for this clutch, I was able to color it really easily and well with the fabric markers and it’s so cozy and cuddly to hold!

Wednesday, October 16

Make It: Neon Tie-Dyed Lampshade


Happy Hump Day! I know it's Fall and almost Halloween but I just felt the need to post something bright, whimsical and fun. You know, something that you can look at and it instantly makes you feel good inside. I will show you today how much fun Tie-Dye and Fabric markers can be. I am really happy with today's neon lampshade and I know you will love it! 

Let's go make a LAMPSHADE! 

Sunday, May 26

How to make Bohemian Flags


Bohemian Flags 
Jaderbomb for iLoveToCreate


There is nothing like a set of whimsical flags flowing in your back yard catching the attention of everyone in your neighborhood or your friends and family. These flags super duper easy to make. It is also a project that relieves stress. You know, a little Art Therapy for ya! Let's get started.
You will need:
*Tulip 5 Color Tie-Dye Kit :  (Red, Orange, Lime, Teal, Violet)
*Plain White Napkins (I got these from Target)
*Glue Gun & Hot Glue 
*Tulip Fabric Markers
*Twine or Bias Tape
*Tulip Fabric Spray Paint (Glitter)
*Scribbles 3-D Paint
*Lot's of LOVE


I wanted to show you what comes with the Tie-Dye kit.
*Rubber Bands
*Powdered Dye
*Clear Gloves
*Instructions
*Squirt Bottles
(p.s. keep these you can reuse them)
I think this is my favorite part of the project. Using all of these materials make me giddy as a "giddy little girl". What is crafting if you can't use great products like these!
Fill a bowl up with water. On the side get an old tray with an old cookie drying rack in it. If you don't have this it's ok, just use whatever you have. I like the drying rack because it allows the dye to drip below it. 
Soak one white fabric napkin in the bowl of water. 
Make sure to cut a "little" hole on your dye packet. We are not using a lot of this and we want to store it without getting it all over. 
This is how much I actually put in my bottle. Not too much. We want a light color on our napkins. 
 
What! No Tie-Dye? Well I figured I would do something a little different today. After you squeeze water out of your napkin place it in your tray. Pick the color you want and start applying it all over the wet napkin. We are creating solid shades of color with our Tie-Dye. 
Repeat the steps until you are done with all of your napkins. I hung my napkins on a clothesline to dry. Make sure you don't hang in the middle of the day. If the sun hits the napkins more on one side it could dry that side faster and cause the color to change.
If you don't have a clothesline you can lay them flat on the ground to dry.
Well looky here! Someone just had to say HI! Mr. Tacky always pops up at my house. 
Your napkins should be done drying outside in 5 hours, maybe 4. Wash them all together, with nothing else.  Then pop them in the dryer. I ironed them when they came out. Trust me, they will be wrinkled. Look how spiffy these babies look. 

The next thing you want to do is:
 1. Lay your napkin flat and cut the edges off.
2. Fold your napkin into fourths and cut the sides. We are just creating small squares. If you want to do this differently you can. Also, remember you can make your squares smaller than what I did in the picture.
3.  After you cut your sides, pull the fabric around all four sides. This will make the edges look frayed.
4.  Tadahh! You will be left with a stack of frayed fabric.
 
P.S. The one thing I love about the Tulip Fabric Markers is...they have two sides! One side is a brush tip and the other side is a fine tip. This is so smart! You can really put those little details in your work now.

I started by drawing my flowers on the fabric squares with the black fabric marker. I figured that would be the easiest thing to do. When you are done it will kinda feel like a coloring book sheet. Have fun with your colors.
I tested the colors on the scrap sheets of fabric to make sure the colors went well together. Set aside for 15 minutes to dry.
 
After the fabric markers are dry I outlined the flowers with Scribbles 3-D Paint. This was the final touch that was needed. Big SIGH. I am in love with them. This takes about 3 hours to dry completely.
 
Last step is to coat the fabric with some Tulip fabric spray paint.
 
It adds a subtle coat of fine glitter on them. You know me, I love glitter.
 
This is the fun part, putting it all together. You can use bias tape or twine for this step. I like bias tape because it makes them look more elegant and finished. and it comes in ton's of colors.
*If you want twine just put a line of hot glue on the back on a square then place the twine on top.
*If you use the bias tape open it up and put a line of hot glue inside then place fabric on top. I put a little more glue on top of fabric then fold the top flap of bias tape on top of it.
 
I can't begin to tell you how much fun your kids would have making these.
 

The only rule for this project is to have FUN. You could do this project for special occasions and get a group of friends to each make a square. I think that is so special. Make your kids birthday flags, holiday flags or whatever you can think of. I love all of you "Tye-Dyers" big big! 
Huge hugs from my craft room to yours!
See you in the next post.
P.S. I promise when you start playing with Tie-Dye you won't be able to stop, hehe! 
*Find more of my DIY decor at JADERBOMB.COM*

Clicky Web Analytics
Pin It button on image hover

Subscribe to our newsletter

* indicates required
I am interested in products and inspiration for...
Close