Showing posts with label Fashion Graffiti. Show all posts

Wednesday, March 28

Tutu Dress-up - National Craft Month with Pattiewack

 
Little girls love wearing tutus, don't they?  And this little dress-up outfit is too-too fun!  I did a graffiti shirt, hair band, and over-the knee socks with vibrant colors, with a little attitude.  You can find all the instructions and supplies on iLoveToCreate.com and pick the colors your tutu wearing girlie girl will love.


Visit us on Facebook!
Craft on!

Wednesday, December 8

ILovetoCreate Teen Crafts: Blue Christmas Card


ILovetoCreate Teen Crafts
Blue Christmas Card

Created by Avalon Potter
"Teen crafted, Mom approved."

This week I wanted to do something that is fun for the person to give and fun for a person to receive. So not only is it a gift for someone else, it's a little gift to you. I decided on a holiday greeting card. You can easily make many of them if you have a time crunch on gifts or you just want to make something simple but nice.

Materials
White Card Stock (or holiday colored)
Blue Card Stock
Tulip Dimensional Fabric Glitter in Crystal Icicle
Foam Dimensional Stickers
Tulip Fashion Graffiti Big Phat Black marker
Large Snowflake Stamp
Aleene's Acid Free Tacky Glue Stick

Tools
Scissors
Paper Cutter
Tulip Sponge Pouncer

1. Cut your white card stock into an 11.5"x5.75" rectangle.

2. Use your marker to color the entire stamp and press down firmly in the middle of the card stock.

3. Re-apply the marker to the stamp two more times and stamp half of the stamp on the card stock in the upper right hand corner and again in the lower left hand corner.

4. Repeat step two on your blue card stock making two snowflakes. Cut the snowflakes to fit in the two empty corners.

5. Put a few dimensional stickers on the bottom of the stamped blue snowflakes and attach them to the two empty corners.

6. Once the ink has dried, take the tulip silver sparkle paint and apply to the blue snowflakes and to the snowflakes on the white card stock.

7. Put a personal message inside of the card by printing it out on the computer, cutting it out to the size and shape you like, and applying to the card using Aleene's Tacky glue stick.


Sunday, September 19

Big City Apron


Big City Graffiti Apron
Designed by Kathy Cano-Murillo
When it comes to sewing, any kind of fabric goes. So why not basic cotton dishtowels transformed into a colorful apron?


Craft on! Click here for today's daily giveaway!

Wednesday, September 15

Maya in the Moment Teen Craft: Rainbow Graffiti Pillowcase


My bedroom needs a serious makeover. Starting with my bed. You know those scenes in the movies where the tormented teenager girl falls on her bed and hugs her pillow? I need one of those in my life!
Bootsie approved.

I have a big body pillow, but it's boring and plain. I got a pillowcase to decorate for it. I didn't know how it would turn out so I practiced on a smaller pillowcase from my parents bed. I'm glad I practiced because it helped me figure out how I wanted to make the bigger pillow.
Ozzy approved, too.

I used:
1 pillowcase
Tulip Fabric Spray in bright colors
Tulip Fashion Graffiti Stencils
Tulip Big Phat Black Marker
Tulip Glitter Spray

Lay down the pillowcase on a flat surface and slide a piece of cardboard in the middle. Smooth it flat with your hands and set down the stencils all over the pillowcase. If it's easier, you can tape down the corners of the pillowcase.
Take turns spraying different colors of the fabric spray all over. Use long strokes as you spray. I used two or three colors on each stencil because I wanted it to look like a graffiti rainbow!
Here's what it looks like with the three colors! Isn't it cool?
My mom came in the room and suggested I add some black accents with the marker.
I added black accents around each of the stenciled areas.
This is what it looked like when I finished. You have to let it dry for FIVE hours and then you can wash it in cold water in the washing machine and dry it. That way it will be super soft when you cuddle it!


Craft on! Click here for today's daily giveaway!

Monday, August 30

'Free the Beat' Jeans


'Free the Beat' Jeans

Designed by Allee Marderosian

Walk to the beat of your own fashion-forward drum with a pair of jeans that rock! Give an old pair edgy new personality with Tulip® Fashion Graffiti™ products and a hint of sparkle from Tulip® Glam-It-Up!™ Iron-On Crystals™.

CLICK HERE FOR THE REST OF THE POST AND FOR PROJECT DIRECTIONS

Tuesday, August 24

Slashed Peekaboo T-shirt


Hi T-shirt fans! This is a project I've been meaning to make all summer. I saw something like it in a tween-ish retail store once (I know, I know, now that I'm a thirty-something perhaps I should start shopping in more adult places)--and thought, as I so often do, I could so make that... And so I did. And now you can make this 80s punk-meets-hip-hop tank top, too.

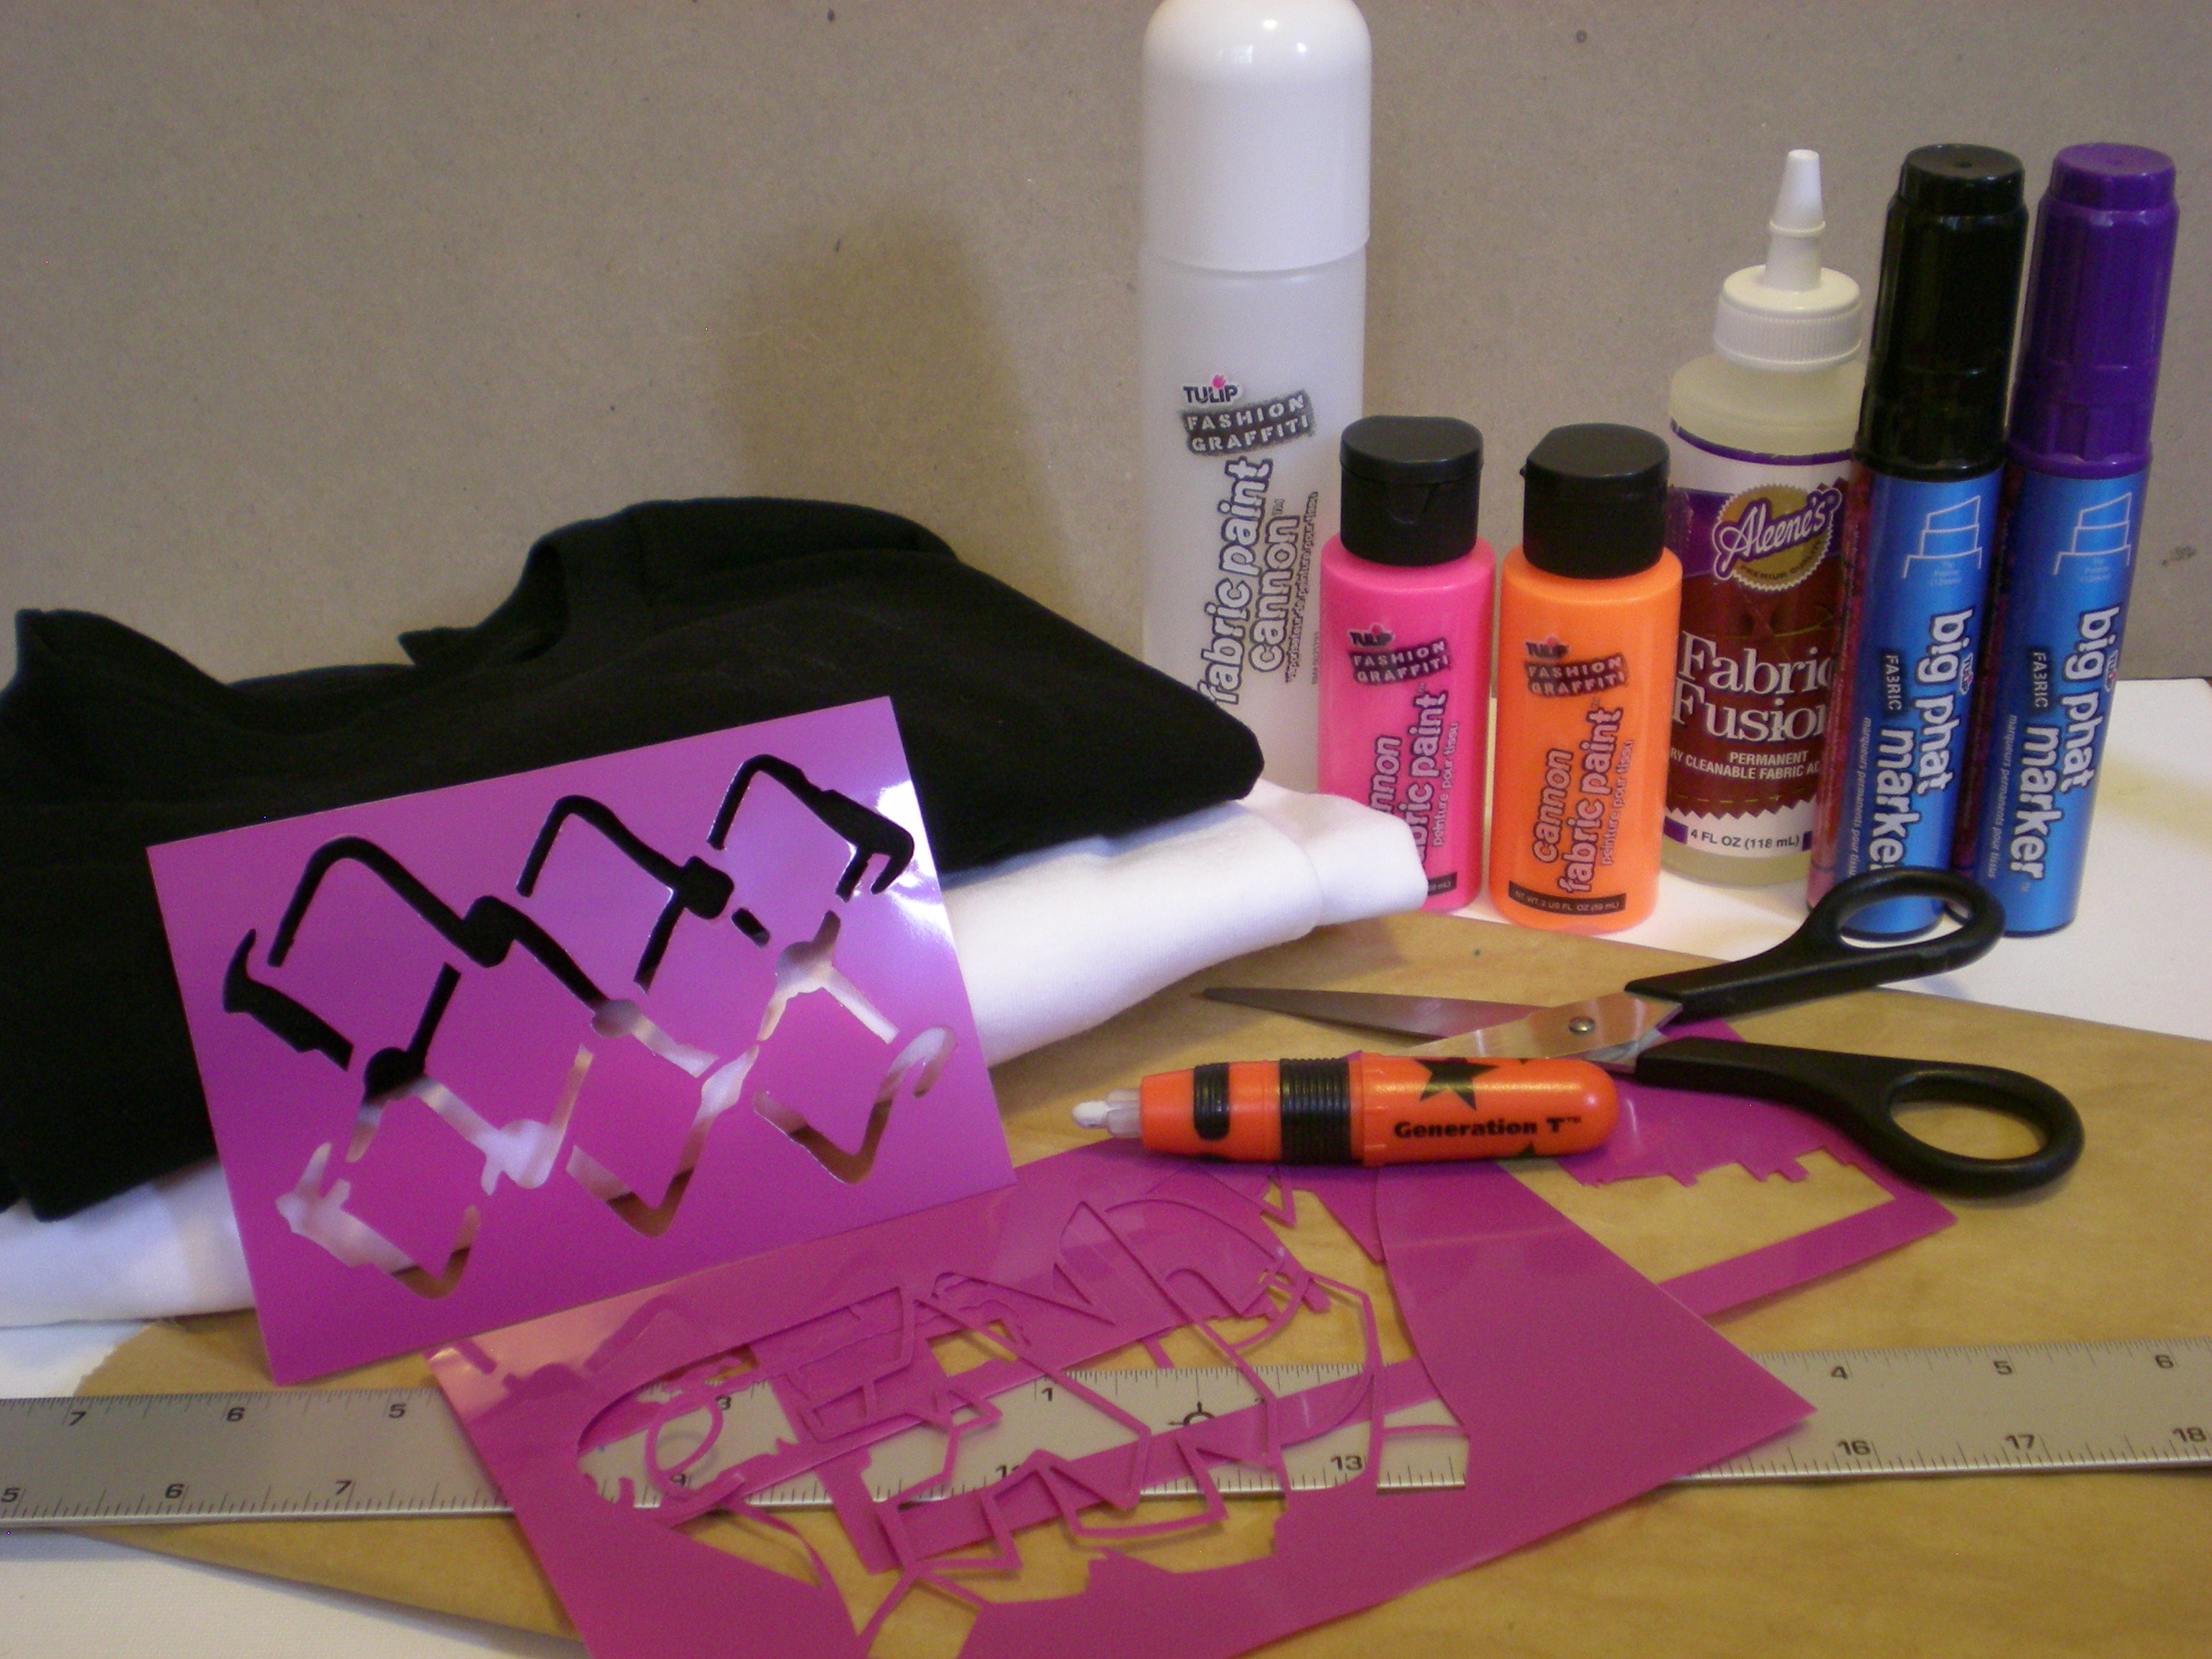
Materials:
– 2 T-shirts (1 fitted, dark color; 1 in larger size, light color)
– scissors
Tulip Big Phat fabric markers
Tulip Fashion Graffiti Spray Paint Kit (including fabric paint and spray paint cannon)
Tulip Fashion Graffiti stencils
– paper grocery bag (or other scrap paper or sheet to use as a drop cloth)
– ruler
– chalk marker
Aleene's Fabric Fusion (or needle and thread)

Make it:
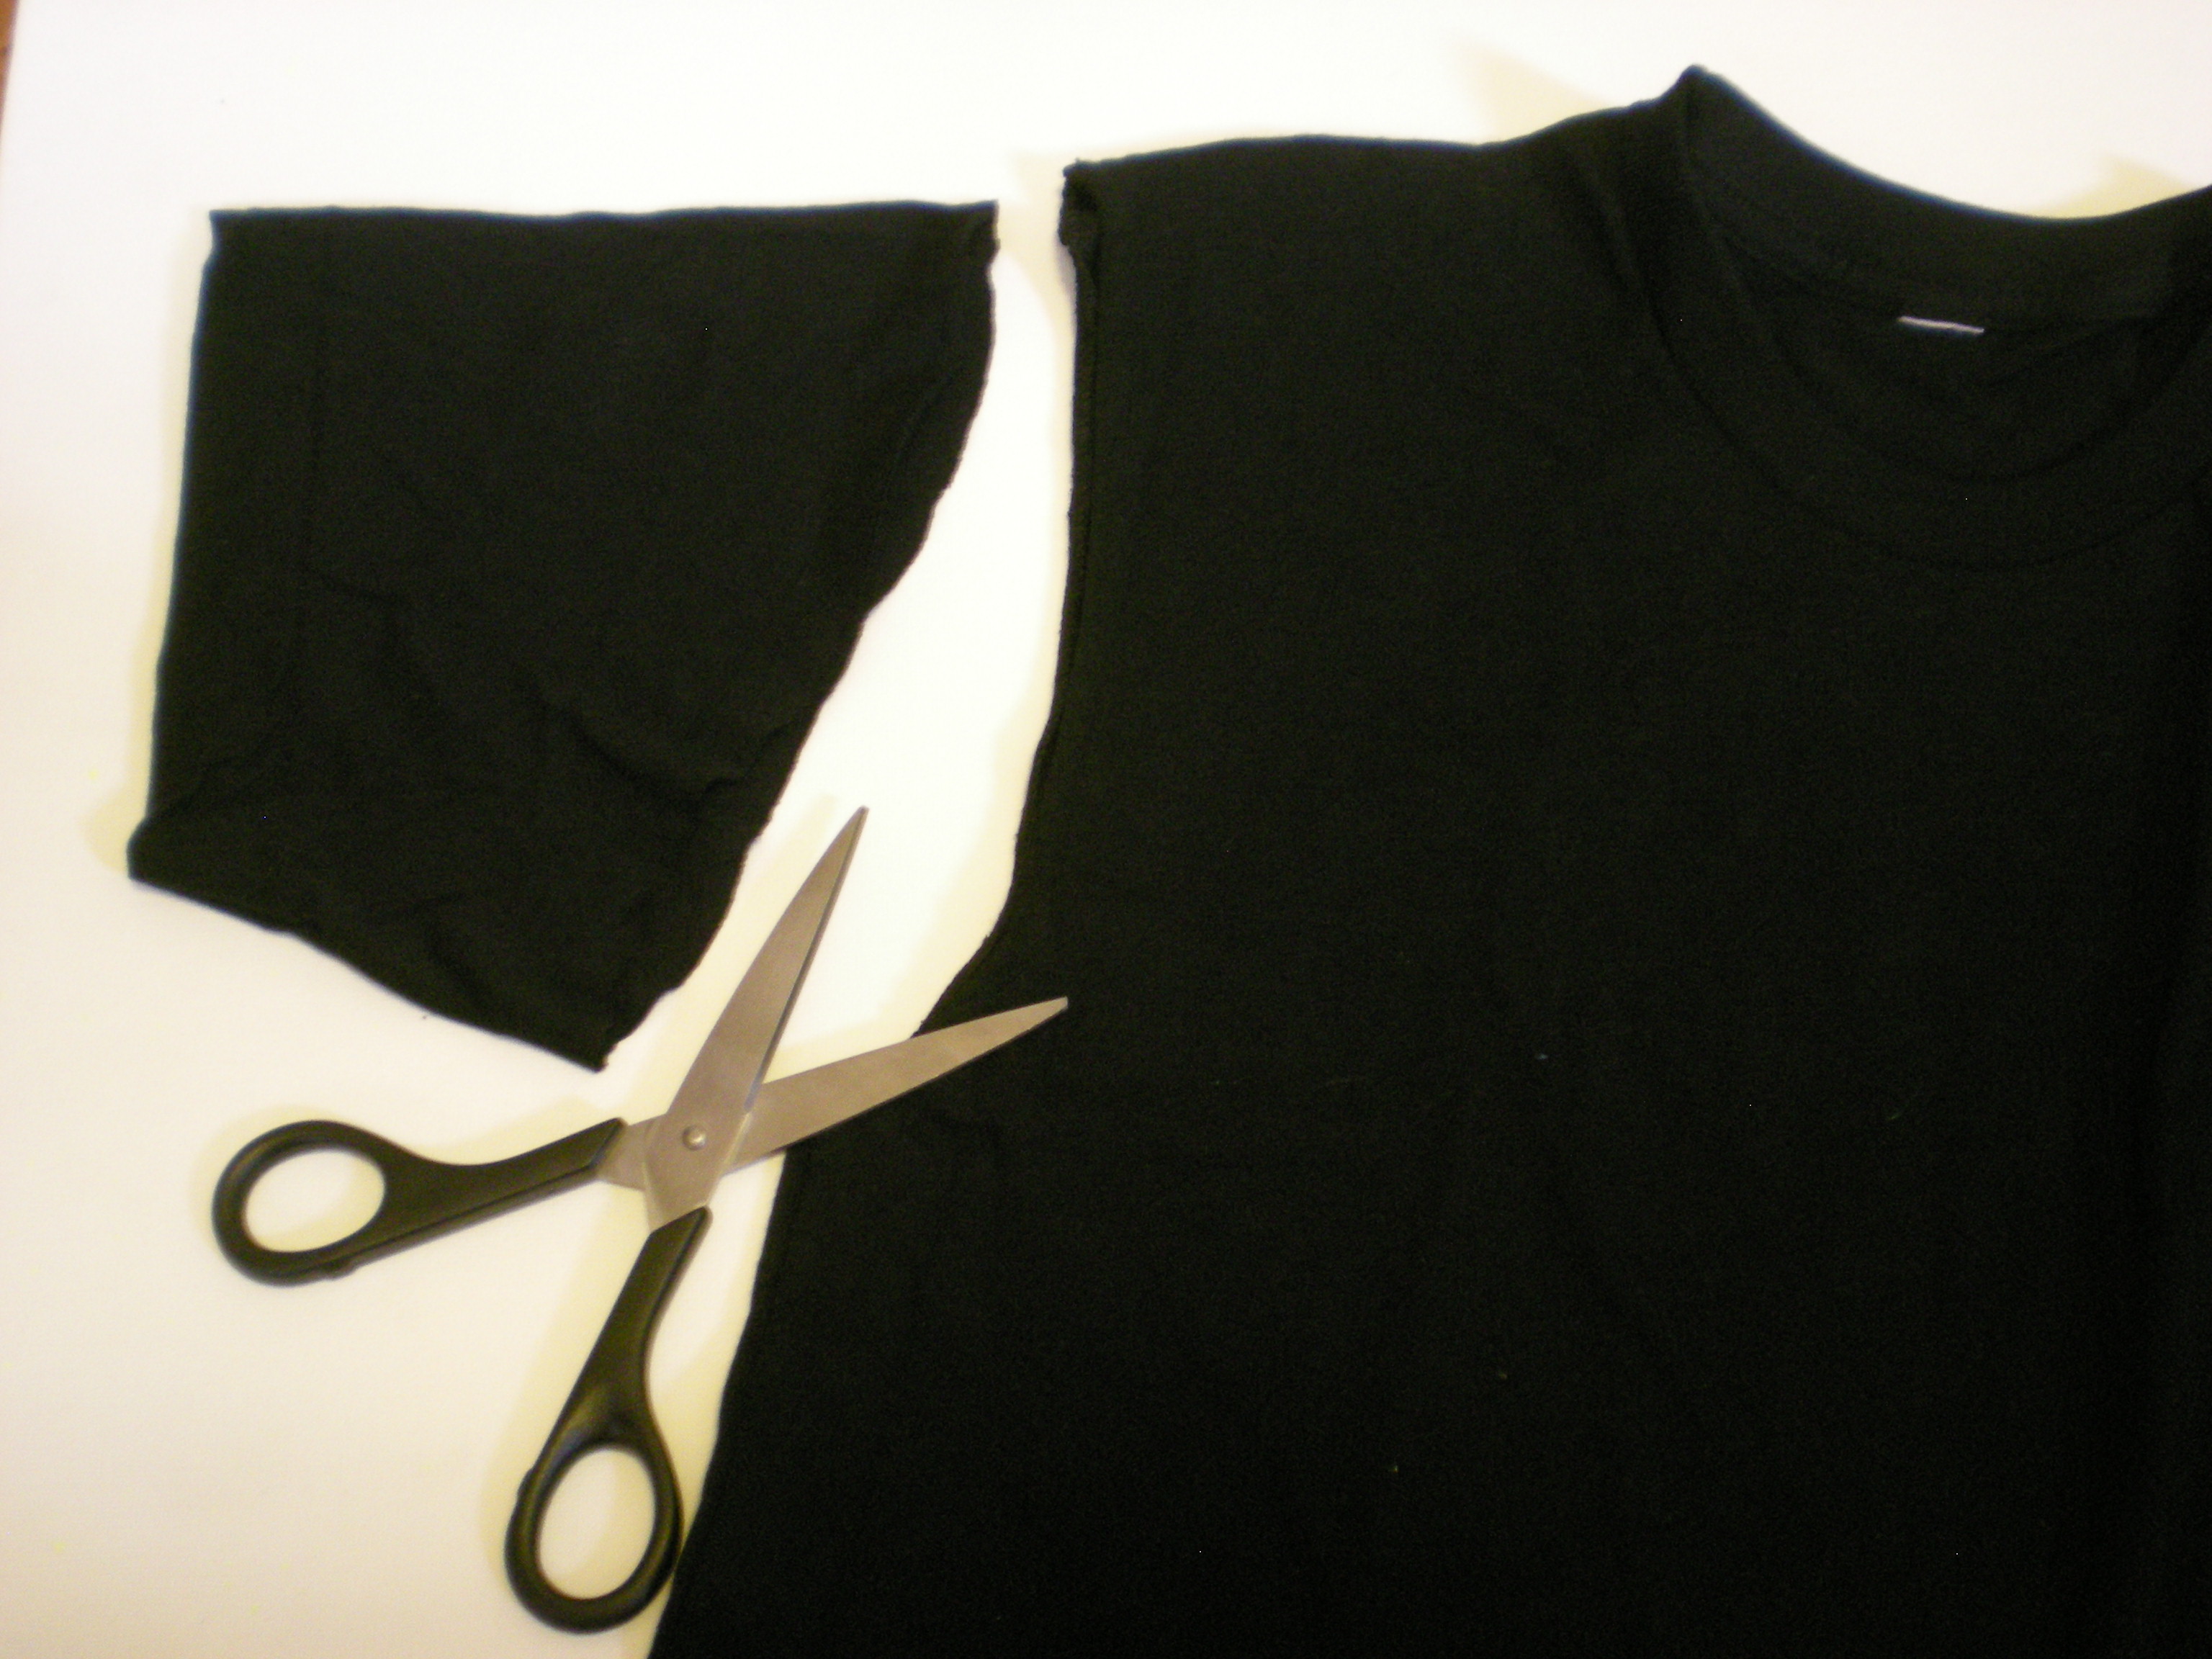
1. Cut off the sleeves of the darker T-shirt, just outside the seams, to make a tank top.


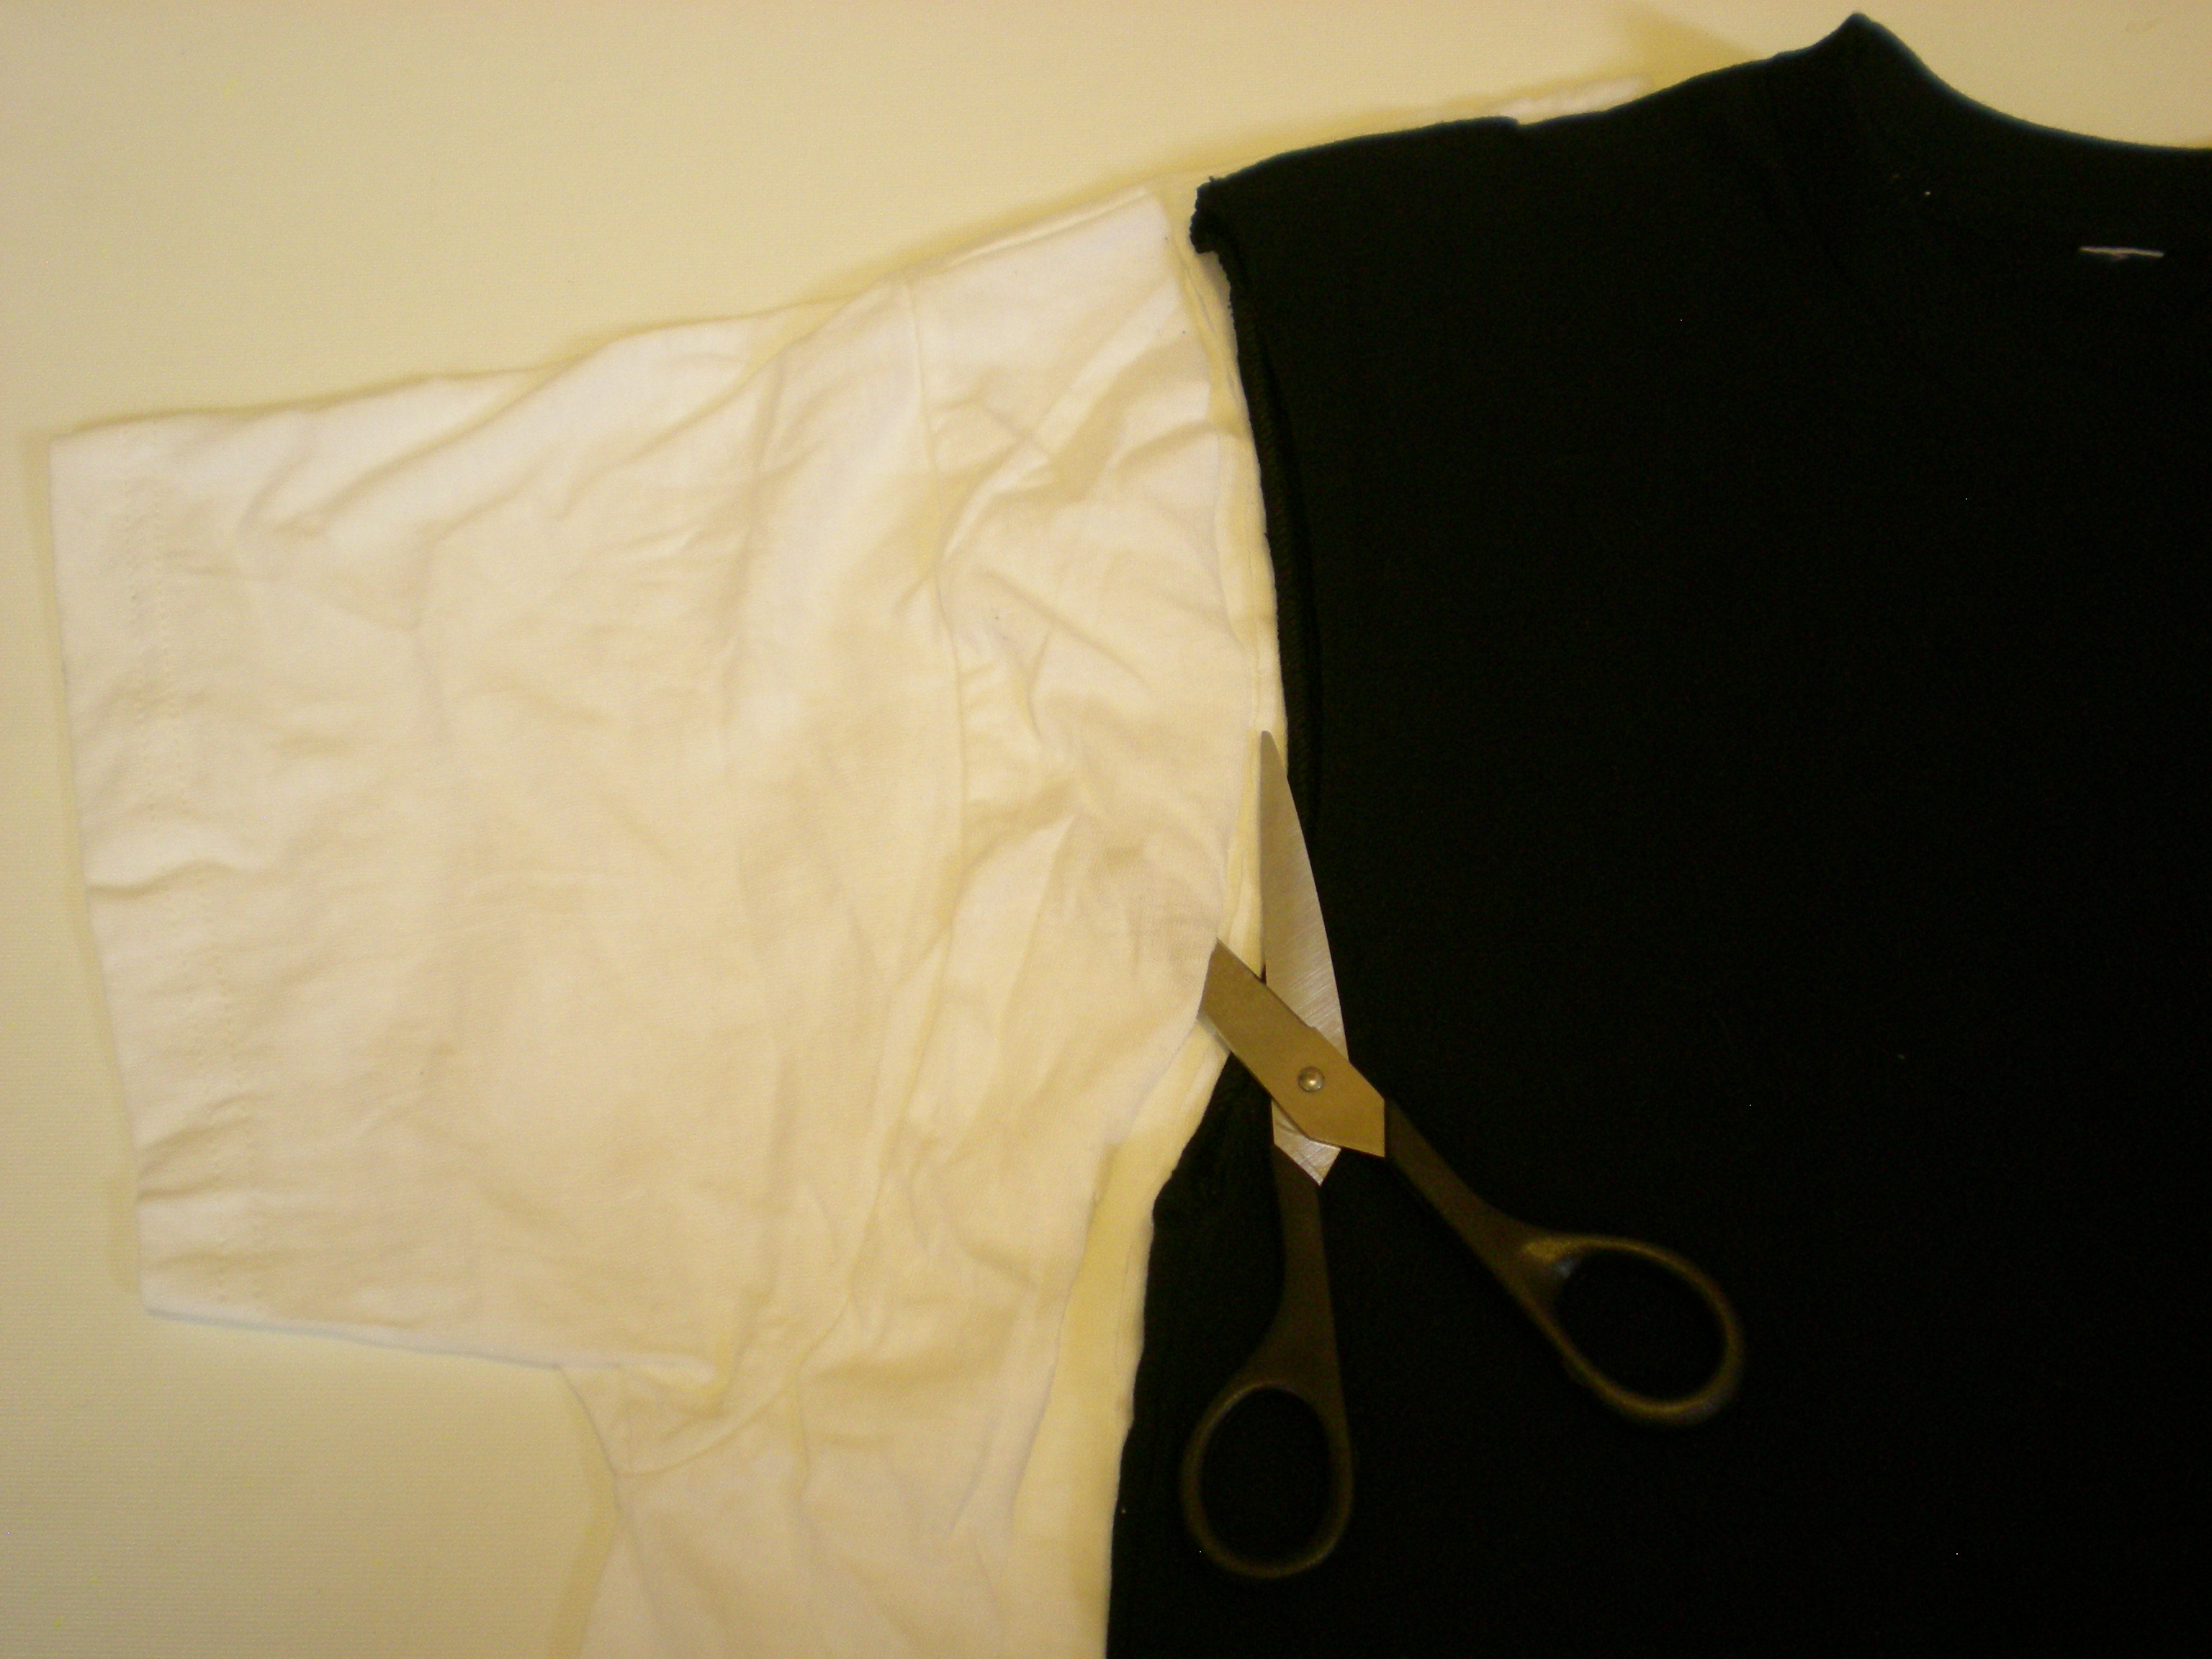
2. Cut off the neckband of the lighter T-shirt and lay the tank top over it, lining them up at the neck holes. Trace the tank top onto the T-shirt and cut out the outline through only one layer to make the peekaboo panel.


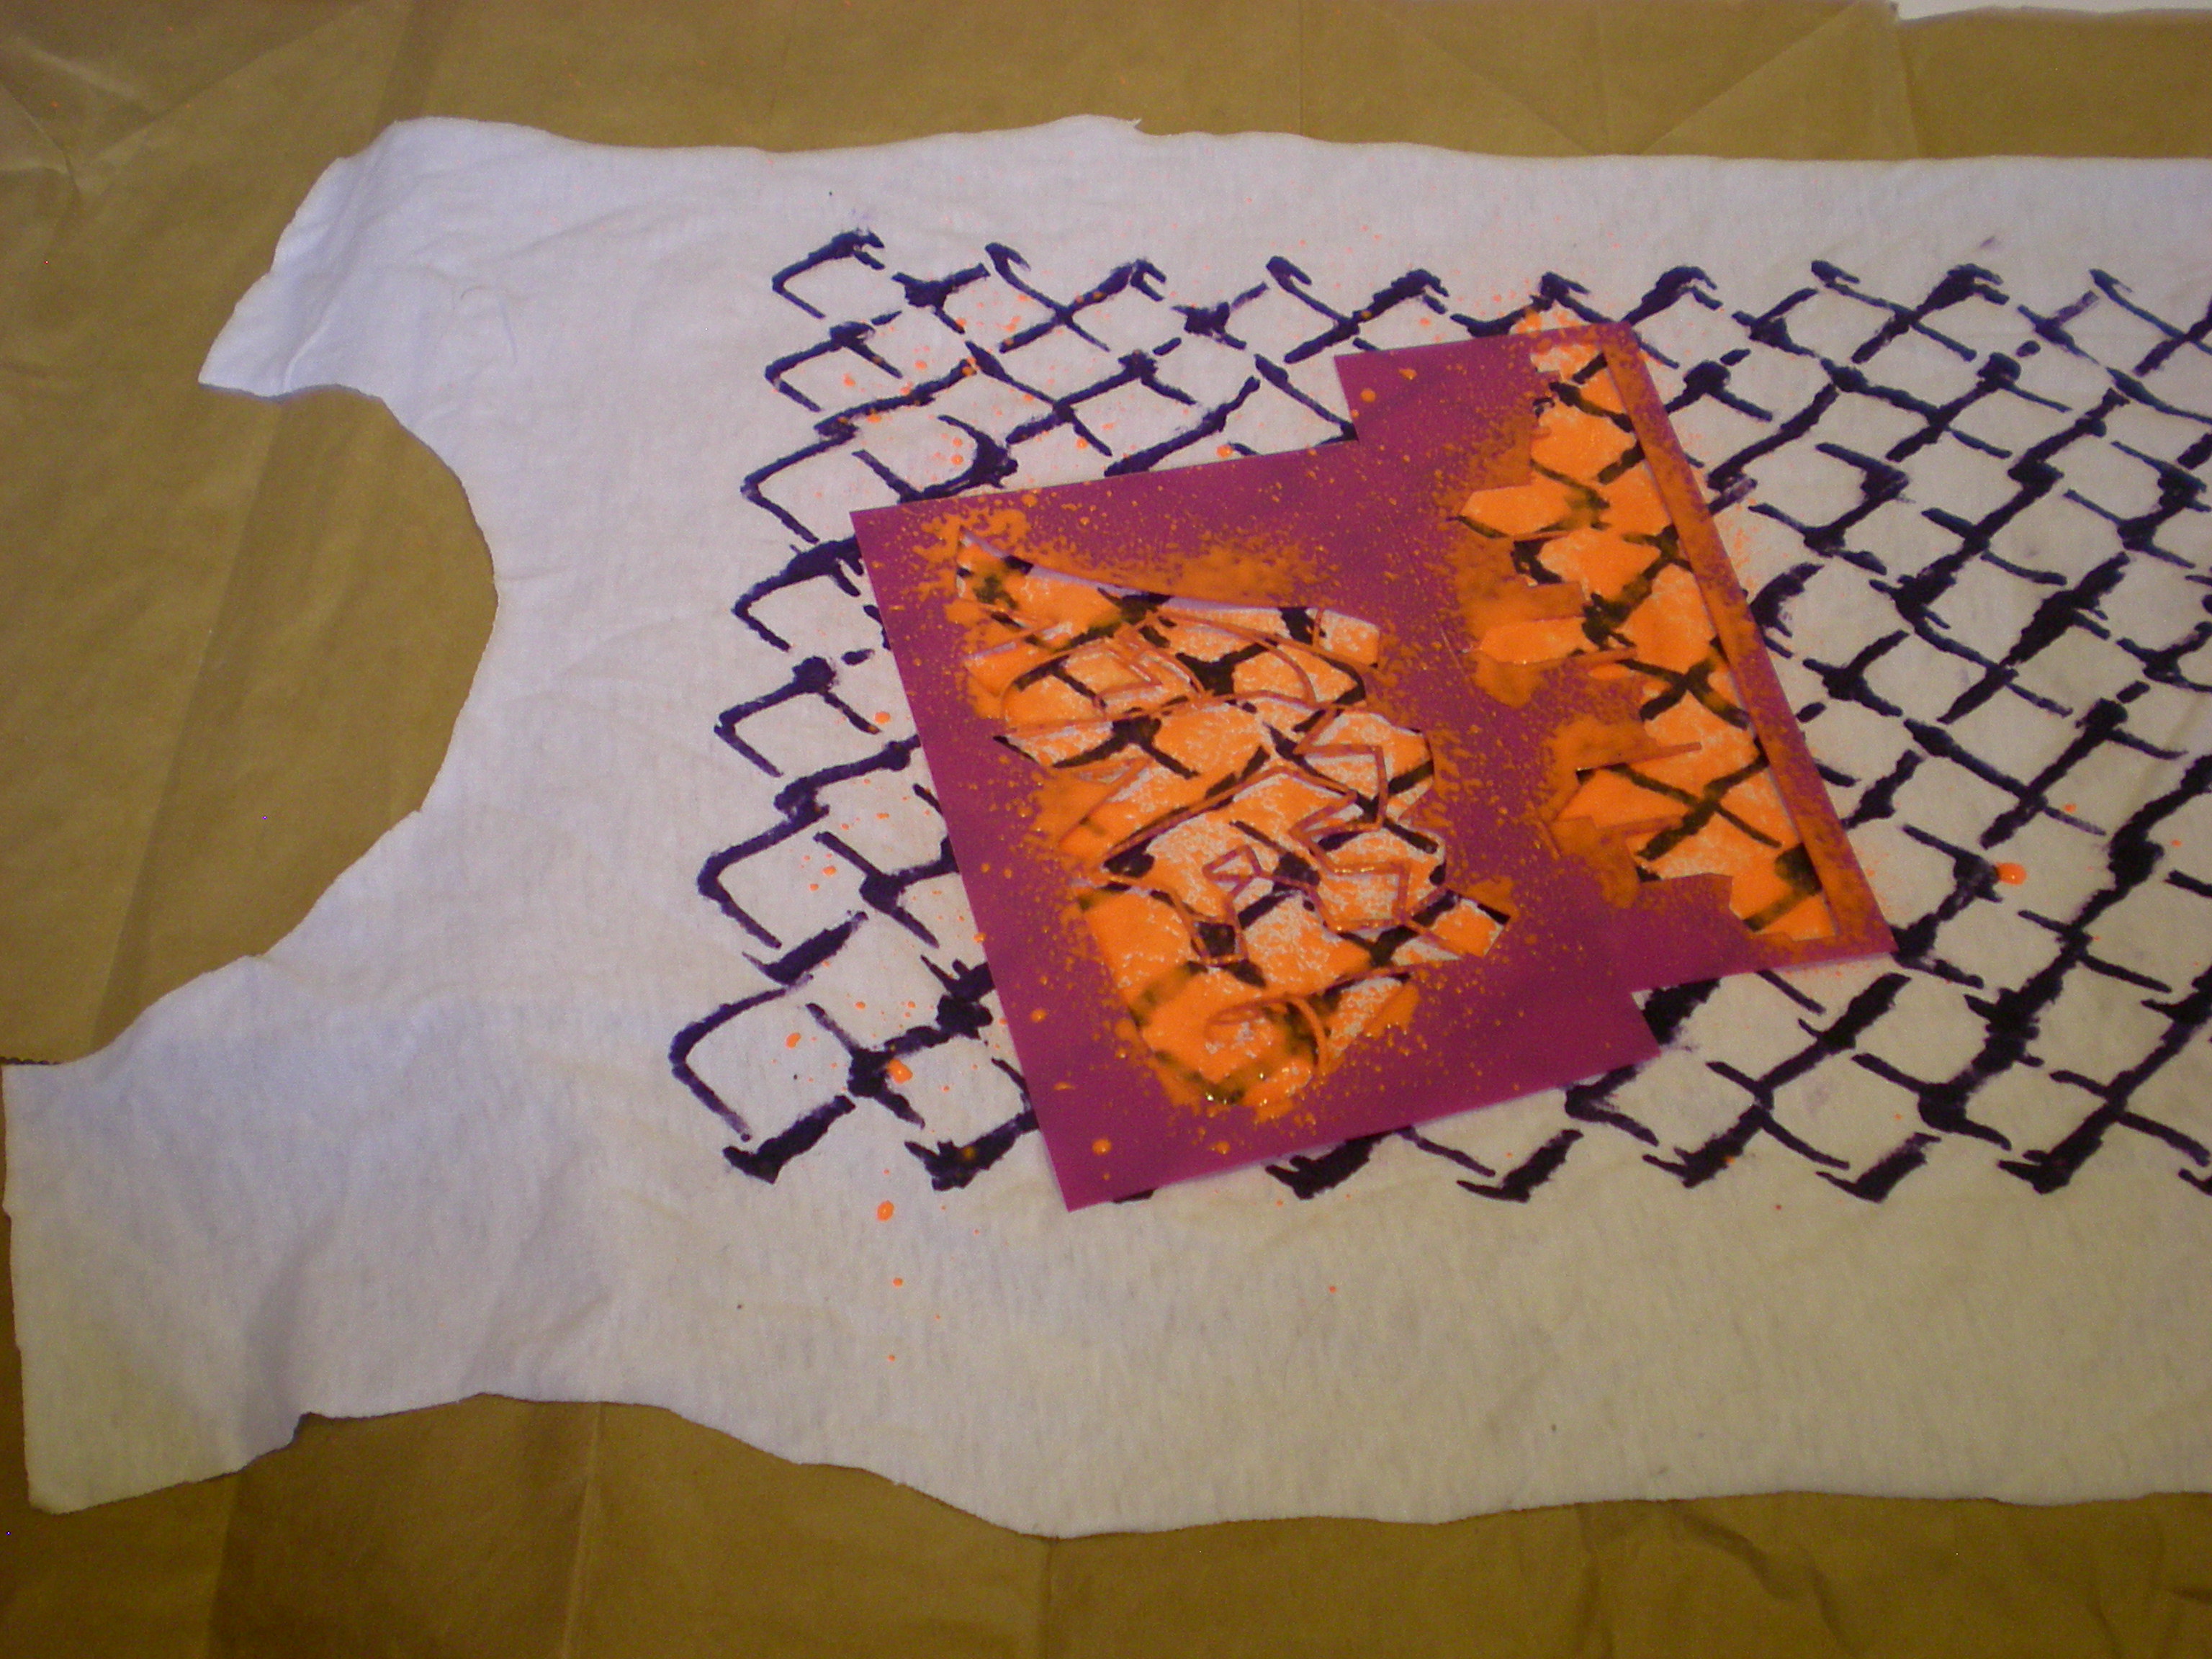
3. Set aside the dark tank top. Lay the panel flat on the grocery bag paper. Use the fabric markers and stencils to lay a background pattern. (I used chain link fence!)


4. Fill up the paint cannon and spray freehand across the panel in combination with stencils to create another pattern layer. Change colors as much as desired! Then set the panel aside and let it dry.


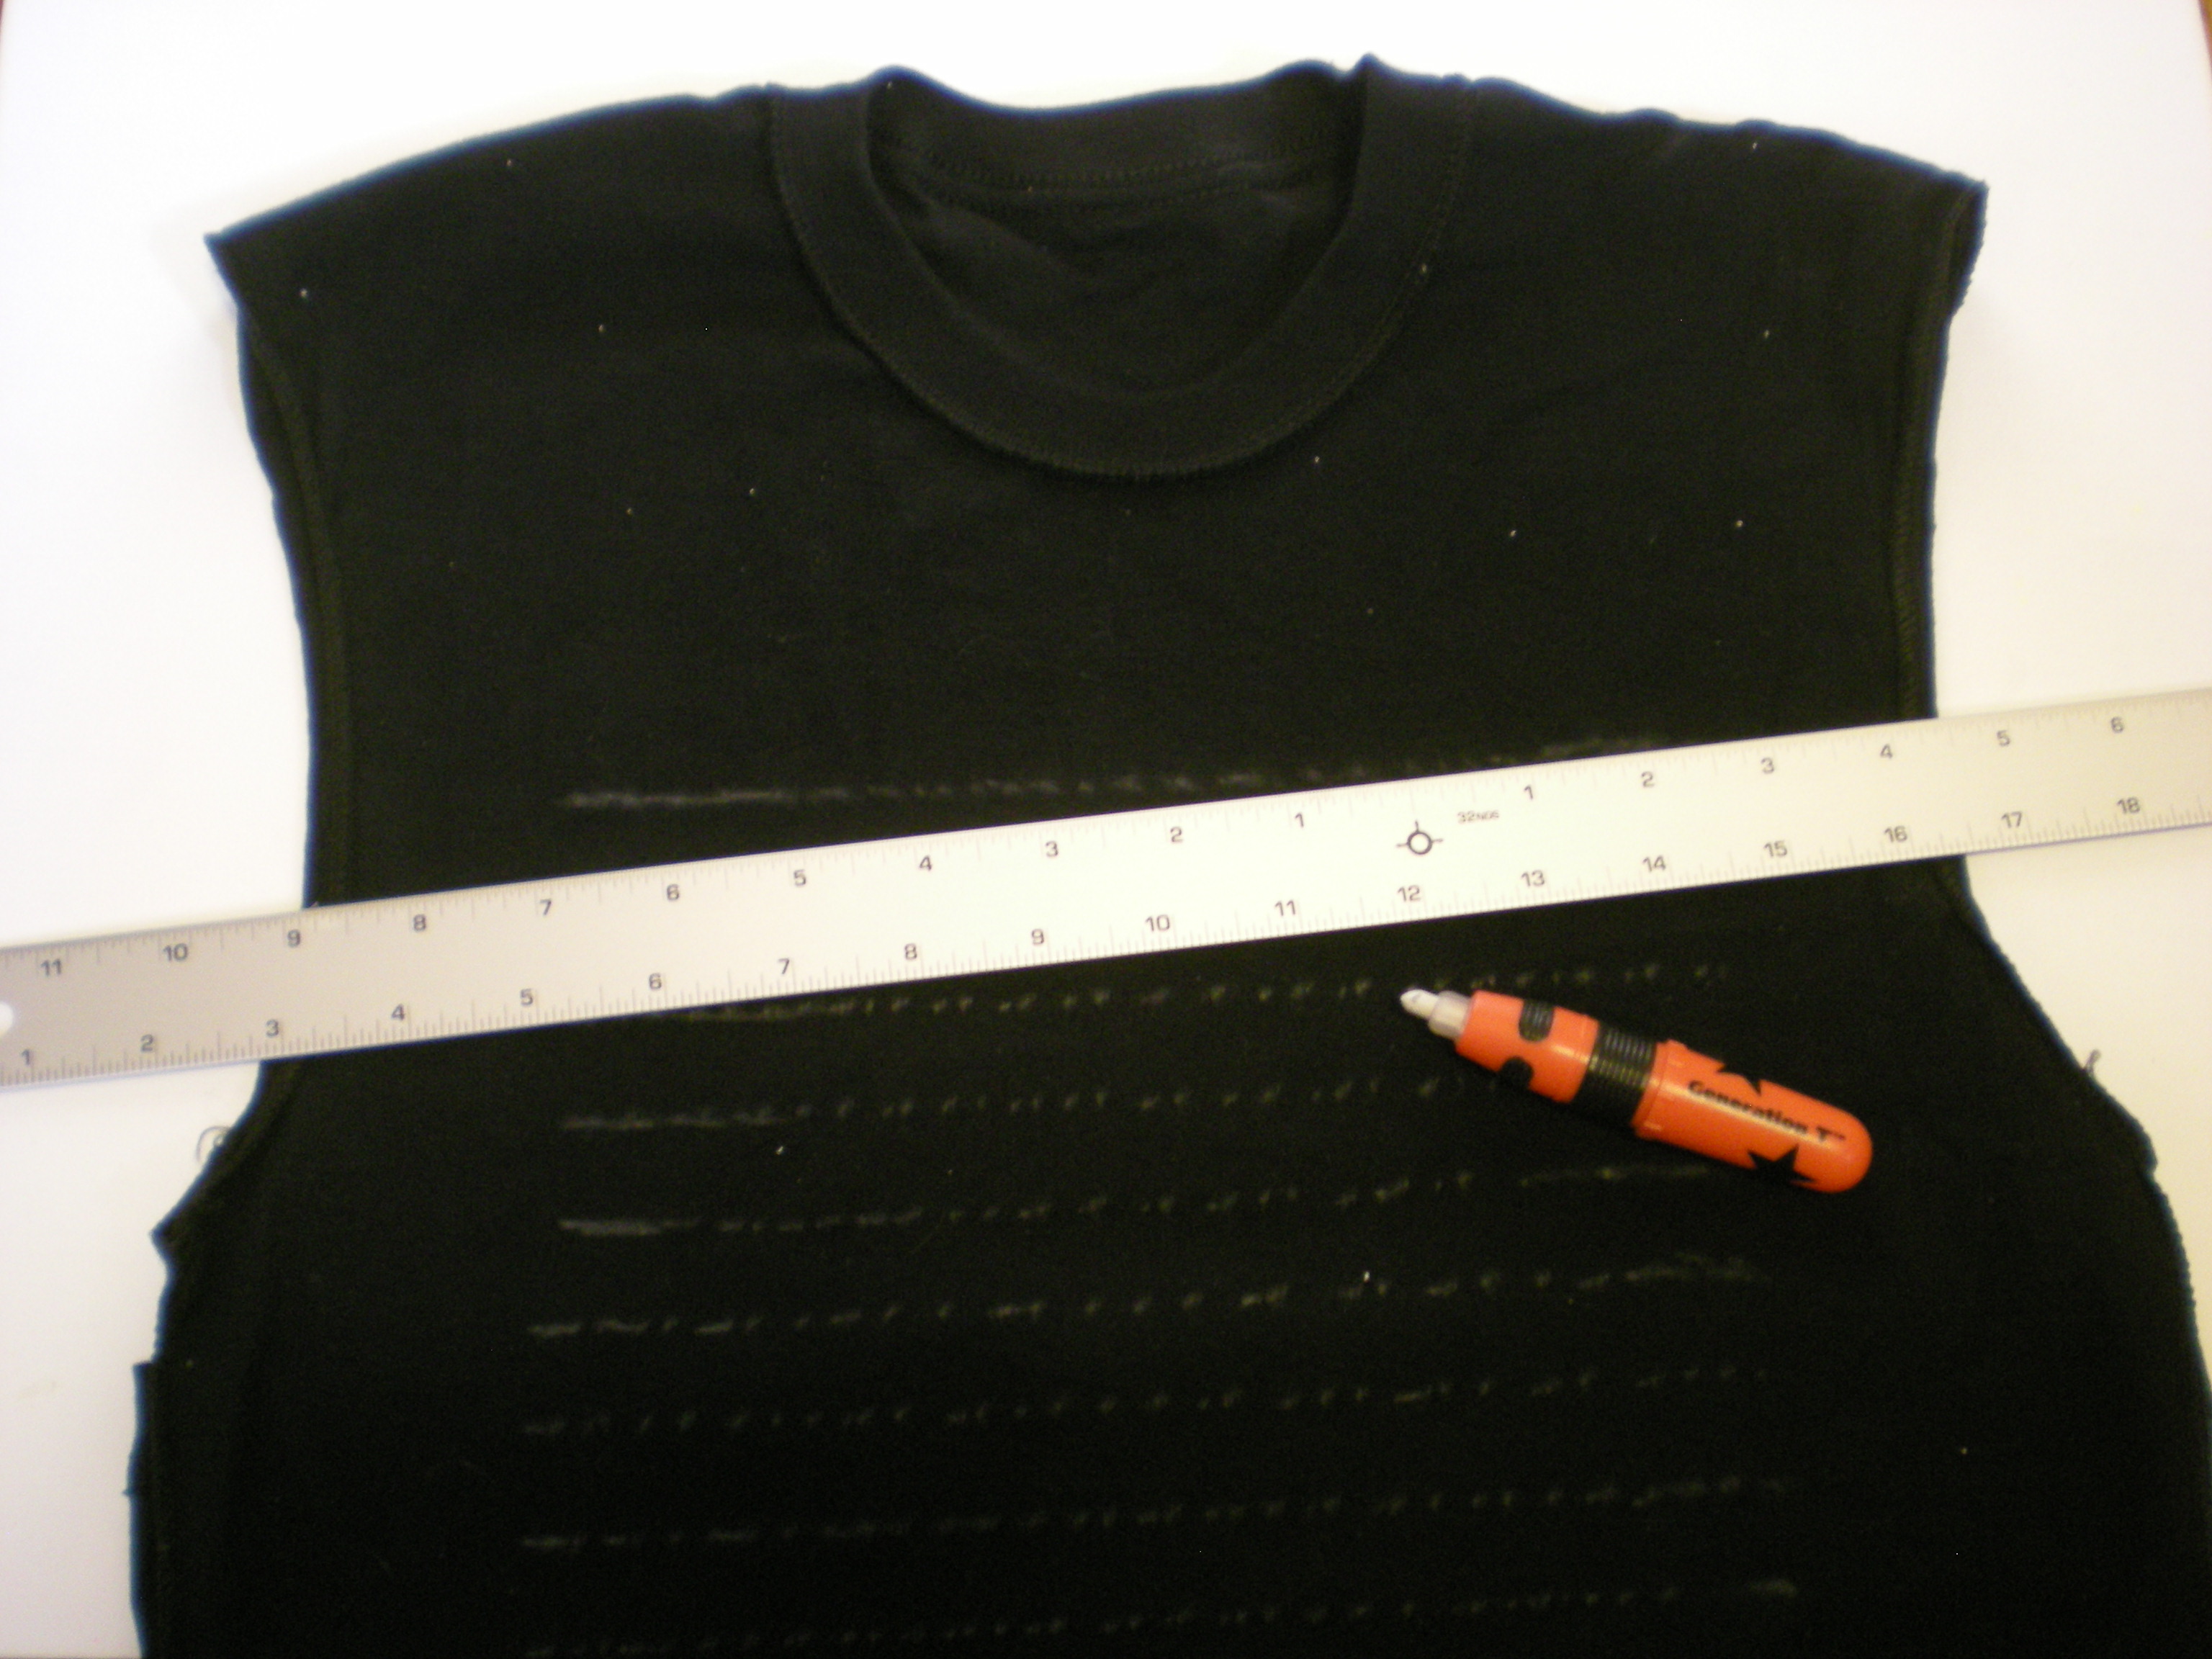
5. Turn the tank top inside out and measure and mark 9"-long horizontal lines, about 1" apart, down the front. Stop about 4" from the bottom hem.


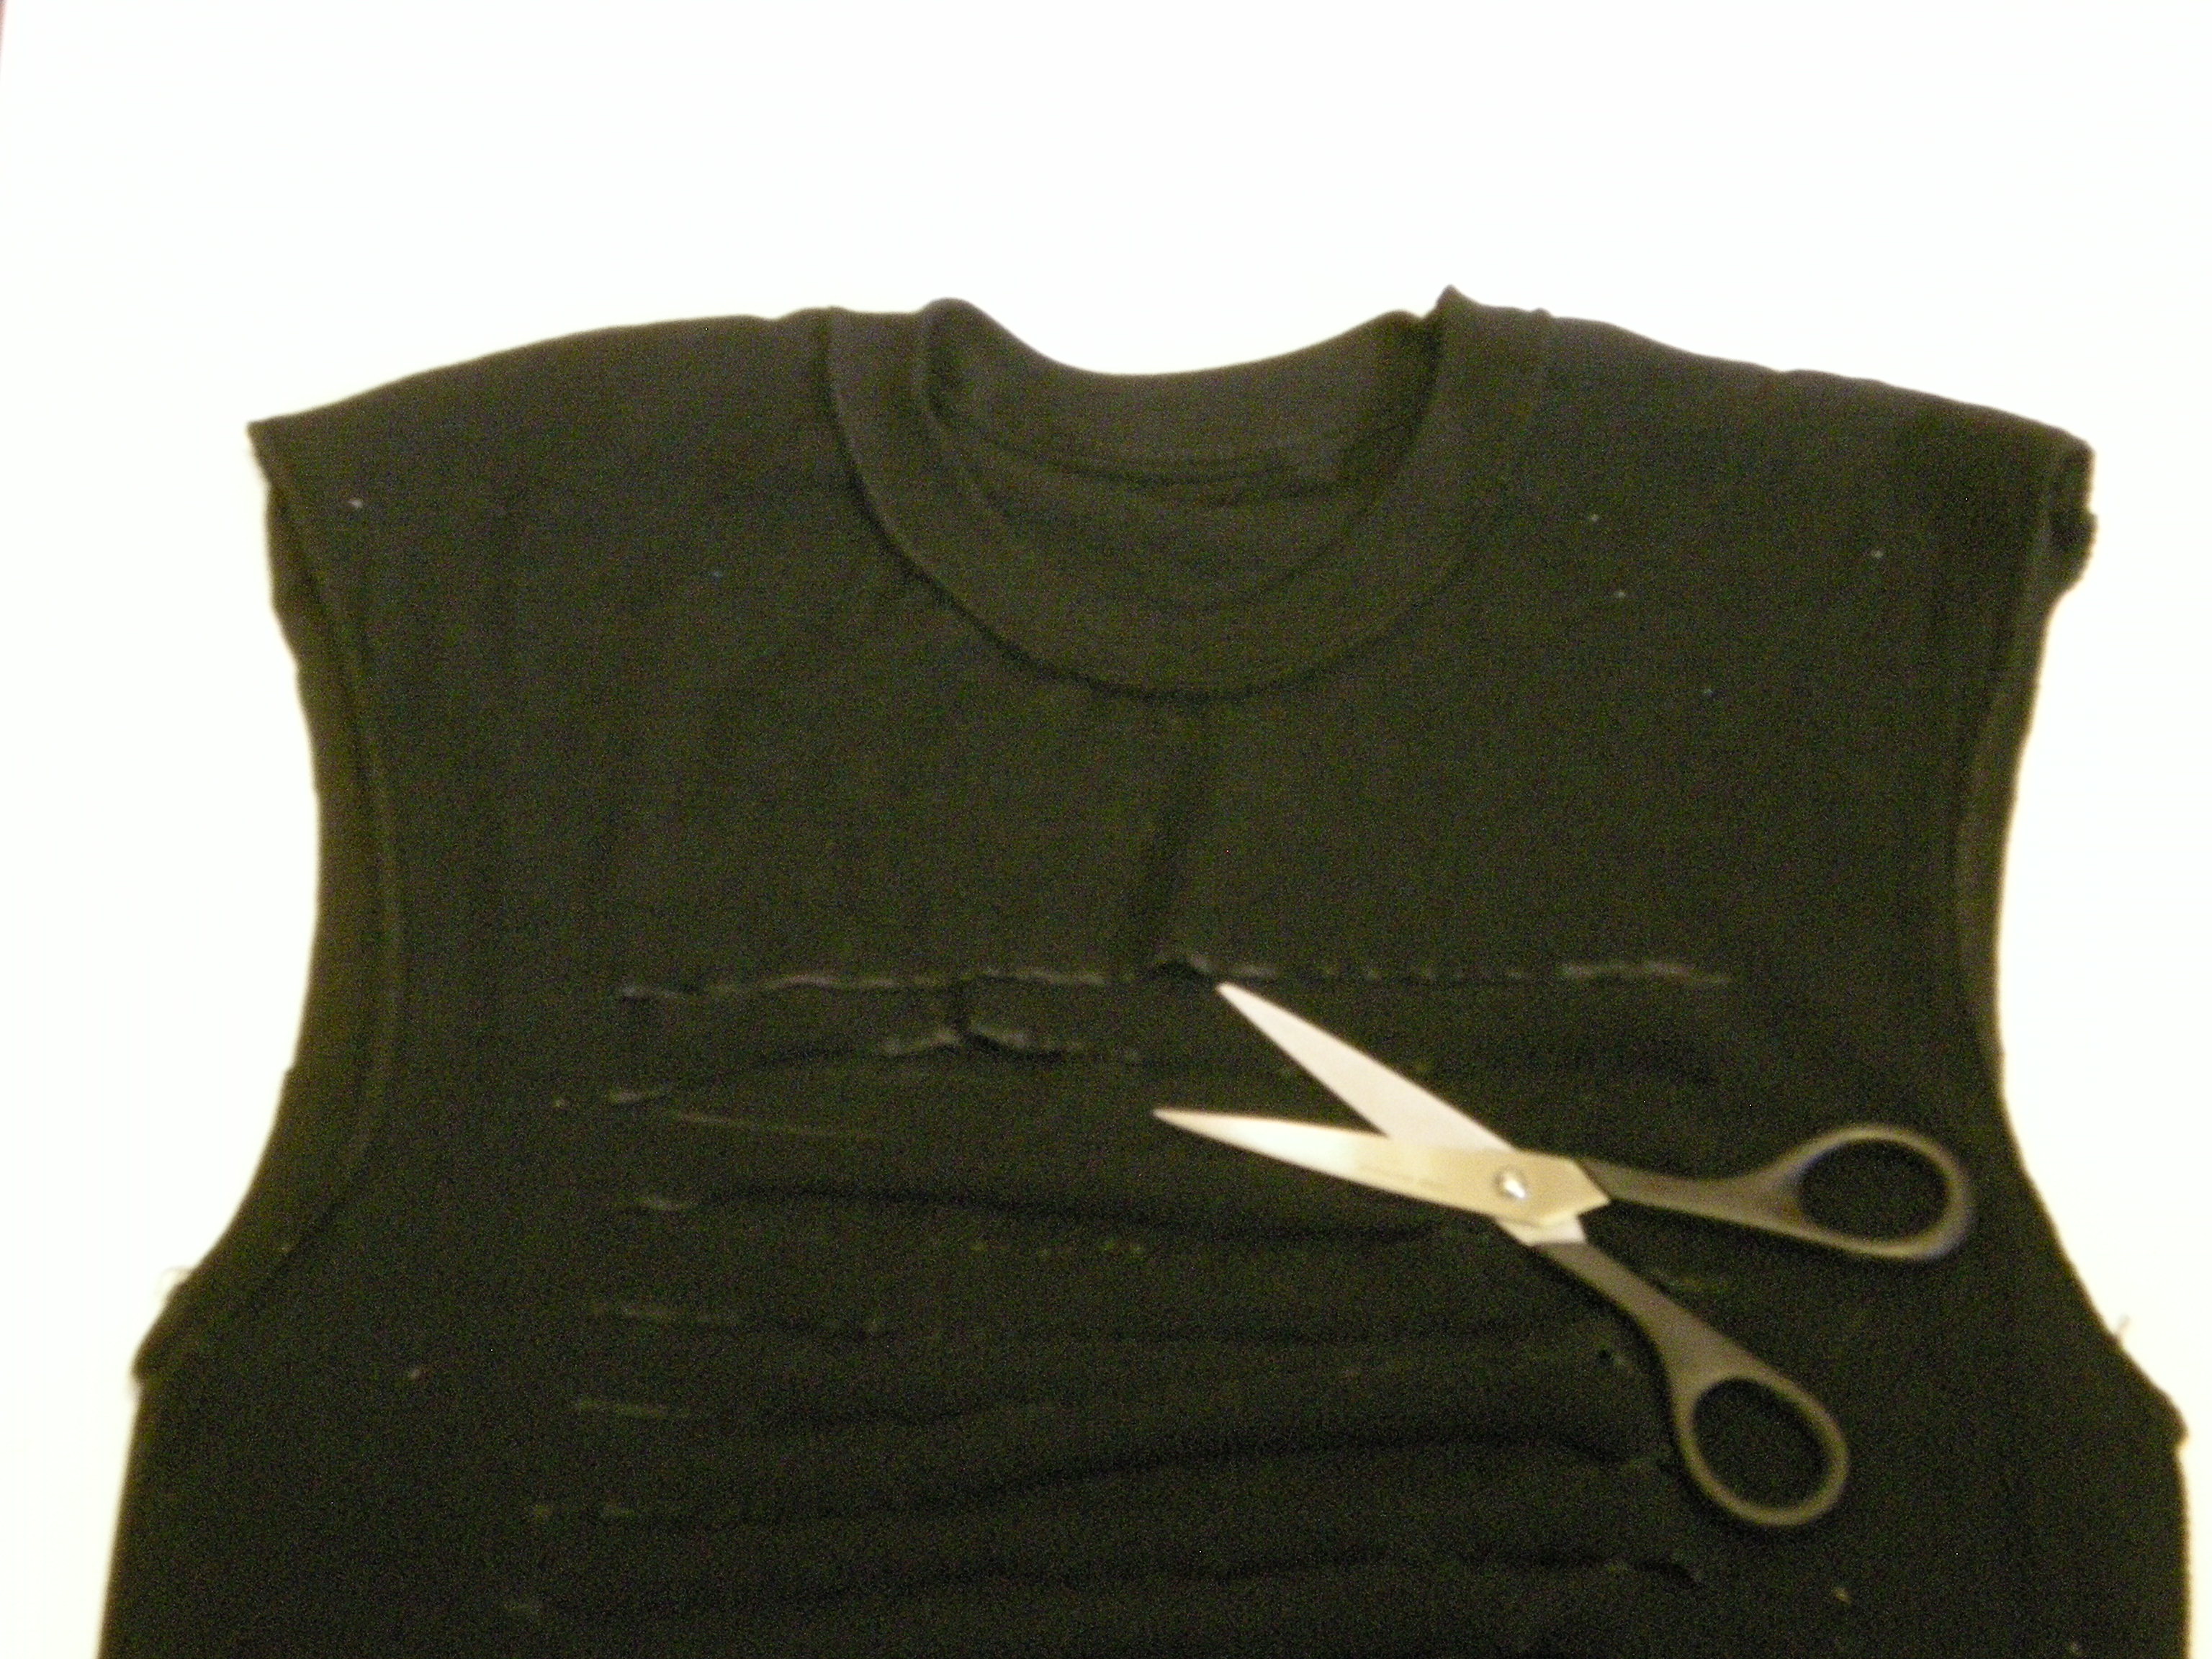
6. Cut along the chalk lines through just one layer of fabric.


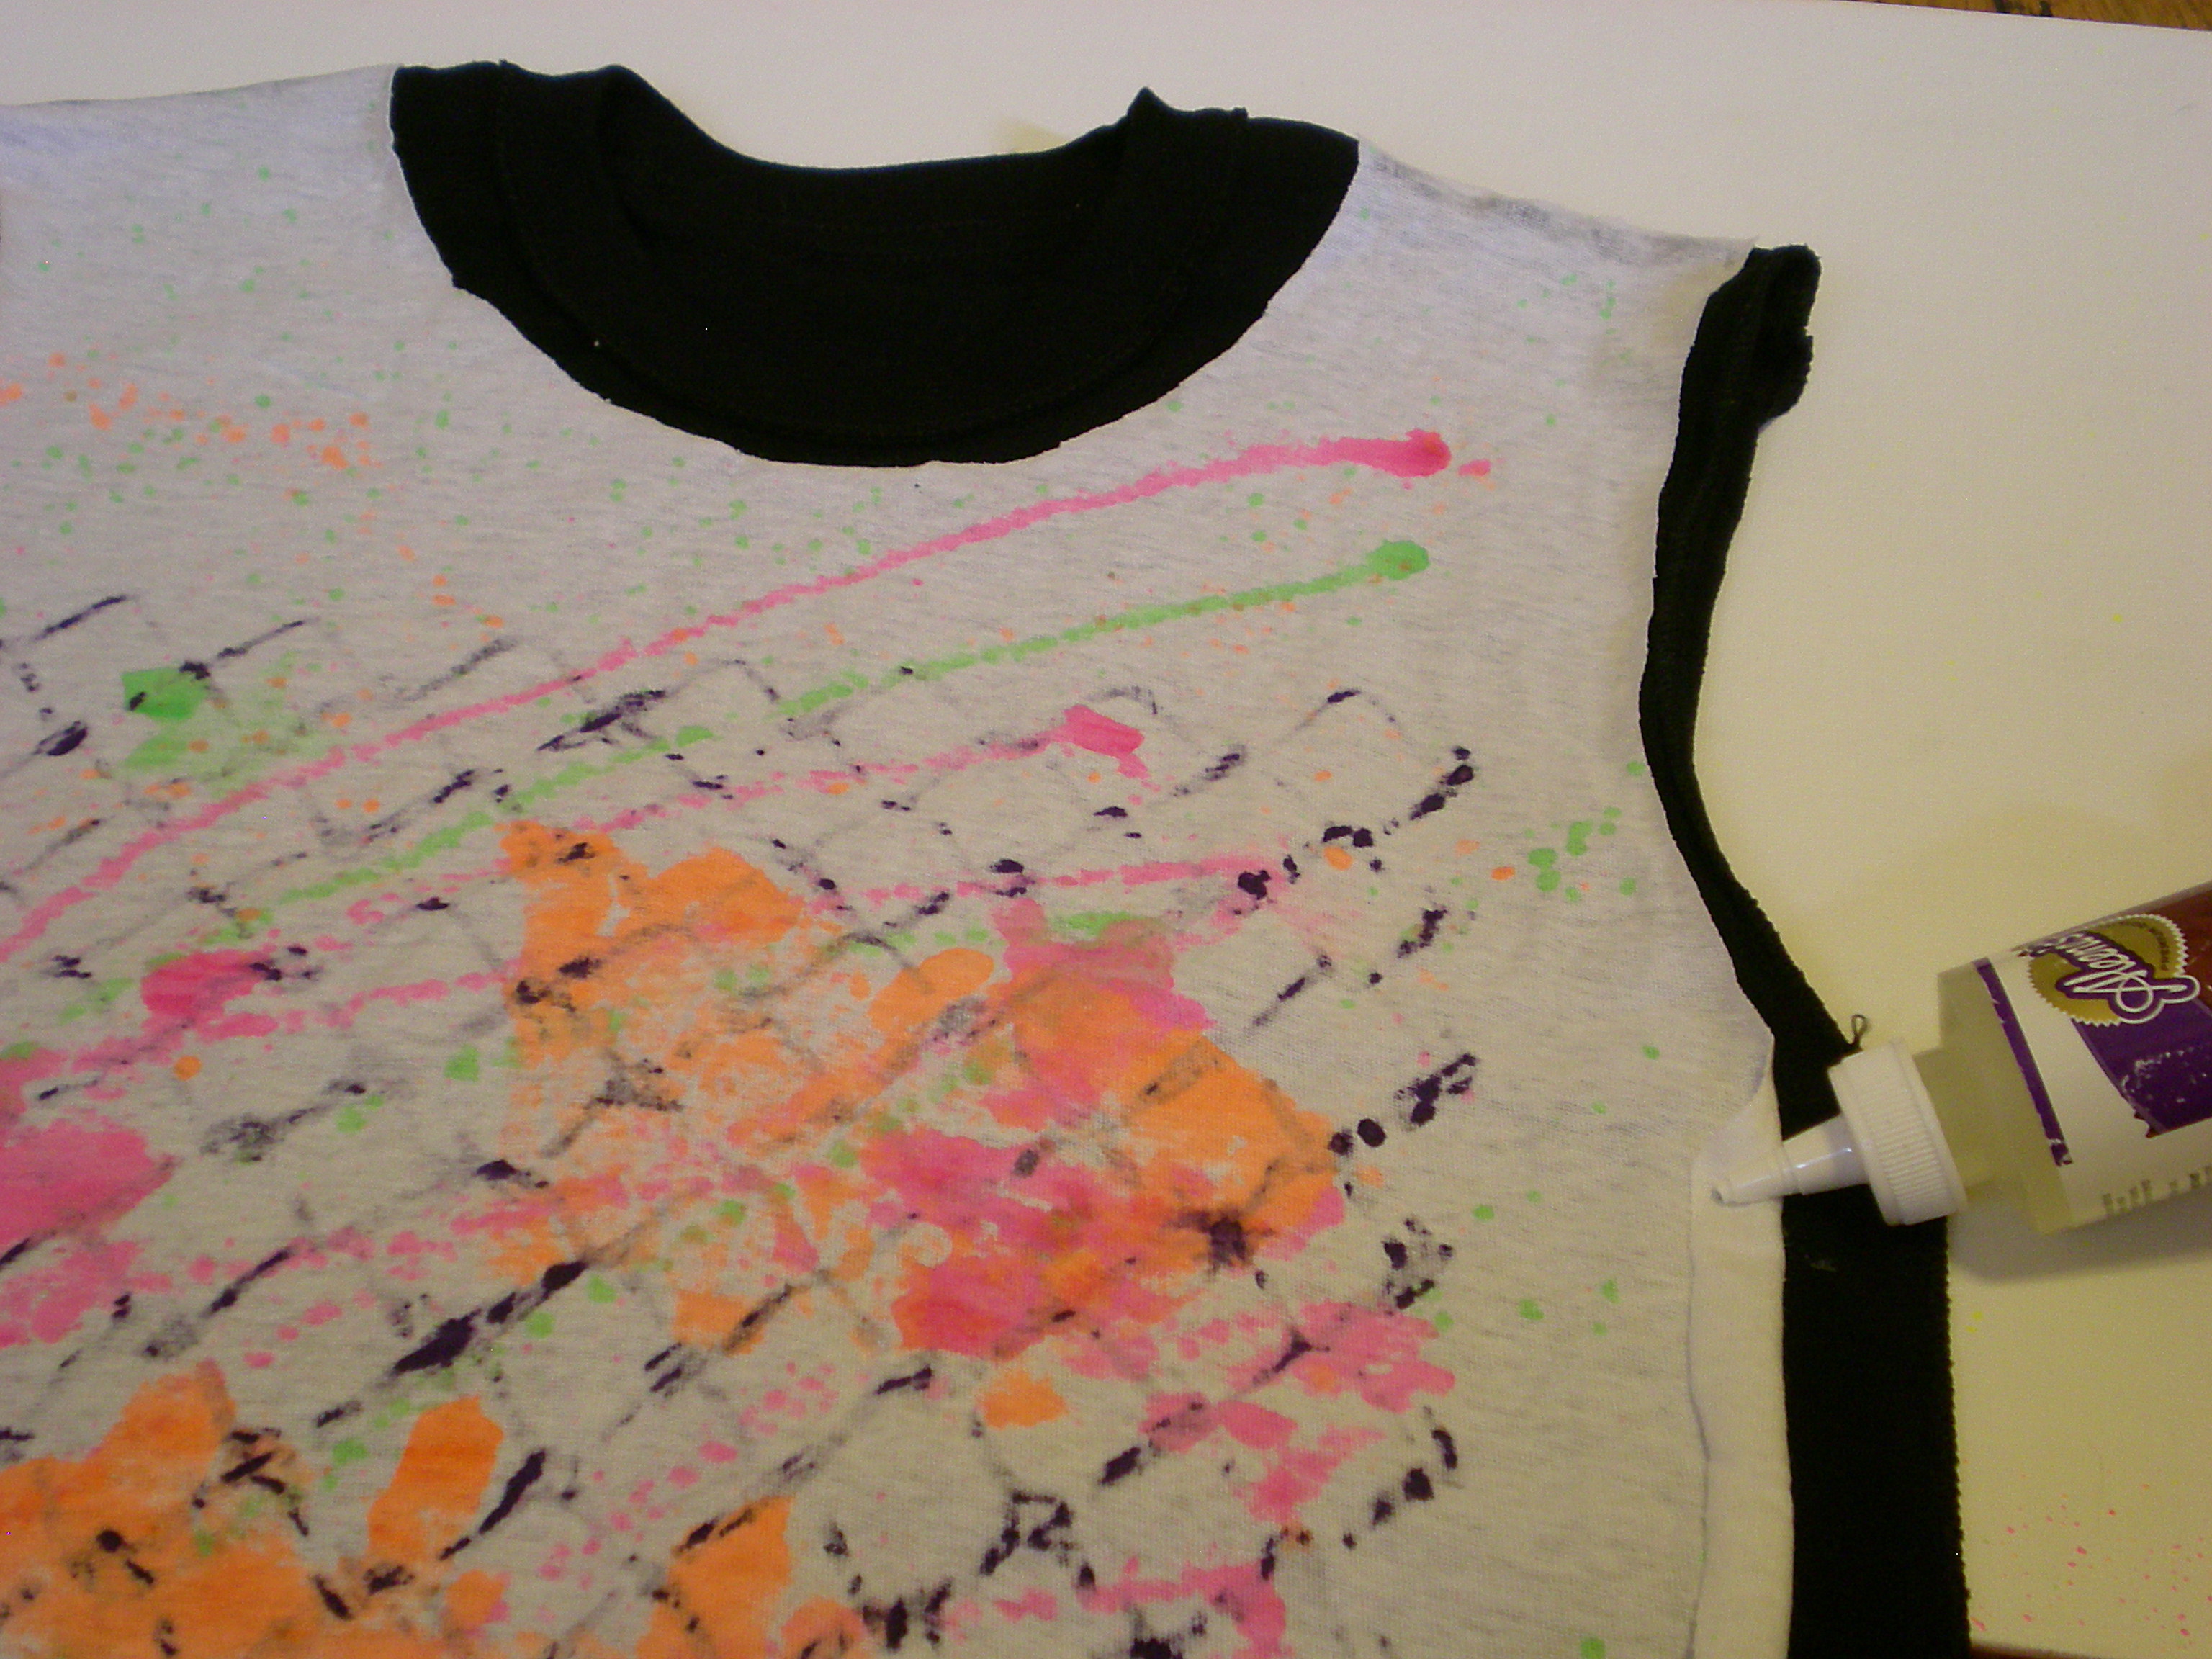
7. Gently place the (now dry) panel right side down against the front of the (still inside out) tank top, lining them up again at the neckline. Peel back one side of the panel and squeeze an even amount of fabric glue along the edge. Then gently press the edge against the tank top. Continue gluing around the straight edges only (minus the bottom hem) to attach the panel to the slashed surface of the tank top. Let it dry!


8. Carefully turn the tank top right side out and try it on! The bright graffiti panel will peek through the slashes you made in the front of the darker layer.


Variations:

-If you want to keep the sleeves attached and your shoulders covered, do it! Simply tuck the sleeves inside the shirt while you're tracing it in step 2.

-If you want to be able to change things up at on a moment's notice, just spray an entire tank top (rather than a panel) in steps 3 and 4 and wear it layered underneath the slashed tee. Then you have the option of having the graffiti tank peeking between the slashes or any other tank top you have in your wardrobe!

-Try slashing different shapes! Familiarize yourself with the Brokenhearted tee (project #3 in Generation T: 108 Ways to Transform a T-shirt) for a sweet spin on this project.

Now go off and fight. For your right. To par-tee!

Sunday, August 22

BACK TO SCHOOL: School Days Graffiti Backpack


School Days Graffiti Backpack!

Designed by Allee Marderosian

Head back to school in super hip style! Turn your backpack into your own personal work of art with Tulip® Fashion Graffiti™ products.

CLICK HERE FOR PRINTABLE DIRECTIONS

See even more back to school projects HERE!

Wednesday, July 28

While the Crew is at CHA, we'll have a BIG Giveaway!


We try our best to keep you up to date with what is going on at our end while at the CHA Summer Tradeshow, but we know it must be tough knowing you really wish you could be there!

So with this in mind, we thought we'd send a little love your way! We are giving away 5 Tulip® Fashion Graffiti™ Spray Paint Kits (a $15 value) in a random drawing to 5 lucky commenters below!

All you have to do is leave a comment below this post telling answering this question...

What do you love to create using iLoveToCreate™ products?

Contest Rules
– Leave us a comment below telling us what you love to create using iLoveToCreate™ products!
– Only one entry per person, we want to give everyone an equal shot at winning!
– Contest coincides with the end of the CHA Tradeshow and Supershow, so entries close midnite on Saturday night, July 31, 2010!
– Please leave us your e-mail in your comment so we can contact you if you are the lucky winner.

We're excited to hear about what you love to create! Have fun!

Friday, May 28

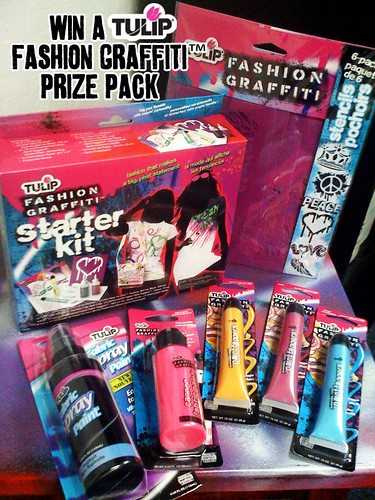
Win a Tulip® Fashion Graffiti™ Prize Pack!!!

Win a Tulip® Fashion Graffiti™ Prize Pack!

We are super excited to tell you about our new I Love Tulip® Fashion Art™ page on Facebook and wanted to celebrate by having a fun Fashion Graffiti™ contest!! Tulip® Fashion Graffiti lets you push the boundaries of creativity and trick out all your fabric surfaces in poppin' style!

Before we tell you about the contest, we want to tell you more about the I Love Tulip® Fashion Art™ page on Facebook. It's a great place to be inspired in all your Fashion Art endeavors. We will be featuring cool links, videos, techniques, projects, insight, behind the scenes features and so much more! Also participate in our discussions and upload your own fan photos of your projects created using Tulip® Fashion Art! We love to see what you create!!!

What you'll win (approximate retail value $40)

Tulip® Fashion Graffiti™ Starter Kit™
Tulip® Fashion Graffiti™ Cannon Fabric Paint™
Tulip® Fashion Graffiti™ Stencils (Peace/Love Set)
– 3 Tulip® Fashion Graffiti™ Dimensional Fabric Paint Taggers™
Black Tulip® Fabric Spray Paint™

In order to win, all you have to do is hop on over and fan/like the I Love Tulip® Fashion Art™ page on Facebook page! If you don't already have a Facebook page, you will need to sign up for an account. Contest begins at 12:01 a.m. PDT on May 28, 2010 and will end at 11:59 p.m. PDT on June 18, 2010 (the “Contest Period”). Following this date, one lucky winner will be chosen randomly from all the fans of the I Love Tulip® Fashion Art™ page on Facebook. The winner will be notified by the iLoveToCreate staff shortly following the contest.

Please scroll down to the contests section on our web site and read our privacy rules for entering this contest. Read about the contest rules here.

So hop on over and get inspired! We're so excited you get to share in the Tulip® Fashion Art fun!!!!

Thursday, May 6

Customized Ribbon Flower Jewelry


This past week I took a ribbon flower class taught by the amazingly rad Becky Joiner with mom as her mother's day present. Like every class at Stitch Lab it was oodles of fun and muy informative. My only complaint is that I am not a fan of the wired ribbon color options. As beautiful as it is, I'm just not a satin or velvet ribon kind of gal. I'm more of hot pink, lime green and zebra skin kind of girl. That being the case I had to take matters into my own hands and create my own color options of wired ribbon. Today for I Love to Create we are taking plain white wedding ribbon to an all new tack-a-liscious level.


SUPPLIES
Wired Ribbon
Needle and Thread
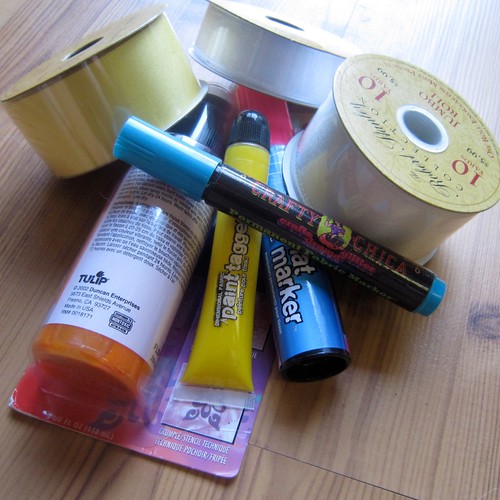
Various fabric paint and dyes such as Tulip Soft Fabric Paint, Crafty Chica Paint Markers, Fabric Spray Paint and Tulip Fashion Graffiti Big Phat Fabric Marker.
Jewelry Findings
Liquid Fusion Glue


COLOR YOUR RIBBON
In the floral department you can find spools of wired ribbon. However, as mentioned none of it really did much for me. I opted for white ribbon which I promptly took home and revamped. Using various paints and markers I polka dotted, splattered and smeared my ribbon. Let your ribbon dry completely.


RIBBON FLOWERS
Using the techniques I learned in class I whipped up a whole batch of ribbon flowers. You can tug on the wire and use a needle and thread to create your own flowers.


WEARABLE RIBBON FLOWERS
Using Liquid Fusion Glue I converted two of my ribbon flowers into wrist corsages. I wired the third to a hair comb.


If you are in Austin I highly recommend taking the ribbon flower class. I also recommend making your own custom ribbon. It was easy, fun and more importantly completely unique. Do you have any ribbon flower making adventures? I'd love to hear.

Thursday, March 18

El Tigre T-Shirt Applique


Two of my favorite things are tigers and hoodies, so today's I Love to Create project is about combining forces with the two of them. What was once an old T-shirt headed for Goodwill is now a fancy applique on my brand new hoodie.


SUPPLIES
T-shirt with a design
Hoodie
Tulip Fashion Graffiti Stencil
Tulip Soft Fabric Paint
Sponge Brush
Embroidery Supplies
Tulip Fashion Graffiti Dimensional Paint Taggers
Steam a Seam
Scissors
Iron
Tulip Fashion Graffiti Big Phat Markers


OLD T-SHIRTS ARE NEW AGAIN
I have so many T-shirts in my closet that either no longer fit me, have been stained or somehow managed to get holes in them. The graphics on these shirts are still as cute as when i bought them, they just need to be transfered onto something else. Like a hoodie for example, but there is nothing that says I could use these T-shirt appliques on another T-shirt, tote bag, you name it!
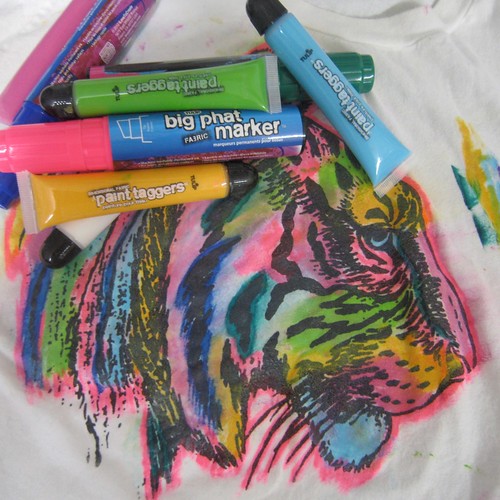

RAINBOW TIGER
I used a combination of Tulip Big Phat Markers and Tulip Paint Taggers to color my tiger. I was inspired by the screen printing of 1Aeon.
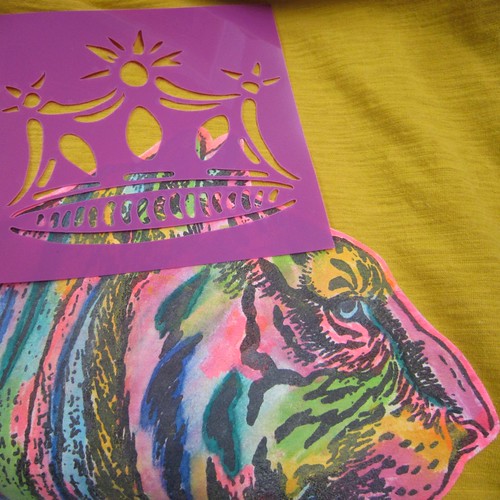

APPLIQUE
Once the tiger's paint had dried I cut him out using scissors. I used Steam a Seam and an iron to adhere him to the back of my hoodie. I decided the El Tigre needed a little something extra, like a crown.
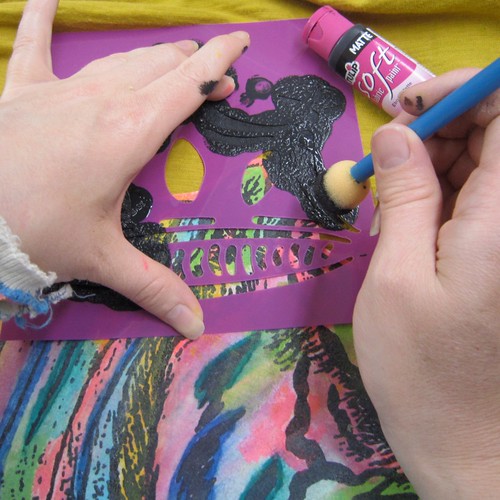

STENCIL
Using a Tulip Fashion Graffiti stencil I placed the crown on my tiger. I used a sponge brush and Tulip Soft Fabric paint in black to add the crown. I allowed the stencil to dry completely.
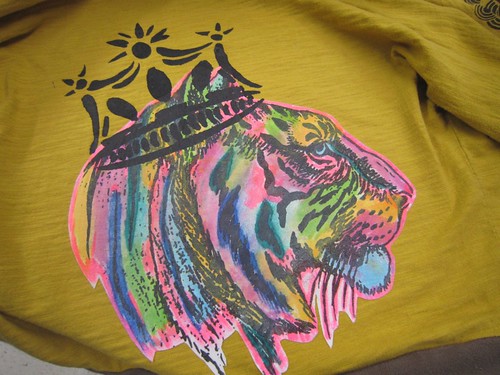

EL TIGRE IS CROWNED
My hoodie was looking better with every step. My old T-shirt has already gone on to a better place. I could have stopped here, but I thought it might be nice to augment my crown a bit.


EMBROIDERY TIME
To give my hoodie a little something extra, not to mention hold my applique in place I decided to embroider the whole thing. I went around the edge of my tiger and accented the crown.


FROM T-SHIRT TO APPLIQUE
I heart my new hoodie and am so glad I did not have to part with my beloved Tiger T-shirt. I have several of Tallulah's onesies that she has either stained or outgrown that I plan on converting into appliques to adorn a whole new summer wardrobe with. You get way more bang for your clothes buying buck this way, not to mention it was pretty dang fun!
Clicky Web Analytics
Pin It button on image hover

Subscribe to our newsletter

* indicates required
I am interested in products and inspiration for...
Close