Showing posts with label Aleene's Glue Stick. Show all posts

Thursday, January 13

Crafty Can Corral

I have oodles of left over orange straws from my Halloween Party and Fall Themed Baby Shower.  Apparently straws are not the big hit that I thought they would be.  What is a girl to do with all these leftover straws?  Recycle them into a new more functional craft was my first thought.

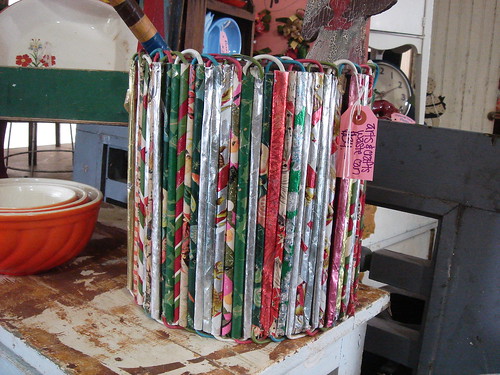
I was inspired by a trashcan I saw at Round Top once that was clearly made using straws or tubing and left over Christmas wrapping paper.  I recently saw the picture in my Flickr stream and thought of my stock pile of orange straws.  Today for I Love to Create just because no one wanted to drink from my straws does not mean they will not get used!

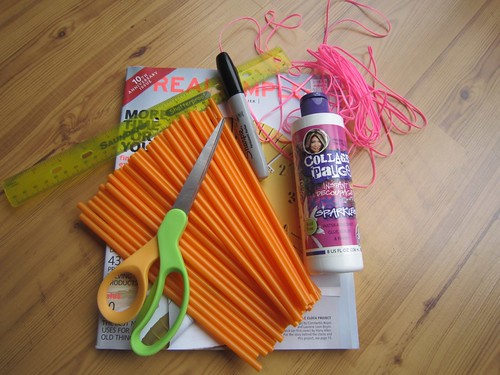
SUPPLIES
Pen
Empty Can
Straws
Plastic Lacing
Scissors
Ruler

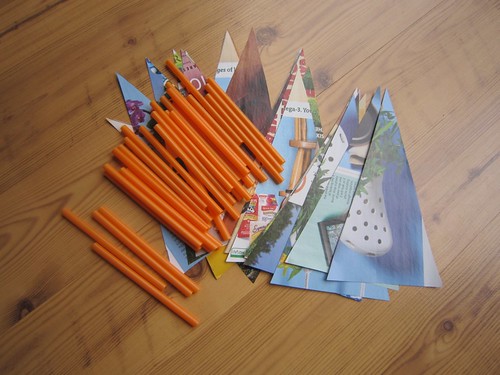
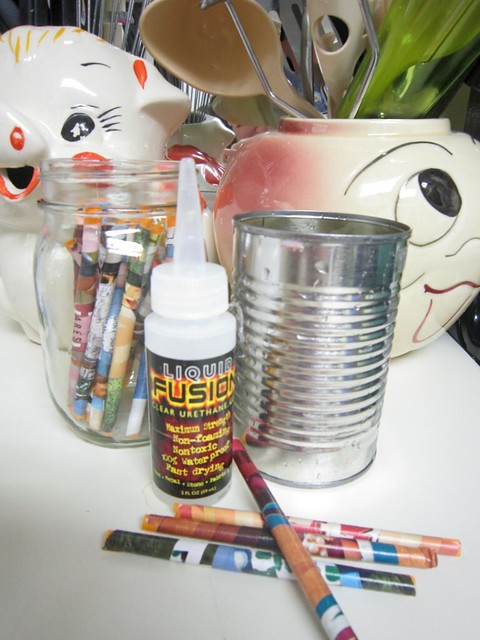
The first thing I did was cut all my straws in half.  Next I needed to adorn them.  If you have ever made paper beads, covering these straws is pretty much the same thing.  I made triangles with a 4" base on colorful magazine pages.  After cutting them out I wrapped them around my straws starting with the wide end.  I swiped the wide end with my Aleene's Glue Stick before adhering to the straw and did the same to the very tip of the triangle.

Once I had all my straws wrapped I coated them in Collage Pauge to protect them.  After the Collage Pauge dried I attached all my straws to an empty and clean tin can with Liquid Fusion Glue.

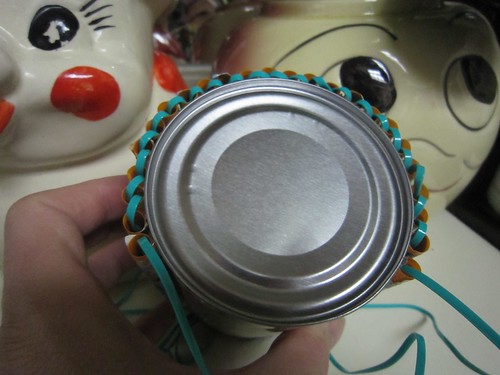
Just for decoration and to make my can more like the original inspiration I used plastic lacing (the kind you use in Vacation Bible School to make key chains) on my can.  You could skip this step, it is just for decorative purposes.

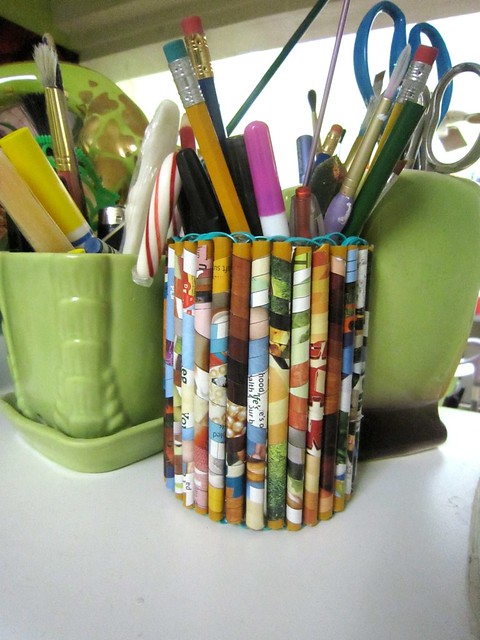
All that is left to do is fill your can with pens, scissors, knitting needles and whatever stray mess you have lying around that needs a crafty corral.  


Visit us on Facebook!
Craft on! Click here for today's daily giveaway!

Wednesday, December 22

ILoveToCreate Teen Crafts: Joyful Christmas Ornament


ILovetoCreate: Joyful Christmas Ornament

Avalon Potter
"Teen created, Mom approved."

I thought I would squeeze in one more holiday project because it is one of my favorite seasons. A few years ago my mom took a clear glass Christmas ornament and put crystals inside making a snow globe for your tree. It was one of my favorite projects she ever made, so I thought why not adapt her old project into something new! My project is a clear ornament that you spray wit Aleene's Tacky Spray Glue and coat the inside with Crafty Chica glitter! I enjoyed making these as gifts for my little cousins because it is fun, easy, and you can personalize each ball with different colors and tag to make it special for the person you give it to.

Materials
Clear ornament with opening top (preferably plastic in case of accident)
Aleene’s Fast Grab Tacky Spray
Tulip Fashion Glitter (green and red or colors of choice)
Colored paper to match glitter
White printer paper
Paper to make funnel
Aleene’s Original Tacky Glue Stick
Ribbon to match color of ball

Tools
Printer
Hole punch
Scissors

Instructions

1. Gather your materials.


2. Open up your ornament and lightly coat the inside with the Aleene’s Fast Grab Tacky Spray.

3. Make a funnel with a piece of paper and insert the bottom into the opening of the ball.

4. Pour a sufficient amount of the color(s) of glitter you choose into the ball. Feel free to mix colors or choose different colors then I used.


5. Close the ornaments top and shake until the ball is completely coated with sparkles. Shake the excess sparkles out of the ball.

6. Using a font you like print out in large letters the word or name you want as the tag. Use a similar color as the one you used in the ball. If you used two or more colors chose one for the font and another for the colored paper behind it.

7. Cut out the word and cut out your colored sheet of paper a slightly bigger into a rectangular card for the word to sit on.

8. Use your Aleene’s tacky glue stick to glue the word to the colored paper.

9. Punch a hole in the corner of the tag.

10. String some colored ribbon that matches the ball through the hole and tie a knot.

11. Tie onto the top of the ornament in a bow to complete the ornament.


Wednesday, December 8

ILovetoCreate Teen Crafts: Blue Christmas Card


ILovetoCreate Teen Crafts
Blue Christmas Card

Created by Avalon Potter
"Teen crafted, Mom approved."

This week I wanted to do something that is fun for the person to give and fun for a person to receive. So not only is it a gift for someone else, it's a little gift to you. I decided on a holiday greeting card. You can easily make many of them if you have a time crunch on gifts or you just want to make something simple but nice.

Materials
White Card Stock (or holiday colored)
Blue Card Stock
Tulip Dimensional Fabric Glitter in Crystal Icicle
Foam Dimensional Stickers
Tulip Fashion Graffiti Big Phat Black marker
Large Snowflake Stamp
Aleene's Acid Free Tacky Glue Stick

Tools
Scissors
Paper Cutter
Tulip Sponge Pouncer

1. Cut your white card stock into an 11.5"x5.75" rectangle.

2. Use your marker to color the entire stamp and press down firmly in the middle of the card stock.

3. Re-apply the marker to the stamp two more times and stamp half of the stamp on the card stock in the upper right hand corner and again in the lower left hand corner.

4. Repeat step two on your blue card stock making two snowflakes. Cut the snowflakes to fit in the two empty corners.

5. Put a few dimensional stickers on the bottom of the stamped blue snowflakes and attach them to the two empty corners.

6. Once the ink has dried, take the tulip silver sparkle paint and apply to the blue snowflakes and to the snowflakes on the white card stock.

7. Put a personal message inside of the card by printing it out on the computer, cutting it out to the size and shape you like, and applying to the card using Aleene's Tacky glue stick.


Thursday, October 14

Halloween Goody Bags with Crayon Cucpakes


Finding cute, not goofy, goody bags can really be the bane of a party throwing mother's existence. Trust me, I know from experience. As usual it was left to me to take crafty matters into my own hands.


SUPPLIES
Decorative Paper
Decorative Edge Scissors
Aleene's Acid Free Tacky Glue Stick
Goodie Bag Fillers - including Crafty Chica Skull Iron-On


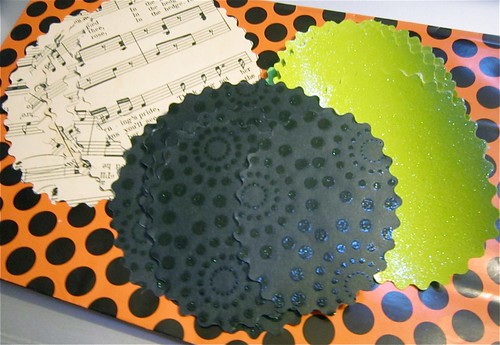
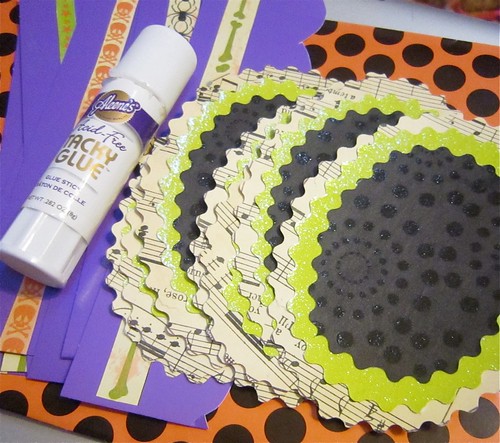
Luckily I found some cute polka dotted bags at Hobby Lobby to work with. From here I cut ovals out in 3 different sizes with scalloped edge scissors.


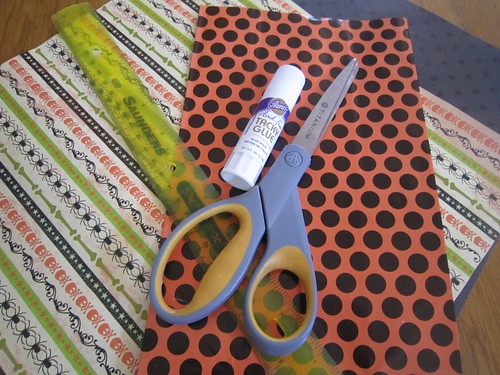
Using my Aleene's Acid Free Tacky Glue Stick I layered all my pieces together. I also made a purple border that I glued a strip of Halloween paper to.


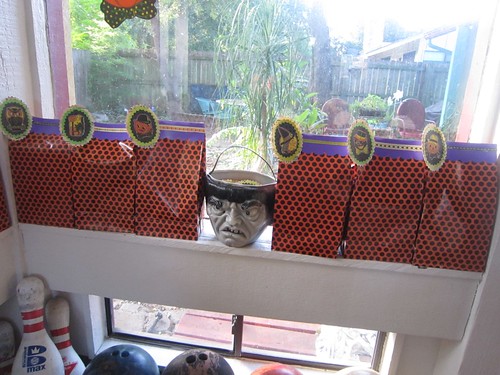
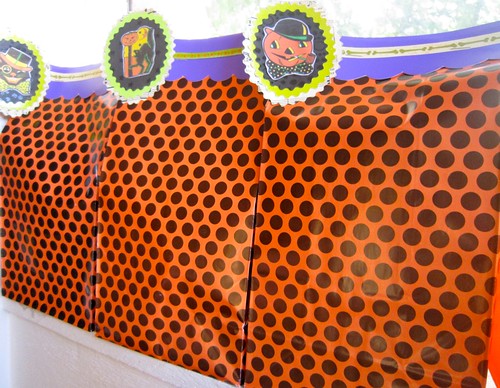
I attached my toppers to the bags using a stapler. Wanna see what's inside?


Here is all the loot for the wee little ghosts and goblins - bubbles, Crafty Chica Iron On's for their creative moms, books and crayon cupcakes. Don't know how to make crayon cupcakes? They are super easy let me show you how!


All you will need are crayons and a muffin tin. I used the same Halloween themed tin I used last year to make soap.


Peel the wrappers off of your crayons, break them into small pieces and fill your muffin tins.


I placed the tin in the oven at 250 and waited for the crayons to melt. All that was left to do was wait for them to harden and they slid right out of the tin. Much easier for toddlers to hold and color with than traditional crayons.


Now all the goody bags are waiting on my windowsills for this weekend's Pint Sized Halloween Party. I hope they are a big hit.


Craft on!Click here for today's daily giveaway!

Thursday, April 8

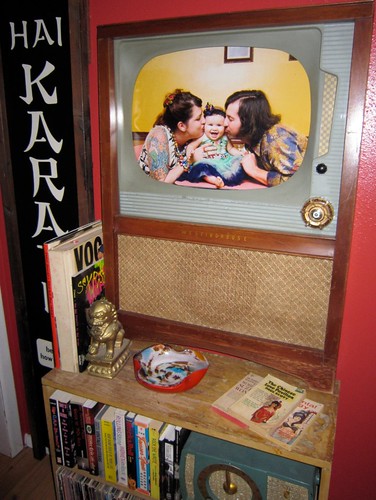
A Face for Television Picture Frame


Remember the I Love to Create post from a few months back called "5 Kitschy Up-cycled Picture Frames"? Well if you thought hand mirrors and an Etch-a-Sketch were kitschy as frames, what do you think about an old television?


SUPPLIES
Old Television
Foam Board
Liquid Fusion Glue
Large Photograph
Scissors
Circular Saw
Aleene's Tacky Glue Stick
Knobs (if needed)
Heavy Picture Hanging Kit
Ruler


TV TIME
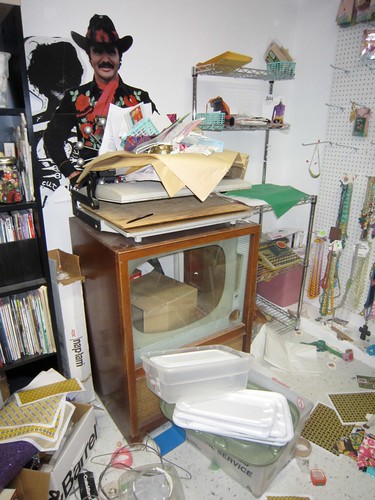
First you need an old TV. I realize this is easier said than done. I found mine at a flea market and purchased it intending to convert it into an aquarium. This week in my neighborhood is bulk trash pick up and I have seen plenty of options, albeit not as old as the TV I used, waiting to be saved and recycled into something awesome like a picture frame.


KILL YOUR TELEVISION
The insides of my TV was already gone so I didn't have to worry about that part. If yours are still there you want to discard the inner workings. Using a saw we cut off the front half of the television. Your photograph will go in the space where you once watched your fave TV shows.


JUMBO PICTURE
My friend Cory Ryan had done a photo shoot of my family for a local magazine called Tribeza this past fall. I took a disc of the image to Holland Photo and had the picture enlarged to fit the size of the glass in my television.


BACKING
The TV frame was already heavy enough so I wanted to make the backing was as light weight as possible. I bought a large sheet of foam board at Michaels. Using a ruler I measured the inside of the TV and cut my foam board to fit.


ATTACH PICTURE
Using an Aleene's Tacky Glue Stick I attached the picture to the foam board. After this had dried I used Liquid Fusion Glue to attach the piece of foam board to the back of my television/picture frame.


CHANGE THE CHANNEL
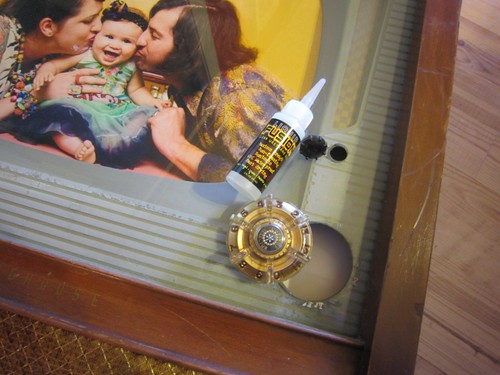
You might be lucky enough to score a TV with the knobs still intact, but alas I was not. I found fun vintage knobs on eBay that I attached using Liquid Fusion Glue.


FINISHING TOUCHES
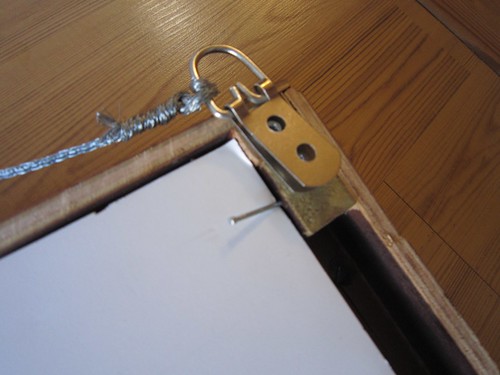
If you TV is a little rough around the edges as mine was Old English Scratch Cover will be your best friend. Also use a heavy duty picture hanger kit on the back.


Now I am constantly keeping my eyes peeled for more vintage televisions to make more picture frames!

Sunday, March 21

Recycle, Reorganize, Recipes


Love to cook, love to organize, and love to decoupage....
so I love this decoupaged recipe tin I made to organize my fave recipes to keep right on the counter top in my kitchen.


I'm a big coffee and hot tea lover and I just can't bear to throw away some of the cool packaging and save them in an ephemera box I keep in my studio. The maple syrup and the chocolate label were tucked away there, too. The cute alphabet caps were in my scrapbooking stash.

I started out with a humdrum recycled tin from the thrift store. It would have been fine the way that it is, but who you have to agree, it's pretty darn boring.

Then I used Aleene's® Collage Pauge Instant Decoupage to glue the labels to the tin. I laid the labels face down on a paper towel, brushed glue on the back and then applied them to the tin, pushing out any air bubbles. When I was finished with that step, I put a coat of glue over the labels to keep my tin nice & clean from flying food.


Recipe cards were a snap to make with colored card stock, clippings from magazines and the web, and glued together with Aleene’s® Acid Free Tacky Glue™ Sticks.
The whole project didn't take very long, and more recipes can be added all the time.


This project, and dozens more were designed by me and written up by Barbara Winkler in "Cookbooking, the delicious new way to scrapbook" by Sterling Publishing. You can pick yours up at Barnes & Noble or online.

Oh, and here's my recipe from the pic. I like to make this for my gal pals on the weekend.

Grapefruit Pomegranate Sunrise:
4oz. Light Rum (optional)
16 oz. Pink Grapefruit Juice
2 oz. Pomegranate Juice
2 oz. Ginger Ale
4 Wedges Ruby Red Grapefruit

Pour ingredients into a tall glass pitcher. Pop a dozen ice cubes into the pitcher. Stir briskly. Serve in champagne flutes with crushed ice and a garnish of grapefruit wedges. Enjoy!

Happy Cooking and Crafting!
PattieWack

Thursday, February 25

How to Throw a Customized Birthday Part - Part 1


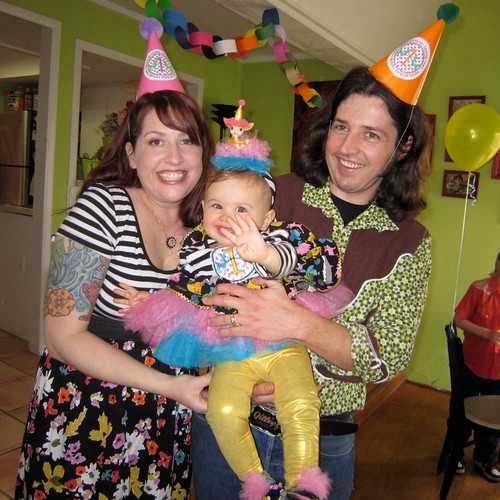
Sure it is a lot easier to hit the party store and buy a pre-prepared theme birthday party kit, but it is a lot more fun to make a party theme yourself. I admit I perused the internet looking for party hats and goodie bags that fit the bill for my daughter's 1st birthday, but nothing seemed quite right. Then I contacted a few Etsy vendors that specialized in custom party gear that didn't bother to write me back. Left with nowhere else to turn I decided to take matters into my own hands. Sure it was a whole lot of work, but the end result was exactly what I wanted. Today on I Love to Create we have part 1 of a 2 part series on how to create your own custom party decorations!


Every good party needs a theme and for this particular birthday I decided to work with Tallulah's middle name, Fawn. I started to go with cherries and powdered wigs since she shares a birthday with George Washington, but that seemed a bit obscure for a 1 year old. Fawns are perky and fun and more importantly between my mother and I we had a ton of them to decorate with. First things first I had a logo designed by Autumn Leah Designs. Doesn't everyone have birthday logos designed? From there all that was left to do was plaster the birthday logo on everything.


Is there anything cuter than kids in party hats I ask you? You might remember from my escapades making fabric covered crowns and pipe cleaner tiaras that I am a firm believer in the idea that a decorated head makes everything more festive. Making your own customized party hats is easy as pie with a little Collage Pauge, colorful pom poms, Tacky Glue, decorative trim and blank party hats available at the party store.
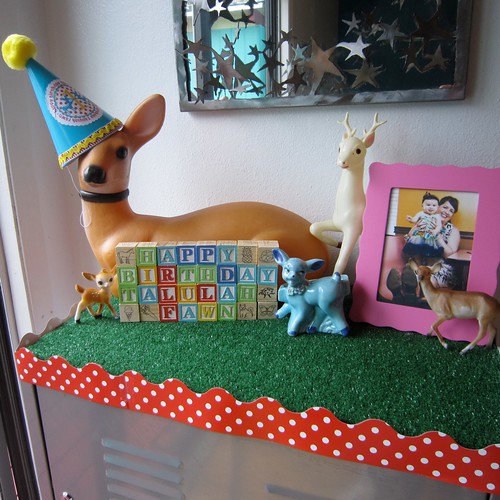


Those of you with an eye for detail might have noticed that I spelled Tallulah wrong with the blocks. I needed to steal an L what can I say. I also went to Home Depot and scored several feet of astroturf to cover all the tables with. I was going for a green grass feel with all my fawn and deer.
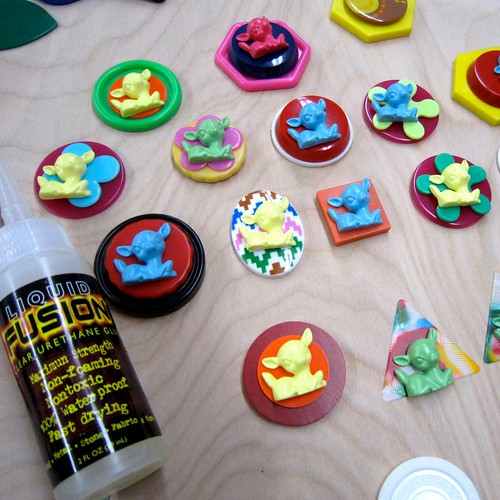


I ordered a whole slew of colorful resin fawns from Buzzard Brand. I made souvenir magnets for all the families that attended the party using various plastic cabochons, the fawns and Liquid Fusion Glue.


The little green baggies are filled with fawn shaped soap. Ordered the molds from Bake It Pretty and the soap supplies are Soapy Love.
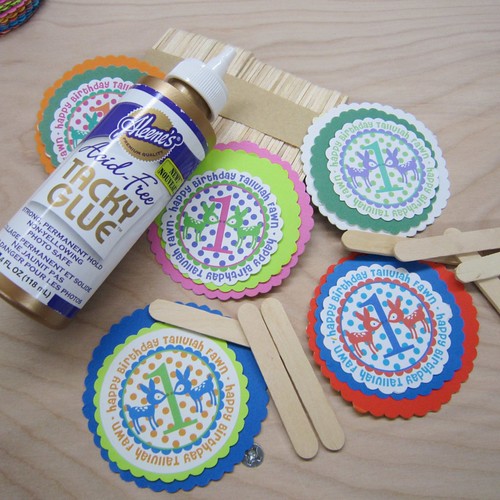


Cupcake toppers make the party, I'm a firm believer in that. You might recall the set I made for my baby shower. It seemed only fitting that a year later I would make them for Tallulah's 1st birthday party. Using small wooden sticks, card stock, scalloped edge scissors and Acid Free Aleene's Tacky Glue I had a batch of colorful toppers in no time. I tweaked my original logo in photoshop to get the different color combinations and printed them out onto card stock paper.
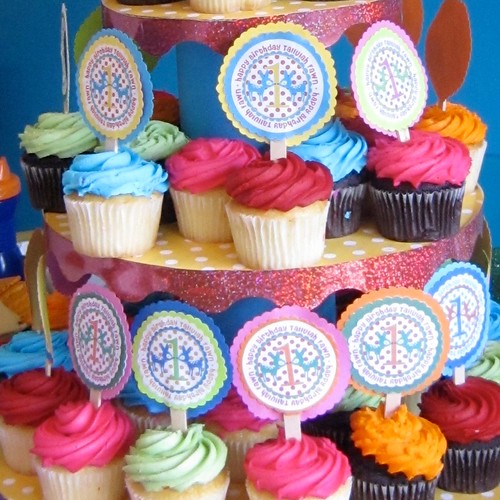


I'm a bit notorious for taking a theme and running with it. I might have gone a little fawn crazy, you be the judge.


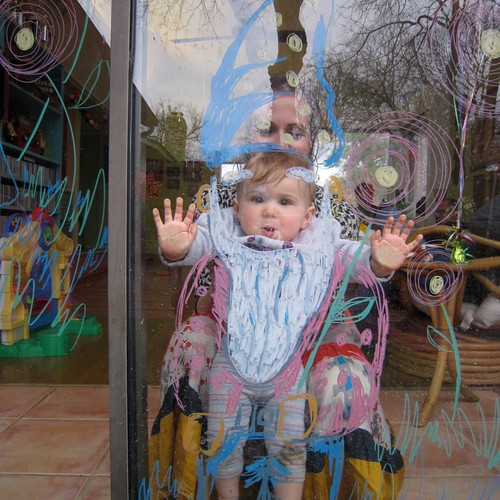

My amazingly talented sister Hope Perkins, who has a deer fetish of her own, did some creative window work for the party. The sliding glass door had a polka dotted fawn on one side and a gnome for the wee ones to pose in on the other.


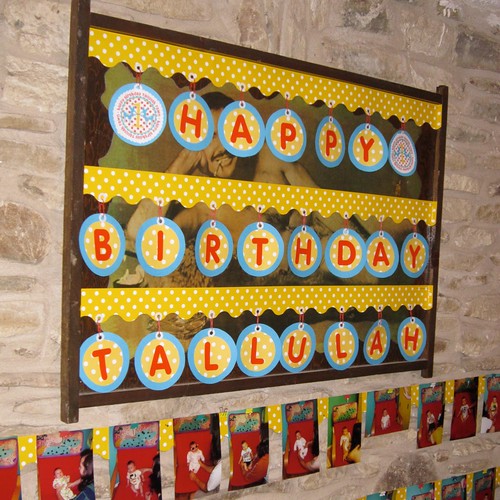
After making a black cat banner at Halloween I caught a bit of banner fever. Using sticker letters, scalloped trim, cardstock, paper clips, hole punch, Aleene's Tacky Glue Glue Stick and hole reinforcers I made a custom Happy Birthday Tallulah banner that censored the Burt Reynolds picture that lives in my living room.


Remember this is a two part series. Tune in next Thursday for more birthday fawn, I mean fun. So what do you think did I go overboard? What kind of custom party decorations have you whipped up? I need to start planning for next year.
Clicky Web Analytics
Pin It button on image hover

Subscribe to our newsletter

* indicates required
I am interested in products and inspiration for...
Close