Showing posts with label mixed media. Show all posts

Sunday, June 21

DIY Junk Drawer Collage


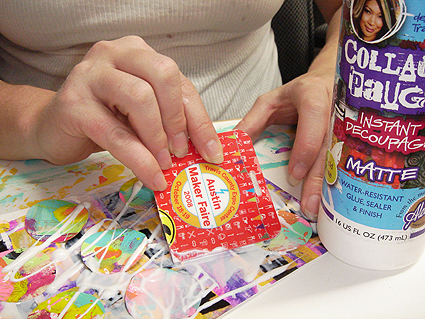
This DIY Junk Drawer Collage is super easy for you to do in an afternoon, and it's a great opportunity to go thru those drawers with the weird things you think you'll need 'someday'.  One of my most favorite things to do is mixed media and collage. And this new Aleene's Rapid Dry adhesive really got my attention because it's perfect for my favorite kind of project.  It dries fast, it's a gel consistency, and it holds like a super strong magnet.  
Wanna see how I did it?  

Saturday, December 29

Decoupage Clipboard Art Frame and more! Cool2Craft TV


Cool2Craft TV December 31, 2012 - the Cool2Craft girls are sharing some super cool mixed media projects! Tiffany is crafting a Decoupage Clipboard Art Frame with Aleene's Matte Decoupage and Aleene's Tacky Glue and Heidi is creating a Mixed Media Pop Open Journal.
 
Learn new techniques, chat with us while watching the show and ask questions about all your favorite Aleene's products! Drop by our chat room during Monday's show and mention that you saw this post on the iLovetoCreate blog for your chance to win Aleene's Tacky Glue!

Airing Monday December 31, 2012 9am Pacific/10 am Mountain/11 am Central/Noon Eastern. Go to Cool2Craft.com and you'll see the link to the Livestream player and chat box where you can join right in. See you Monday!

Visit us on Facebook! Watch our video tutorial archives on YouTube! Get creative! Get inspired! Be cool!

Thursday, March 1

Traci Bautista's Doodles Unleashed Blog Tour


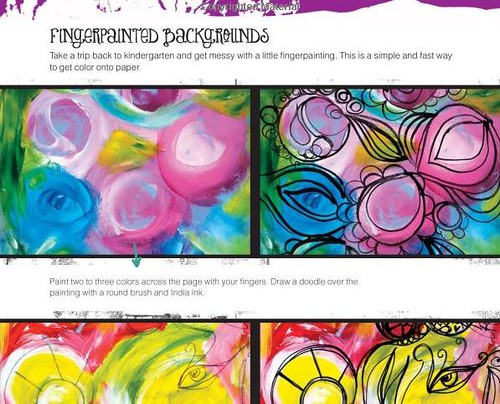
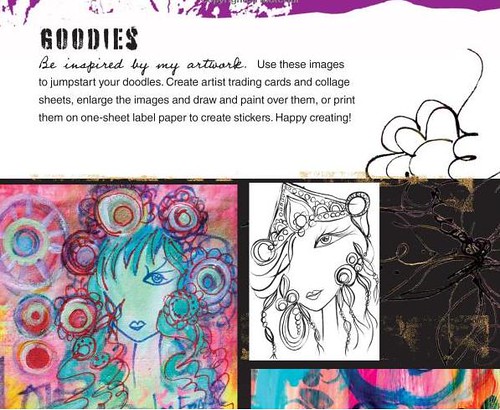
Attention all mixed media artists - brace yourself - Traci Bautista's new book Doodles Unleashed is here. The anxiously anticipated follow up to Collage Unleashed was worth the wait! As someone who has crafted alongside Traci in person many of times this book is the next best thing. The colorful pages pop with inspiration and really get your creative wheels turning. I am thrilled to be today's stop on the Doodles Unleashed blog tour!


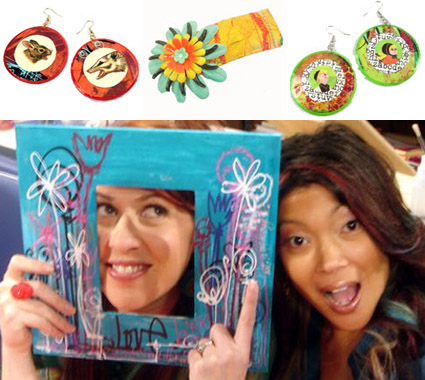
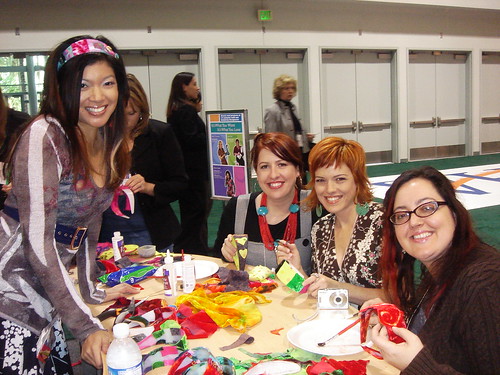
From the first time I met Traci it was true crafty love. Traci was a guest on a show I was hosting for the DIY Network called Craft Lab when we first met. She was one of those guests that I loved the project, loved her style and after filming 120 episodes I walked away wanting to explore her version of collage, doodling and mixed media even more. I have used her papers along with her line of decoupage medium called Collage Pauge many of times to create jewelry, art, customized cupcake coozies and various other paper products. Opening up Doodles Unleashed was like being on set with Traci all over again. I had almost forgotten how much her designs and use of color get my creative juices flowing.


For those of you following along on the blog you know that one of my latest crafty endeavors is digital scrapbooking. Doodles Unleashed has a whole section on the topic and made me think of different digital options I had never considered. Traci suggests to-go doodling by using your iPhone and taking advantage of all the various applications. Talk about making your art portable. You get a great collaged look without the paint under your fingernails. Traci has a whole line of digital scrapbooking elements to download that I combined here with some of my other favorite designers like Kitschy Digitals, Minitoko, Maybe Me J and Pugly Pixel.


Traci is known for her artsy girlie meets urban style graffiti doodles. I have long been a fan of her free hand fonts. Traci walks you through typeography in Doodles Unleashed. She has prompts in the book for continuous writing, layering letters, digital lettering, using bold typeface and more. There is also a gallery of hand drawn letters in the back of the book you can use as a jumpstart to hone your own signature style.


Since having kids finding the time to do much mixed media art has been difficult. To create a beautiful piece you need layers and time to create those layers. Doodles Unleashed makes me want to try harder to find that time. Until I find the time I fully intend to download every iPhone app Traci suggests in her book and get busy doing some mobile doodling.

P.S. Thank you Traci for the shout out to my blog in the back and picture of my Crafty Curious in the Found Materials section. Whoo-hoo!

Visit us on Facebook!
Craft on!

Friday, January 20

Learn new crafting techniques! Cool2Craft TV Monday January 23, 2012: Mixed Media

Cool2Craft TV for January 23, 2012: Mixed Media - Join host Linda Peterson for a new episode of Creative Life TV on the Cool2Craft TV network. This week's show theme is Mixed Media. Linda is creating a No-Sew Cellphone Pouch featuring Aleene's OK to Wash-It Glue. Next up, it's a Mixed Media Embossed Frame finished with Aleene's Collage Pauge and she will craft a vintage inspired Baby Wipes Flower Tag. It's a terrifically tacky and creatively cool show!

It’s easy to watch the Cool2Craft TV Channel right from your computer. Airing Monday January 23, 2012 9am Pacific/10am Mountain/ 11 am Central/ Noon Eastern. Go to http://cool2craft.com and find the Livestream player and chat box. See you Monday!

Visit us on Facebook!
Craft on!

Friday, June 10

Pattiewack's Mixed Media Jewelry Stand

Pattiewack's Mixed Media Jewelry Stand

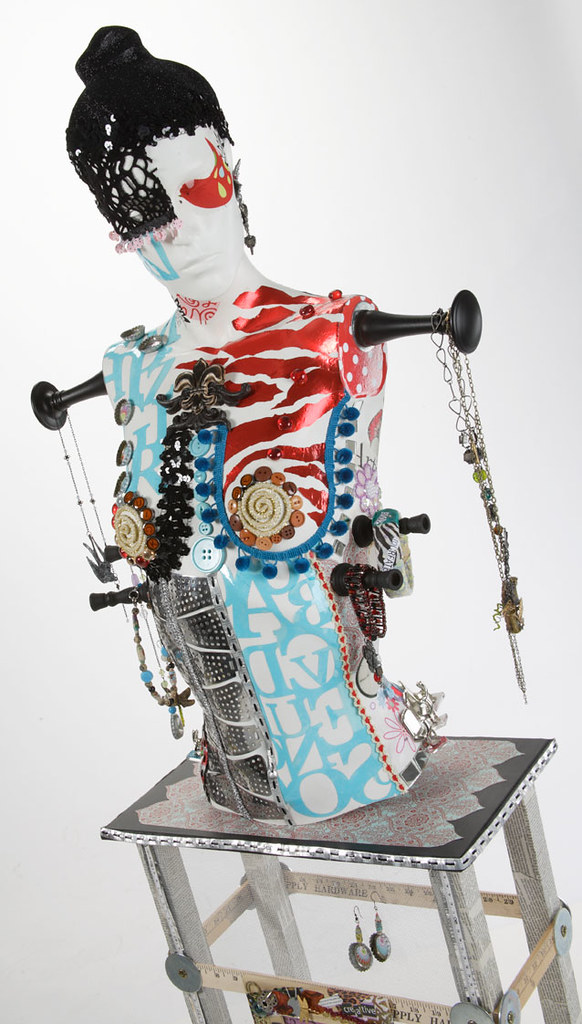
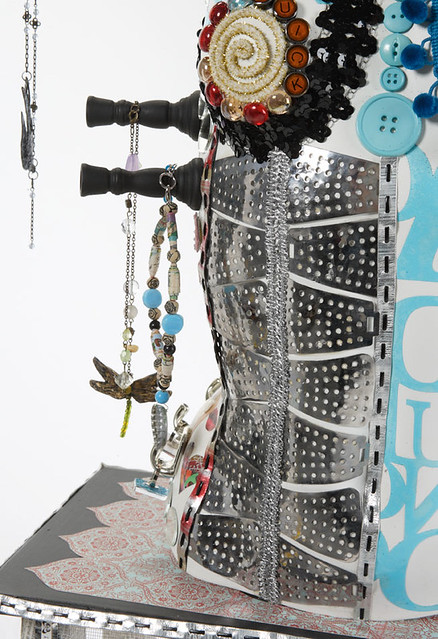
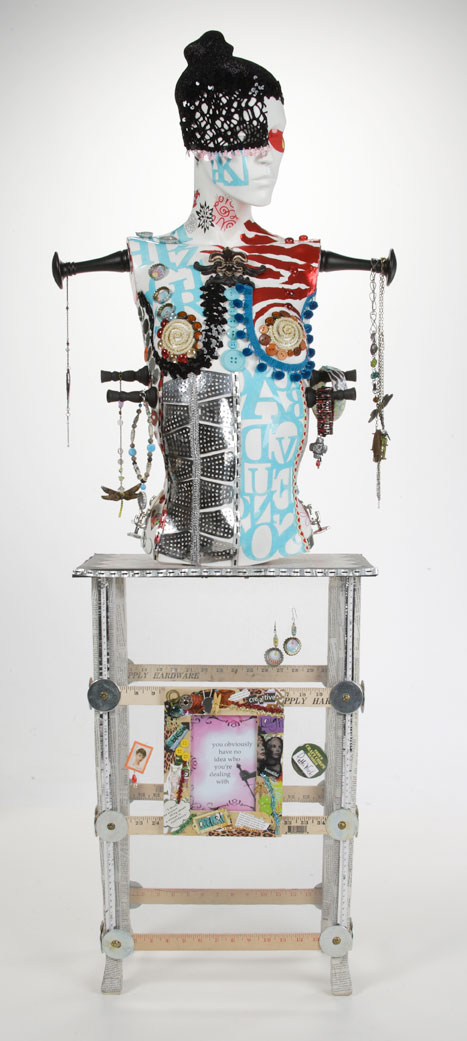
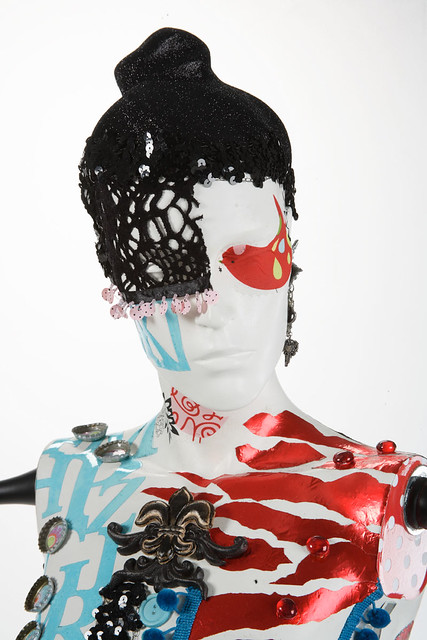
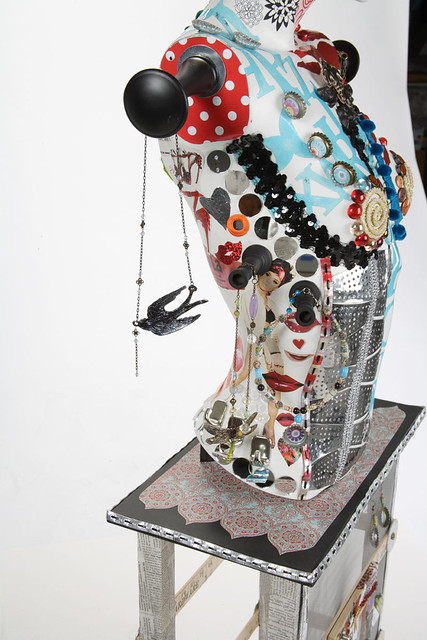
Looking today through our project image library, I came upon this amazing piece of art by Pattie Wilkinson! She created it last year for the 2010 Craft and Hobby Association Summer Tradeshow. We've posted a pic of it here or there, but none this good. It is too cool of a piece not to reshare! Isn't all the detail just amazing?? Awesome job Pattie! You really made that mannequin come to life!

This entire mannequin was put together using various Aleene's® Adhesives! Even the jewelry pieces were created using techniques using good ol' Aleene's® Original Tacky Glue®.

Pattiewack's Mixed Media Jewelry Stand

Pattiewack's Mixed Media Jewelry Stand

Pattiewack's Mixed Media Jewelry Stand

Pattiewack's Mixed Media Jewelry Stand

Pattiewack's Mixed Media Jewelry Stand

Visit us on Facebook!
Craft on!Click here for today's daily giveaway!

Tuesday, March 23

ILoveToCreate Teen Crafts: Trashionista Mixed Media Purse


ILoveToCreate Teen Crafts
Trashionista Mixed Media Purse
Margot Potter

"Mom crafted, kid approved."
Copyright Margot Potter All Rights Reserved

I have an ever bursting at the seams pile of fashion mags that sit by my bed and on the kitchen table. I peruse them at night before I go to sleep and while I’m noshing to trend spot. The problem is that they start to take over my house if I’m not careful! What I don’t recycle, I love to use to make accessories. The words and images on this purse are all made of recycled paper. This is all about layers of paper, inks and paints and every purse will turn out differently. I love that! 

Teaching our teens about the many ways they can recraft, reuse and repurpose is crucial. Plus this project will be a lot of fun for them to personalize. You can do this with old cigar boxes and get hardware and a handle to retrofit. Avalon loved this one and I’m hoping we can whip up some more soon together.


Materials

Wooden purse blank
Aleene’s Traci Bautista Collage Pauge Matte
Crafty Chica Little Chica Paints Red
Fashion Graffiti Paint Cannon Fabric Paint White
Fashion Graffiti Big Phat Fabric Marker Black
Fashion Magazines
Vintage book pages or newspaper
Inkadinkado Animal Print Clear Stamps
Fiskars Clear Stamp Block
Sizzix Big Shot Flower Die

Tools

Sizzix Big Shot
Mini-screwdriver
Paintbrush
Foam Brush
Old toothbrush
Scissors

1. Remove hardware from purse. Sand, clean and coat purse with a layer of racy red paint inside and out. Allow to dry.


2. Use Big Shot and die to cut three vintage book page or newspaper flowers.


3. Select words and images.  Decoupage flowers and cut and torn magazine words and images to the purse front using Collage Pauge matte and a foam brush. Allow to dry. If bubbles form under the images, wet your finger with water and work them out from center. Don’t fret about bubbles, they’ll go away once the medium is dry.  (I had to remove and replace a word at the top of this purse...which you can do while everything is still wet.) 

4. Use the Big Phat marker to put a layer of ink on your stamps and randomly stamp the leopard and tiger prints around edge of purse. Allow ink to dry.

5. Use marker to make angled stripes on thinner edge of purse. Allow ink to dry.


6. Dip an old toothbrush into the white paint and flick it across purse front. Repeat using red paint. Allow to dry.

7. Reassemble purse.

Friday, March 5

Graffiti Journal Pages using Tulip® Paint Cannons Part 1!


Our friend Pam Carriker has been making amazing journal pages using our new Tulip® Fashion Graffiti™ products!As Pam says, "If you have 20 minutes? Then you have enough time to create a journal page!" Thanks Pam for these wonderful tutorials!!

Tuesday, February 23

iLoveToCreate Teen Crafts: Creative Wings Journal


iLoveToCreate Teen Crafts
Creative Wings Journal Cover
Copyright Margot Potter
"Mom crafted, kid approved."

I spent the better part of yesterday adding layers to a canvas to make a journal cover.  Right as I was finishing the first draft I made an unfortunate executive decision, then tried to 'fix' it and had to scrap the whole enchilada.  Second round I took what I learned and applied it and I'm really digging the final result.  This is a dollar store journal that I've covered with Claudine Helmuth's Sticky Back Canvas which has been layered with a wide variety of Tulip Fashion Graffiti line and Tulip fabric spray products.  This is one of those projects you can easily adapt to your own personal taste.

Every teen needs a place to keep their private thoughts and it's a good thing to take a break from the computer sometimes and pick up a pen.  They can doodle, dream, draw and do what they please inside, the cover is all about inspiring them to spread their creative wings.  Quite frankly, I think young women these days need all of the positive creative inspiration they can get.

Even professionals have craftastrophes sometimes, the key is to turn those experiences into positives.  No matter how badly you mess something up, there is something of value there.  Some of my best ideas came from my worst 'mistakes' so don't be afraid to take creative risks.  I call that creative fertilizer for my crafty garden.  Oh and...sometimes it's good to know when to stop adding 'one more thing' to your designs!


Materials
Basic Cardboard Cover Bound Notebook
Claudine Helmuth's Sticky Back Canvas
Multi-color Textured Yarn (coordinating with paint colors)
Tulip Big Phat Marker Black
Tulip Fabric Cannon
Tulip Cannon Fabric Paint White and Black
Tulip Paint Taggers Silver and Black
Tulip Fabric Spray Neon Pink, Orange, Yellow
Tulip Matte Dimensional Fabric Paint Coral
Tulip Slick Dimensional Fabric Paint Dandelion Yellow and Poppin' Purple
Tulip Fashion Graffiti Stencil Wing (Peace Love Stencil Set)
Aleene's Liquid Fusion Glue

Tools
Sea Sponges
Fabric Scissors
Marking Pen

1.  Begin by adding silver and black paint taggers to your canvas.  Use more silver than black.  Spray some black paint with the fabric cannon.  Use a sea sponge to dab the colors on the canvas until the canvas is covered with a layer of paint.  Allow to dry.

2.  Spray the canvas with pink, orange and yellow fabric spray in layers.  Allow to dry.

3.  Use the cannon fabric paint in white on a sea sponge to dab the wing stencil along both sides of your canvas.  Allow to dry.  I used segments of the wing and cleaned the stencil in between each use, then I could flip it over when working on the opposite side.  This is intended to create a batik or resist style image, so it's not going to be a perfectly clean stencil.

4.  Add more layers of fabric spray as desired.  Allow to dry.

5.  Use the Big Phat marker to accentuate the outlines of your stenciled images.

6.  Use the dimensional fabric paints to add accents to the outlines you've accentuated with marker.  Allow to dry.


7.  Mark the canvas with a pen to fit cover of journal.  Cut the canvas.

8. Adhere sticky canvas to cover.

9.  Attach a segment of fuzzy yarn to the top and bottom of your journal cover using a thick bead of Liquid Fusion glue.  Trim ends with scissors.  Allow to dry.

Friday, February 5

One Man's Junk is Another Man's Robot


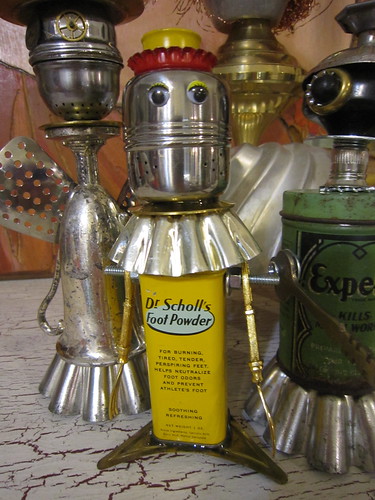
I am currently spending the week at my parent's house with Tallulah which means craft party in the USA. Last time I was here visiting my mother was on a shell mosaic bender, this time around it is all about the recycled robots. No piece of metal is safe around these parts. I witnessed her tear apart an innocent vegetable steamer for her art with the ferocity of a hungry jungle cat jumping on it's prey. Of course, I too caught junk-bot fever and had to join in the fun. One vintage can of Dr. Scholls foot powder later I too find myself looking at silverware and tea balls in a whole new light.


SUPPLIES
Liquid Fusion Glue
Dremel Drill
Metal Bit
Scrap Metal
Vintage Tin
Googly Eyes
Nuts, Washers and Bolts


DIVE INTO YOUR JUNK DRAWER
You might be surprised by what you have lying around your own house to use on your robot. If you are low on supplies it's nothing a quick trip to the thrift store can't fix. Look for old tins, metal measuring cups and spoons, defunct cameras - what you use on your robot is completely up to you.


COLD CONNECTIONS
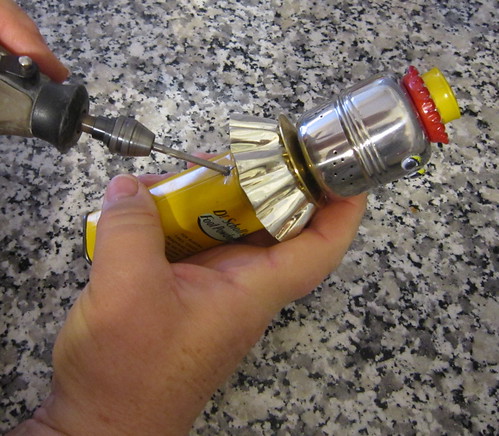
The fun part is deciding how you are going to put together your recycled rubbish robot. Some parts were glued in place using Liquid Fusion Glue like his little red bottle cap hat and google eyes. Other parts like the arms made from olive picks were attached by drilling through the tin then attaching with nuts and bolts.


Just when I finally get my studio clean another hobby comes along. Of course it involves hoarding random junk, which I need like a hole in the head. Since when has that ever stopped me? I do after all have a few empty plastic bins left from all my organizing and cleaning begging to be filled up with metal junk for future robots.


I can only take credit for the Dr. Scholls Robot, the rest of the awesome creations belong to the amazingly talented Fredda Perkins, AKA my mom. However, I fully intend to raid my own junk drawers and make a few more the minute I get back to Austin.
Clicky Web Analytics
Pin It button on image hover

Subscribe to our newsletter

* indicates required
I am interested in products and inspiration for...
Close