Showing posts with label paint tagger. Show all posts

Wednesday, May 12

Virtual Exhibit: Craft Corps Art Piece Call for Submissions!

DSC00996

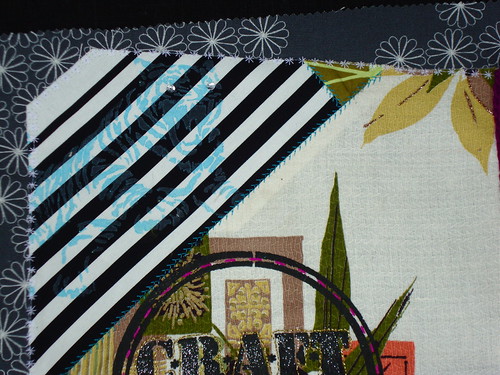
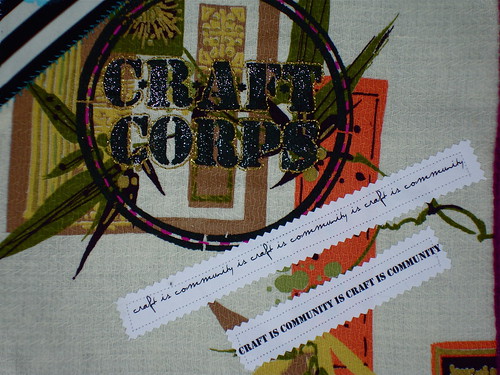
Over the past few days I worked on making a fabric collage in honor of Craft Corps and all of the amazing people I've gotten to chat with (for the book) or read about (on the website). I knew the focal point would be the call-to-action, stenciled logo to represent the project itself but I wanted to overall piece to reflect at least a little of my story in creating Craft Corps. Included in my collage are sewn, stenciled, embroidered, painted, printed, crocheted and pieced bits--all little nods to those who've shared a glimpse of themselves within the book's pages.
DSC01003

As I finished, I got to thinking. How would any of the 2200+ Facebook Fans, the 300 crafters on the website or the more than 90 creative beings featured in the book tell their own "Craft Corps Story" via the one thing that all bonds us together: craft. I decided that I'd really like to find out!

Make Your Own Art Piece!
So, my crafty compadres, I implore you to join me in participating in the Craft Corps Virtual Exhibit! Following the guidelines below and using I Love to Create's Craft Corps stencil kit and ANY other materials you choose to work with--wood, paper, fabric, yarn, beads, clay, whatever--make an art piece that reflects your creative passion. It doesn't have to be perfect; it just has to be you.
DSC00997

Details
  • Pieces can be made out of any medium that suits you as long as they fit within the guidlines outlined below.
  • E-mail a photo of your finished Craft Corps piece to contests@vickiehowell.com by August 1, 2010.
  • I'll create a Virtual Exhibit via photo gallery of everyone's submissions to share with the public, debuting later in August!
  • The public will be invited to vote on the pieces, via web poll.
  • The winners will recieve one of the prizes below.

Craft Corps Stencil Kits--Available for $5 in 6, color combinations!
  • Piece must not be larger than 24" high or wide.
  • Piece must be able to be hung on a wall.
Grand Prize:
$200 worth of craft supplies (courtesy of I Love to Create), craft books (courtesy of Lark Books) and yarn (courtesy of NaturallyCaron.com).

Runners Up Prize:
Two more people will win a signed copy of Craft Corps: Celebrating the Craft Community One Story at a Time along with their choice of one of the following:
OR
All entries will recieve a "Proud Craft Corps Member" button, be featured over the coming months on the Craft Corps website AND be elligiable to have their piece shown at a future, live exhibit (details TBA)!

Even if you don't consider yourself an artist, I hope you'll consider creating something for the exhibit. All you need is a little craftiness and the Craft Corps spirit, to be a part of a collective statement on creativity, community and general kick-arsness (the latter because I was getting too sentimental for my own comfort level ;-)).

So go on now; grab yourself a stencil and get to it! I look forward to seeing (and sharing) your submissions.

Good luck and have fun, you talented people, you!

Craft.Rock.Love,

P.S. Looking for inspiration? Read the stories influential designers & everyday crafters in Craft Corps, the book!

Wednesday, April 14

Bow to Betty White Cards!

DSC00789

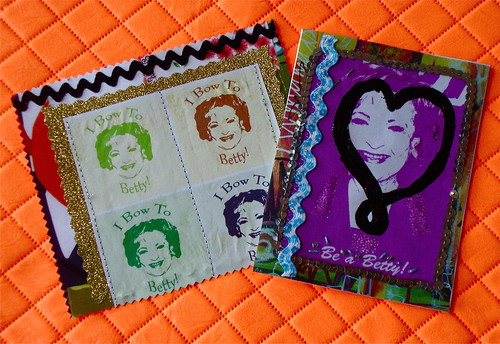
Last week I was dragging--just feeling tired. You know, kids, juggling several jobs, life obligations; the same things we all go through. Before I could start feeling sorry for myself though, I thought about Betty White. I know, random, but stick with me. Here this legendary woman is, 88 years old and with a career stronger than ever. She's working the talk show circuit (including playing beer pong on Late Night with Jimmy Fallon a few months back), she's a regular on Comedy Central "Roasts", she's in a football-themed Snickers commercial and, much to my utter delight, will be hosting Saturday Night Live (for the first time ever ) on May 8th. If anyone should need a nap, it's Betty!

There's something about Betty's continued relevance, cutting wit and awe-inspiring stamina that just makes me proud to be a woman. It's hard not to smile at age 36 knowing that if I follow her lead, I still have 50+ years to keep doing what I love!
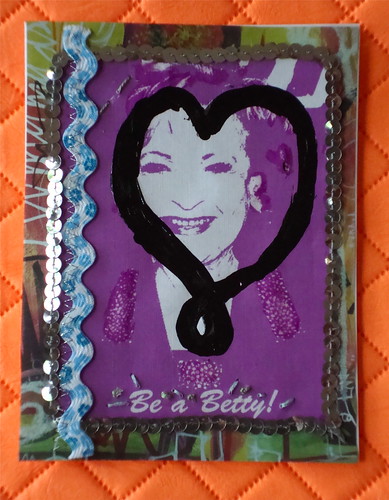
So, my crafty friends, these cards are my ode to this incredible lady. Make your own versions and give them to all of those women in your life who work hard and kick ass while doing it!

DSC00794

Materials
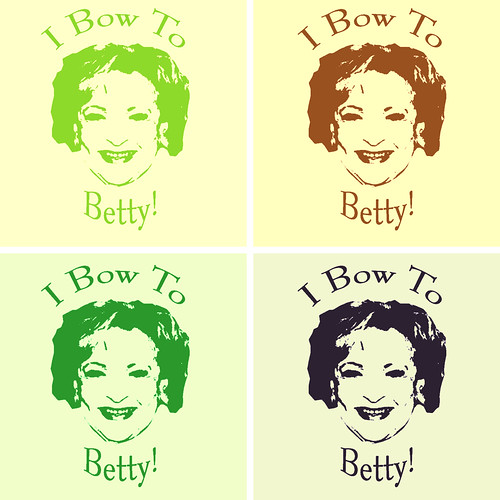
Betty White Pop Art Images (see below)
Scrapbooking Papers
Plain Card Stock
Decorative Scissors
Assorted Trims
Embroidery Needle & Floss
Sewing Machine & Thread (Optional)

How I Made These:

Download this image from Flickr.
Betty White Card Image #2

"Be a Betty!" Card
DSC00791
Download this image on Flickr.
Betty White Card Image #1
  • For this 2nd version, I began by laying out pieces of some of my favorite fabrics and color copying them to make my own, customized card stock. Using decorative scissors, I cut that card down as well as a piece of gold glitter paper (another nod to our Golden Girl) and layered them together. Next, I spread a layer of Acid Free Tacky Glue over the back of the "Bow to Betty" image and added it to the mix. Lastly, I glued on some trimming and added some machine-stitched lines.
"I Bow to Betty" Card
DSC00790

Craft.Rock.Love,
Vickie
Twitter: @vickiehowell

Wednesday, March 24

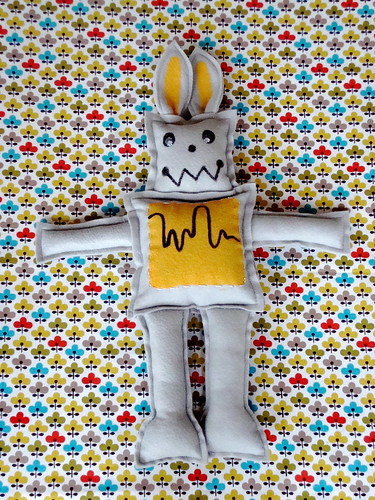
Robbit Plushies!

Robbit Plushies!

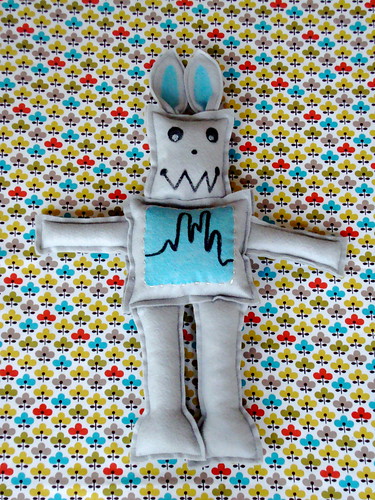
Rabbits are nice but robots are (dare I say) cooler--this year add a little techie love to a traditional bunny to make the kids a Robbit plushie for their Easter basket! Here's how.

Materials

Grey Felt
Poly or Bamboo Stuffing
Sewing Machine & Grey Thread
Fashion Graffiti Fabric Paint Tagger (in either color: Soho, Merge or Taxicab)
Fine Tip Paint Brush
Optional: Embroidery Needle & Floss (Silver & Light Blue)
Optional: Wooden Skewer

How-To
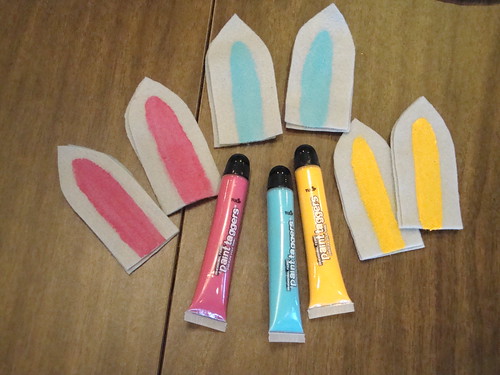
  • Cut front & back pieces for the head, body, legs, arms & ears (see photo below for examples.)
DSC00668
  • Use Fabric Paint Tagger to color in the center of the front ear pieces, and a square on the front body piece. Let dry.
DSC00669
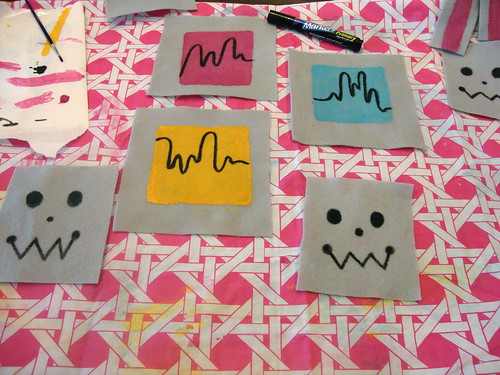
  • Use Fabric Marker to draw a robot-y face on front head piece and the frequency modulator line on the body front.
DSC00670
  • Using needle & floss, embroider detailing on the body & eyes (optional).
  • Sew Robbit together using a top stitch & 1/4" seam allowance; stuffing all pieces (except the ears) as you go along.
Note: If you don't want your Robbit to be all flopsy-mopsy, insert a wooden skewer through the stuffing in the body & head.

Blue Robbit
Blue Robbit

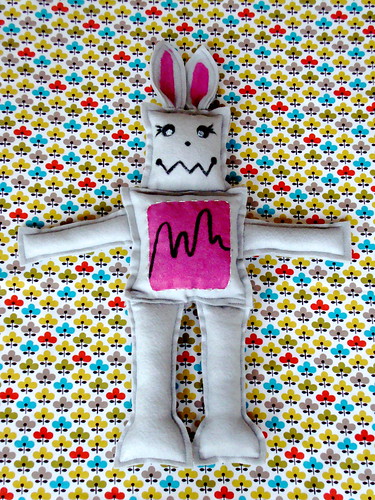
Pink Robbit
Pink Robbit

Yellow Robbit
Yellow Robbit

Beep-beep, hippoty-hop--Happy Easter!

Craft.Rock.Love,

Wednesday, February 3

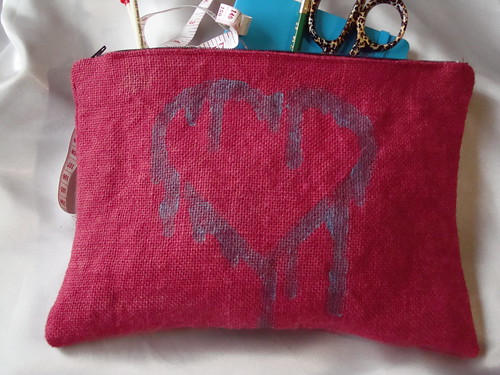
Project Runway Challenge-Inspired Zippy Bag

Hand-Dyed Burlap Bag 2

A couple of weeks ago I was watching the Potato Sack episode of Project Runway. What struck me about this particular challenge (other than the amazing dresses that a couple of the designers came up with), was how incredibly the burlap sacks took dye.

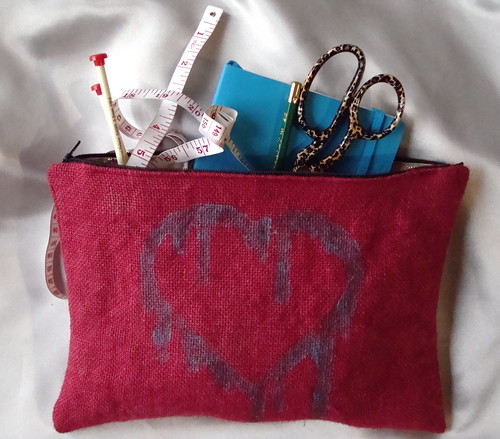
It got me thinking, "I've got burlap. I've got dye. How can I apply the Project Runway challenge to a project that anyone can make?" What I came up with is a simple, zippy bag dyed a brilliant red & stenciled with a melting heart. It's great for keeping supplies in, and would make a perfect V-day gift for anyone who, well, has something that needs holdin'. Here's how to make your own!

Materials
1, 12"x18" Piece of Plain Burlap
1, 12"x18" Lining Fabric
Zipper
Iron
Sewing Machine (optional)
Coordinating Thread
Sewing Pins
Scissors
Graffiti Fashion Stencil (from Peace & Love Pack)
Sponge Brush

How-To Dye Burlap
  • In a large pot or stainless steel sink, mix 4 Tbsp salt and 1 package of Tulip Fabric Dye into 1 gallon of STEAMING HOT water.
  • Submerge burlap into dye mixture. Let sit for 1 hour, stirring occasionally.
  • Rinse with cold water. Wash with mild soap and water.
  • Machine or hang dry. Press.
How-To Stencil on Burlap
  • Measure 2"-2 1/2" from top edge of fabric; place stencil.
  • Using a sponge brush, blot Paint Tagger inside of stencil. Let dry. Remove Stencil.
How-To Make Zippy Bag
  • With right-sides together, fold burlap in half, lengthwise. Using a 1/4" seam allowance, sew sides. Repeat for lining fabric.
  • Turn burlap pouch right-side out. Fold top edge under 1"; press. Set aside.
  • Leaving lining pouch wrong-side out, fold top edge over 1"; press.
  • Pin zipper to folded top edge of lining. If your zipper's a bit too long, leave the tail end dangling off fabric. Unzip and sew, using a zipper foot and 1/8" seam allowance.

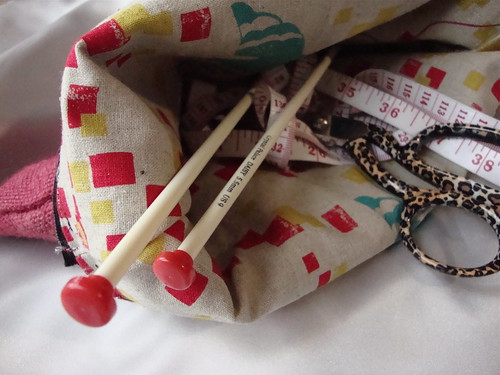
    Burlap Zippy Bag (Inside View)
  • Insert lining into burlap pouch. Tuck excess zipper tail in between lining and burlap. Using 1/8" seam allowance, top stitch lining (with zipper) to burlap.
Hand-Dyed Burlap Bag

Craft.Rock.Love,
Vickie
Clicky Web Analytics
Pin It button on image hover

Subscribe to our newsletter

* indicates required
I am interested in products and inspiration for...
Close