Showing posts with label wall art. Show all posts

Sunday, June 21

DIY Junk Drawer Collage


This DIY Junk Drawer Collage is super easy for you to do in an afternoon, and it's a great opportunity to go thru those drawers with the weird things you think you'll need 'someday'.  One of my most favorite things to do is mixed media and collage. And this new Aleene's Rapid Dry adhesive really got my attention because it's perfect for my favorite kind of project.  It dries fast, it's a gel consistency, and it holds like a super strong magnet.  
Wanna see how I did it?  

Saturday, May 23

Easy Wall Art: Be-YOU-Tiful Painting with Poster Puffy

Easy wall art project - Poster Puffy makes it easy!

Who doesn't need an encouraging word or affirmation once in awhile? Make your own inspirational quote art easily, with the help of Poster Puffy. This easy wall art is the perfect project for teens or tweens, and adults will enjoy it just as much! And psst -- I took a cue from preschool and did some finger painting for this project!

Easy wall art project - Poster Puffy makes it easy!

If you don't like messy art, don't let the "finger painting" thing scare you off -- you can make this art without your fingers, too! (But there is something seriously therapeutic about getting your hands messy with paint!) I know you are intrigued, so come find out how easy it is to make custom wall art!


Tuesday, June 3

Easy Geo Canvas Art


With geometric patterns popping up in clothing and home decor, it seemed a geo canvas art tutorial was just the ticket for today's post. The process is simple and the results stunning!

Tuesday, February 26

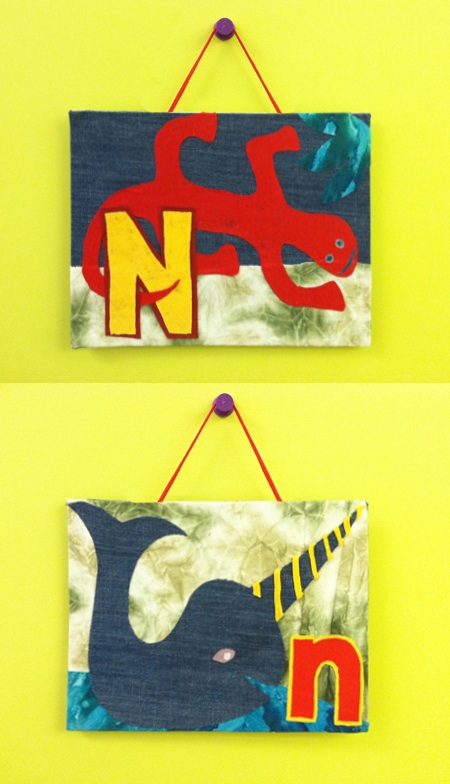
"A is for Animal" Wall Decor!

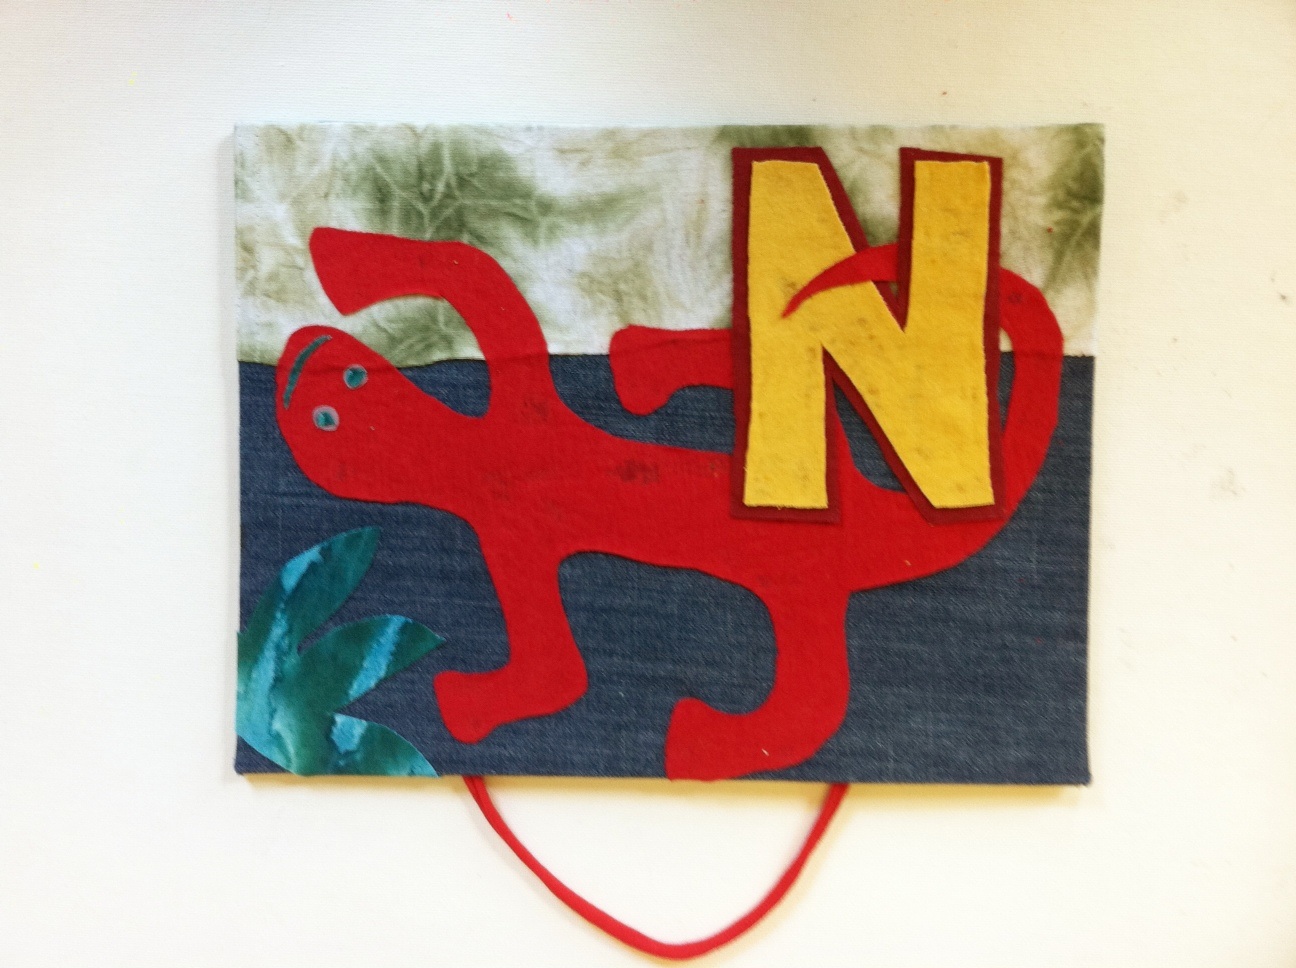
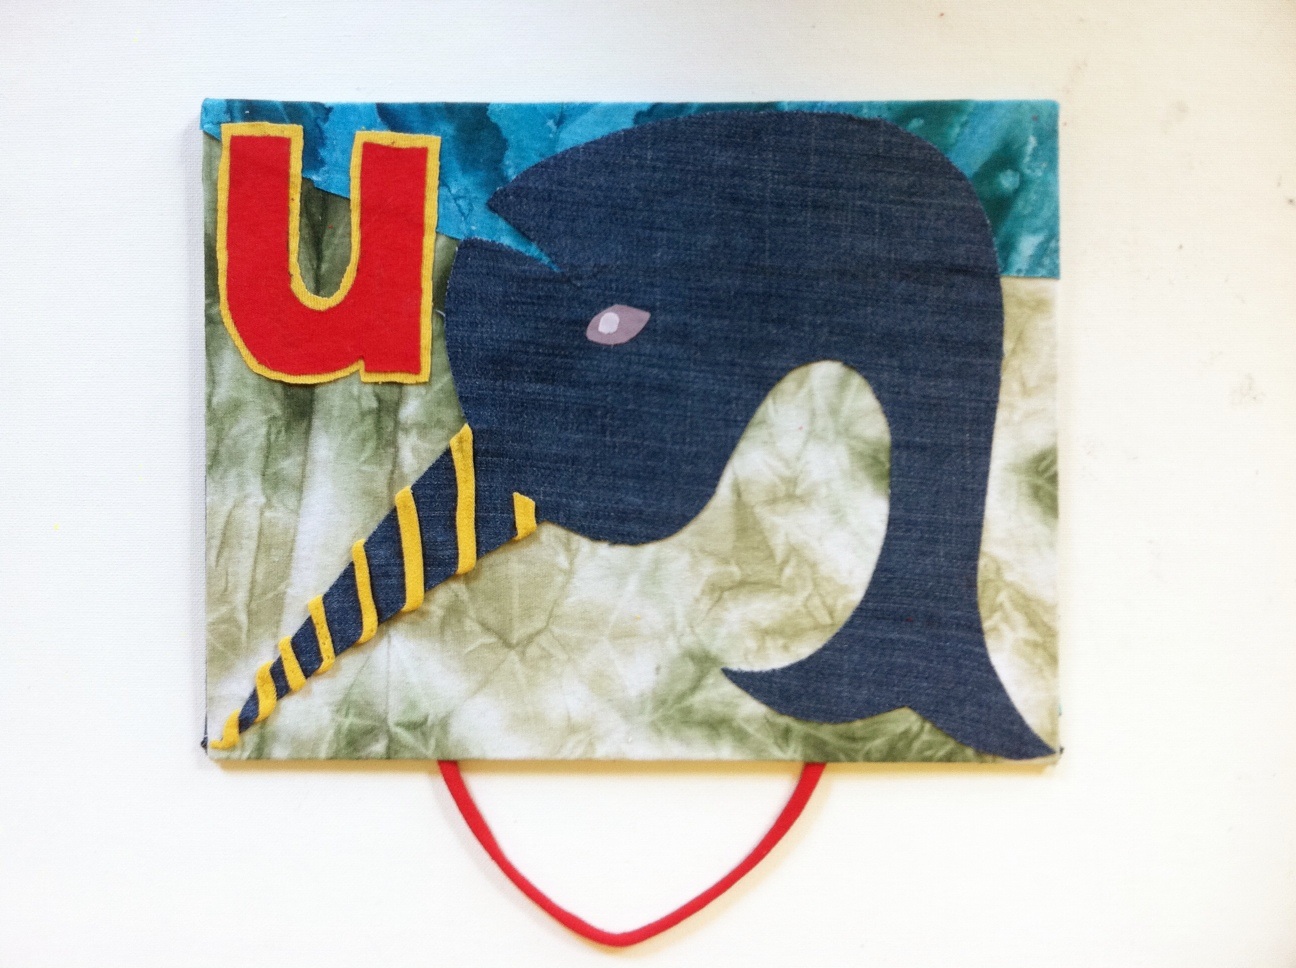
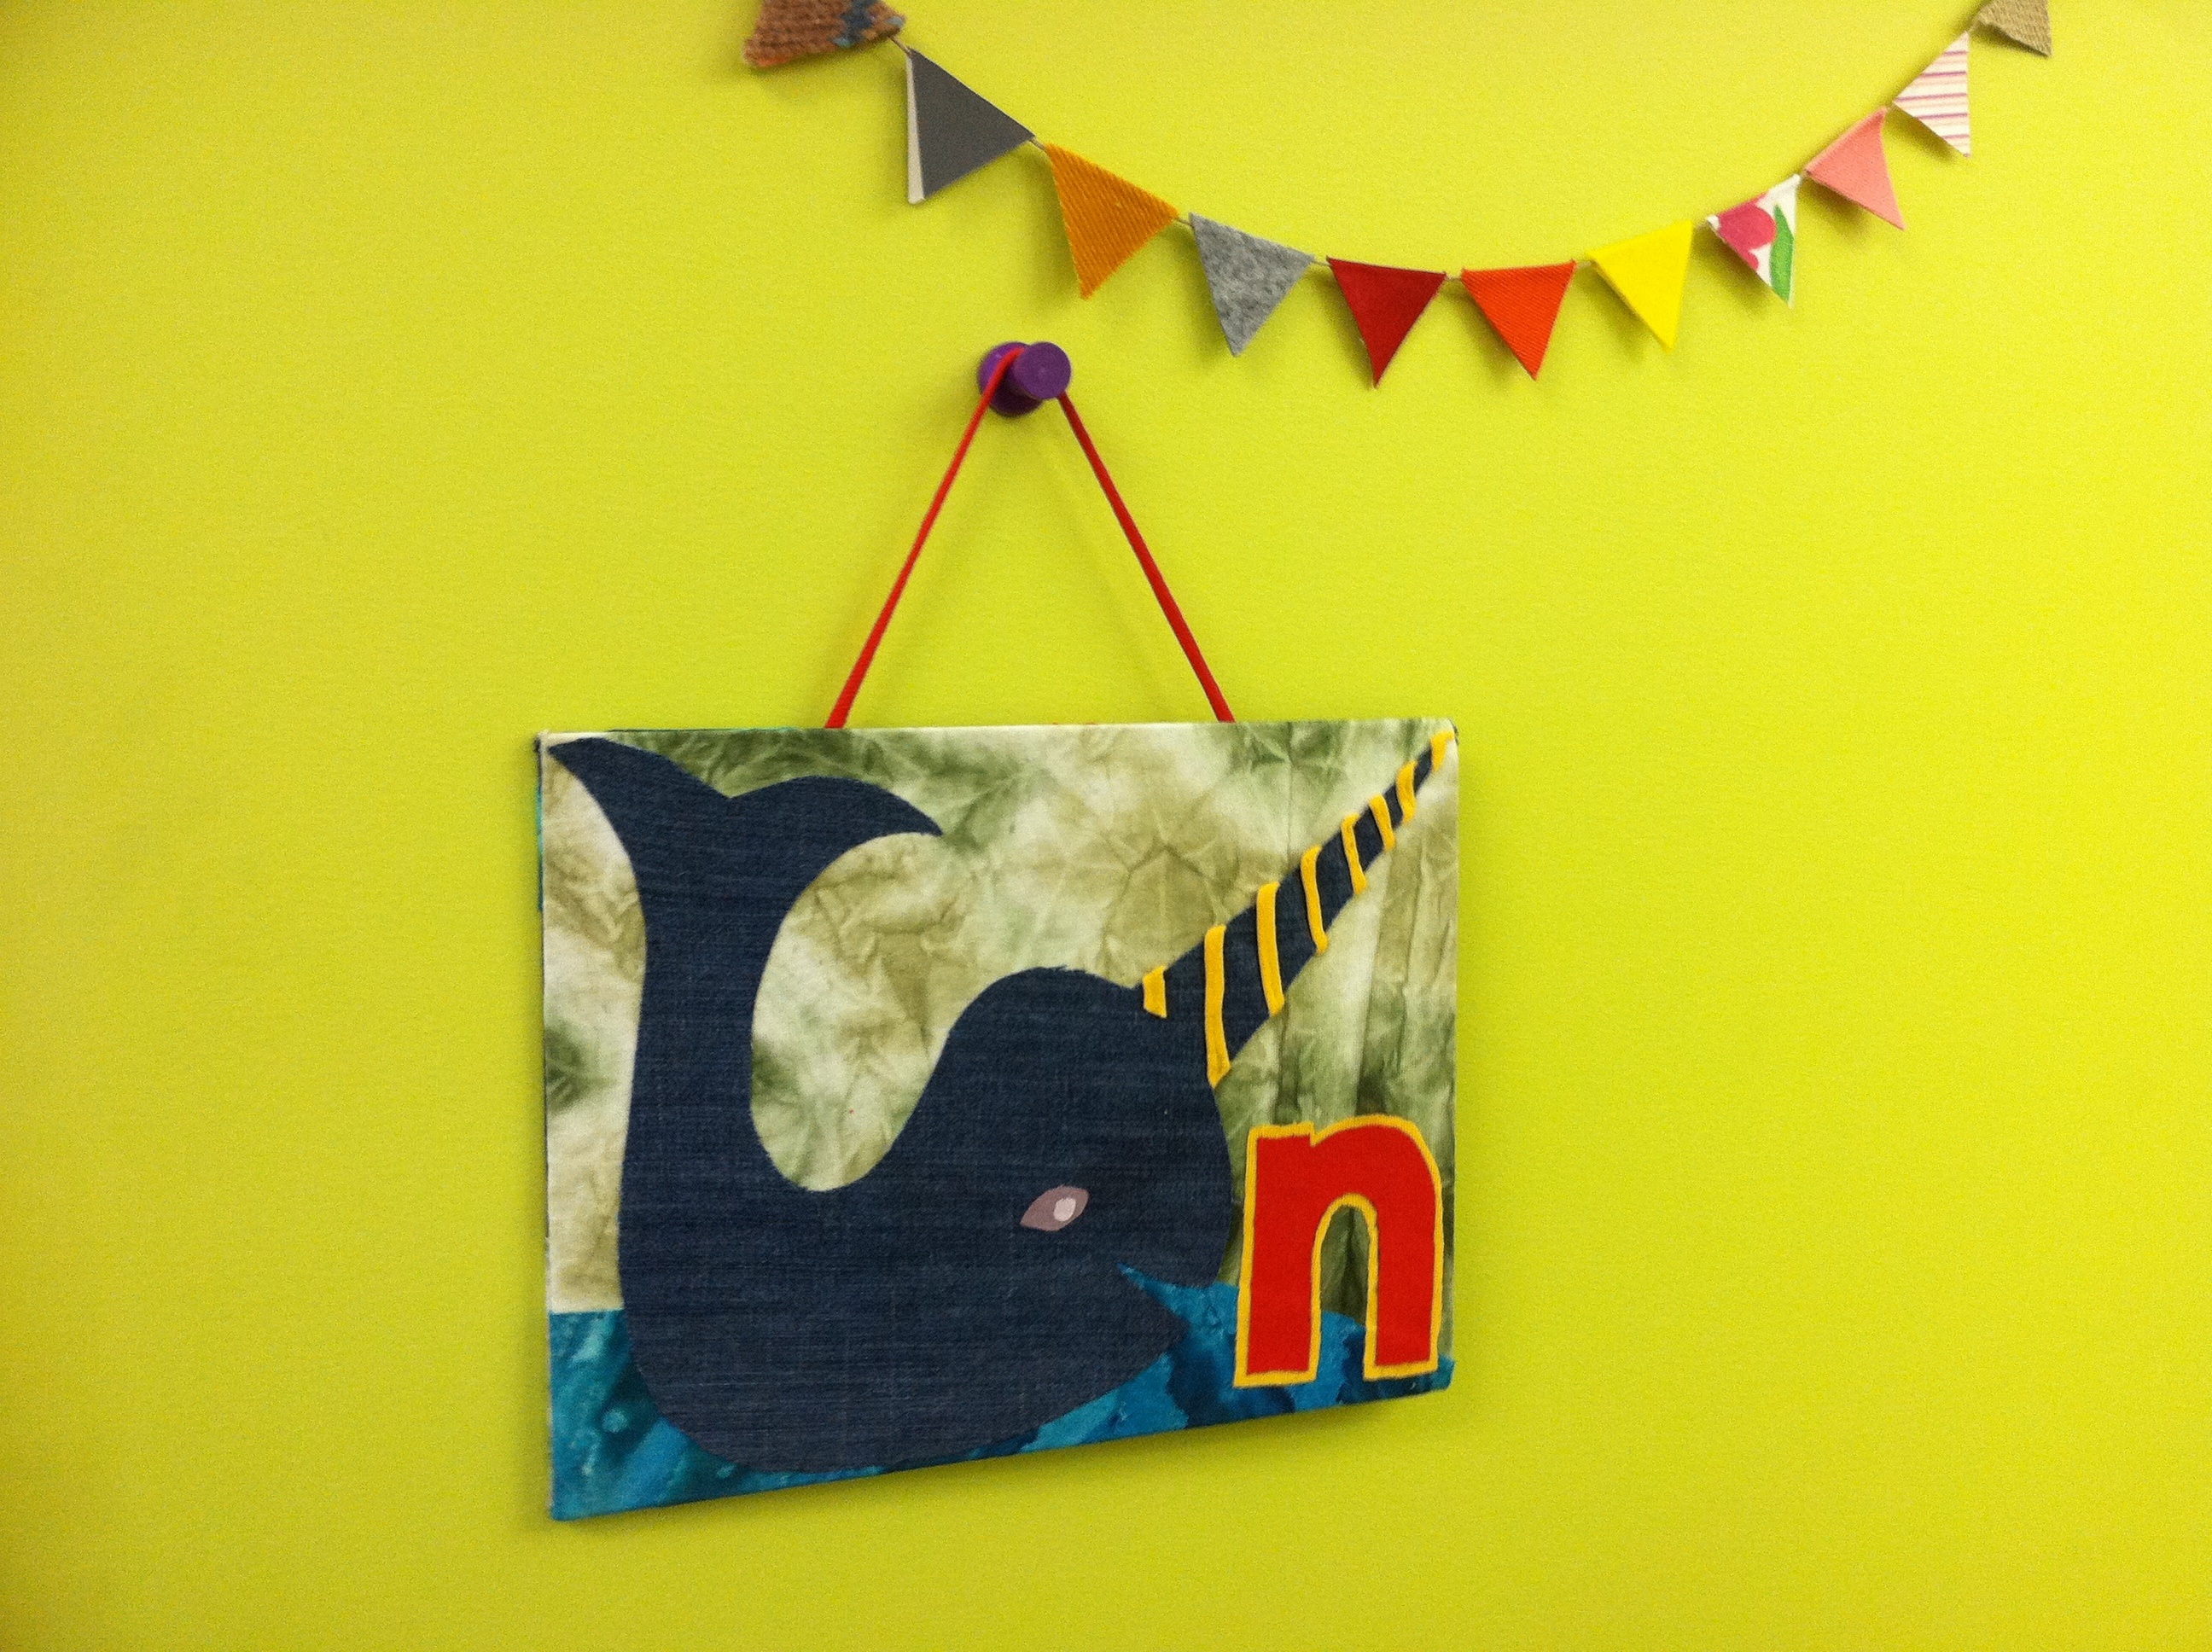
A is for Ant, B is for Beetle, C is for Cat.... Here's an easy way to turn old clothing scraps (in this case, T-shirts and jeans) into personalized decoration for a young (or young at heart) friend's bedroom wall or door. Whether you stick with the animal theme, or go with fruits and veggies (A is for Apple, B is for Broccoli, C is for Carrot), geography (A is for Australia, B is for Belgium, C is for China), or a more random selection of words (A is for Astronaut, B is for Bubbles, C is for Castle), part of the fun is brainstorming the image that will represent the recipient's initial. For me, N is for Narwhal was a shoo-in. N is for Newt came second. What animal would you choose for your name?

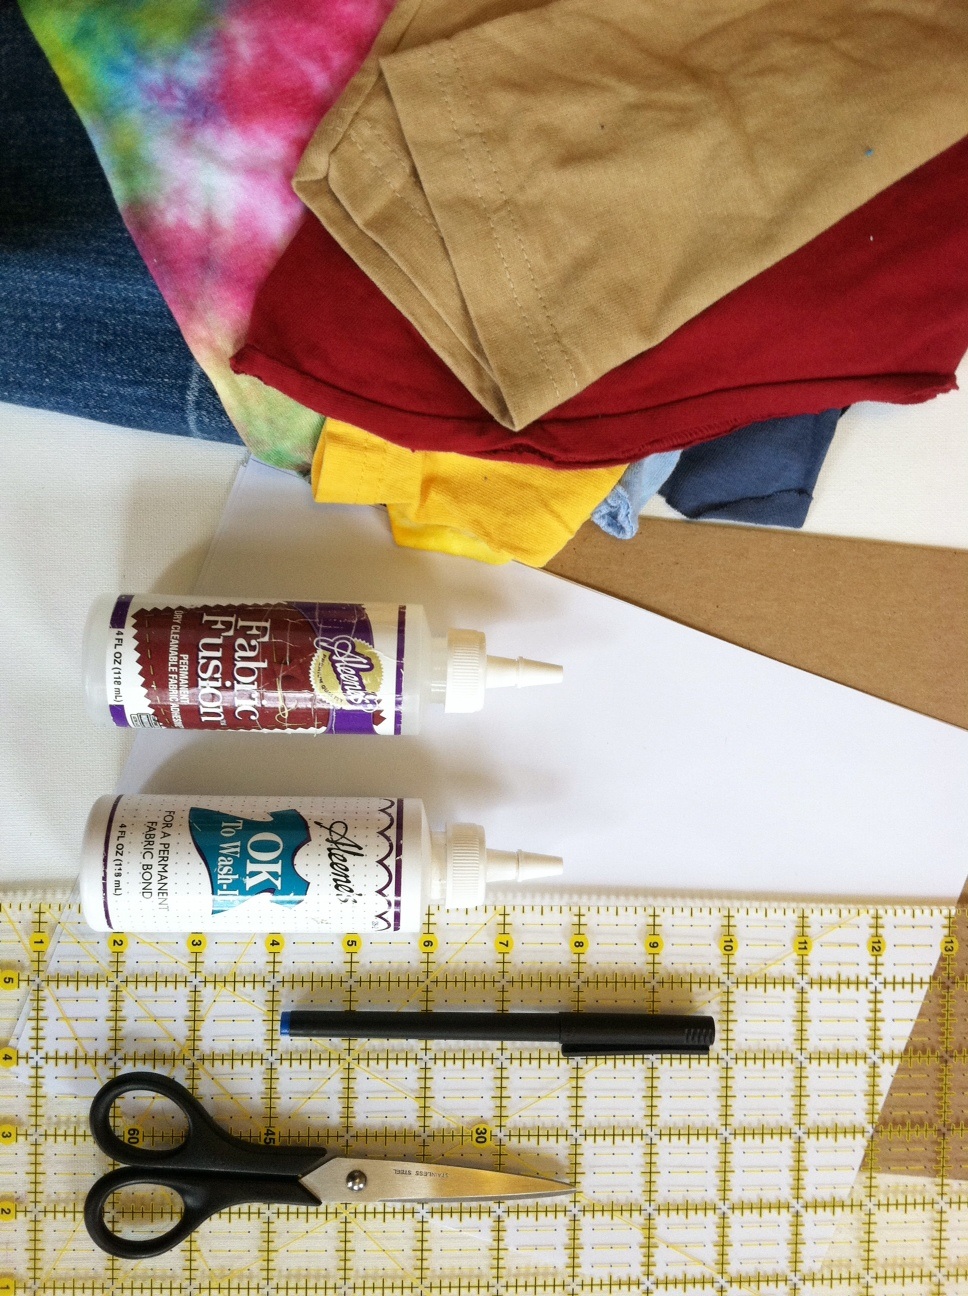
Materials:
-Paper
-Pen
or pencil
-Scissors
-Fabric scraps (old T-shirts and denim pieces)
-2 sheets 8 1/2" x 11" medium-weight cardboard (often used as stiffener in a flat parcel)
-Aleene's OK to Wash It
or Aleene's Fabric Fusion permanent fabric adhesive
-Ruler
-Fabric paints (optional, for additional embellishment)


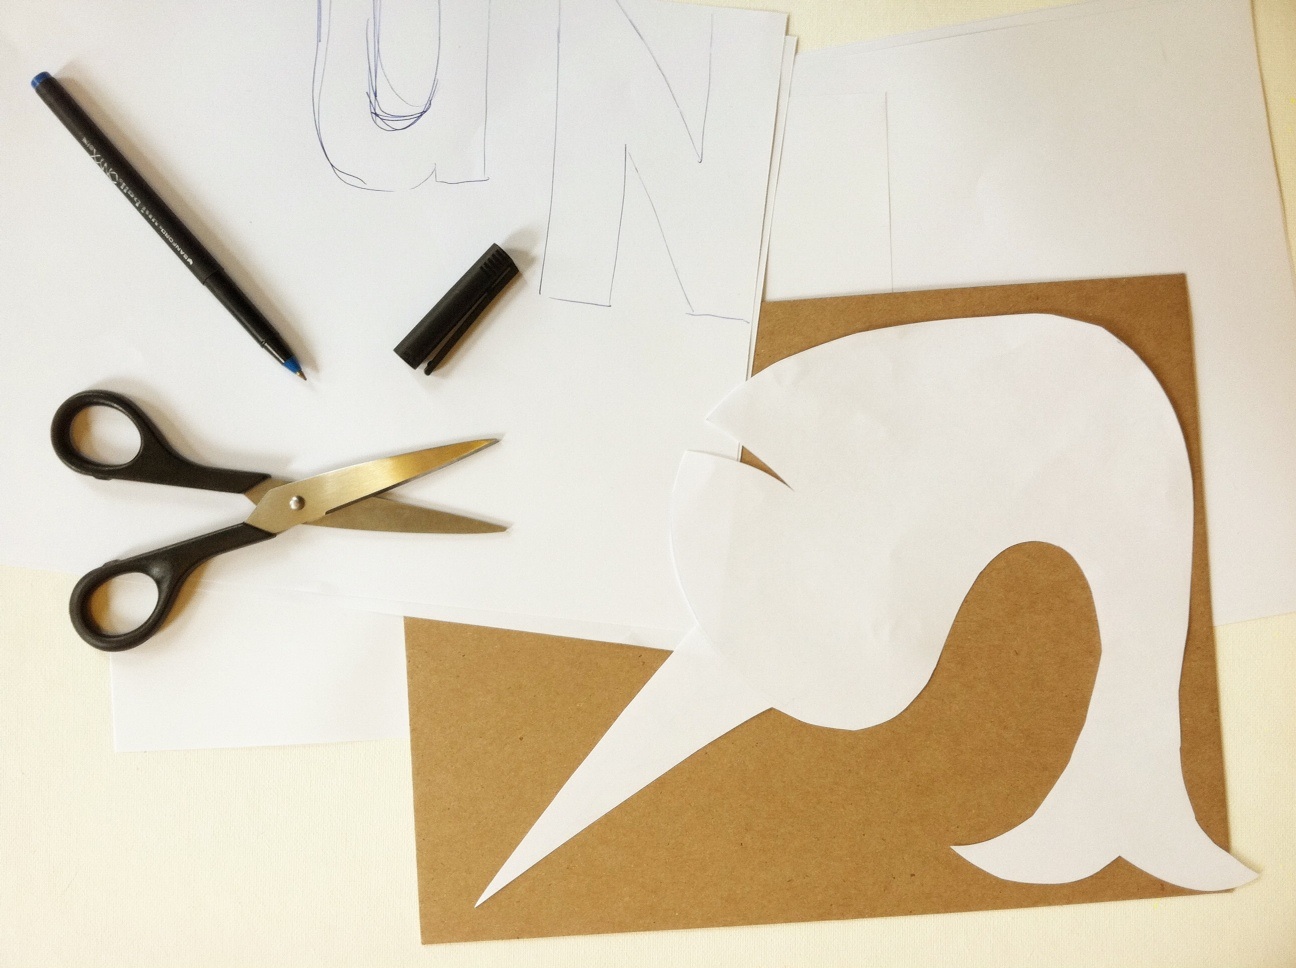
1. Select a first initial and then choose an animal (or two) with a name that also begins with the letter: I chose to start with N for Narwhal (that fabulous sea mammal that looks like it was crossed with a unicorn) and N for Newt (an orange salamander. Draw an outline of each animal and the capital and lowercase letter. Cut them out and arrange them on the cardboard to make sure they'll fit. Set them aside.


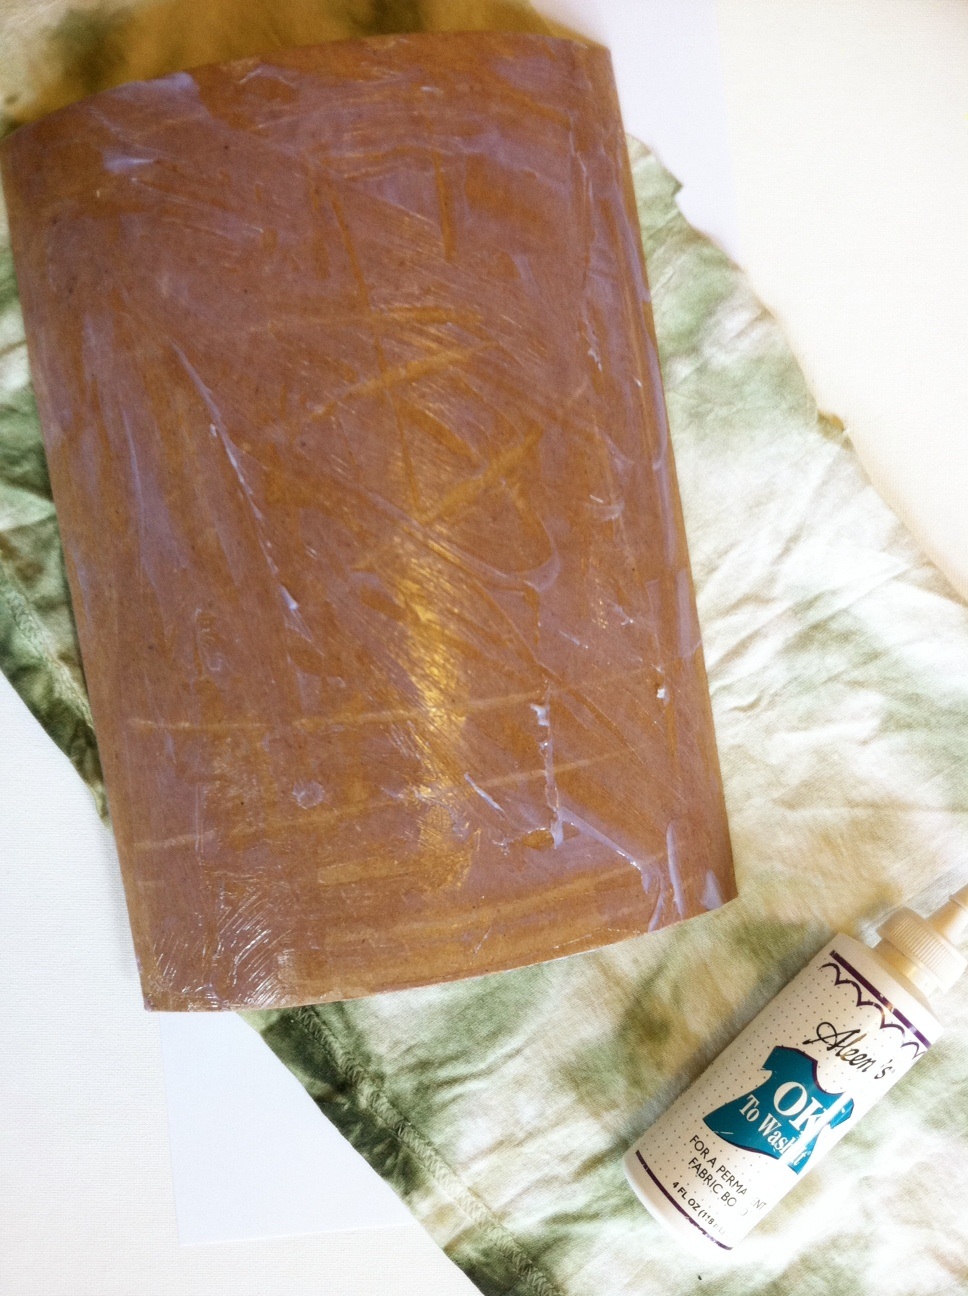
2. Spread fabric glue evenly over one side of one of the sheets of cardboard and press it onto fabric.


3. Fold and glue the edges to the back of the cardboard. (It's okay if the edges are messy -- they'll be covered up.)


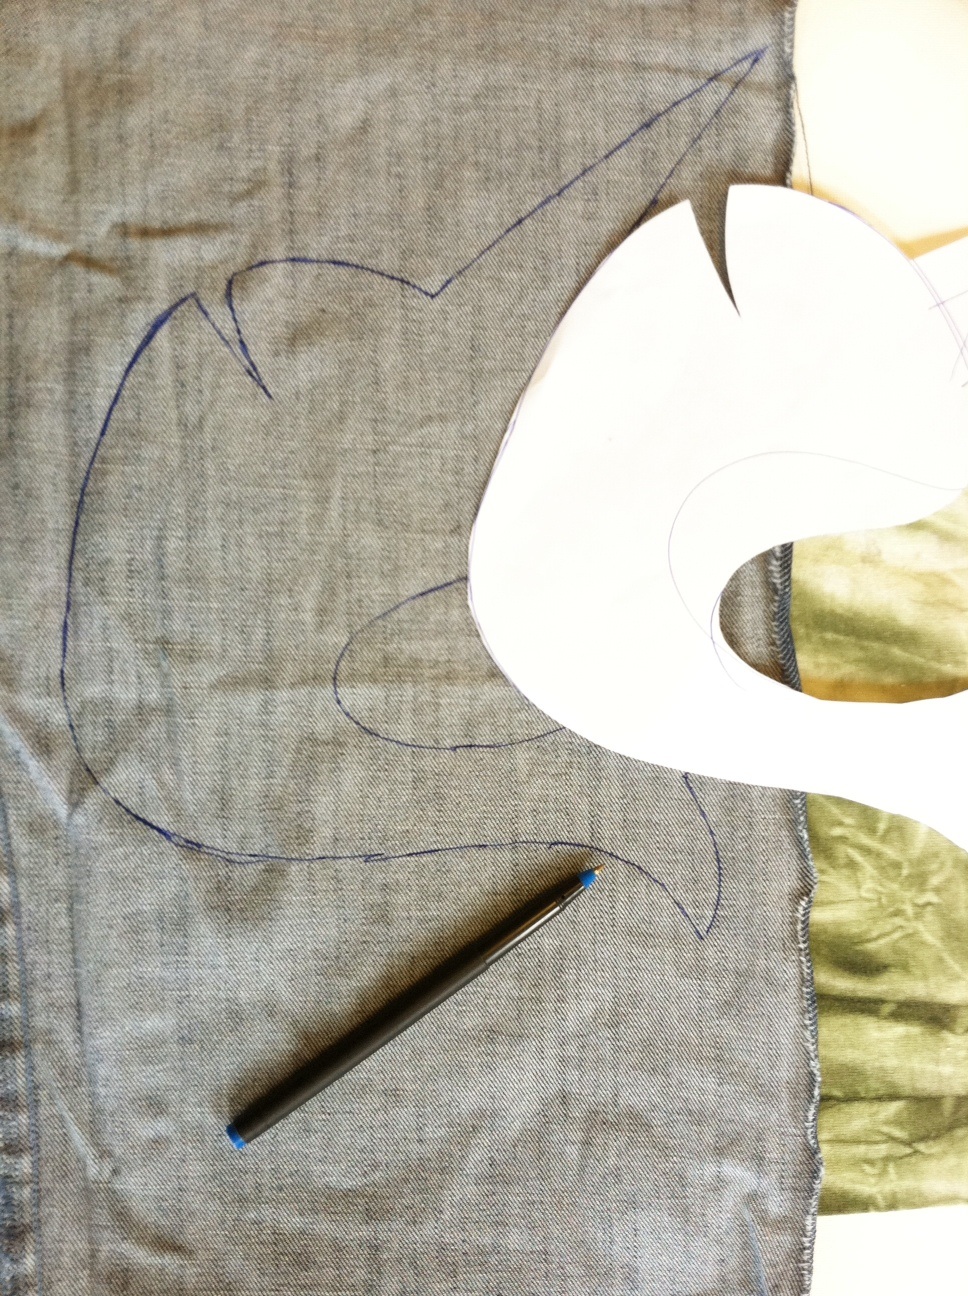
4. Trace one of the paper animal templates (in reverse) onto the wrong side of one of the fabric scraps. Repeat with different scraps with the letters and second animal.


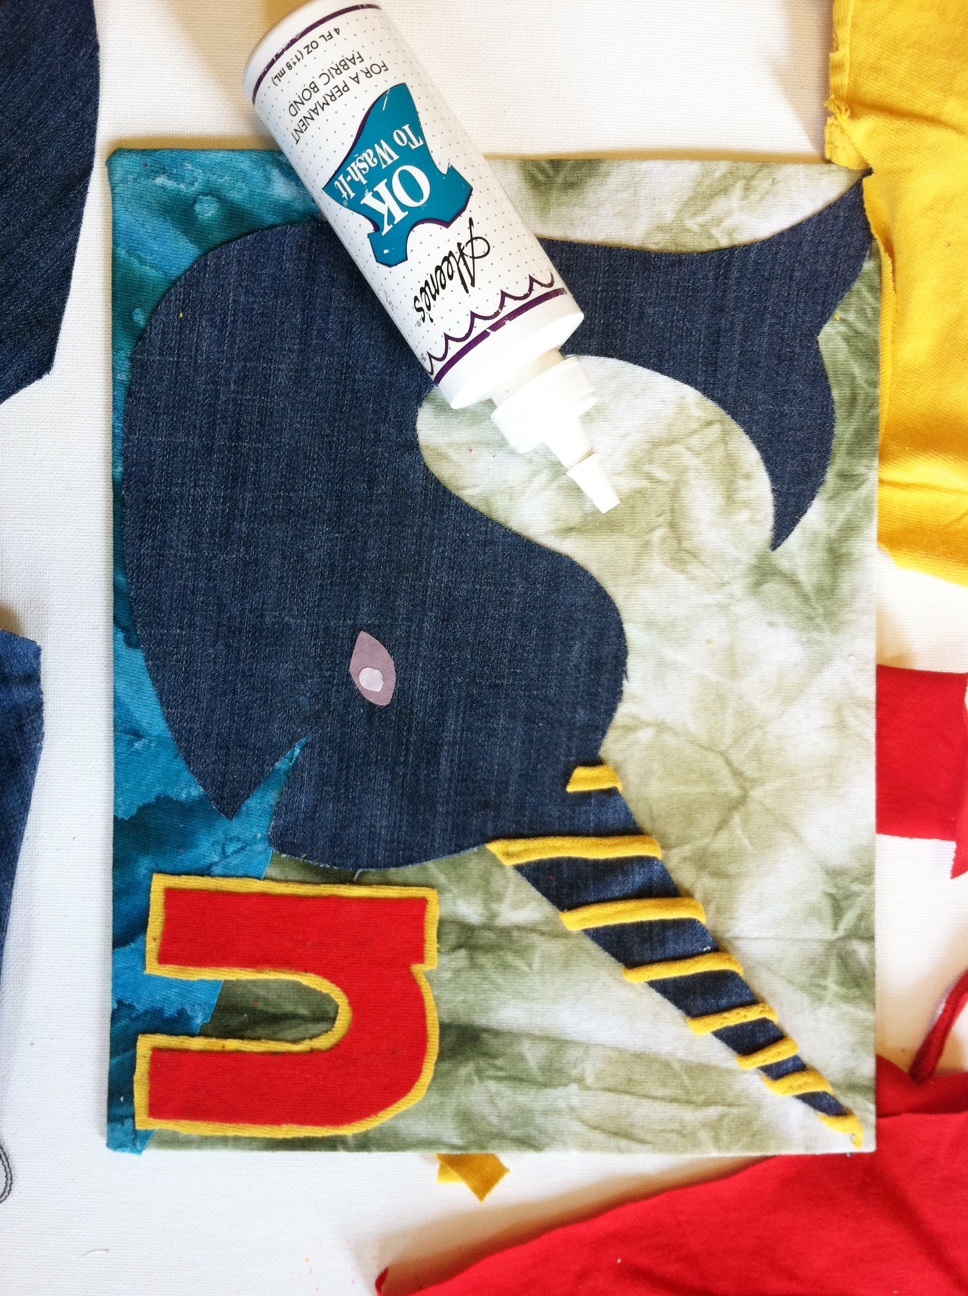
5. Arrange and glue each of the elements onto the fabric-covered cardboard. Add background (like water!) and details (spiral on the horn, eyes!), making sure to layer the pieces appropriately. Let it dry and proceed to decorate the second piece of cardboard!


6. Cover the second piece of cardboard by following steps 1 and 2. Arrange and glue on the embellishments by following steps 4 and 5.


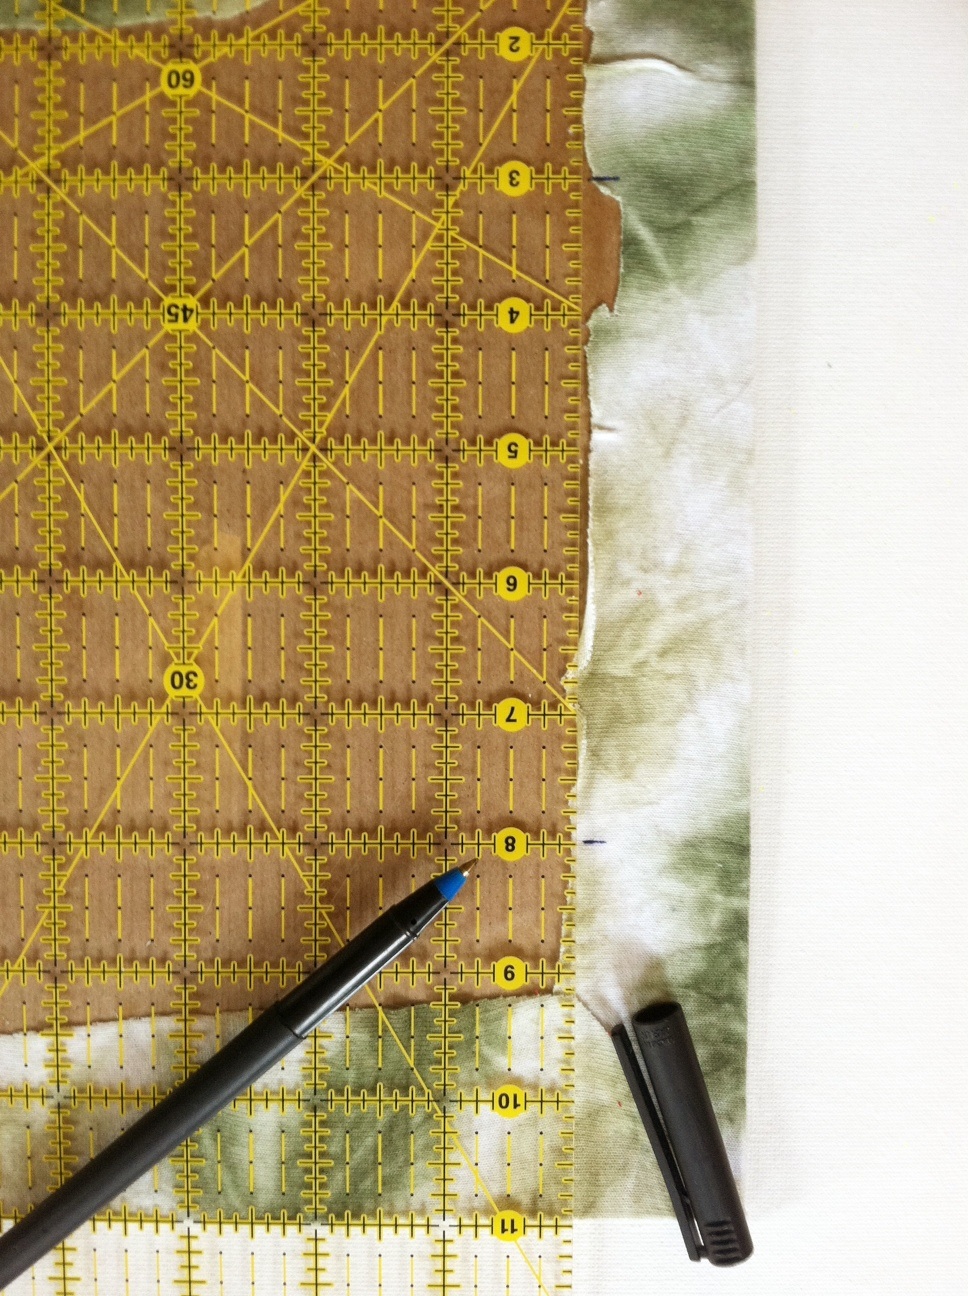
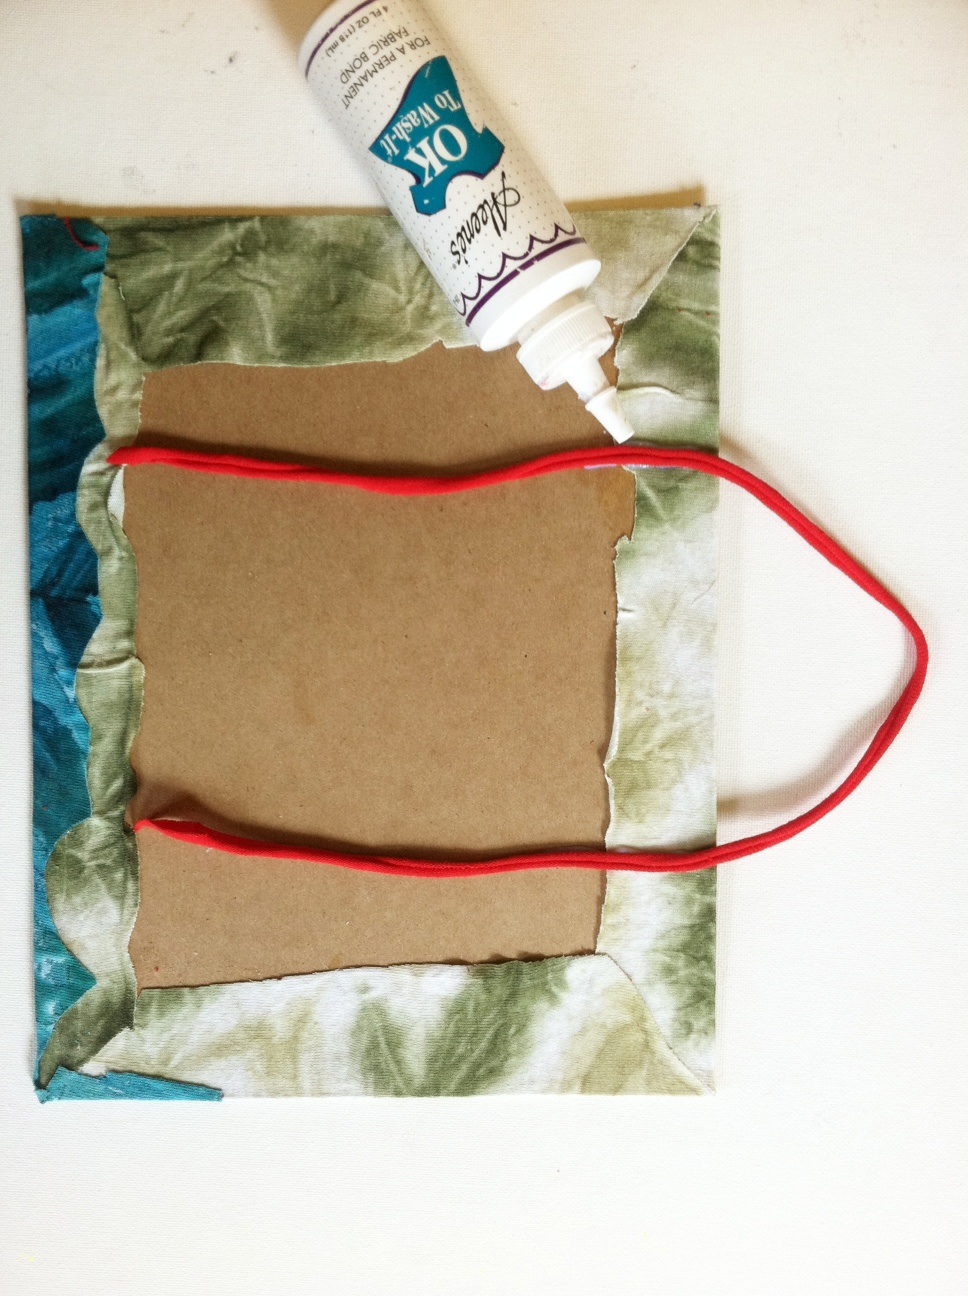
7. Flip one of the panels backside up and measure about 3" in from each side. Mark each point.


8. Squeeze fabric glue at each mark, and press the length of a T-shirt cord into each line of glue.


9. Then spread glue across the entire backside of one of the panels and press it firmly to the back of the other, sandwiching the hanging strap ends between them. (This tidily covers any messy work and makes the sign reversible, whether you prefer caps or lowercase -- or narwhals or newts.) Let it dry.


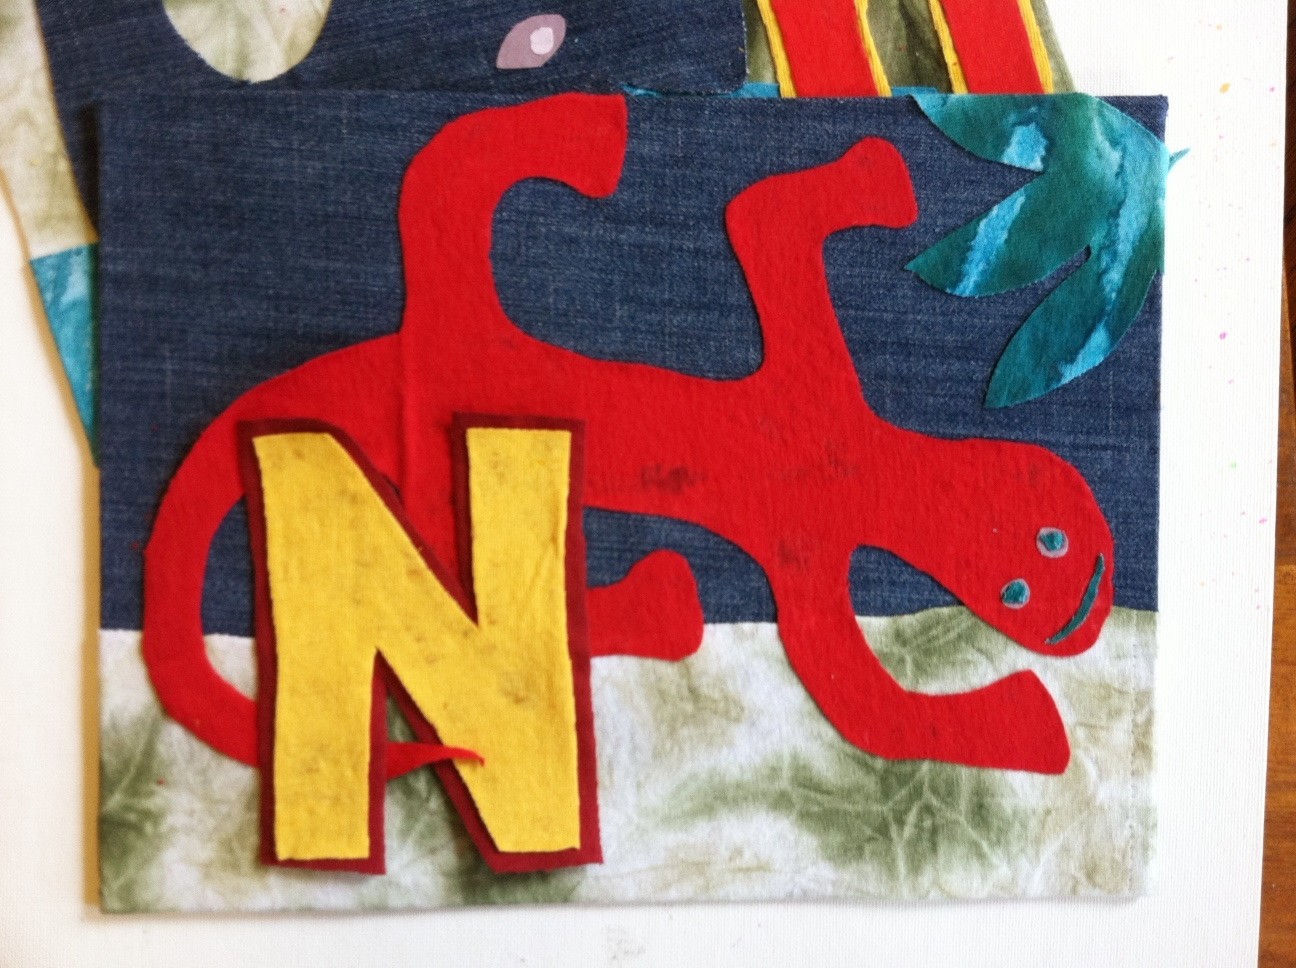
10. A, B, C, D, E, F, G...H, I, J, K, L, M, N is for Newt and Narwhal!

After it's completely dry, choose a side to display and hang it up!


Variations:
-If you're feeling ambitious, make multiple signs to spell out a person's name. Arrange them in a row, a column, or rectangle.
-If you're feeling really ambitious, make the whole alphabet, and line the edges of the room with A through Z animals!

Tuesday, January 8

Embellish a Personalized Letter with Old Jewelry

Have you been wondering what to do with all the trinkets and odds and ends you have laying around in your craft drawers and bins?   Here's the perfect project from designer Pattie Wilkinson to put them to good use. This pretty and chic DIY wall art is so easy to make and can be accomplished in an afternoon.
What you need:
– large paper maché letter(s)
– random jewelry, chain, and trinkets
– Wire cutters
– Gold spray paint
 
Artfully arrange your items on your paper mache letter. Apply to letter using a dab of the glass and bead glue on each piece. You may need to cut off any sharp parts or details using your wire cutters.
This is what they will look like when completed!
Apply a coat of spray paint to the front and back of your letters.
Add another coat so that you get full and even coverage over the entire letter!
That's it! You have an artfully collaged letter that is visually interesting! Your friends and family won't believe that you recycled all those odds and ends making it!

Friday, October 19

Make polka dot framed pumpkin wall art


I just LOVE decorating for Halloween!  Here's a fun project I did for an iLoveToCreate photo shoot to match our Halloween food table.  I love both polka dot and stripes and in this project, I got to create with both these looks!  Halloween is one of my favorite times of year to decorate, because everything is so funky and fun!

What you will need:
– Aleene's Tacky Tape
– Tulip Fashion Glitter in black
– Medium to large foam pumpkin
– craft knife
– 16 x 16 square frame
– black and white striped fabric


1. Remove the insert from your frame and tack out the paper/cardboard sheet. Cut a piece of fabric larger than the sheet and wrap it around. Use your Tacky Tape to hold it in place.


2. Put your fabric-wrapped cardboard back into the frame and secure.

3. Use a craft knife to cut the pumpkin in half. It's really easy to do, the foam pumpkin cuts like buttah!


4. Open up the large Tacky Dots and remove from inbetween the plastic sheets they are seperated by. Apply randomly all over pumpkin.


5. Pour the glitter all over Tacky Dots and shake off onto a sheet of scrap paper.


6. Use a large brush to remove any excess glitter. Don't the dots look great?


7. I chose to further embllish the stripes with some random Tacky Dots using the Tacky Dot Dotter.  I sprinkled on and shook off the glitter as I went.  I went back in and used the brush to remove glitter when I was done.

Now frame and enjoy your creation!  I actually did 2 framed pumpkins with my two halves. They looked perfect with the Halloween table we set up!!


Friday, September 7

Treasures & Trinkets Wall Art with Julianna Hudgins


Crafting, its in my blood! I love creating projects of all types and get really excited when I have the opportunity to share one of my creations with the ILOVETOCREATE readers! Recently I went shopping at this really cool place in Phoenix Arizona Called “Sweet Salvage” with my dear friend and business associate Stacey Caron, Owner of Spellbinders to find some cool items for my next project. The shop is only open once a month and people line up for hours just to get in. I was so excited because I truly love this kind of store. You can find new, used and really old treasures from furniture, lamps, crystals, lace, artwork and so much more.


I couldn’t resist the folding yard stick, it folds in thirds which is really cool for portability! The old watch face captured my attention right away and the lattice frame was a true find. Of course I had to have the metal letter J, feathers, faux pearls, old black and white photos and other trinkets. I knew all of these items would make a cool project and that it would come together with my most favorite Aleene’s Glues.


Aleene’s Jewelry Metal Glue is AMAZING! Its super quick to adhere and dry, not only perfect for all of your jewelry projects but a must have for any project that requires a instant super duper hold. Of course I also had to use my favorite Aleene’s Glue, Super Thick Tacky Glue available in a variety of sizes including this uber cute Travel Size. This particular Tacky Pack, giggle giggle, contains Turbo Tacky Glue, Clear Gel Tacky Glue and Super Thick Tacky Glue.


We also stopped by a local Scrapbook Store. I bought this really cool paper by My Mind’s Eye exclusively designed by Rhonna Farrer called Follow Your Heart “Be Amazing” Be Adored Paper. Its double sided so you have twice the amount of creative expression. In addition to the paper I bought some beautiful crystal and pink rhinestone trim.


Of course no project is complete without my favorite Beadalon Tools and Artistic Wire. For this project I used 22G and 24G wire.


Using Artistic Wire 24G Tarnish Resistent Silver, wrap wire around bottom opening of lattice frame. String pearl on to separate piece of wire and create loops at each end using your round nose pliers.


Continue to add wire and pearls to each bottom opening of lattice frame.


Its always a good idea to lay out your project before glueing, especially if you decide not to use a piece in your project.


You may want to pre-hang your frame to see how placing will look while in the Vertical position and on a wall.


I used Super Thick Tacky Glue to adhere the two feathers together and the photo and paper. I wanted to make sure that I had a super hold on everything else so I used my Aleene's Jewelry Metal Glue.


I really enjoyed making these hand made wired flowers using 24G Ice Blue and 22G Rose Artistic Wire.


I also wrapped the metal letter J with wire and layered mica flakes using Aleene’s Super Thick Tacky Glue. The J was attached with Aleene’s Jewelry Metal Glue.


I wanted to cover the bottom of the feather so I wrapped wire around and secured it with Aleene’s Jewelry Metal Glue.


In case you didn’t know I was raised on a ranch outside of Oxnard California. So Farm Baby is totally appropriate!


Clicky Web Analytics
Pin It button on image hover

Subscribe to our newsletter

* indicates required
I am interested in products and inspiration for...
Close