Friday, March 9

DIY Feather Necklace - National Craft Month with Pattiewack!


DIY Feather Necklace

Have you been to the store, Charming Charlies?  Well if so, you probably flipped out like I did when you saw all the feather jewelry.  And I knew exactly what I wanted to do when I saw this one.  But it didn't have any of the glittery shimmery paint on it.  Go to the iLoveToCreate website to see how I did it and to shop for the shimmery paint!  I'll see you tomorrow with another craft for my crafty celebration of National Craft Month!

Visit us on Facebook!
Craft on!

Thursday, March 8

Irish Moss St. Patrick's Day Initials


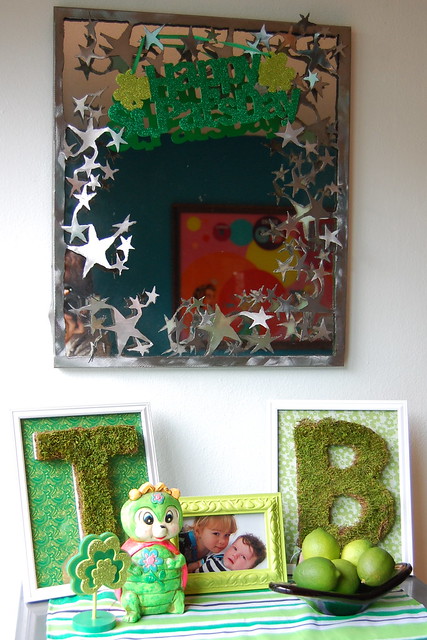
I must admit, this is my first St. Patrick's Day to decorate for. This holiday falls right after my kids birthdays and I am usually so anxious to get my collection of vintage Easter toys out that ole' St. Pat gets skipped right over. Not this year! In the spirit of the mossy Irish Blarney Stone I did a little handmade decorating this year. I love the resulting initials so much I might just make more for next year.


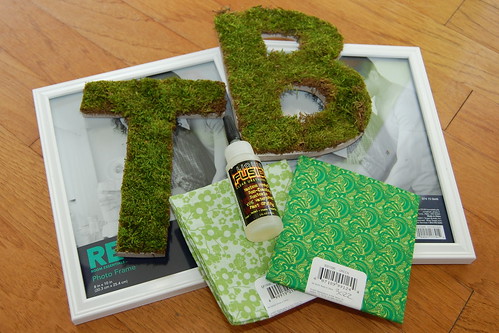
SUPPLIES
Moss
Chipboard Letters
Fabric
Tacky Glue
Scissors
Picture Frames
Liquid Fusion Glue

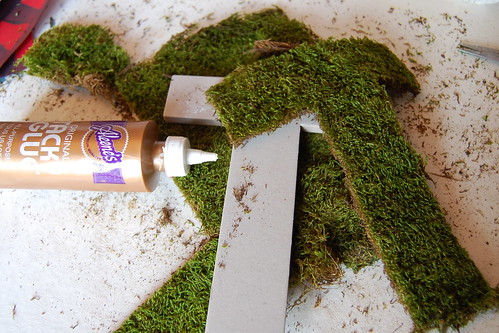
The first thing I did was trim my moss to fit my chipboard letters. The letter T for Talluah was really easy, the B took a little more effort. Once I had my moss cut I adhered it to my letters using Tacky Glue.


The next thing I did was to frame two pieces of green fabric. I used Liquid Fusion Glue to attach the fabric to the backside of the frame.


Once the glue was dried on my moss letters and picture frames it was time to join forces. Again with my Liquid Fusion Glue I attached the letters to the glass in my frames.


I love the way the letters turned out. They are perfect for St. Patrick's Day without being over the top leprechauns and pots of gold.


How do you decorate for St. Patrick's Day? Any special edible treats you make? Now that I have decorated I have to finish the job and make something fun and themed for the kids. Even if it just a box of Lucky Charms for breakfast.


Visit us on Facebook!
Craft on!

Doily Tote Bag


Painted Doily Tote Bag


I absolutely loved making this tote bag, because it seriously took about 15 minutes to make.  And now I can pack it with a bundle of books or my lunch, or wad it up and keep it in my purse for a shopping bag.  You can do it, too!  The instructions are on the iLoveToCreate website, and you can shop for the paint there, too.  If you're loving National Craft Month, drop back by tomorrow for another project from me.... Pattiewack!


Visit us on Facebook!
Craft on!

Wednesday, March 7

MAYA IN THE MOMENT CRAFT: Flower Petal Mash-Up

Finally, it's spring! I was in need of some color pop in my hair.(As you can see, the magenta wasn't enough) What better way than to make flower petal mash-up barrettes? I found these flowers on sale at my local Michaels store, so of course I grabbed a variety of colors! I took them all apart then decorated them and then put them back together in different layers and colors.
On a purse as a pin!

SUPPLIES:

Separate the petals on all the flowers as shown, and saving the pistol.


Next, add some more color POP using Tulip Beads In A Bottle! This is definitely going to turn heads!
For each color, decorate it in a different way to add contrast in the design. From experimenting, I found it was easier to use Aleene's Brush On Tacky Glue to apply the glitter!


I used Tulip Fabric Markers  to draw on some cute designs. Let the petals dry before placing them together.
After they are all dry, and stack them in contrasting colors and by size. You can also trim with scissors if you need to, anything to make them look good! Then, glue on any backing of your choice.
Ta Daaaaaah! Here they are! Now I'm ready to enjoy spring time the appropriate way! You can use these as pins, the final touch on a shirt, hat, or purse. OR you can even attach them back on to the stems to make a bouquet!

Please add me on Facebook!

Live, Laugh, Love... Faux Etched Mirror

This was easy-peasy to make!  And I think it totally looks like glass etching, but it's not!  For the instructions, go to the iLoveToCreate website and you'll be shocked at how easy it is with GLUE!
Be sure and check back tomorrow, 
and every day this month for more crafts to celebrate National Craft Month!


Visit us on Facebook!
Craft on!

Tuesday, March 6

A Craft A Day with Pattiewack for National Craft Month

Chalkboard Placemats

The secret to these chalkboard placemats is to adhere chalkboard fabric to placmats.  You'll find complete instructions on the iLoveToCreate website.  I love this idea for parties, or for everyday.  The kids will love to have something to doodle on while you put the finishing touches on the mac and cheese or to do a little math when they're doing homework.

If you're loving the daily craft projects to celebrate National Craft Month, then come back tomorrow, because I'll have something new to create!


Visit us on Facebook!
Craft on!

Double Dipped Glitter Skirt

My sister will be having her first little girl this week, which gives me the opportunity to use a bit of glitter in my crafting.  I made her this tiny glitter outfit, with a little salute to her superhero-loving brothers.


I started with a plain shirt and skirt (which I got from Wal-mart).  I used my Tulip Glitter transfer sheets.  The beauty of these sheets is that you can do glitter without the mess.


I started by cutting one inch strips out of the glitter sheets.  (In hindsight, I probably should have cut the pieces a little curved rather than straight.  The ruffles on the skirt were slightly rounded.)


I peeled off the clear protective top and then ironed the strips onto the skirt.  I found it was easiest to cut the strips into smaller pieces to apply them.  The glitter sheets can overlap each other a bit and you'll never notice it.  


To apply them you place a cloth over the top and press the iron onto it for 30-45 seconds.  


I made my way around both layers of the skirt until it was finished.


For the top I made an emblem like Superman, but changed it to an "M," since her name will be Millie.  Super Millie!  I used the glitter that matched the shirt, so it wasn't too loud.


Now she'll have a glamorous girly look, with a brother-approved superhero signature.


Thanks for dropping in.


Clicky Web Analytics
Pin It button on image hover

Subscribe to our newsletter

* indicates required
I am interested in products and inspiration for...
Close