Showing posts with label Cheri Heaton. Show all posts

Tuesday, December 17

Santa Sacks

 I thought it would be fun this year to have a special way to wrap the presents that are from Santa, so I made these "Santa sacks" to put under the tree for my boys.  You can make these even if you don't sew.  How?  It's a pillowcase.  Easy peasy.

Tuesday, December 3

Paper Christmas Tree

Decorating for Christmas is so fun, but it can also get a little pricey.  I don't like to spend a lot of money on things that will only be up for a month, so I made this paper Christmas tree for almost nothing.

Tuesday, November 19

Glitter Snowflake Pillow

Want to add a touch of seasonal decor to your home?  Here's a super fast and easy project you can finish in about 5 minutes.  I love a quick project with pretty results.

Tuesday, November 5

Feather-stamped Tee and Bag


When I was young I had a collection of rubber stamps.  The only thing I ever used them for was making cards.  However, with the I Love to Create products, I use stamps in so many different ways.  I carved this feather stamp and used it on a couple of projects here to show you how you can make use of any stamp you might have.

Tuesday, October 1

DIY Glitter Polkadot T-shirt

One of my very favorite Tulip products is the fashion glitter transfer sheets.  I think it's so cool that you can easily put glitter anywhere without making a big mess.  The transfer sheets made this glitter polkadot shirt really easy to make.

Tuesday, September 17

Thunderbolt Shoes


No matter what kind of shoes I buy my boys, they always end up favoring the boat/deck type shoes that they can slip on and off easily.  They are great because they are inexpensive and easy to find, but we like to add a personal touch to make them extra fun.  My oldest requested red thunderbolts and here's how they turned out.

Tuesday, September 3

Bitty Bow Headbands (No Sew!)


Now that I have a baby girl it's been fun to throw in some girly projects among all the boys projects I'm usually working on.  These little headbands are super easy to make and don't even require sewing.
They add a little girly flair to any outfit.  Here's my little girl.  She's almost 3 months old and I love putting a headband on her with her crazy hair flying out all around it.
 

Tuesday, August 13

Decoupaged Wooden Arrows

Right now I'm working on a little organizational wall for my boys where their chort charts hung up and  their artwork will be displayed.  I wanted the space to feel like a gallery wall and I decided to add these arrows to the wall for a fun pop of color.  While my signs are arrows, you can use this concept to make others types of signs or even to recover old frames.

Tuesday, August 6

Arrow Baby Boots


Baby boots have been something on my list of things to make my new little baby girl.  However, while walking the aisles at Michael's the other day I saw they had some there for only $7 (and less if you use your coupon).  That saved me a lot of sewing time.  They were right next to all the I Love to Create products and I thought they'd be really fun to embellish.

So, I play off the recent trends of neon and arrows and turned them into these little arrow baby boots.

Tuesday, July 9

Logo Bag to Fun Tote

Bags and totes are a lot like shoes; you can never have too many of them.  While I enjoy a free bag, I don't necessarily like bags with big logos or advertising on them.  So, here's a simple solution to make a logo bag into a fun, useable tote.

Tuesday, July 2

Hello Pillow


While in the process of redecorating our family room, I wanted to add some pillows with personality.  This "hello pillow" was super easy to make.  I only needed a printer and my Tulip fabric markers.  Here's how I did it.


I found a telephone picture I liked from the internet and printed it out as large as I could.  I also printed out the word "hello" in a font I liked.  I purchased an inexpensive pillow cover at Ikea.
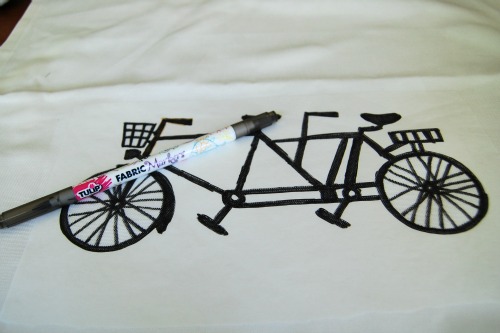
I placed the papers I printed inside the pillow so that I could trace them.  See how you can see through the fabric to the design?
Then I started tracing....
 ...and coloring.
 And here's a picture of the fabric I'll be using to bring the room together.
 I love a simple, easy project that's easy to personalize.


Tuesday, June 11

No Sew Embellishing

Embellishing clothing is such a fun way to personalize things.  However, even if you don't sew there are still lots of ways to embellish clothing.  All of Aleene's adhesives can help you get that hand-sewn look without even picking up a needle and thread.

Here are a couple of ways I embellished some onesies without sewing.  For the first onesie (pictured above) I got out some lace and Aleene's Fabric Fusion.
I ran a line of fabric fusion down the sleeve and another line parallel to it since my lace was fairly wide.  I pressed on the lace, allowed it to dry well, and it was done.
While I did sew to make the hat, I actually used fabric fusion on the hat as well so that the petals on the flower wouldn't flop around or fall downward.
On another onesie I pulled out some leather I had, a Tulip fabric marker, and Aleene's Peel and Stick Sheets.
I cut a small heart out of the leather and used my Tulip fabric marker to create stitch marks.
I traced the heart onto the peel and stick sheet to cut the adhesive the same size as the heart.  
Then I peeled off the backing and pressed the heart onto the shirt.  Done.
You could even add a name right below the heart with the fabric marker for a personalized look.
So what will you embellish next?

Tuesday, June 4

Fingerprint Balloon Pillow

I long time ago I came across a cute poster with a bike that had balloons tied to it.  I thought it would make a great pillow and our pillow covers are really worn out.  Here's how it came out.


I started with a blank pillow cover which I found at Ikea.  It was a few dollars and it has a nice zipper in it which is great for washing.  I created a freezer paper stencil of a bike.  (If you've never tried freezer paper stenciling I have a how to video HERE.)  You cut the paper and then iron it onto the fabric to seal it on.  I usually use paint with these stencils, but I thought I'd go for fabric markers this time around.


With a stencil it's super easy.  Even if you color out of the lines, it won't show because the stencil is forgiving.


Peel it off and your image is perfect.  After I removed the stencil I added a few lines for balloon strings.


Then colored my finger with Tulip fabric markers and stamped it to create ballooons.


I also use the Scribbles fabric stamp pads to get a wider variety of colors.  The finger stamping is really easy.  You can't do it incorrectly.


And here's the finished pillow.


 I think it would make a cute shirt as well.


Tuesday, May 14

DIY Dipped Glitter Vase

While I enjoy intricate crafting, it's also really fun to find a simple project you can create in a few minutes.  This dipped glitter vase can be made in about five minutes.  It would make a great wedding centerpiece or just a pretty decoration at home.
To Create This Project You Will Need:

- a glass vase
To begin, I taped off the vase with paper about 1/3 of the way up.  I headed outside and sprayed the bottom of the vase with Aleene's Fast Grab Tacky Spray.  
I poured the glitter onto the bottom of the vase.
After enough pouring, the glitter starts to accumulate on the paper and you can roll the vase in it as well.  That makes it easier to really get the glitter pushed on tightly.
 Once the glitter is on you can protect it with Aleene's Spray On Glitter Sealer.  
Then simply remove the paper.
 Now you have a one-of-a-kind vase with some extra glam.

Clicky Web Analytics
Pin It button on image hover

Subscribe to our newsletter

* indicates required
I am interested in products and inspiration for...
Close