Showing posts with label crafty chica little paint pack. Show all posts

Monday, March 4

St. Paddy's Day Mason Jar Vase


iLoveToCreate Teen Crafts
St. Paddy's Day Mason Jar Vase
Avalon Potter

We love St. Patrick's Day around these parts, being of Irish descent.  Erin go bragh! Avalon wanted to make an Irish themed craft for St. Patrick's Day using a mason jar.  This mason jar vase is so simple to create and you can customize it however you like by cutting a different stencil, using different paint colors or adding a different message.  All you need is a mason jar, Crafty Chica Little Paints, a manilla folder, a tag, twine, Aleene's Tacky Dot Runner, a computer printer and a few coats of Aleene's Spray Acrylic Sealer.  In under an hour, you'll have a pretty vase for your favorite faux flowers.


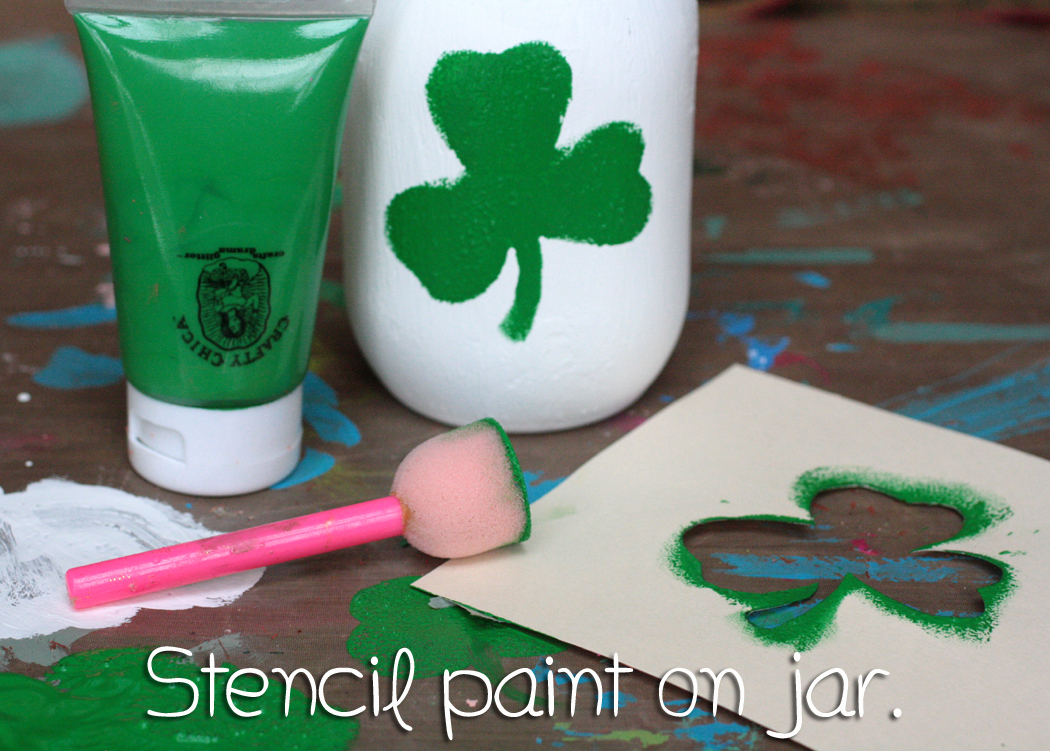
Paint the outside of your jar white.  Two to three coats will be needed.  Let it dry completely before the next step.

Free hand draw a shamrock or find a permission free image online.  Ours is about 2" long and wide.

Use a craft knife and a cutting mat to cut your stencil out.

Use a Tulip pouncer to stencil green paint on front of jar.  Allow to dry.  (We liked the fuzzy edges, but you can, if you so choose, go back in with a small brush to clean the image.) Once paint is dry, spray 1-2 coats of Aleene's Spray Acrylic Sealer in matte finish.  Allow to dry.

Print text in green, using the KG Skinny Latte font at 28pts.  Cut text, use Aleene's Tacky Dot Runner to adhere to small kraft paper tag.

Use green and white baker's twine to attach tag to top of jar.


Wednesday, February 13

How to make Pretty Pastel Upcycled Can-tainers

 How to Make Pretty Pastel Upcycled Can-tainers
iLoveToCreate Teen Crafts
Avalon Potter
"Teen Crafted, Mom Approved"

When Avalon started saving tin cans for a project, I really wasn't sure what she had in mind.  But once I saw these super cute upcycled can-tainers, I was instantly smitten.  These pastel colors are easy to mix by combining your Crafty Chica Little paint colors with white.  Use Aleene's Tacky Glue to attach the matching baker's twine to the top of your painted area.  Add liners if you like, toss in your toothbrush, make up brushes, combs...whatever clutters your sink top or vanity.   Mess managed, adorably!

 
Remove labels and any leftover adhesive before starting.  Tape off section you wish to paint with blue painter's tape. 

Paint section with brush, one to two coats.  While paint is still tacky, remove tape and use a finger tip or cotton swab to gently remove any overlap.  Allow to dry.

 Add baker's twine in coordinating color to top of painted edge.  Run a thin line of Aleene's Tacky Glue underneath to secure twine.  Avalon added some tiny pennants to one can for fun. 

That's it!  How simply fabulous is that?


Wednesday, October 10

'A' is for Awesome DIY Framed Initial

(It's another AWESOME DIY Teen Craft Project from the AWESOME Ms. Avalon Potter!)


A is for Awesome (Avalon and Autumn) 
DIY Framed Initial
Avalon Potter foriLoveToCreate
'Teen Crafted, Mom Approved'

Autumn has always been my favorite season. The way the leaves form a masterpiece of color, and the crisp air rejuvenates the mind amazes me. Even though I have never been a large fan of Halloween (I don’t do scary), I still love the thick textures and shabby chic appeal that pops up during this time. I have a beach theme throughout my room the blends naturally with this style, so I am always finding new things I would love to hang up. I decided for this project I would make something that would go with the theme of my room and the theme of the season. I hope you enjoy it!


Materials
Weathered wood frame
Sturdy cardboard
Burlap
Wooden letter
Crafty Chica white paint
Aleene’s Fabric Fusion
Tulip Glitter Spray Paint diamond
120 grit sand paper
Paint the letter with the Crafty Chica white paint and let dry.


Measure and cut cardboard to fit inside of frame.

Glue burlap to fit cardboard with spray adhesive.  Glue one layer, allow to dry.
Glue second layer and allow to dry.

Trip burlap leaving a 1" edge.


Install burlap board into back of frame.

Sand paint in various spots to distress.

Spray glitter paint on paint brush and brush on letter. Allow to dry.

Use Fabric Fusion glue to adhere letter to center of burlap.

Thursday, October 28

Best Halloween Costume Trophy


The big day is this weekend, do you have your primo costume ready? I'm talking something worthy of a handmade trophy not something you picked up this week at Target. Well the clock is ticking you better get on it. For those doing the costume judging if the participants in your contest are going to take the time to put together a rad costume shouldn't you take the time to make them a special trophy?


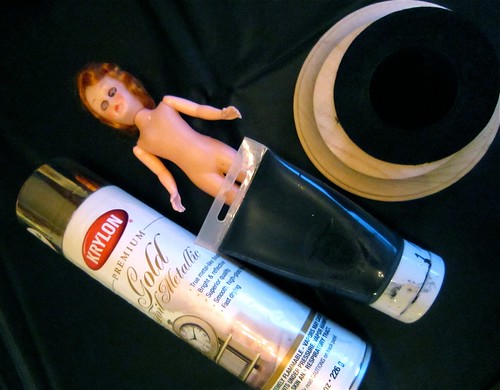
Wooden Disc
Crafty Chica Little Chica Paint Pack - Black
Small Doll
Witches Hats
Gold Spray Paint
Aleene's Fast Grab Tacky Glue
Bic Mark-It Permanent Markers
Rick Rack or Ribbon


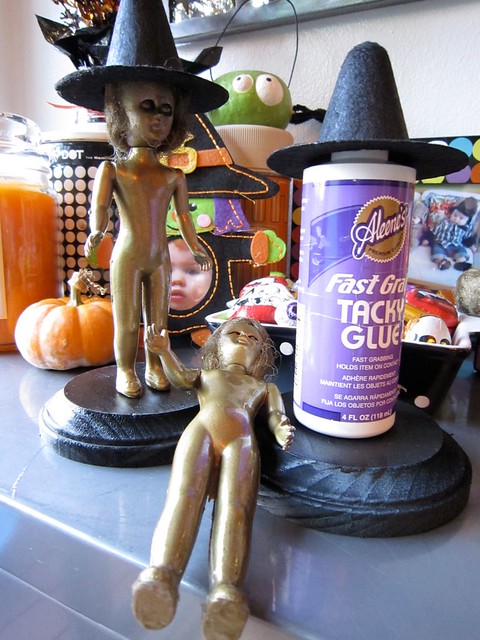
The first thing you need to do is spray paint your doll. I opted for gold so my trophy would resemble an Oscar. I also painted my wooden discs with black Crafty Chica paint. After all the paint was dried I used Fast Grab Tacky Glue to attach my dolls to their base and the hats to their heads.


The last thing to do is to decide what your winning categories will be: best costume, best family themed costume, scariest costume - the choice is yours. I made my sash using some vintage trim and a fine tip bic Mark-It Permanent Marker.


Once you decide make a sash to go around your trophy pageant style and present the lucky winners with their prize!

Craft on!Click here for today's daily giveaway!

Thursday, October 21

Terrifying Topiary & Keepsake Ornament


This week I have been chatting about creating the perfect Halloween themed table. Whether you are having a Halloween party or maybe just a few people over for dinner there is no reason not to set the mood with a festive centerpiece - and the mood is easier to create than you might think.

SUPPLIES
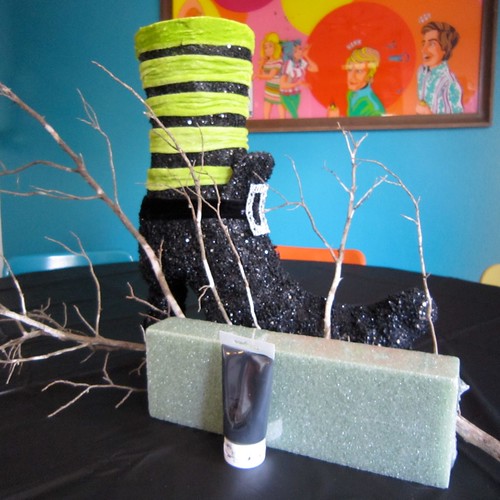
Vessel (I used a witches boot)
Florist Foam
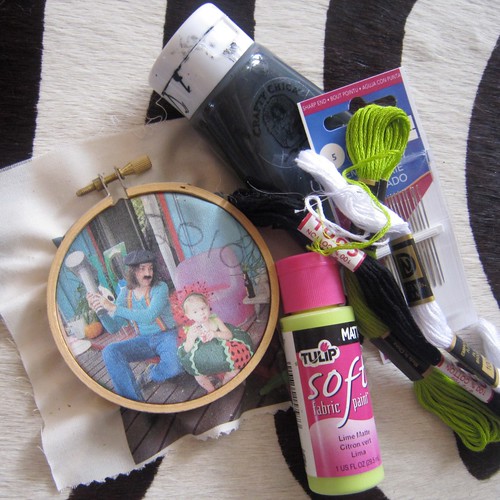
Crafty Chica Paint Pack
Scraggly Branch
Small Embroidery Hoop
Decorative Paper
Aleene's Tacky Glue
June Tailor Printer Fabric
Embroidery Floss
Decorative Ribbon
Embroidery Needle
Scissors
Small Christmas Ornaments
Paint Brush


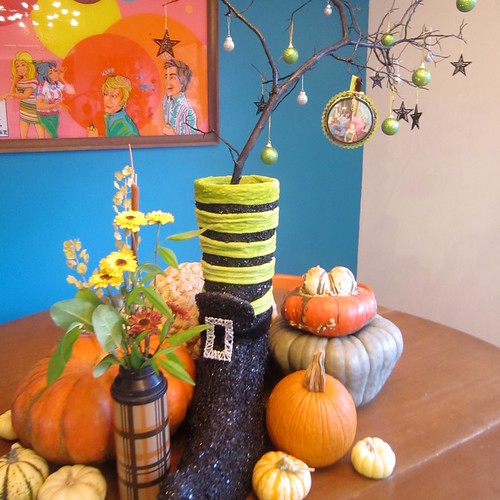
First things first you are going to need the perfect creepy branch. This was a harder task than I had envisioned. It was even brush pick up week in the neighborhood so everyone had their trees trimmed, but none of the branches I spied on my walks were quiet right. Luckily the fam and I took a stroll to a local park where I found the perfect dead branch.


Your other quest for this project is finding the right vessel. I discovered my giant witch's boot at TJ Maxx. You are going to need florist foam to stuff inside your vessel and hold your branch in place. You are also going to need to paint your branch black with Crafty Chica paint for the full creepy effect.


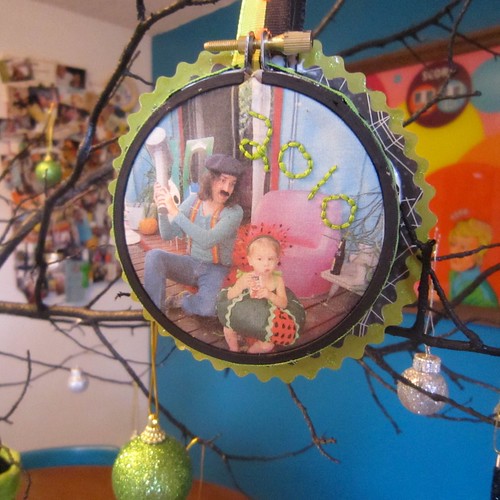
I was pleased as punch with the centerpiece at my party! I found some small Christmas ornaments in black, silver and lime green at Hobby Lobby and decked the halls. This week however I had an epiphany. People make keepsake Christmas ornaments, why not make one for Halloween?


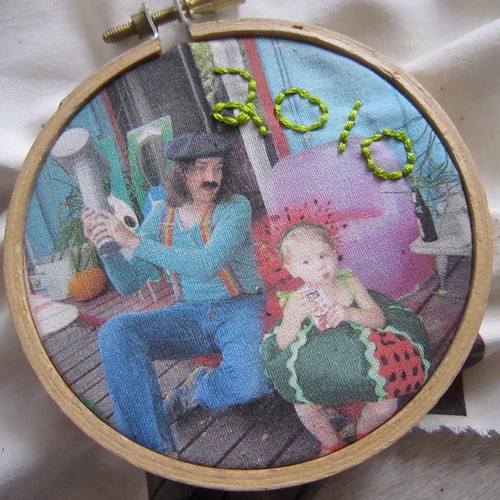
This year for Halloween Chris and Tallulah had a group costume. Chris was Gallagher, complete with Sledge-o-Matic and Tallulah was a squashed watermelon. I printed a picture of them up on fabric that goes through your printer. I wrote 2010 in pen on the fabric so I could embroider the year.


Using the wee-est of all wee embroidery hoops I could find I stretched my fabric and embroidered my 2010 using a simple back stitch.


After I was done embroidering I removed my photograph and set it to the side. Using Crafty Chica Paint in black I painted my wooden embroidery hoop. After the paint dried I trimmed the edge of the hoop with decorative ribbon using Aleene's Tacky Glue.


I made a back for my ornament using decorative paper and black craft felt. I attached a loop of ribbon so that I could hang my ornament from the tree.


Now all I need to do is make an ornament with a picture from Halloween 2009 and the tradition has begun!


Craft on!Click here for today's daily giveaway!

Thursday, September 30

Haunted Milk Carton House


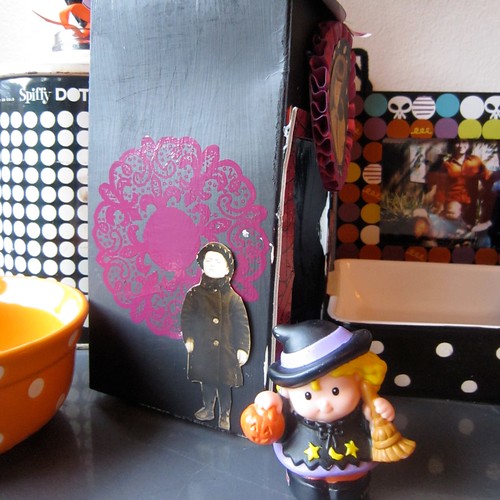
This summer I scored a large bag of Little People for my daughter at the thrift store. Included were animals, knights and Little People dressed in their Halloween costumes. Tallulah has plenty of fun playing with her Little People as is, but I thought why not kick it up a notch and start getting her in the Halloween spirit. We missed the recycling last week so I had cardboard milk cartons starting to pile up and it dawned on me what cute Haunted Houses they would make!


SUPPLIES
Cardboard Milk Carton
Scissors
Paint Brush
Crafty Chica Little Chica Paint Pack
Paint Brush
Sandpaper
Craft Knife
Aleene's Acid Free Tacky Glue
Hambly Overlay
Vintage Photographs
Scrap Booking Paper
Halloween Themed Chip Board
Trim


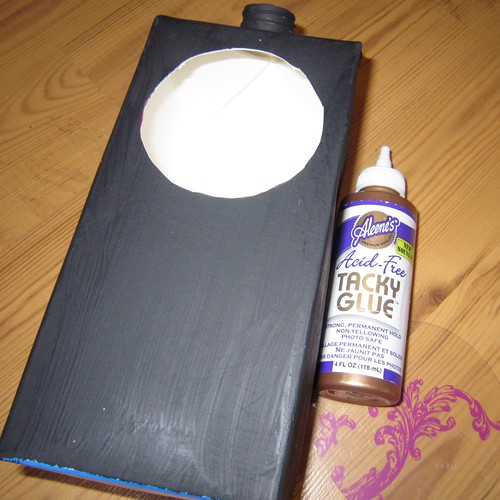
The first thing I needed to do was use sandpaper to get the waxy topcoat off of my milk carton so I could paint it black.


Every haunted house needs a door and a window so your Little People can go inside and play. I used a craft knife to cut out the shapes from my milk carton.


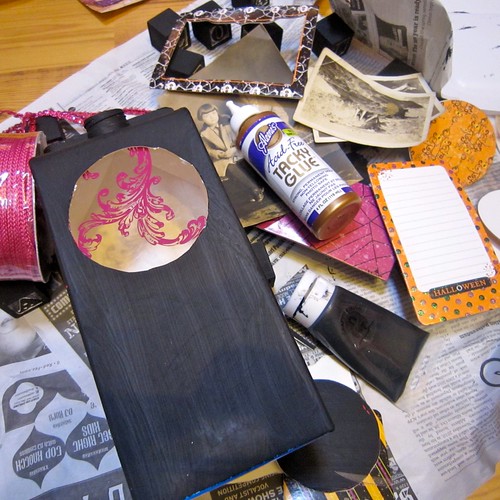
I decided to use Aleene's Tacky Glue to attach a piece of clear Hambly overlay inside my window. From here hot pink and black became my theme.


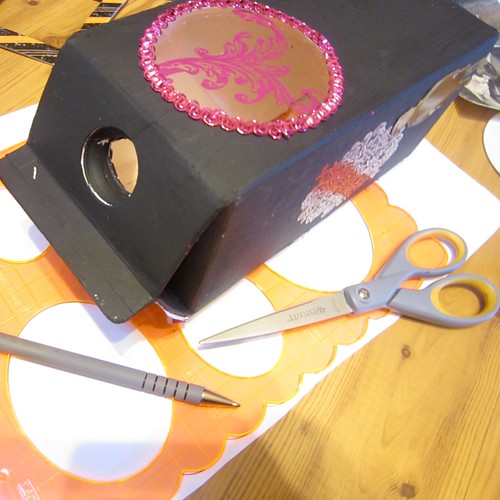
I decked out my window in sparkly pink trim for a little extra some-somethin'.


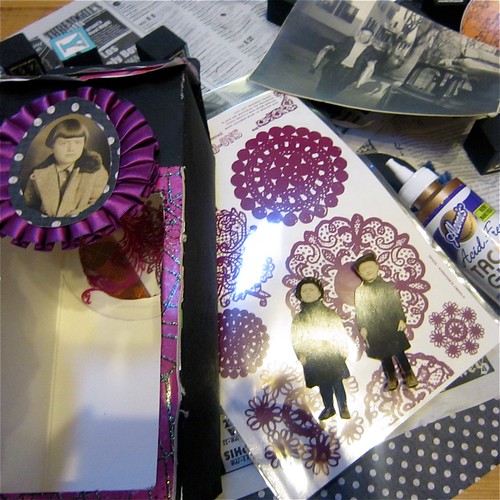
To keep up with the hot pink theme I used some Hambly rub-on's that look like doilies/spider webs on the sides of my haunted house. I used Aleene's Acid Free Tacky Glue to adhere some vintage photographs of children that were kinda creepy.


I used a scalloped edge template and scissors to cut out paper shingles for the roof of my haunted house. I used Aleene's Tacky Glue to attach alternating strips of paper.


I added a few last minute frills like chipboard around the door and a rosette with another creepy kid over the door.

Seems like a lot of work, but actually a milk carton was transformed into a creepy casa in a couple of hours and most of that was paint and glue drying time.


All that is left to do is bust out the Little People and the haunted house is ready for action!

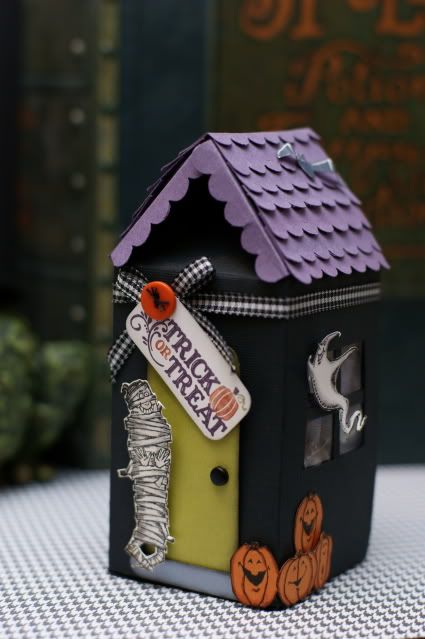
Have some extra milk cartons lying around? Check out these other crafty up-cycled options!

Halloween Cartons by Stampin Addicts


Halloween House by Little Lovely


Haunted Milk Carton by The Little Room

Craft on!Click here for today's daily giveaway!
Clicky Web Analytics
Pin It button on image hover

Subscribe to our newsletter

* indicates required
I am interested in products and inspiration for...
Close