Showing posts with label t-shirt. Show all posts

Saturday, July 25

Dollar Store Craft: Geometric Collar T-shirt DIY

Dollar Store Craft: Geometric Collar T-shirt DIY - super easy to make with foam stickers and fabric spray paint

I recently watched a movie set in ancient Egypt, and I was inspired by all the gorgeous collar necklaces made of heavy metal chainwork and embellished with precious stones. I used some geometric foam stickers (find them at the dollar store!) to help me create an Egyptian-inspired t-shirt, which I was able to make in just minutes using gold Tulip Color Shot fabric spray paint.

Dollar Store Craft: Geometric Collar T-shirt DIY - super easy to make with foam stickers and fabric spray paint

Thursday, May 21

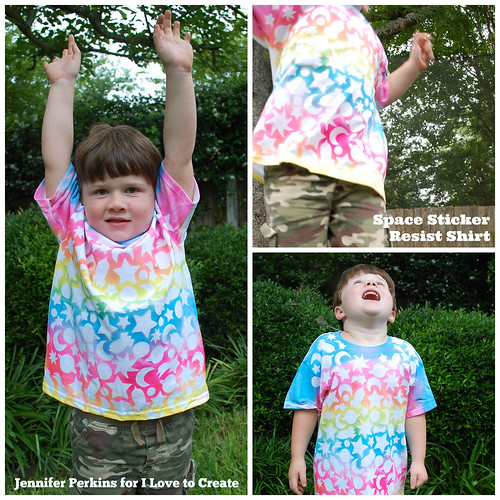
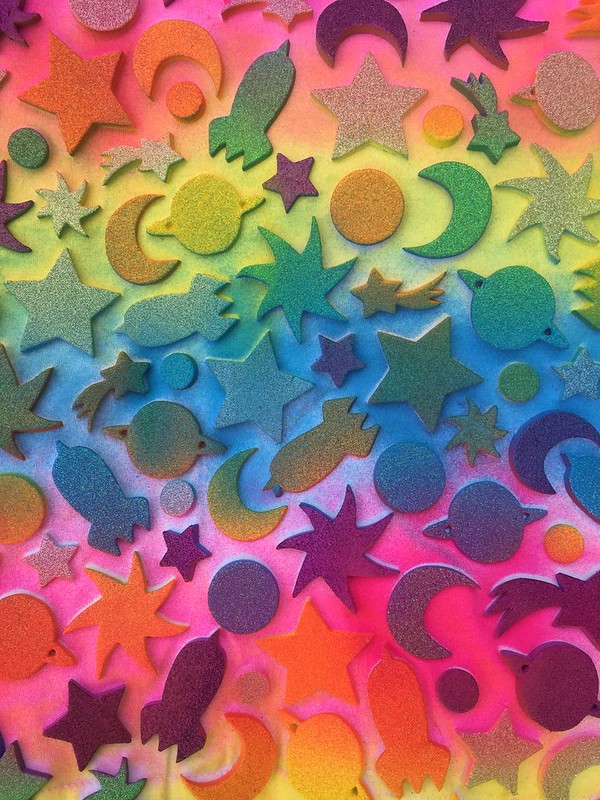
Space Sticker Resist ColorShot Shirts


I am pretty smitten with the new Tulip Color Shot line. Sure I work for them, but really - the colors are so vibrant, the paint goes on so dreamy and well it's spray color. There is nothing to mix or paint, just spray and go. I have a feeling by the end of the summer not much in my wardrobe will be safe from the spray. Look how bright and neon those colors are, I mean come on!

Saturday, February 14

No-Sew Vest T-shirt: New Life for Old Clothes!

Give new life to old kids' clothes -- No-sew Vest T-shirt

As the mom of four boys, I know how quickly kids can stain, rip, or otherwise destroy their clothes. But just because it's stained or holey doesn't mean you can't remake a clothing item into a great new piece! Combine two or more old pieces to help build a brand new t-shirt. You don't even have to know how to sew.

I took a too-small vest and combined it with a colorful t-shirt to make a new wardrobe staple that I love. Just how easy is it to make this stylin' DIY vest t-shirt?


Saturday, January 31

No-Sew Owl Applique T-shirt


I love the look of fabric applique, but I just don't have time to painstakingly sew an applique to a t-shirt. Aleene's Fabric Fusion to the rescue! I used it to glue an adorable owl print applique on some t-shirts for my son, and it was so quick and easy I just had to share with you!
http://dollarstorecrafts.com

Monday, July 7

Cool Hues Shibori Top


I discovered shibori completely by accident. I was browsing a department store and saw a fun shirt with a really interesting pattern and was told that the method used was probably shibori. So I did some searching and found that it's an ancient Japanese resist method that basically involves scrunching, twisting, folding and/or mashing a fabric and then dying it. There are several ways to do it and the results, as with any tie dye, are different every time.


Thursday, May 15

Food Allergy Awareness Week - Your the Sunbutter to my Jelly T-shirt

This week is Food Allergy Awareness Week. Unlike, say, Valentine's Day or the Fourth of July, this holiday (if I can call it that), which affects 15 million Americans, does not have many crafts associated with it. My son Baxter is one of those 15 million. Crafts help bring awareness to a holiday or event. I've decided to make it my mission to make more crafts related to food allergies. My little man Bax is the Sunbutter to my jelly, and I wanted to make him a shirt to say it loud and proud!

Sunday, September 8

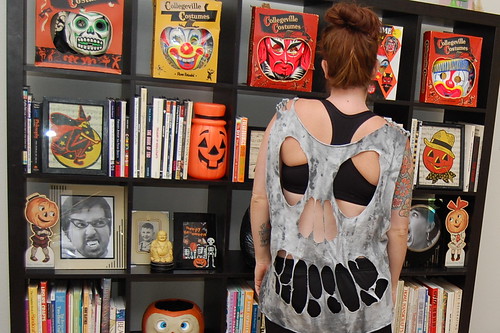
DIY Skeleton T-Shirt


I have waited as long as I can stand. It's time to start the Halloween crafting. I spent the summer doing demos for I Love to Create across Austin tie-dying shirts. I'm a bit of a pro now. Anywhoo, I have several large T-shirts lefts. I have been dying, cutting, revamping and more. My latest creation - a skull T-shirt. Lemme show you how easy and cute this T-shirt is.

Monday, August 12

Strapless, No-Sew T-shirt #2, DIY


Happy Monday to you all.
 I am trying to squeeze every last moment I can out of Summer,
so I have been experimenting with a few strapless no sews over the last week.
When you add a little Tulip Gold- Glitter Fabric Paint  
 you have your very own unique creation.
I hope you have as much fun making this top  as much as I did.

Tuesday, January 1

Squirrel T-shirt

I have a sister who we like to tease because she's seriously afraid of squirrels.  You know...the cute cuddly animals that won't even let you get near them?  Yeah, those.  So she receives a lot of squirrel stuff from the family.

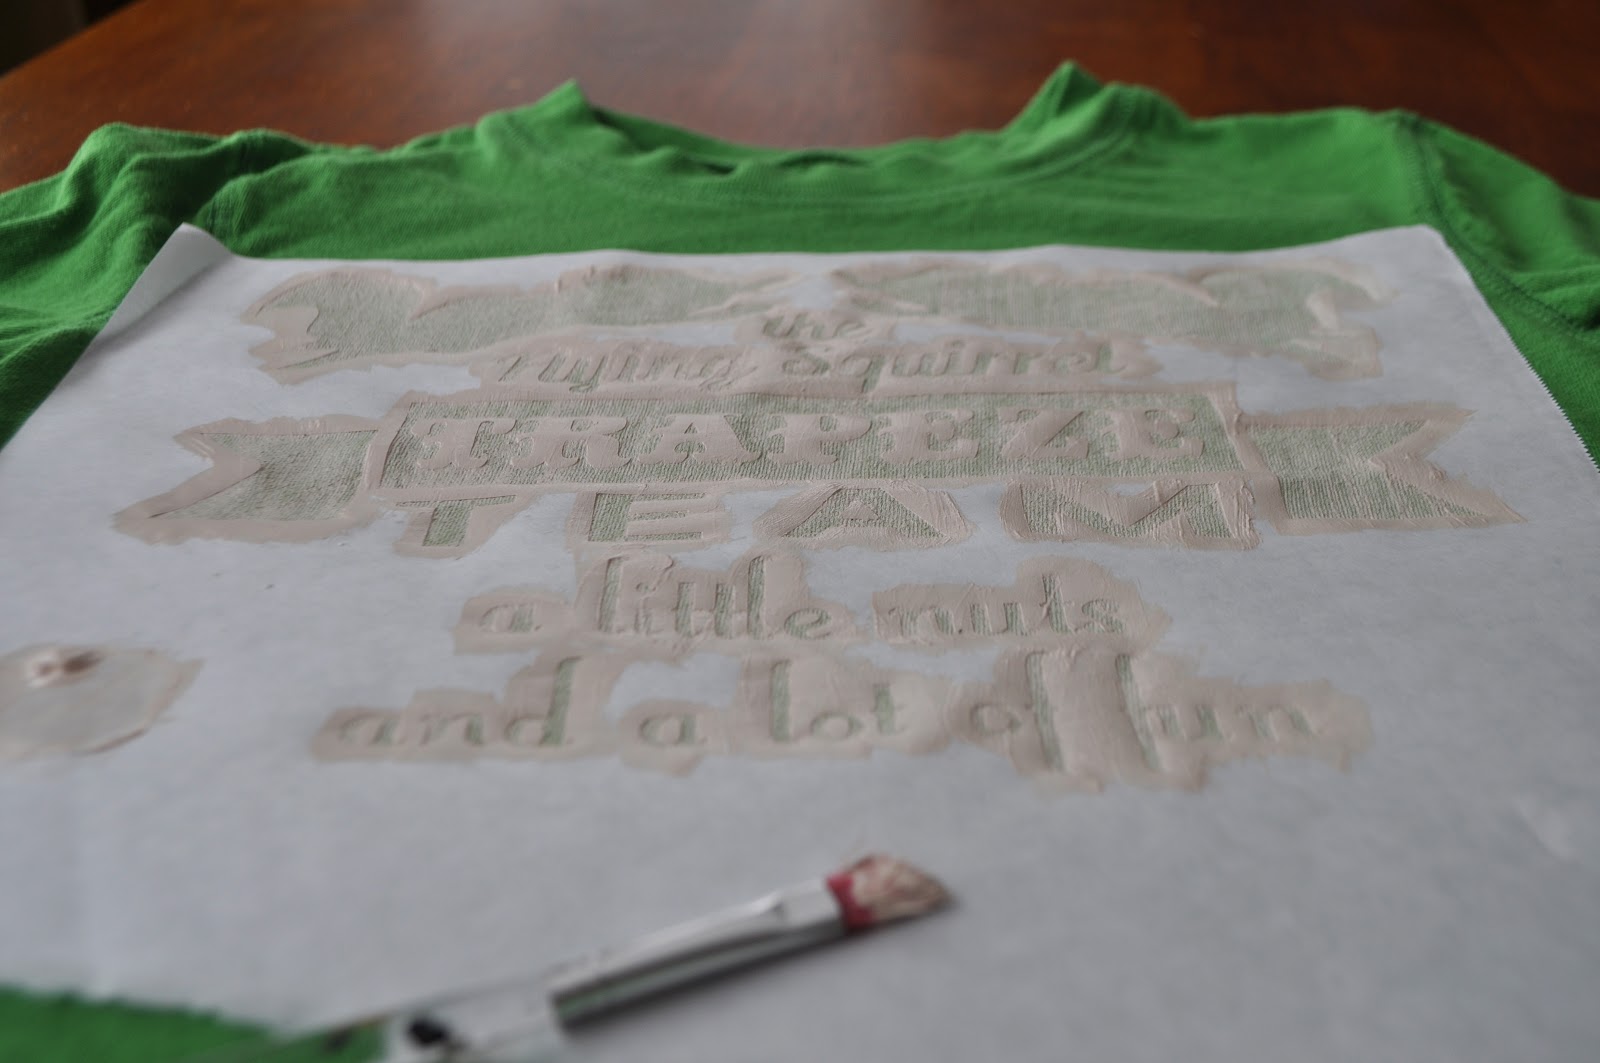
I designed this t-shirt to make some for my boys and hers.  The boys get pretty squirrely when they are together, so why not the Flying Squirrel Trapeze Team?  


Because this design was pretty intricate I used my cutting machine (the Silhouette) to cut it.  Had it been a simple design I would just use an exacto knife to cut the freezer paper.  I ironed the paper to the shirt to make it seal.  (If you haven't tried freezer paper stenciling you can find a video tutorial I made of it HERE.)


I used the Tulip soft fabric paint, which is my favorite.  I painted it with two coats and removed the paper.


I placed a sheet over the shirt when it was dry and ironed it to heat set the paint.  And my son is ready to tease his aunt.


I love making shirts that don't look homemade.  It's inexpensive and easy and my boys love having something personalized for them.

Tuesday, October 9

the "All By Myself" Tee - part 2

Due to the great response on the original "All By Myself Tee," I thought I'd show you a different version that's just as easy for kids to make.  My kids are getting a little older and more than having me make something for them, their greatest thrill is when I let them make something for themselves.  This one even my three-year-old was able  to do.


We got some blank tees and I got out some painter's tape.  I taped diagonal lines on both shirts as shown.  I even extended the tape a little so that the actual was taped to the table.  That way it wouldn't shift on them if they got a little aggressive with the paintbrush :)


Then I got out a plate of Tulip fabric paint for each boy.  I picked colors they liked, but also ones that I thought would work well on the shirt they had.  Then I let them go for it.  


They actually did pretty well.  The paint went under the tape in a couple little spots, but the overall t-shirt design lends itself to that messy skater look.  The boys also mixed colors as they painted, which turned out really cool.  It's funny how they are so unlimited in their design process as kids.  They just have fun.  If their paint was really blotchy I smoothed it over for them, but other than that they did it themselves.


I think their favorite part was taking off the tape.  Then they begged to try on the shirts.  We got out a blowdryer to speed up the dry time.  


And they were pretty impressed with themselves.


This is how they roll.


And that's a wrap.


Tuesday, June 5

All By Myself Tee

My young kids see me craft a lot and they like to get in on it as well.  However, I obviously can't let them do everything I'm doing.  "Yeah, grab that steaming glue gun.  Sure you can paint the walls like Mommy!  Want to try the sewing machine?"  It just doesn't work that way.

And sometimes it can even be hard to let go of my inner-control freak and let them do things the way they want to.  Anyone with me?  Yes?  Okay, so here's the perfect project to let little ones do with you or all by themselves.  Why?  Because you can't mess this t-shirt up.  It's meant to look messy.


Here's how it went down.  I cut a stencil of a large number 5 from freezer paper because that's how old my oldest is going to be next month.  (FYI: You don't need a cutting machine for this.  This would take less than 5 minutes to do this by hand.)

I ironed the paper on.  (Video tutorial for freezer paper stenciling HERE.) Then I got out my Tulip fabric paint and my big phat fabric markers.  I also got out some bubble wrap to use like a stamp.  


I let my son and his cute cousin go for it and I joined in too.  It was pretty fun.


We used these big phat markers like stamps to get a checkered pattern.  My nephew filled in the holes with red paint, which I thought ended up looking really cool.


Here's what it looked like when we were done painting it.


My favorite part is always removing the freezer paper stenciling.  You can see the bubble wrap stamping, the checkered pattern of stamping the markers, and a lot of random painting on the shirt.


So if your kids are out of school and looking for a project, cut a stencil and let them go for it.


Tuesday, October 26

Glow-in-the-Dark Ghoulish Tee


Here's a last-minute Halloween costume that easily transitions from day to night! Wear the T-shirt casually by day in all the sunny places, then skulk in the shadows at night and you'll take on an eerie glow. (A dark-colored tee ensures that the glow will be all the more dramatic.)

Materials:

-A plain T-shirt

-Scrap paper

-Sponge brush

-Tulip Neon Glow-in-the-Dark Paint in "Natural Glow"

-Black permanent marker (optional, for the stencil)

-Freezer or parchment paper (optional, for the stencil)

-Scissors (optional, for the stencil)


Make it:

1. Draw the outline of a skull (teeth, nasal cavities, eye sockets) on the stencil paper, then cut out the pieces. Insert a piece of scrap paper (like a paper grocery bag) between the layers of the T-shirt and lay it flat. Lay the stencil over the front of the shirt. (Note: If you're feeling brave, skip the stencil and freehand the design on the shirt.)


2. Squeeze out some glow-in-the-dark paint and generously sponge it onto the front of the T-shirt.


3. Cover the whole design evenly!


4. Peel off the stencil and let the paint dry completely.


5. Then slide out the scrap paper from between the layers and wriggle yourself in there instead. In other words, try on you shirt and find the light! (And pack a flashlight in order to recharge as needed throughout the witching hours.) I tried to take a cool picture of the glowing shirt in the dark, but alas, it proved too challenging for my weakling camera. But it looks SO ghoulishly good.


Craft on! Click here for today's daily giveaway!

Tuesday, September 21

T-shirt Covered Notebooks


Back-to-school means fall fashion and outerwear in some circles, but here, we're talking about the style inside your backpack. Take those old worn-out T-shirts languishing in the bottom of your dresser drawers and put them to work!


Materials:
-Old T-shirt
-Scissors
-Composition notebook or sketchbook
-Aleene's Super Thick Tacky Glue
-Squeegee-like hand applicator


Make it:

1. Lay the notebook open on the T-shirt (preferably over the logo or design you'd like to feature). Cut through one layer of the T-shirt, about 2" outside the edge of the notebook.


2. Lay the T-shirt panel face down on your work surface. Apply glue liberally to the cover of the composition notebook.


3. Spread the glue evenly across the cover. Be sure to reach the edges, but avoid getting any glue on the pages!


4. Fold the T-shirt fabric over the front cover and press it evenly into the glue.


5. Flip the notebook over and spread glue over the spine and the back cover. Then pull the remaining T-shirt fabric over the back cover, smoothing any wrinkles. Let it dry flat.


6.
Trim the excess fabric to the edges of the notebook cover. With glue, touch up any edges that are pulling away from the fabric.


7. Repeat with tie-dye T-shirts, old concert shirts, your favorite (but threadbare) sports jerseys, and so on...until your notebooks and sketchbooks are as stylin' as the person who carries them!


Variation: If you don't have that perfect T-shirt with the perfect text on it (like the Dancil-McGriff Family Reunion "Fun in the Sun" from August 31, 1999 that I found at a thrift store in Florida), make your own! Use iron-on letters to express whatever sentiment you're feeling. Announce your alliance to a particular sports team, school subject, or just claim it as your own by spelling your name across the front.

Craft on! Click here for today's daily giveaway!
Clicky Web Analytics
Pin It button on image hover

Subscribe to our newsletter

* indicates required
I am interested in products and inspiration for...
Close