Showing posts with label tulip fashion glitter bond. Show all posts

Tuesday, January 13

Sweatshirt Sequin Bolero.


I have had this left over piece of a sweatshirt 
from a previous project just sitting in my scrap bin for about 8 months.
I am the very worst at throwing left over pieces away,
 I always want to  recycle them.
I have been on the look out for little 
boleros to keep my shoulders and arms warm. 
I thought this would be perfect project.
Come and see how easy it is to make.

Thursday, December 11

DIY Glitter Ring


Add a pop of color to your hands with this simple and fun to make Glitter Ring DIY. With so many fun glitter colors to choose from you can make one in every color. They’d be perfect gifts for the holidays or a fun project to make with friends. Let’s get started!

Monday, December 8

DIY Glitter Earrings


This is a super fun and fast project with lots of sparkle for the holidays. These DIY Glitter Earrings add tons of sparkle and are so easy to make you’ll want them in every color. I’m using Tulip’s Fashion Glitter kit and Glitter Bond to make these you’re going to love this project. Let’s get started!

Sunday, December 7

Glittered Skinny Belts

header-glitter-belts 
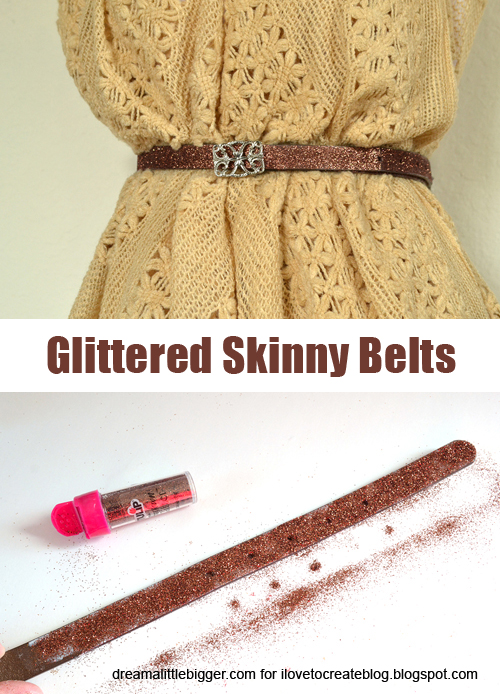
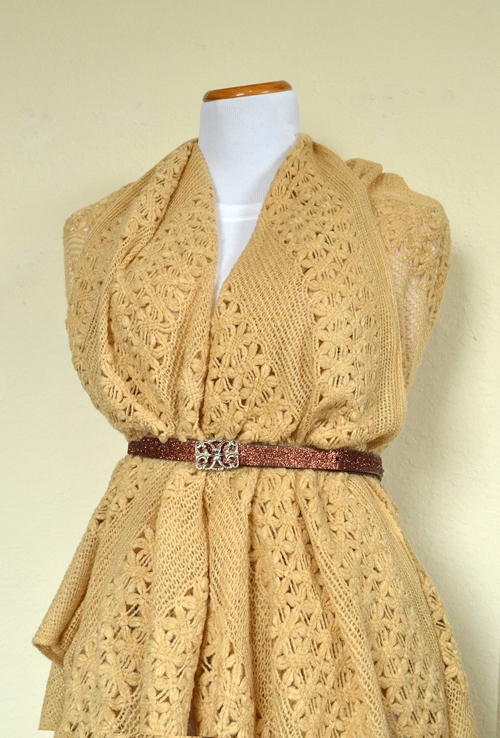
Sometimes I want to add a quick and low budget bit of pop to an outfit. Loving my over-sized throw-like cardigan, I thought it would be nice to cinch it with a skinny belt for a more fitted look. And then it seemed only right to toss in a bit of glitter as well!
For this project you will need:
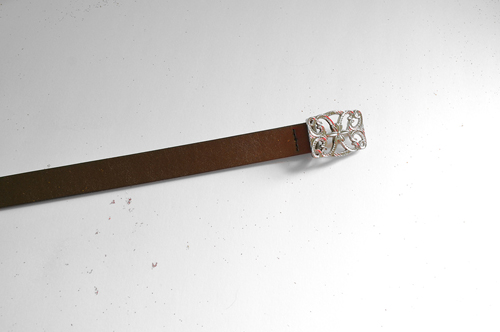
Skinny belts

002-glitter-belts 
I love this skinny belt. It's plain and brown, which isn't bad in and of itself but it has a fabulous buckle!

010-glitter-belts 
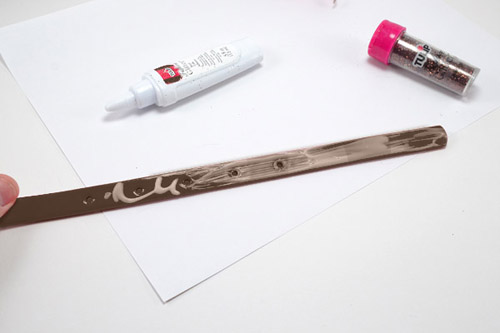
To update simply apply your glitter bond...

001-glitter-belts 
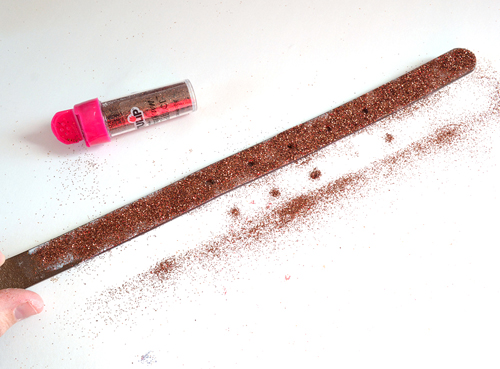
Sprinkle glitter liberally over a piece of paper to easily collect and return the stray glitter back into your tube.

006-glitter-belts 
Allow to dry and rock it out!

003-glitter-belts
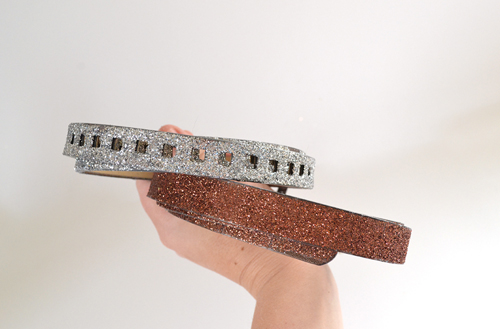
I decided to go brown glitter on my brown belt to keep things kind of sedate, but on my belt with square cut outs thought SILVER was the way to go for an edgier look!

All in all, this project took about 5 minutes. The hardest part was waiting for my belts to dry!

For more fun projects, I hope you'll visit me at Dream a Little Bigger!

Wednesday, March 12

Gold Dipped Glitter Clutch


A black clutch should be a staple in every girls wardrobe, but no one ever said that staples had to be boring, did they? This gold dipped glitter clutch is definitely not boring, but I would still consider it a staple. It is functional and fabulous at the same time; Perfect for everyday use as well as a night out on the town.

Tuesday, December 24

Geometric Glitter Heels DIY

I was challenged to glam up a pair of plain black heels for New Year's, 
so I took them to the extreme with some glitter and tape! They turned out so fun, sparkly, and one-of-a-kind!  Here's how you can get the look in just a few minutes!

Tuesday, October 8

Glitter Bones and Heart Tee.

 I LOVE this time of year.
 When I was young I could not wait to come up with a costume to Trick or Treat in from things I just had laying around the house. Now that I am all grown up I still feel like a little kid when October rolls around. It brings back such awesome memories. I wanted to make a shirt that I could wear even after the month of October. So the Glitter Bones Shirt was created.

Tuesday, May 3

Glitter-toed Flats

Have you seen those glittery heels that are popular right now?  While they are SO cute and very glamorous, they just aren't something I'd get to wear a whole lot.  I spotted THESE shoes the other day and I thought they were adorable.  So, I decided to marry the two and make some glitter-toed sparkley shoes for myself.  They are casual enough for jeans and dressy enough for a dress.  They were fast and easy to make, too. 


I bought some inexpensive black flats.


I taped off the area I wanted to add glitter to. I used painter's tape.


 I spread over the Tulip Glitter Bond and then sprinkled on my Tulip Fashion Glitter.


I peeled off the tape and voila!  They were done.


I think it would be fun to make some bolder ones for a little girl - like purple with bright kelly green toes or something kind of wild.


Tuesday, April 5

Glitter Team T-shirts

Do you remember the days of elementary school?  Remember how you'd be put in teams and how you'd have to come up with your team name?  "Let's be the Tigers!"  "No, that's a dumb name!  How about the Princesses?"  "No way!"  Finally you combined the first letter of each person's name to form the team name...which formed a weird word, but everyone was happy.  Right?

Well my sister called me the other day and asked me to make team shirts for her daughter's Battle of the Books team.  Their name?  "JAMMZ"  I had to giggle a bit.  With an all-girl team I got to do something a little girly.  Here's what I came up with.  See how the frame with the owl is on a different letter on each shirt?  That way the girl wears the shirt that frames the first letter of her name.


It's hard to tell from the picture, but the frame is glitter.  I made freezer paper stencils for each shirt.  If you haven't tried that yet, you can find my video tutorial HERE.  It worked really well for the glitter too. 

I wanted to do something with the unused part of the stencil, so I made a little glitter owl onesie too.


Here's the process of freezer paper stenciling with glitter.  I used Tulip Fashion Glitter and Tulip Fashion Glitter Bond.  I ironed on the stencil first and got my supplies ready.


I used the sponge to apply the glitter bond.  I applied a medium coat of it - not too thin and not too thick.


Then I spread the glitter over the top.  I pressed the glitter into the glue a little bit with my finger and then I peeled off the stencil carefully while it was still wet.  I did this over the garbage to make clean up a bit easier. The glitter worked well and was really fun to use.


Tips: I would probably chose a bigger graphic with less detail next time.  The tiny owl was a bit tricky.  The instructions say the shirt shouldn't be washed for 72 hours.  If you want to wear it before then I recommend using a little scotch tape to remove the little bits of glitter around your design.  It's easier than trying to pick or shake it off.


Now I have a cute little onesie ready for a baby gift....


.....and a team of giddy girls ready to win their competition.


Clicky Web Analytics
Pin It button on image hover

Subscribe to our newsletter

* indicates required
I am interested in products and inspiration for...
Close