

 Teen Crafty Rockstar Necklace copyright Margot Potter for iLoveToCreate
by Margot Potter
"Mom Crafted, Teen Approved."
Fall is upon us and winter isn’t far behind. I was thinking about fall friendly jewelry for teens and this idea popped into my head. I love the unexpected addition of soft blue with the traditional fall colors. You could easily make this same idea in other color palettes, but I really liked these earthy tones. My daughter Avalon thought this was super cool, and I trust her sense of teen style implicitly. And just for the record, I’d sport this myself in a hot second...in fact I may just sport it today!
Think about this for Christmas with holiday themed charms and papers...
...I’m just sayin’!
Materials
Traci Bautista’s Collage Pauge Glossy
Aleene’s Liquid Fusion Glue
Crafty Chica Little Paint Pack Paints Red and Yellow
3 Tim Holtz Acrylic Fragments charms
Die Cuts With a View The Rockstar Stack
8 frosted orange Lucite leaves (The Beadin' Path)
5 frosted green Lucite leaves (The Beadin' Path)
8 8mm olive green moonglow vintage Lucite rounds (The Beadin' Path)
2 frosted orange Lucite flowers (The Beadin' Path)
6 6mm cracked blue Czech glass rounds
Silver plated rolo chain
Silver plated swivel lobster
13 silver plated head pins
3 10mm silver plated jump rings
21 6mm silver plated jump rings
Flourish stamp
Tools
2 pairs chain nose pliers
Round nose pliers
Wire cutters
Foam brush
Paint brush
Pen or pencil for tracing shapes

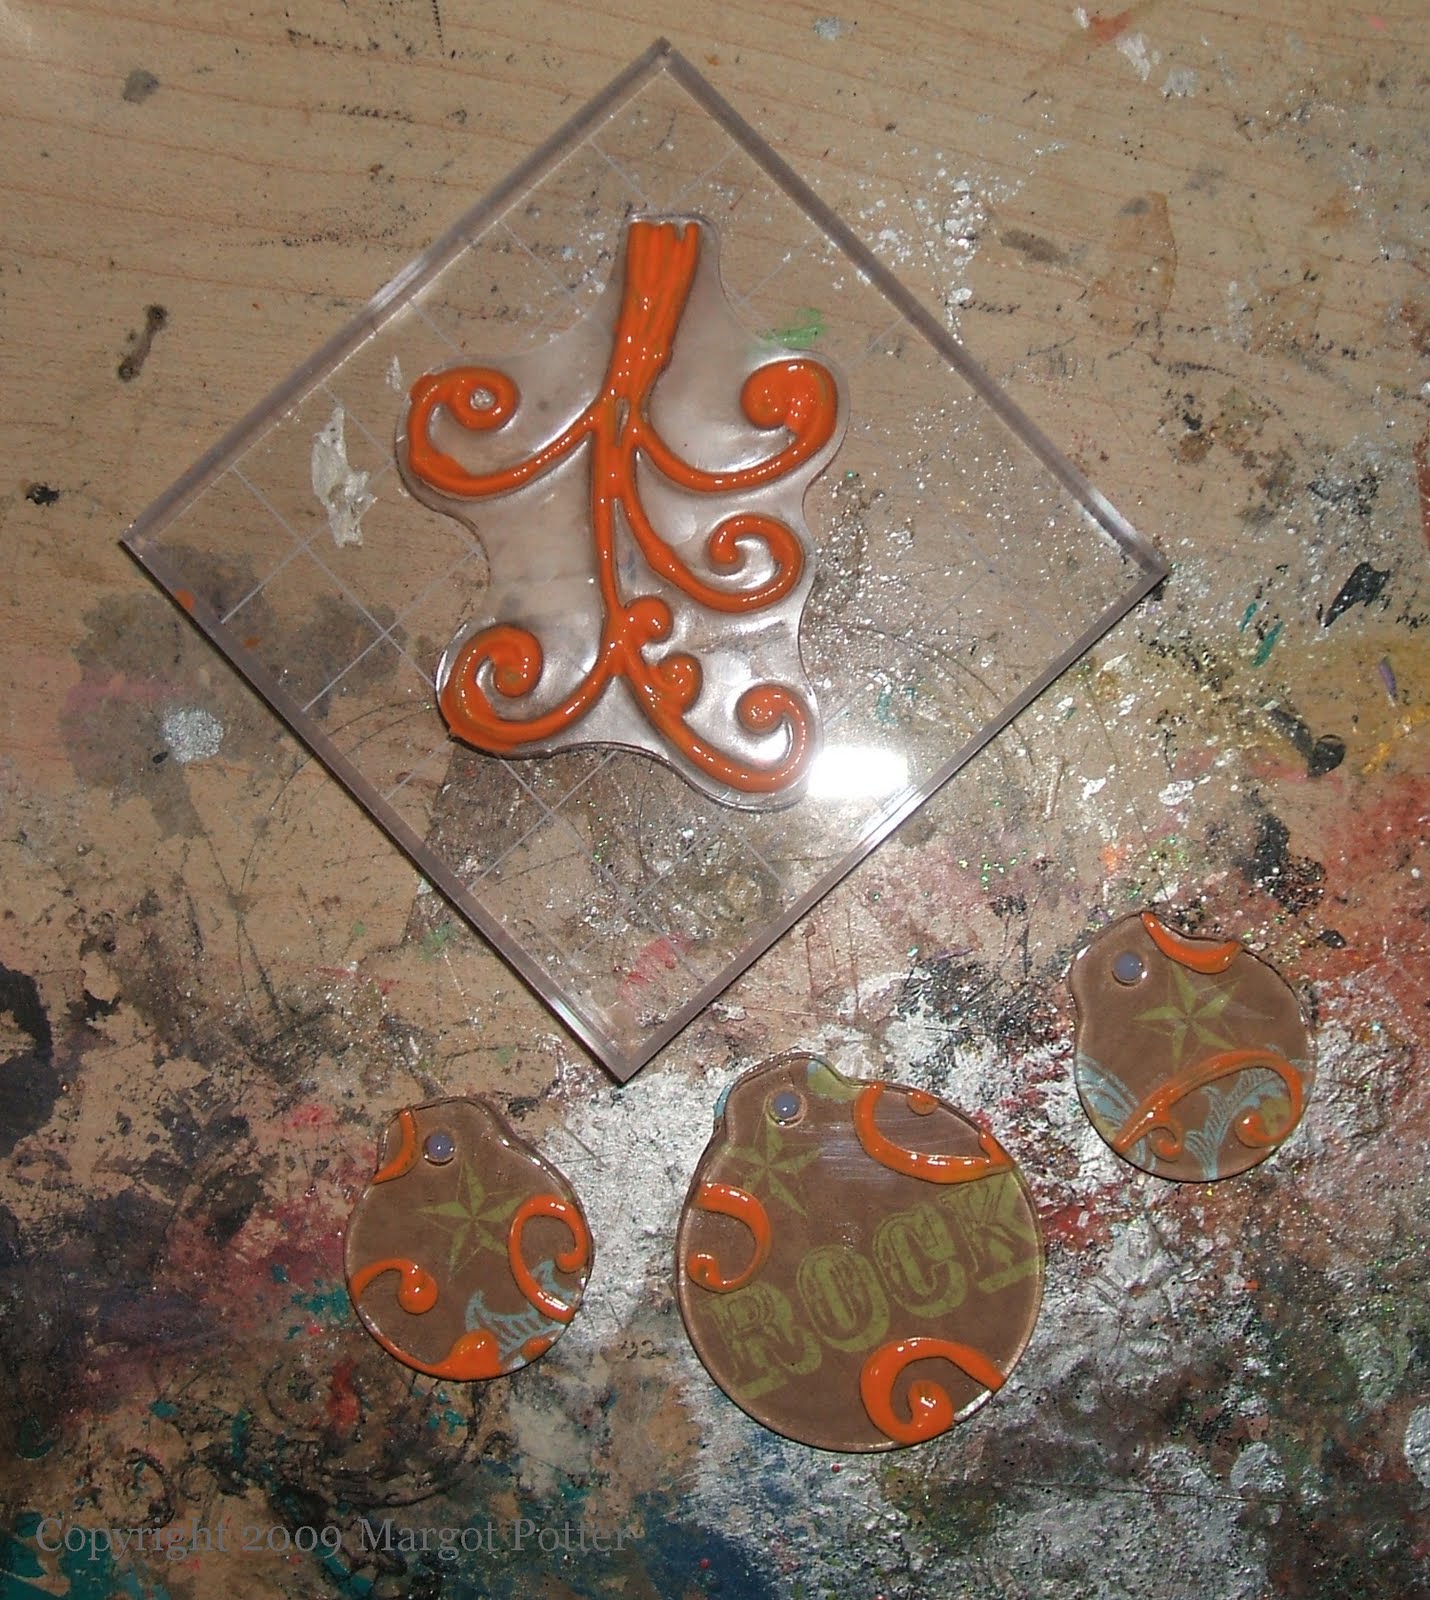
Place pendent over segment of paper you desire and trace. Repeat for all three pendants.
Cut out papers. Spread a thin layer of Collage Pauge on pendants and adhere paper. Gently press on the back to remove any air bubbles. Paint collage pauge on back of tile. Allow this to dry for several hours.
Mix a small amount of red and a much larger amount of yellow Crafty Chica paints to create a warm pumpkin orange. Stamp into paint and stamp flourish on edges of your pendants. Allow to dry.
Attach an orange flower and a blue bead on to the top left corner of the largest pendant using Liquid Fusion. Allow to dry.
Create coil topped dangles for your blue and green round beads. Thread a blue bead, a flower and a green leaf on a head pin, then coil the back and bend it flush to the back of the leaf to create a small pendant for the back of your chain. (See this video for a quick and easy head pin coiling how to!)

Attach the largest pendant to the center of an 18” length of rolo chain using a 10mm jump ring. Move over 4 links and begin to attach elements on every other link using 6mm jump rings for beads and leaves and 10mm jump rings for the pendants, make sure they’re all falling to the bottom of your chain. The pattern on both sides is: orange leaf, green bead, green leaf with blue bead, green bead, orange leaf, pendant and the same pattern established in the first section of beads and leaves. (For a quick and easy tutorial on opening and closing jump rings see this video how to!)
Attach a lobster clasp to one end of your chain using a 6mm jump ring. Attach the flower pendant you created to the opposite end using a 6mm jump ring.
(Most of the products used in this design were donated for promotional purposes with the exception of the scrapbook paper and the rubber stamp.)
2 comments:
Perhaps words will be small for it you know why because this is very beautiful and i like it.
silver jewelry exporters
If you don't work with your hands or you don't think you'll damage the ring then you make want to consider some of the more precious metals available. White gold, yellow gold, platinum, and palladium offer a much richer look than the hard metals. Vintage Engagement Rings
Post a Comment