Showing posts with label cinco de mayo crafts. Show all posts

Friday, May 3

DIY Mexican Painted Planters


It's Cinco de Mayo weekend and I know there is a lot of sombrero and chili pepper crafting going on, so I thought it was my duty to up the ante a bit and show a new side to Mexi-themed party decor! (I refuse to do sombreros and chili peppers for personal reasons, lol) How about learning to paint your own Mexican-style pottery?
 
Here at iLTC, we have a whole wall filled with shelves of blank bisque. This week I came across these wall planters that reminded me of Ensenada, Mexico. They had amazing, beautiful designs like this:
I decided to try my hand at the planters and give them my own spin! Here is what you need:
Pencil
Eraser
(carbon paper if you want to trace designs)
Duncan Blank bisque: 31531 Teardrop Wall Planter (you can ask your local paint on pottery store to order for you!)
Duncan® Cover-Coat® Opaque Underglazes or Duncan Concepts Underglazes
Red, blue, white, green, yellow, orange, teal, purple.
Duncan® French Dimensions™
Pure Brilliance® Clear Glaze
Assorted brushes
Fan brush or sea sponge

Draw your designs on the bisque. Don't worry, the pencil will burn off when you fire. Erase if needed. This is to get your design down, so you know where you want to apply the paint. I ALWAYS sketch my design first, it makes the process so much easier!

Once your base is completely covered with your paint, let it dry. For a traditional look, you'll want to add thin white lines to outline. I skipped that part because I wanted to give it my own spin!


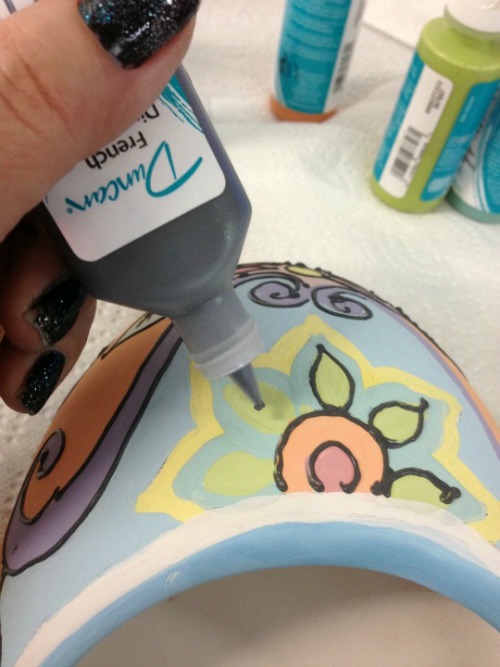
Time to break out the French Dimensions, this is my favorite part! It's like Puffy Paint for ceramics! Make sure the liquid flows easily from the tip, otherwise your hand will cramp from squeezing. I always knead my bottle before I open it and turn it upside down and tap, tap, tap, so the paint goes to the top of the bottle.

Outline everything in black! In the picture above, the photo on the left is the paint dry, and the photo on the right is of the paint still wet. It will look super matte when it is dry, but will fire to be super colorful and brilliant!

Once it is all dry, you'll want to coat it in glaze. This will make it super shiny and bold. TIP: I ONLY use a fan brush or a sea sponge to blot onthe glaze, otherwise the paint can smear and you'll cry because your work will be ruined!


Here are my pieces, glazed and in the kiln! fire at cone 06, if you glazed the back of the pieces, make sure to add stilts!


Thursday, May 2

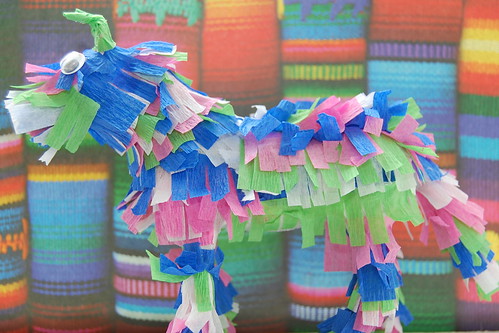
Decorating for Cinco de Mayo - Make Your Own Pinata Figurine


Mother's Day might be right around the corner, but let's not forget about Cinco de Mayo this weekend. You gotta admit Cinco de Mayo is more fun to craft for. Come on, who does not want to make colorful donkey pinata figurines?

The current issue of Kids Crafts 1-2-3 has a couple of cute Cinco de Mayo themed projects. There is a even a free pinata necklace project on our website. Last year I made the kids matching pinata appliqued shirts. This year I wanted to go with the donkey theme, but until I remembered the giant box of spray painted plastic toys in my garage I was not sure what it would be. Then after a trip down the party aisle this morning it all came together.

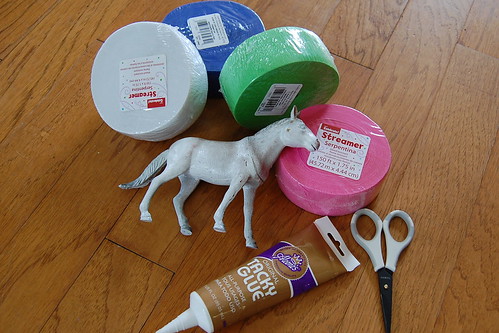
SUPPLIES

Aleene's Tacky Glue

Toy Horse

Scissors

Streamers

Googly Eyes

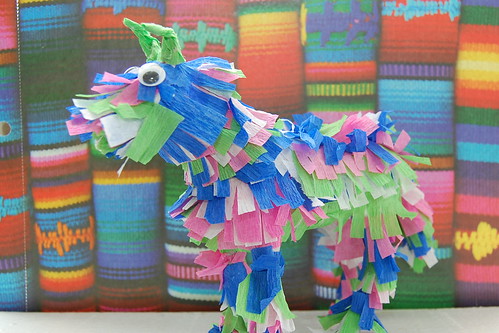
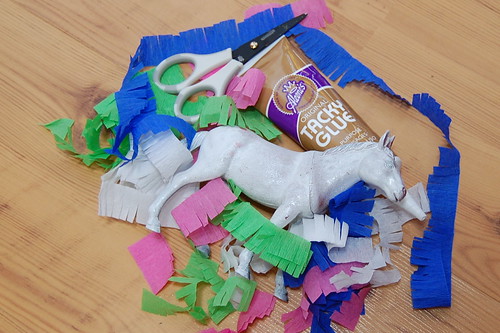
I cut my streamers into lengths of about 1". From there I folded the streamers and made them fringed.

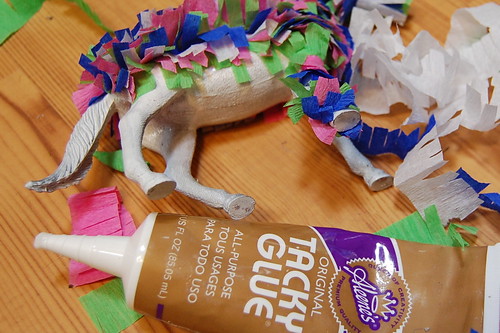
Bit by bit I would smear Tacky Glue onto the horse and add strips of streamers. I did the head, tail and legs last. Oh and be sure to make some pointy ears.

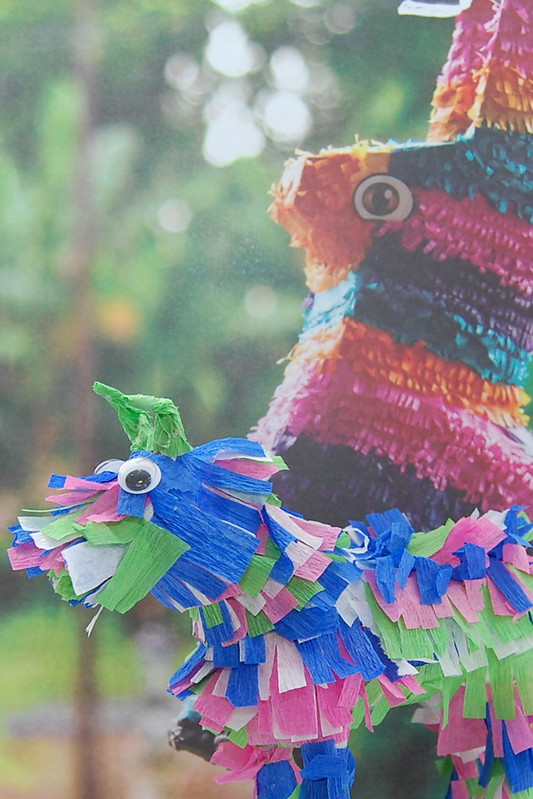
Next I added googly eyes with Tacky Glue.

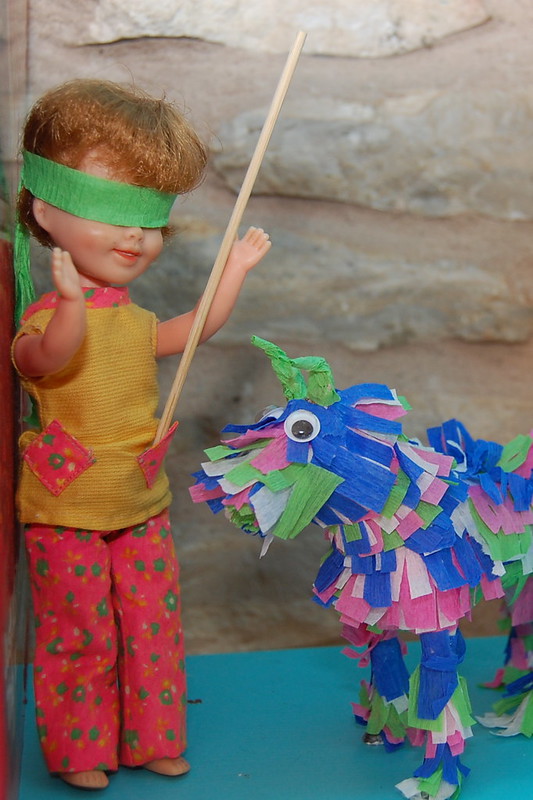
I'm pretty smitten with how he turned out. I'm bringing a batch of margarita cupcakes to a Cinco de Mayo party this weekend and thinking my new fringed friend would make a great centerpiece.

Then again I kinda like the way this set-up looks on my shelf so maybe I will keep it for myself.

Wednesday, May 1

CINCO CHIC: Mariachi-Inspired Jeans!

Cinco de Mayo is right around the corner and if you're like me, (underage, although I probably wouldn't drink..I'd eat tacos), it's a great time to celebrate all things south-of-the-border. I was just in Mexico a couple weeks ago and loved watching the mariachis perform, I especially love their outlandish outfits. I came across this picture and loved the fashionable twist. I decided to make my own version!

Supplies:
Jeans, preferably black
White pompom fringe

Measure out how much trim you'll need to go down the length of your leg, don't forget you'll need a strip for both legs!

Add a line of glue down the length of the outer pant seam and place the trim in place. Use clothespins to hold it while the glue dries.

This is when I called in my dad to help! Use the Tulip 3D paint to add mariachi-style swirls around the pockets and seams! Be outlandish, it's Cinco de Mayo!


Thursday, May 3

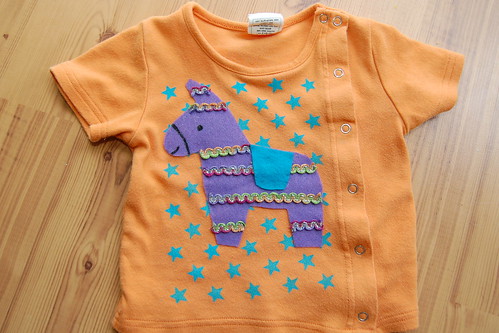
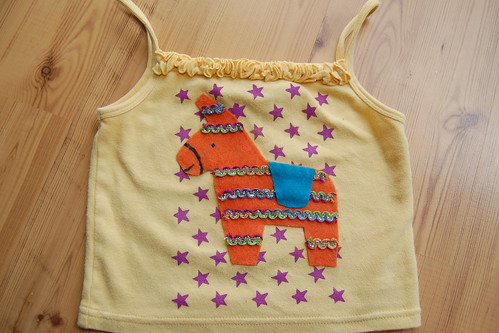
Cinco de Mayo Pinata Shirts


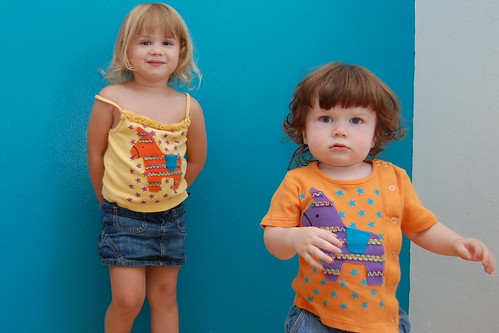
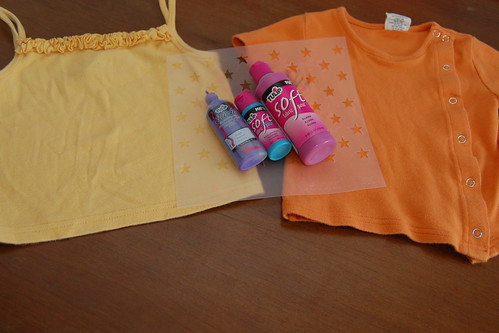
Nothing says Cinco de Mayo like a pinata. You know how I love to dress my kids in theme (weenie dogs anyone?) so I thought why not make them matching pinata shirts to wear this weekend. Not to mention they will be great for birthday parties. Earlier this week I featured an embroidery pattern by Mollie Johanson of Wild Olive on BlogHer. The pattern was for the March stitch-a-long at Feeling Stitchy. I kept thinking about this perky little donkey and how I needed to make something with him for this week's I Love to Create post. SUPPLIES
T-shirt and/or tank top

Tulip Fashion Paints

Stencil Bruch

Printer

Fabric Fusion Glue

Felt

Scissors

Wild Olive pinata embroidery pattern

Rick Rack

Scribbles Paint Marker

Stencil 1 star pattern stencils from the Stencil 201 Book
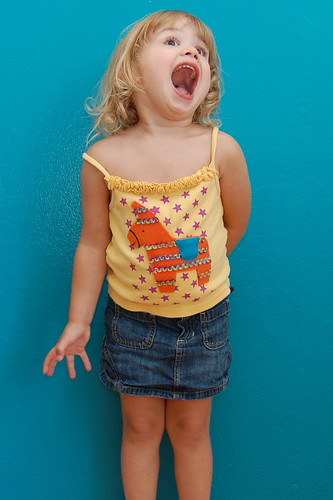
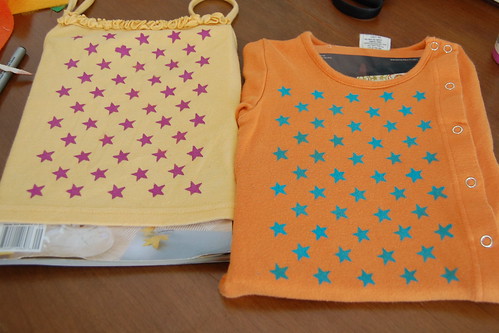
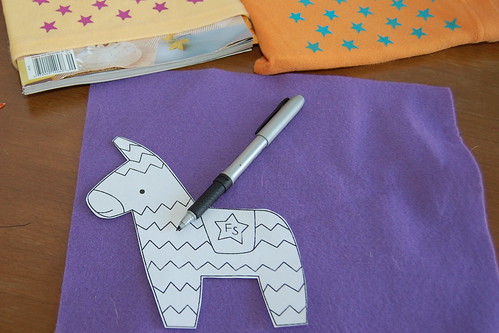
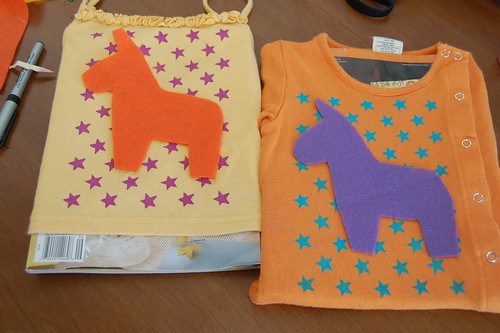
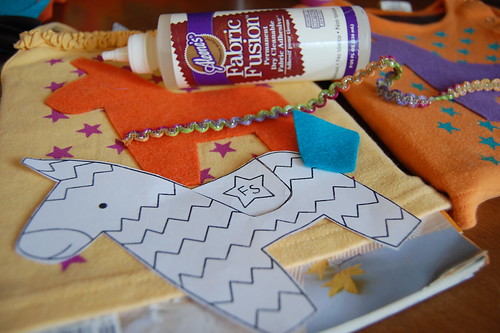
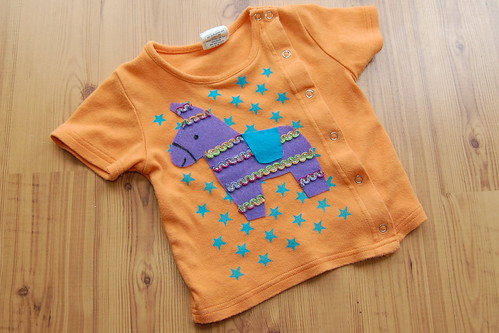
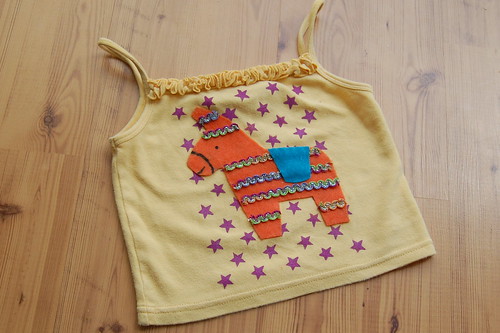
The first thing I did was adorn a T-shirt for Baxter and a tank top for Tallulah with a star pattern from Ed Roth's Stencil 201 book. I used some festive colors from Tulip. While the paint was drying I enlarged the pinata embroidery pattern from Wild Olive and printed it out. I cut out the donkey and traced it onto two separate pieces of felt. Once the stars were dry using Fabric Fusion Glue I attached my felt pinatas to the shirts. The next thing to do was add the stripes. Molly from Wild Olive embroidered hers, but I had some colorful rick-rack that worked great. Again, I used Fabric Fusion Glue to attach the trim.
I cut out the saddle from the paper and traced onto some teal felt. Using Fabric Fusion Glue I attached to the pinatas.
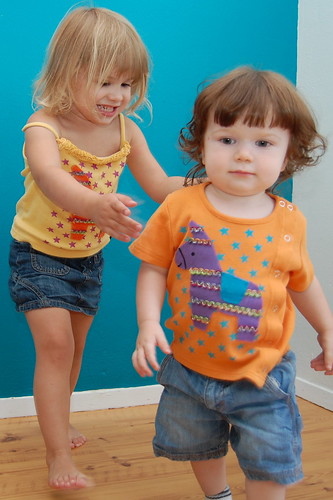
Last, but not least, I added the details of the face using a Scribbles paint marker. Once everything was dry I tried to get pictures of my children modeling their new shirts. This was about as easy as herding cats. So now that I have these snazzy new matching shirts made I guess that means I should find something to do on Saturday so we can show them off. Visit us on Facebook!
Craft on!

Tuesday, May 5

Crafty Chica™ Myspace contest winner announced!


Congratulations are in order for Tessa Green, the winner of the Crafty Chica™ Myspace Prize Pack! Crafty Chica is currently in the www.ilovetocreate.com house, so we asked her to do the honors!

One of the qualifications of the contest was to friend us and leave a comment on our page...here's what Tessa told us that she loved to create:

"I love to create gifts for friends and family and sometimes myself :). Now that I have a sewing machine most all my crafts use it in some way. It's so rewarding to be able to finish a project in an afternoon. Since discovering the Crafty Chica at the Austin Maker Faire I've used her blogs and books to inspire many a project."

Thanks so much to Tessa and everyone else who participated! We are always going to be finding ways for you to win...in fact, if you didn't win this time, check out our Baby Onesie contest that is going on now for an additional chance to win cool products from www.ilovetocreate.com.


Oh, and in honor of Cinco De Mayo, hop on over to Crafty Chica's Crafty de Mayo blog post for lots of artful and inspiring ideas!
Clicky Web Analytics
Pin It button on image hover

Subscribe to our newsletter

* indicates required
I am interested in products and inspiration for...
Close