When decorating for the holidays, no matter what holiday, don't be afraid to do a little rearranging. Those pictures are not glued to the wall, switch em' out every so often. Your kitschy trinkets are not bolted to the shelf try rotating them with some seasonal goodies. In the case of today's
I Love to Create post I am further proving this point by showing you that there is no good reason why you should not swap lamp shades from time to time.
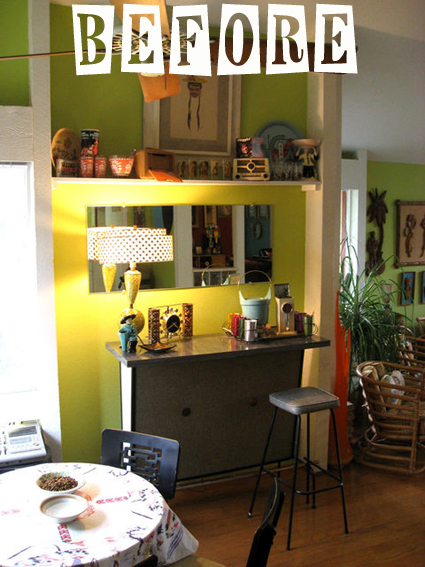
It all started when my mother recently gave me a new batch of vintage wrapping paper, which I collect and adore. This particular batch had some that was neon pink with lime green poodles and my knees about buckled. This wrapping paper needed to be displayed, adorned, worshiped and admired. What better way to showcase these pepperminty poodles than by covering a lampshade with them!
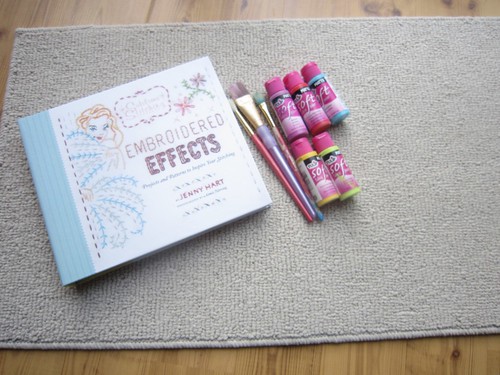
 SUPPLIES
Lamp Shade
Collage Pauge Instant Decoupage MediumLiquid Fusion GlueBall Fringe
Clothes Pins
Wrapping Paper
Scissors
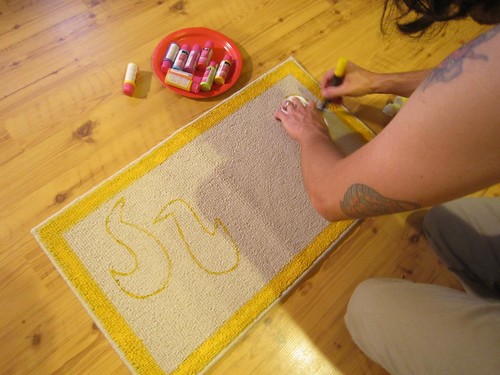
 CUTTING YOUR PAPER
Now I could have gotten all professional and measured my lampshade and cut the wrapping paper accordingly, but we all know I am not that kind of crafter. Instead I eyeballed it and cut my wrapping paper into strips a little bit longer than the length of the shade.
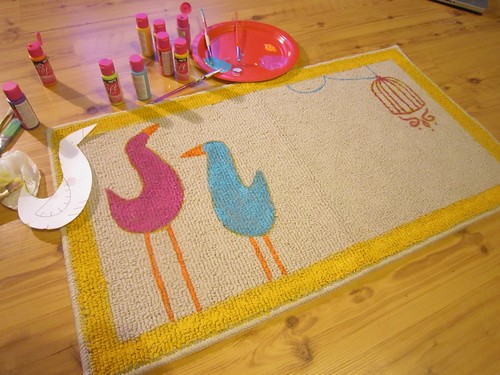
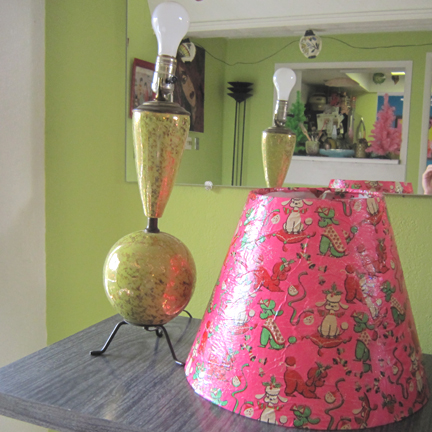 DECOUPAGE
I opted for Sparkle Collage Pauge, because after all everything is better with sparkle. I used a copious amount underneath and on top of my wrapping paper to adhere the paper to the lampshade. I intentionally made the paper longer than the shade so that I could fold the edges over into the inside of the shade giving myself a nice finished looking edge.
As with any time you are trying to cover something round there were a few spaces where the edges did not meet up and I had to do a bit of patchwork with the paper. Luckily the wrapping paper was such a busy pattern you can not tell.
 BALL FRINGE
Using Liquid Fusion Glue I attached ball fringe to the bottom of my lamp. I used clothes pins to hold the fringe in place as it dried.
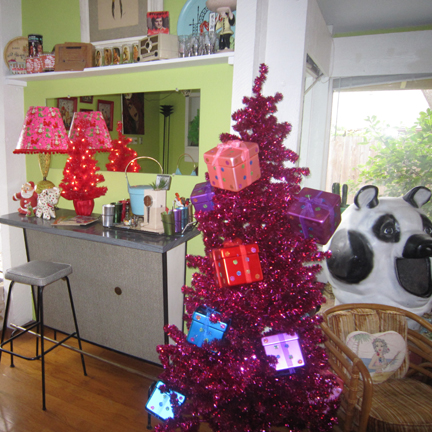
 LIGHTS, CAMERA, ACTION
All that was left to do was to put my usual lamp shade in the attic for a winter's rest and put out my new poodlerific shade to shine. I think my new shade makes the bar look that much more inviting and a peppermint schnapps taste that much yummier!
P.S. Read more fun bloggy goodness about wrapping paper
here,
here and
here.