
How does one create a Little Lumberjacks and Jills birthday party? I'm here to tell you that you can't run down to the local Party Pig and pick up supplies. Oh no. You have to put on your crafty hat and make your own. Tuesday I showed you pictures from kid's
lumberjack themed birthday party, Wednesday it was all about the
lumberjack breakfast and today for I Love to Create I'm gonna show you how you can make your own Little Lumberjacks and Jills party.
When I throw kids parties I like to have lot's activities for everyone to do. I've been known to whip up batches of
homemade Playdoh, have coloring stations,
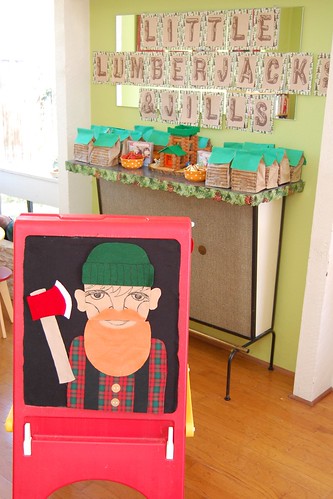
chalkboards, sensory bins, bubble machines and more. For the kid's lumberjack themed birthday party I toyed with an idea of a 'pin the beard on the lumberjack' game. In the end I decided to make a flannel and felt story board instead.

 SUPPLIES
Liquid Fusion Glue
Easel
Felt
Scissors
Flannel
Tulip Slicks Paint
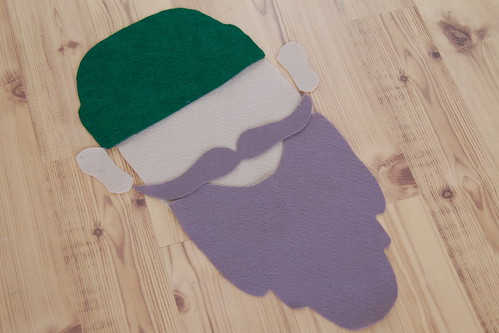
Tallulah has a Little Tikes easel that she rarely uses. I picked it up at the thrift store for cheap so I had no problem converting it into a storyboard. Using Liquid Fusion Glue I attached black flannel to the front and the back. Luckily, my mother was in town to help me make a lumberjack face and accessories out of felt. There were different beards, hats, a log cabin, axe, trees, even a blonde flip for a little lumberjill. We used Tulip Slicks Paint to add detail to the felt. Tallulah can still use her easel (not the chalkboard side). I plan on making some other story boards and paper doll type activities out of felt so she can continue to use her board. When Baxter is older he can join in too.

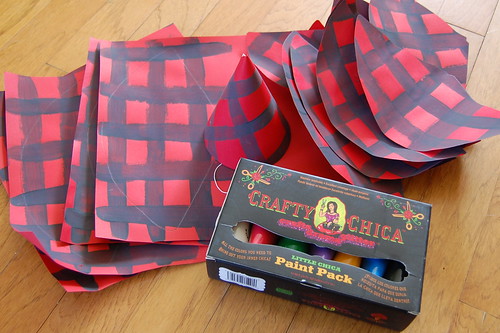
As mentioned it is not as if you can walk into Party Pig and find yourself some buffalo plaid party hats. I did however think I would be able to walk in to a scrapbook store and find plaid paper. Wrong again.
 SUPPLIES
Party Hats
Red Paper
Wide Sponge Brush
Crafty Chica Paint Black
Stapler
Scissors
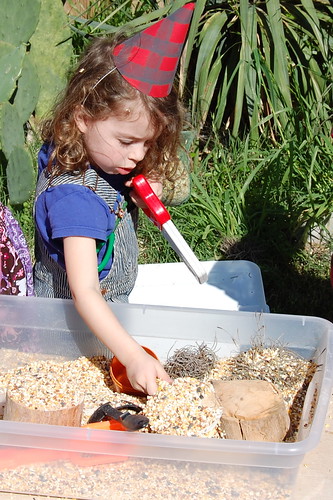
Turns out buffalo plaid paper is pretty easy to make. Using a wide sponge brush and some black Crafty Chica paint I striped pieces of red scrapbook paper. I bought readymade party hats to cover. I took one apart and traced it onto the sheets of paper. Cut the red paper out, wrap around the hat and staple together and to the readymade party hat all at once. It took a lot of will power not to add earflaps and fur trim for the full lumberjack effect.
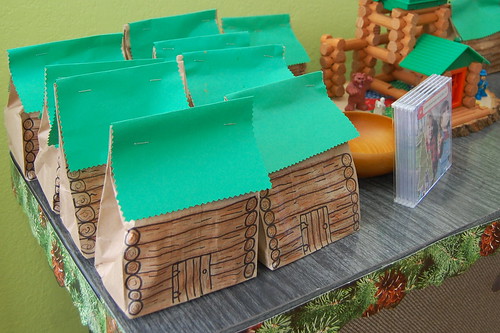
We had goodie bags for the kids and mixed CDs for the adults. No readymade goodie bags around these parts. I was inspired by this
paper bag fireplace I had seen on Pinterest.
 SUPPLIES
Paper Bags
Green Construction Paper
Scalloped Edge Scissors
Black Markers
Brown Crayons
Stapler
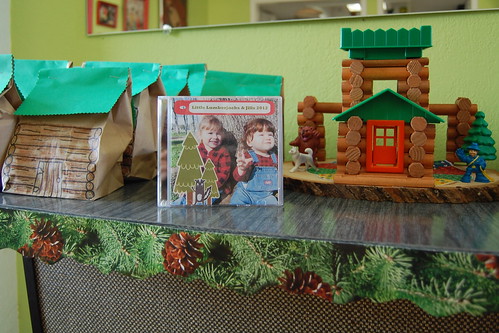
My mother, husband and I all decorated the paper bags. I decided my husband was the best log artist of the bunch. We hand drew logs and a door on the bags and then using brownish crayons made them look more wood like. Once the bags were filled with loot it was time to seal them up. Using a sheet of green paper I measured it so that it would fold over the bag and look like a roof. I trimmed the edges with scalloped scissors. Once the folded paper was in place I used a stapler to attach it to my bag.
For the CD I did a little digital scrapbooking with
Cosmo Cricket goodies. The CD had hits like "Baxter" by Superchunk and "Talulah Gosh" by Talulah Gosh.
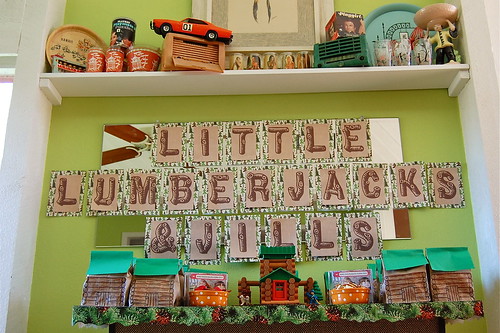
Speaking of digital scrapbooking I used some elements to make one of the two banners at the party.
SUPPLIES
Computer
Kitschy Digitals Calico Dream Kit
Aleene's Tacky Glue Dots
Scissors
Forest Scrapbooking Paper
Father-in-Law
The first thing I did was hunt down a font that looked like twigs. Once I found that I printed up the letters with a backdrop from the Kitschy Digitals Calico Dream Kit. Next my father-in-law and I furiously cut out squares that I had traced onto the paper. I wanted the letters to be slightly smaller than the tree paper I got in the scrapbooking section at Hobby Lobby. Using Aleene's Tacky Glue Dots I first attached the letters to the forest paper. Next, also using the glue dots, I stuck my letters to a mirror.

This party had not one, but two banners. I love making banners what can I say. The second banner hung in the dining room behind the food table.
SUPPLIES
Fabric
Packing Tape
Tacks
Ribbon
Photographs
Aleene's Tacky Glue Stick
Green Tulip Fashion Glitter
Sticker Letters
Paper Pinecones
Aleene's Tacky Glue
Clothes Pins
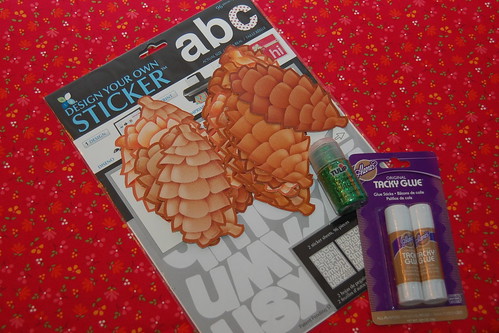
I bought a large faux pine tree from a local teacher supply store to decorate with that just so happen to come with some random pinecones. I was inspired by a banner I saw on Pinterest by
Eleven Cupcakes that used clothespins.
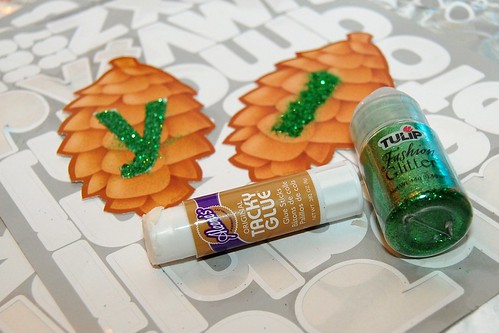
First I decorated my pinecones. I found these sticker letters at JoAnns that you can run through your printer. While the sticker was still on the sheet I covered it with my glue stick. Next I put the letter on the pinecone. Once it was centered I quickly covered it in glitter while the glue was still wet. Every three letters or so I shook off the excess glitter. When all the letters were glittered and dry I used Aleene's Tacky Glue to attach the pinecones to clothespins.
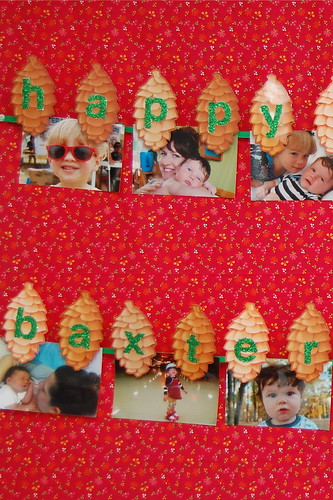
I have a large framed piece of glass from a vintage pin ball machine that hangs in my dining room. I wrapped the glass in a yard of fabric like a gift and used packing tape on the back. Once I had a blank canvas I used push pins to attach two strands of green ribbon. I selected a few of my favorite pictures of the kids over the years and hung them on my banner spelling out "Happy Birthday Baxter and Tallulah".

No lumberjack themed party is complete without a log cabin to play in. Luckily my husband Chris was nice enough to indulge me and make one.
 SUPPLIES
Crafty Chica Paint
Level
Knife
Scissors
2 Large Cardboard Boxes
Duck Tape
The first thing you will need are some large boxes. We went to a packing store and bought two wardrobe boxes. They have used boxes for sale too. Chris taped two boxes together to make the cabin large enough for a gaggle of kids.
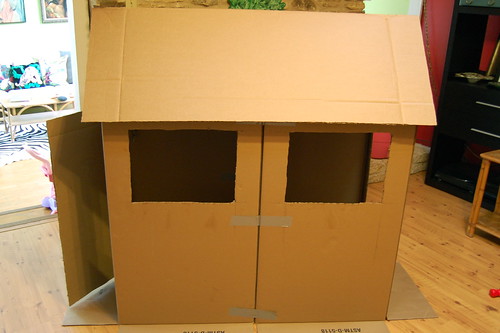
Chris used a knife, scissors, level and more to create the little fort. There was a door on one side, two windows and a roof. He also cut out the sides of the boxes that joined so you could walk all the way through the cabin from end to end.
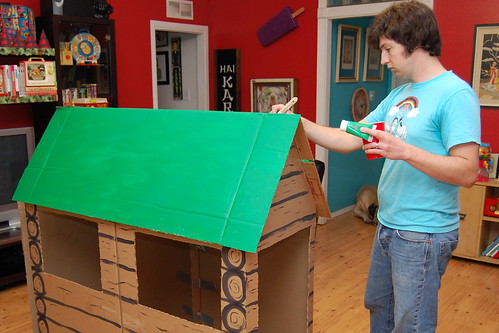
Chris used Crafty Chica paint to give the cabin some faux wood, green roof and a red doormat that said "welcome".
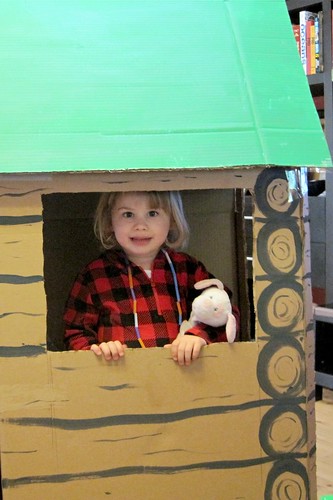
All that was left to do was tape the cabin to the floor for stability and let the kids have at it. And have it they did!
I hope you can tweak some of these ideas and use them for your next party. It just goes to show that with a little bit of paint and glue you can create a party with any theme you can think of!
Visit us on Facebook!
Craft on!